
This project implements the gesture recognition for a common game rock-scissors-paper, including three parts: model training on PC, model compile on Vitis-AI and model calling on Ultra 96. Firstly, a seven layers deep network is trained with tensorflow on PC, in which the dataset from Google is utilized. Then, the h5 model generated with tensorflow 2 is compiled into a elf model with Vitis AI docker. The compiled result is able to be run on the edge platform like Ultra96. Finally, a scheme including camera reading, model calling and model validating is implemented with jupyter-notebook on the edge platform.
This project is based on PYNQ-DPU, and is compatible with Ultra 96 V2.
root:[rps_u96]
+--1.compile.sh
+--2.dpuRps.ipynb
+--dataset
+--dataset_valid
+--DpuCar.py
+--imgs
+--prebuilt
|      +--dpu_dpuCarModel_0.elf
|      +--model.h5
+--README.md
+--run
+--train.py
+--vitisAI
|      +--1_vitisAI_keras2frozon.sh
|      +--2_vitisAI_tf_quantize.sh
|      +--3_vitisAI_tf_compile.sh
|      +--dataset_valid
|      +--dpuPynq.dcf
|      +--graph_input_fn.py
|      +--keras_to_tensorflow.py
|      +--model.h5
|      +--u96pynq.json
where the key files are shown as follow:
-
The network training related file is
train.py. The trained result will be in resrunand the dataset used for training is indataset -
The model compile files is in dir
vitsiAI. The compiled result will be invitisAI/compile_result, the valid data used for quantizing is invitisAI/dataset_valid. -
The main file with edge is in the root, including
1.compile.shwhich translate theelffile tosomodel.2.dpuCar.ipynbis main program, which can run under U96 directly.DpuCar.pyis a dpu helper prepared for2.dpuCar.ipynb.
other files:
- img: images used for readme.
- prebuilt: the prebuilt model.
The dataset is from google. You can download from the web:
https://www.tensorflow.org/datasets/catalog/rock_paper_scissors
The necessary packages:
- python 3.7
- tensorflow 2.0
- numpy
- opencv
- matplotlib
- sklearn
under the anaconda cmd or spyder, run train.py:
python train.py-
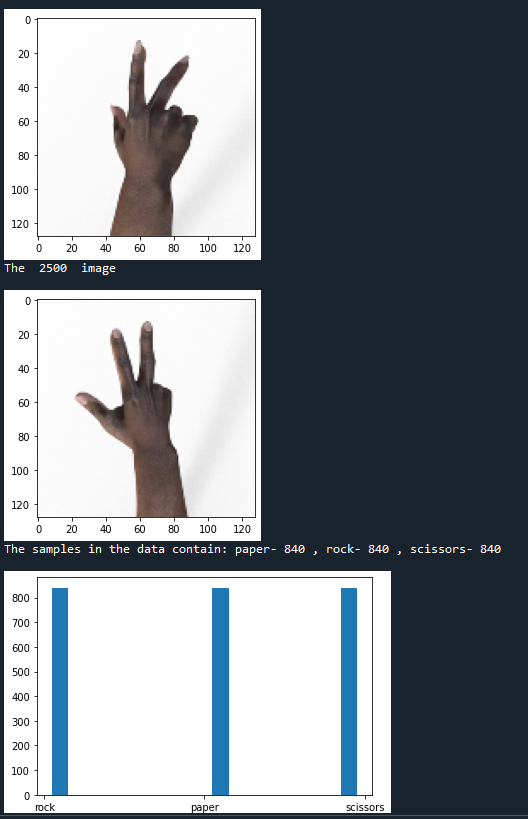
the script will output some sample (please check carefully), and static the distribute of different samples.
-
then, the script will print the build network:


-
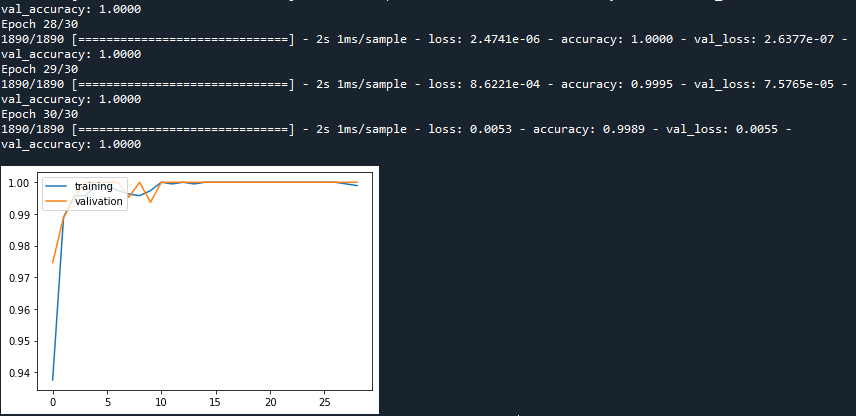
Show the accuracy during training:
-
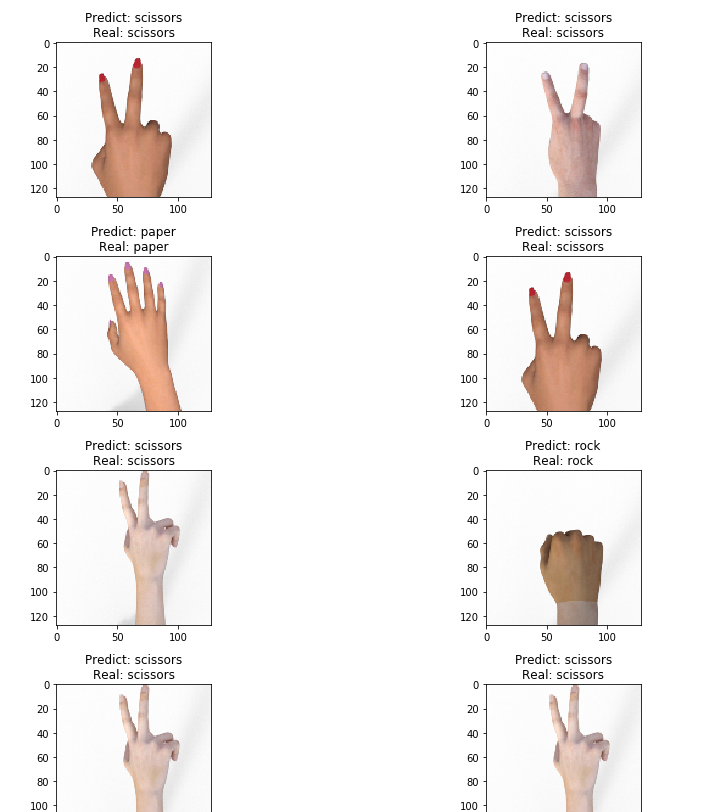
Print the path for the trained model:

The trained result is saved on xxxxxxx\rps_u96\./run/model.h5The trained model is required to be compiled to the special format for running on the edge platform like Ultra 96.
How to install the vitis AI: https://github.com/Xilinx/Vitis-AI。
- Copy the trained model
xxx.h5to the dir ofvitisAI. If another dataset is captured, please update thevitisAI/dataset_validmeanwhile. The smallest valid-dataset is 50. - Start vitis AI on docker,copy the dir
vitisAIto docker.
./docker_run.sh xilinx/vitis-ai-
on vitisAI under dockder, activate the environment for tensorflow:
conda activate vitis-ai-tensorflow
-
on vitisAI under dockder, firstly, froze the weights to the network.
./1_vitisAI_keras2frozon.sh
The result is shown as follow:
############################################
Convert keras h5 model to frozon model begin
Vitis AI 1.1
############################################
...
I0613 02:00:10.120678 139970248464192 graph_util_impl.py:334] Froze 12 variables.
INFO:tensorflow:Converted 12 variables to const ops.
I0613 02:00:10.169036 139970248464192 graph_util_impl.py:394] Converted 12 variables to const ops.
I0613 02:00:10.237048 139970248464192 keras_to_tensorflow.py:177] Saved the freezed graph at frozon_result/model.pb
############################################
Convert completed
############################################
The fixed model will be in
./vitisAI/frozon_result. -
on vitisAI under dockder, then, run the follow script for quantizing model:
./2_vitisAI_tf_quantize.sh
The result is shown as follow:
#####################################
Quantize begin
Vitis AI 1.1
#####################################
INFO: Checking Float Graph...
INFO: Float Graph Check Done.
INFO: Calibrating for 50 iterations...
100% (50 of 50) |########################| Elapsed Time: 0:04:27 Time:  0:04:27
INFO: Calibration Done.
INFO: Generating Deploy Model...
INFO: Deploy Model Generated.
********************* Quantization Summary *********************
INFO: Output:
  quantize_eval_model: ./quantize_results/quantize_eval_model.pb
  deploy_model: ./quantize_results/deploy_model.pb
#####################################
QUANTIZATION COMPLETED
#####################################
The quantization result is in
./vitisAI/quantize_results. -
on vitisAI under dockder, finally, run the following script for compiling
./3_vitisAI_tf_compile.sh
The result is shown as follow:
#####################################
COMPILE WITH DNNC begin
#####################################
**************************************************
* VITIS_AI Compilation - Xilinx Inc.
**************************************************
[VAI_C][Warning] layer [y_out_Softmax] (type: Softmax) is not supported in DPU, deploy it in CPU instead.

Kernel topology "dpuCarModel_kernel_graph.jpg" for network "dpuCarModel"
kernel list info for network "dpuCarModel"
                               Kernel ID : Name
                                       0 : dpuCarModel_0
                                       1 : dpuCarModel_1

                             Kernel Name : dpuCarModel_0
--------------------------------------------------------------------------------
                             Kernel Type : DPUKernel
                               Code Size : 0.02MB
                              Param Size : 0.46MB
                           Workload MACs : 406.29MOPS
                         IO Memory Space : 0.23MB
                              Mean Value : 0, 0, 0,
                      Total Tensor Count : 7
                Boundary Input Tensor(s)   (H*W*C)
                      x_input_input:0(0) : 128*128*3

               Boundary Output Tensor(s)   (H*W*C)
                       y_out_MatMul:0(0) : 1*1*3

                        Total Node Count : 6
                           Input Node(s)   (H*W*C)
                       x_input_Conv2D(0) : 128*128*3

                          Output Node(s)   (H*W*C)
                         y_out_MatMul(0) : 1*1*3
.......
#####################################
COMPILATION COMPLETED
#####################################
The compile result is in
./vitisAI/compile_results, where the file.elfis necessary for the following section.
- copy the project the
jupyter_notebookunder the home of Ultra96. If you want to use the new trained model, replace theelffile with your one. - compile the
elfmodel to the shared library.
sudo ./1.compile.sh- under Ultra 96, check the IP address:
sudo ifconfig- on a PC under the same LAN with Ultra96, start the browser, type the IP address. Then, you can enter the jupyter Notebook.
- on a PC under the same LAN with Ultra96, run cells one by one and you can find the result.
- on a PC under the same LAN with Ultra96, test experiment with prepared valid-dataset:
- on a PC under the same LAN with Ultra96, real-time experiment with USB camera:

