If you are looking for the WebGPIO application, you will find it at the bottom of this page (in the Raspberry Pi/ODROID-C2 section).
A fast and easy way to add a graphical user interface (GUI) to your Python programs.
With the Atlas toolkit, both front and back ends are handled by the same code, and the programs will also be reachable from all over the internet.
Only basic knowledge of web technologies are required (no JavaScript knowledge required). And, with the Atlas toolkit, you can easily add a GUI to a programs originally designed to have a CLI, so the users of this programs can choose which interface they want to use.
If you want to use the Atlas toolkit without installing the examples, simply install the atlastk package from PyPI (pip install atlastk). This package has no dependencies.
You can also use the Atlas toolkit on Repl.it, an online IDE, so you have nothing to install. You will find some examples in the next sections. Important: you have to fork this examples before launching them (by clicking the dedicated button or by modifying the source code), or they won't work properly! See http://q37.info/s/zbgfjtp9 for more details.
Before we dive into source code, let's begin with a live demonstration of the 15-puzzle game made with Atlas toolkit: http://q37.info/s/mdghbt3n (more about live demonstrations)!
Yet another game; the Reversi (aka Othello) game: http://q37.info/s/jhv7dtsp.
There are two other versions of this game: a version with less CSS stuff (http://q37.info/s/kwck3t7n), and another which demonstrates the use of XSL (http://q37.info/s/3cbd7w9n). There are intended as part of a future tutorial about the Atlas toolkit.
Here's how a Hello, World! type program made with the Atlas toolkit looks like:
git clone http://github.com/epeios-q37/atlas-pythoncd atlas-pythonpython Hello/Hello.py
You can also put below source code in a file and launch it after having installed the atlastk package (pip install atlastk), or, with absolutely no installation, paste the below code here, and open the displayed URL in a web browser.
For a live demonstration: http://q37.info/s/vhnb3q3v.
Source code:
# Following two lines can be removed:
# - if the 'Atlas.python.zip' file is referenced in 'PYTHONPATH',
# - if you made a '[python -m] pip install [--user] atlastk',
# - if you paste this code in Repl.it.
import os, sys
sys.path.append("Atlas.python.zip") # Add the path to 'Atlas.python.zip' if needed.

import atlastk as Atlas

body = """
<div style="display: table; margin: 50px auto auto auto;">
 <fieldset>
  <input id="input" maxlength="20" placeholder="Enter a name here" type="text"
         data-xdh-onevent="Submit" value="World"/>
  <div style="display: flex; justify-content: space-around; margin: 5px auto auto auto;">
   <button data-xdh-onevent="Submit">Submit</button>
   <button data-xdh-onevent="Clear">Clear</button>
  </div>
 </fieldset>
</div>
"""

def acConnect(this, dom, id):
  dom.setLayout("", body)
  dom.focus("input")

def acSubmit(this, dom, id):
  dom.alert("Hello, " + dom.getContent("input") + "!")
  dom.focus("input")

def acClear(this, dom, id):
  if ( dom.confirm("Are you sure?") ):
    dom.setContent("input", "")
  dom.focus("input")

callbacks = {
  "": acConnect,  # This key is the action label for a new connection.
  "Submit": acSubmit,
  "Clear": acClear,
}

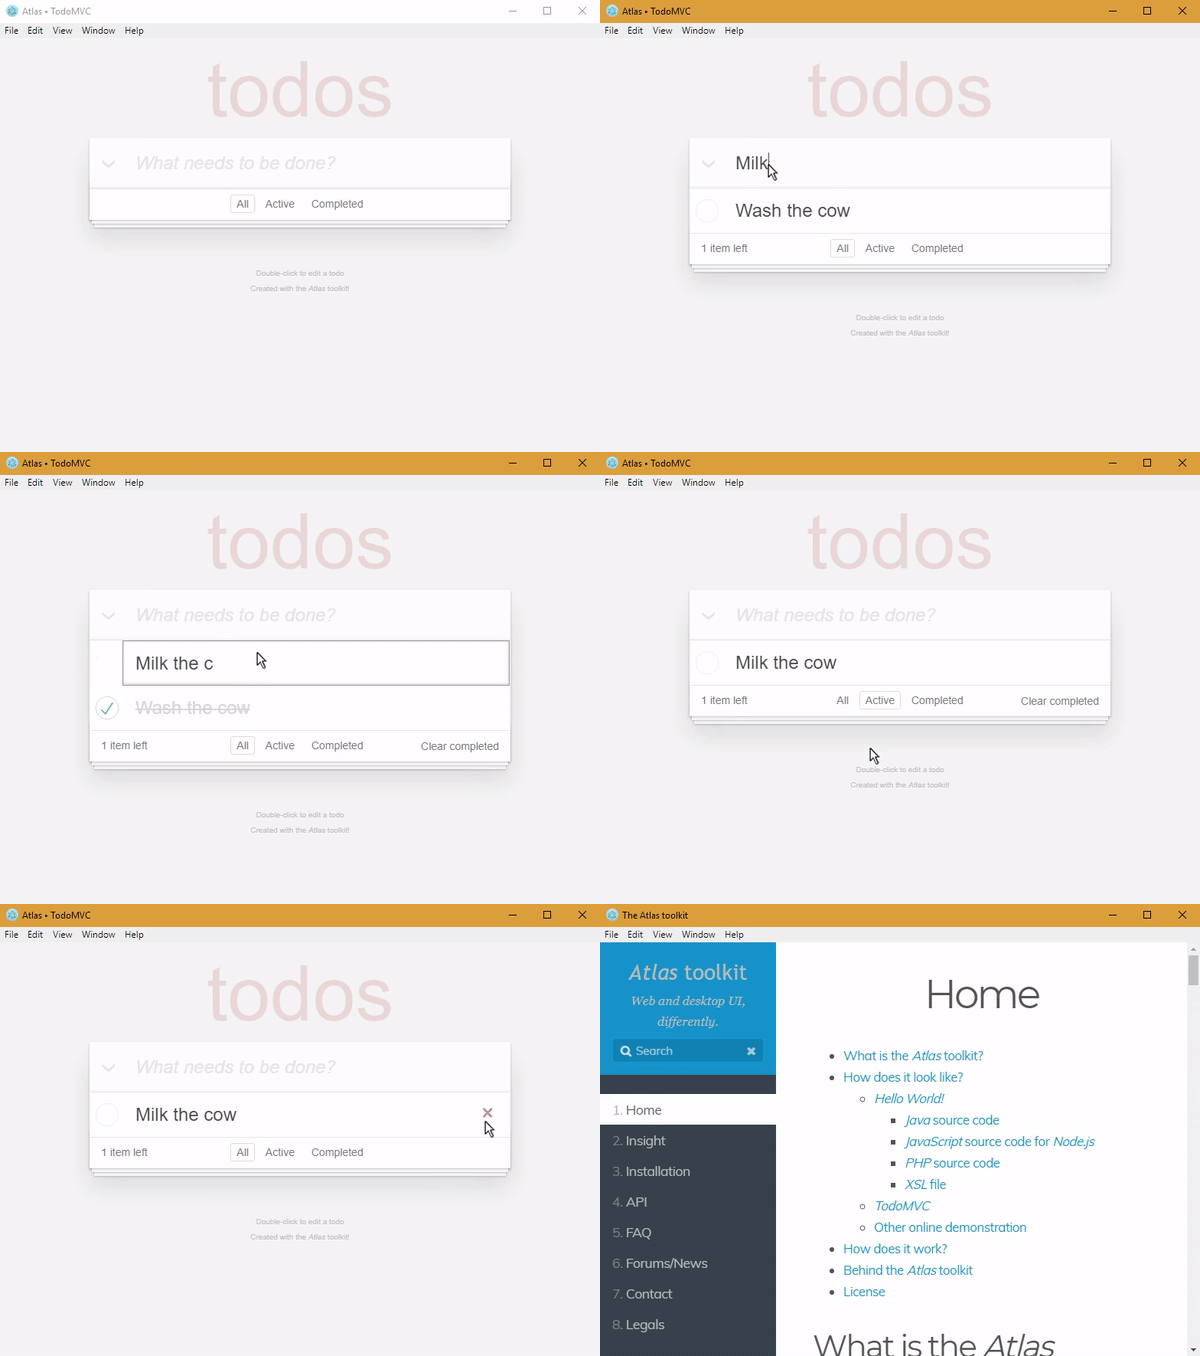
Atlas.launch(callbacks)And here's how the Atlas toolkit version of the TodoMVC application looks like:
For a live demonstration: http://q37.info/s/n9nnwzcg.
The atlastk directory contains the Python source code of the Atlas toolkit, which is not needed to run the examples.
Atlas.python.zip is the file you have to reference in PYTHONPATH in order to use the Atlas toolkit in your own program (unless you have installed the atlastk package with pip install atlastk).
All other directories are examples.
To run an example, launch python <Name>, where <Name> is the name of the example (Blank, Chatroom…), except for the ErgoJr, GPIO and RGB applications, which are detailed just below.
The Stars application is an example where the Atlas toolkit is used to control a Pygame based application. Of course, Pygame needs to be installed.
The GPIO and RGB applications are designed to be used on a Raspberry Pi or a ODROID-C2.
For the Raspberry Pi, the RPi.GPIO Python module have to be installed (this is probably already the case).
For the ODROID-C2, The Python version of WiringPi must be installed, and the application has to be launched with sudo (sudo python GPIO or sudo python RGB).
The ErgoJr application is experimental and to control a Poppy Ergo Jr robot.
The RGB application is dedicated to the control of a RGB led, and the GPIO (aka WebGPIO) application allows to control the basic pins. Here is a video to see how they works:
Same video on PeerTube : https://peertube.video/videos/watch/e7e02356-c9c3-4590-8ec0-8f8da06ff312
This applications are only examples to show how easily it is to write your own applications.
The Atlas toolkit is also available for:
- Java: http://github.com/epeios-q37/atlas-java
- Node.js: http://github.com/epeios-q37/atlas-node
- PHP: http://github.com/epeios-q37/atlas-php
- Ruby: http://github.com/epeios-q37/atlas-ruby
For more information about the Atlas toolkit, go to http://atlastk.org/.


