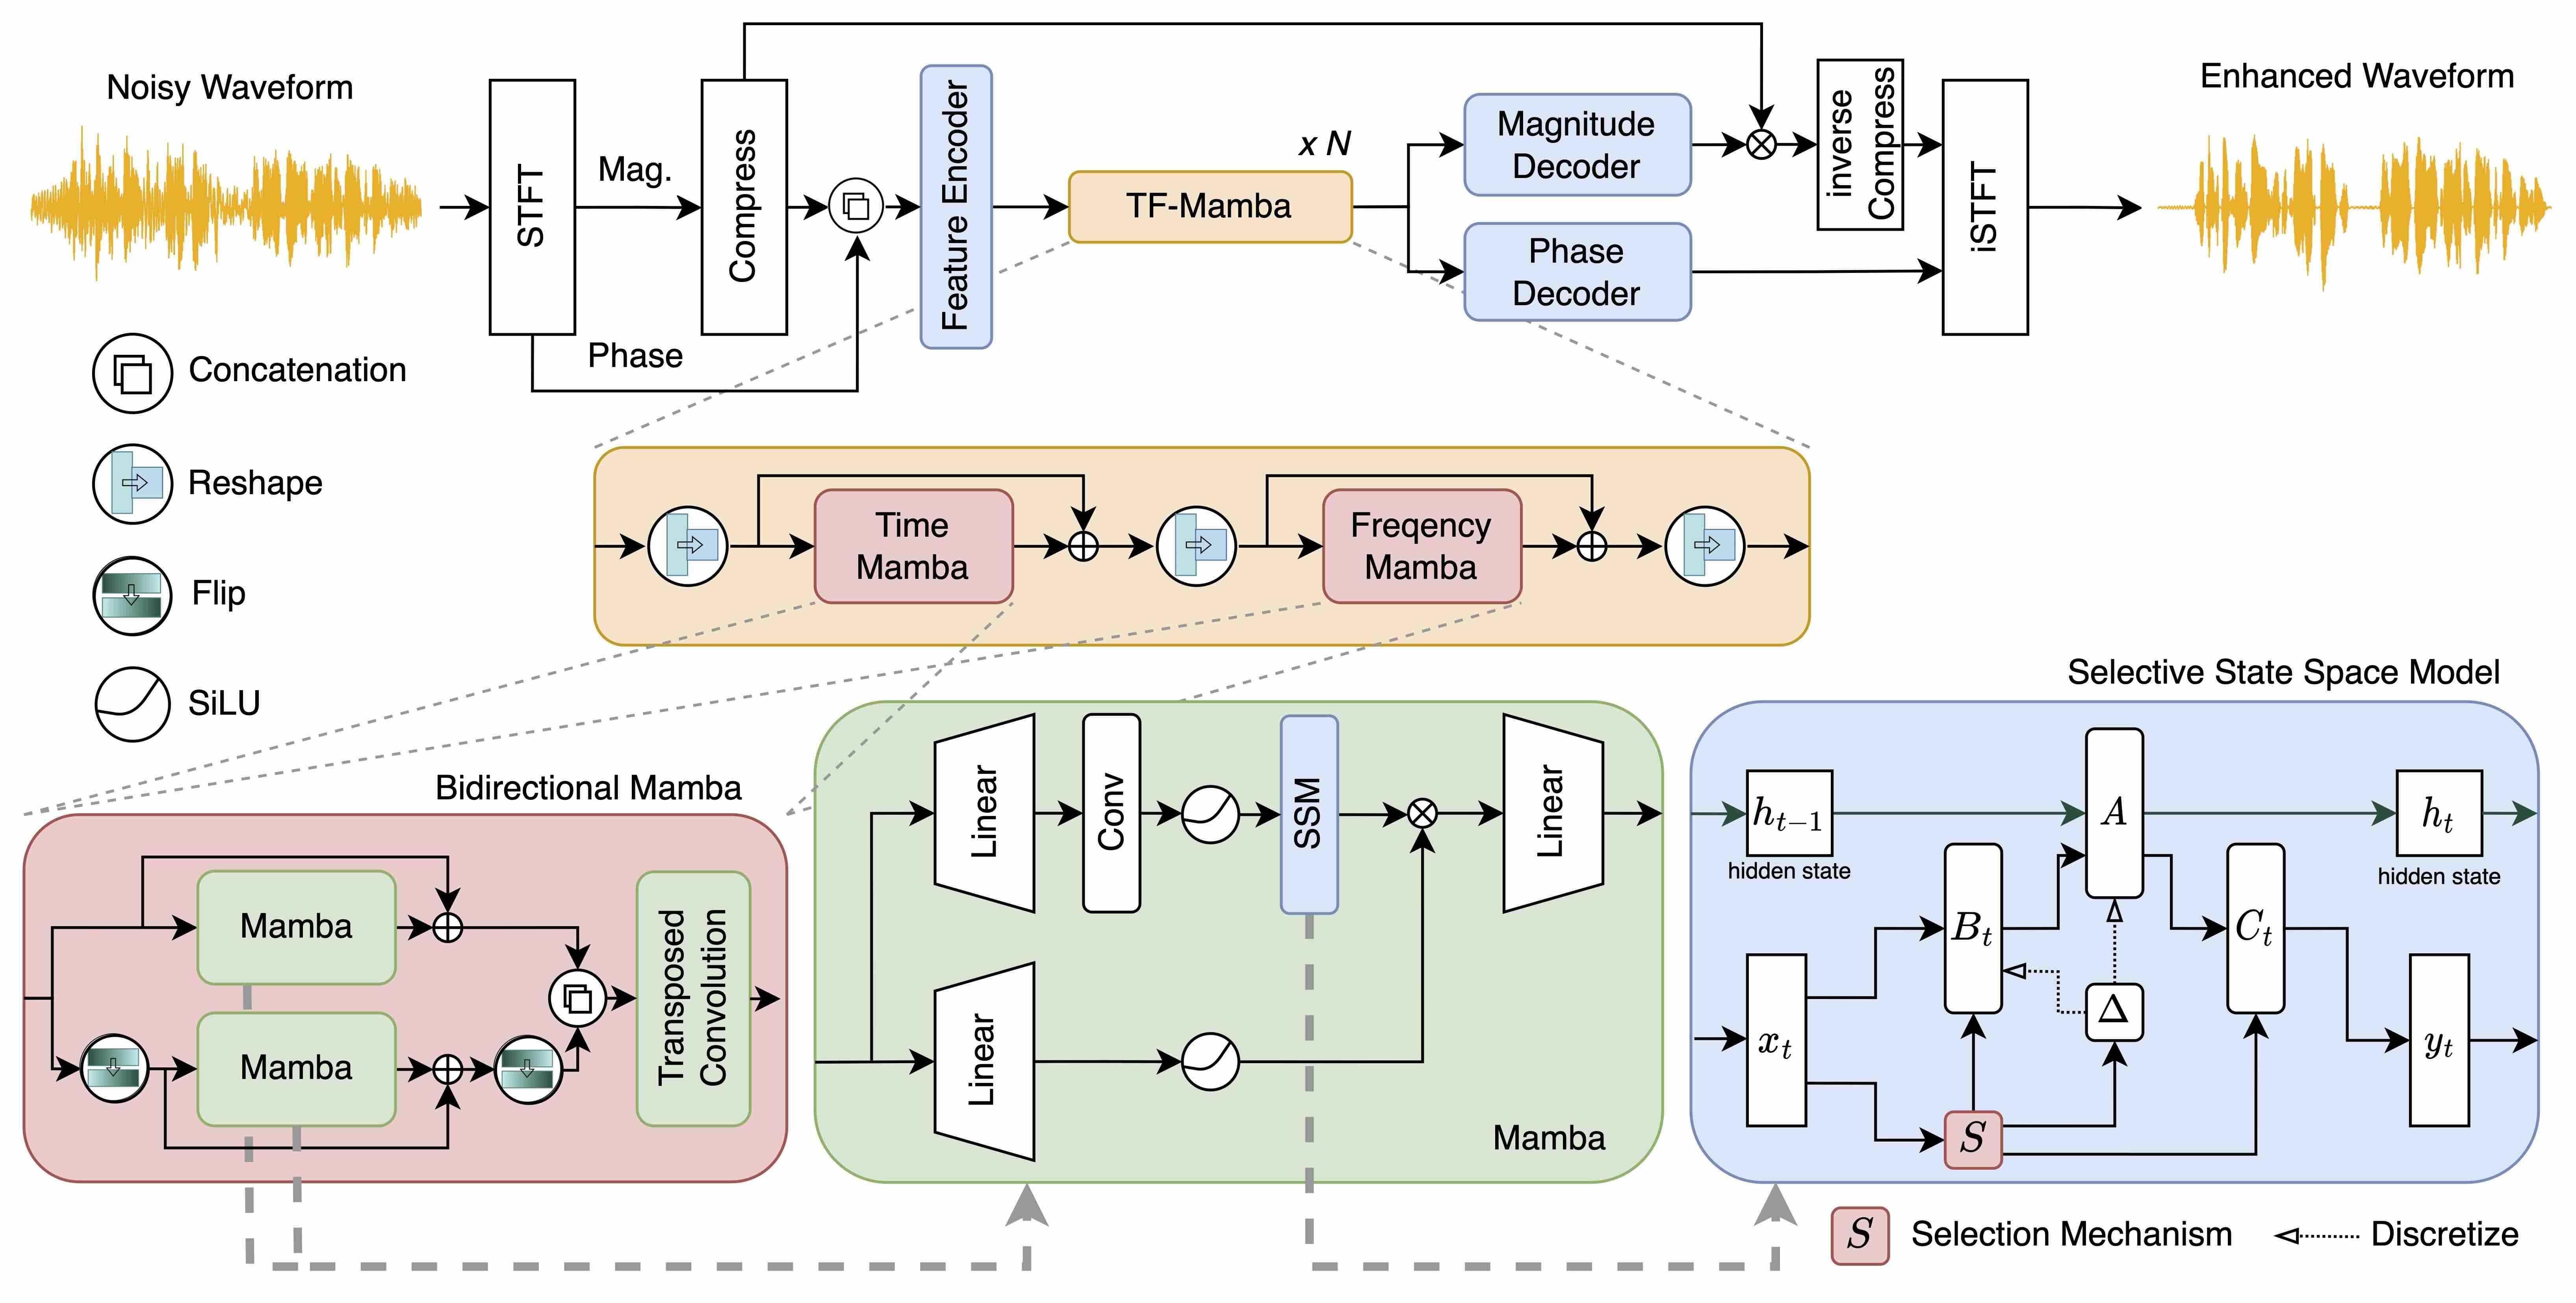
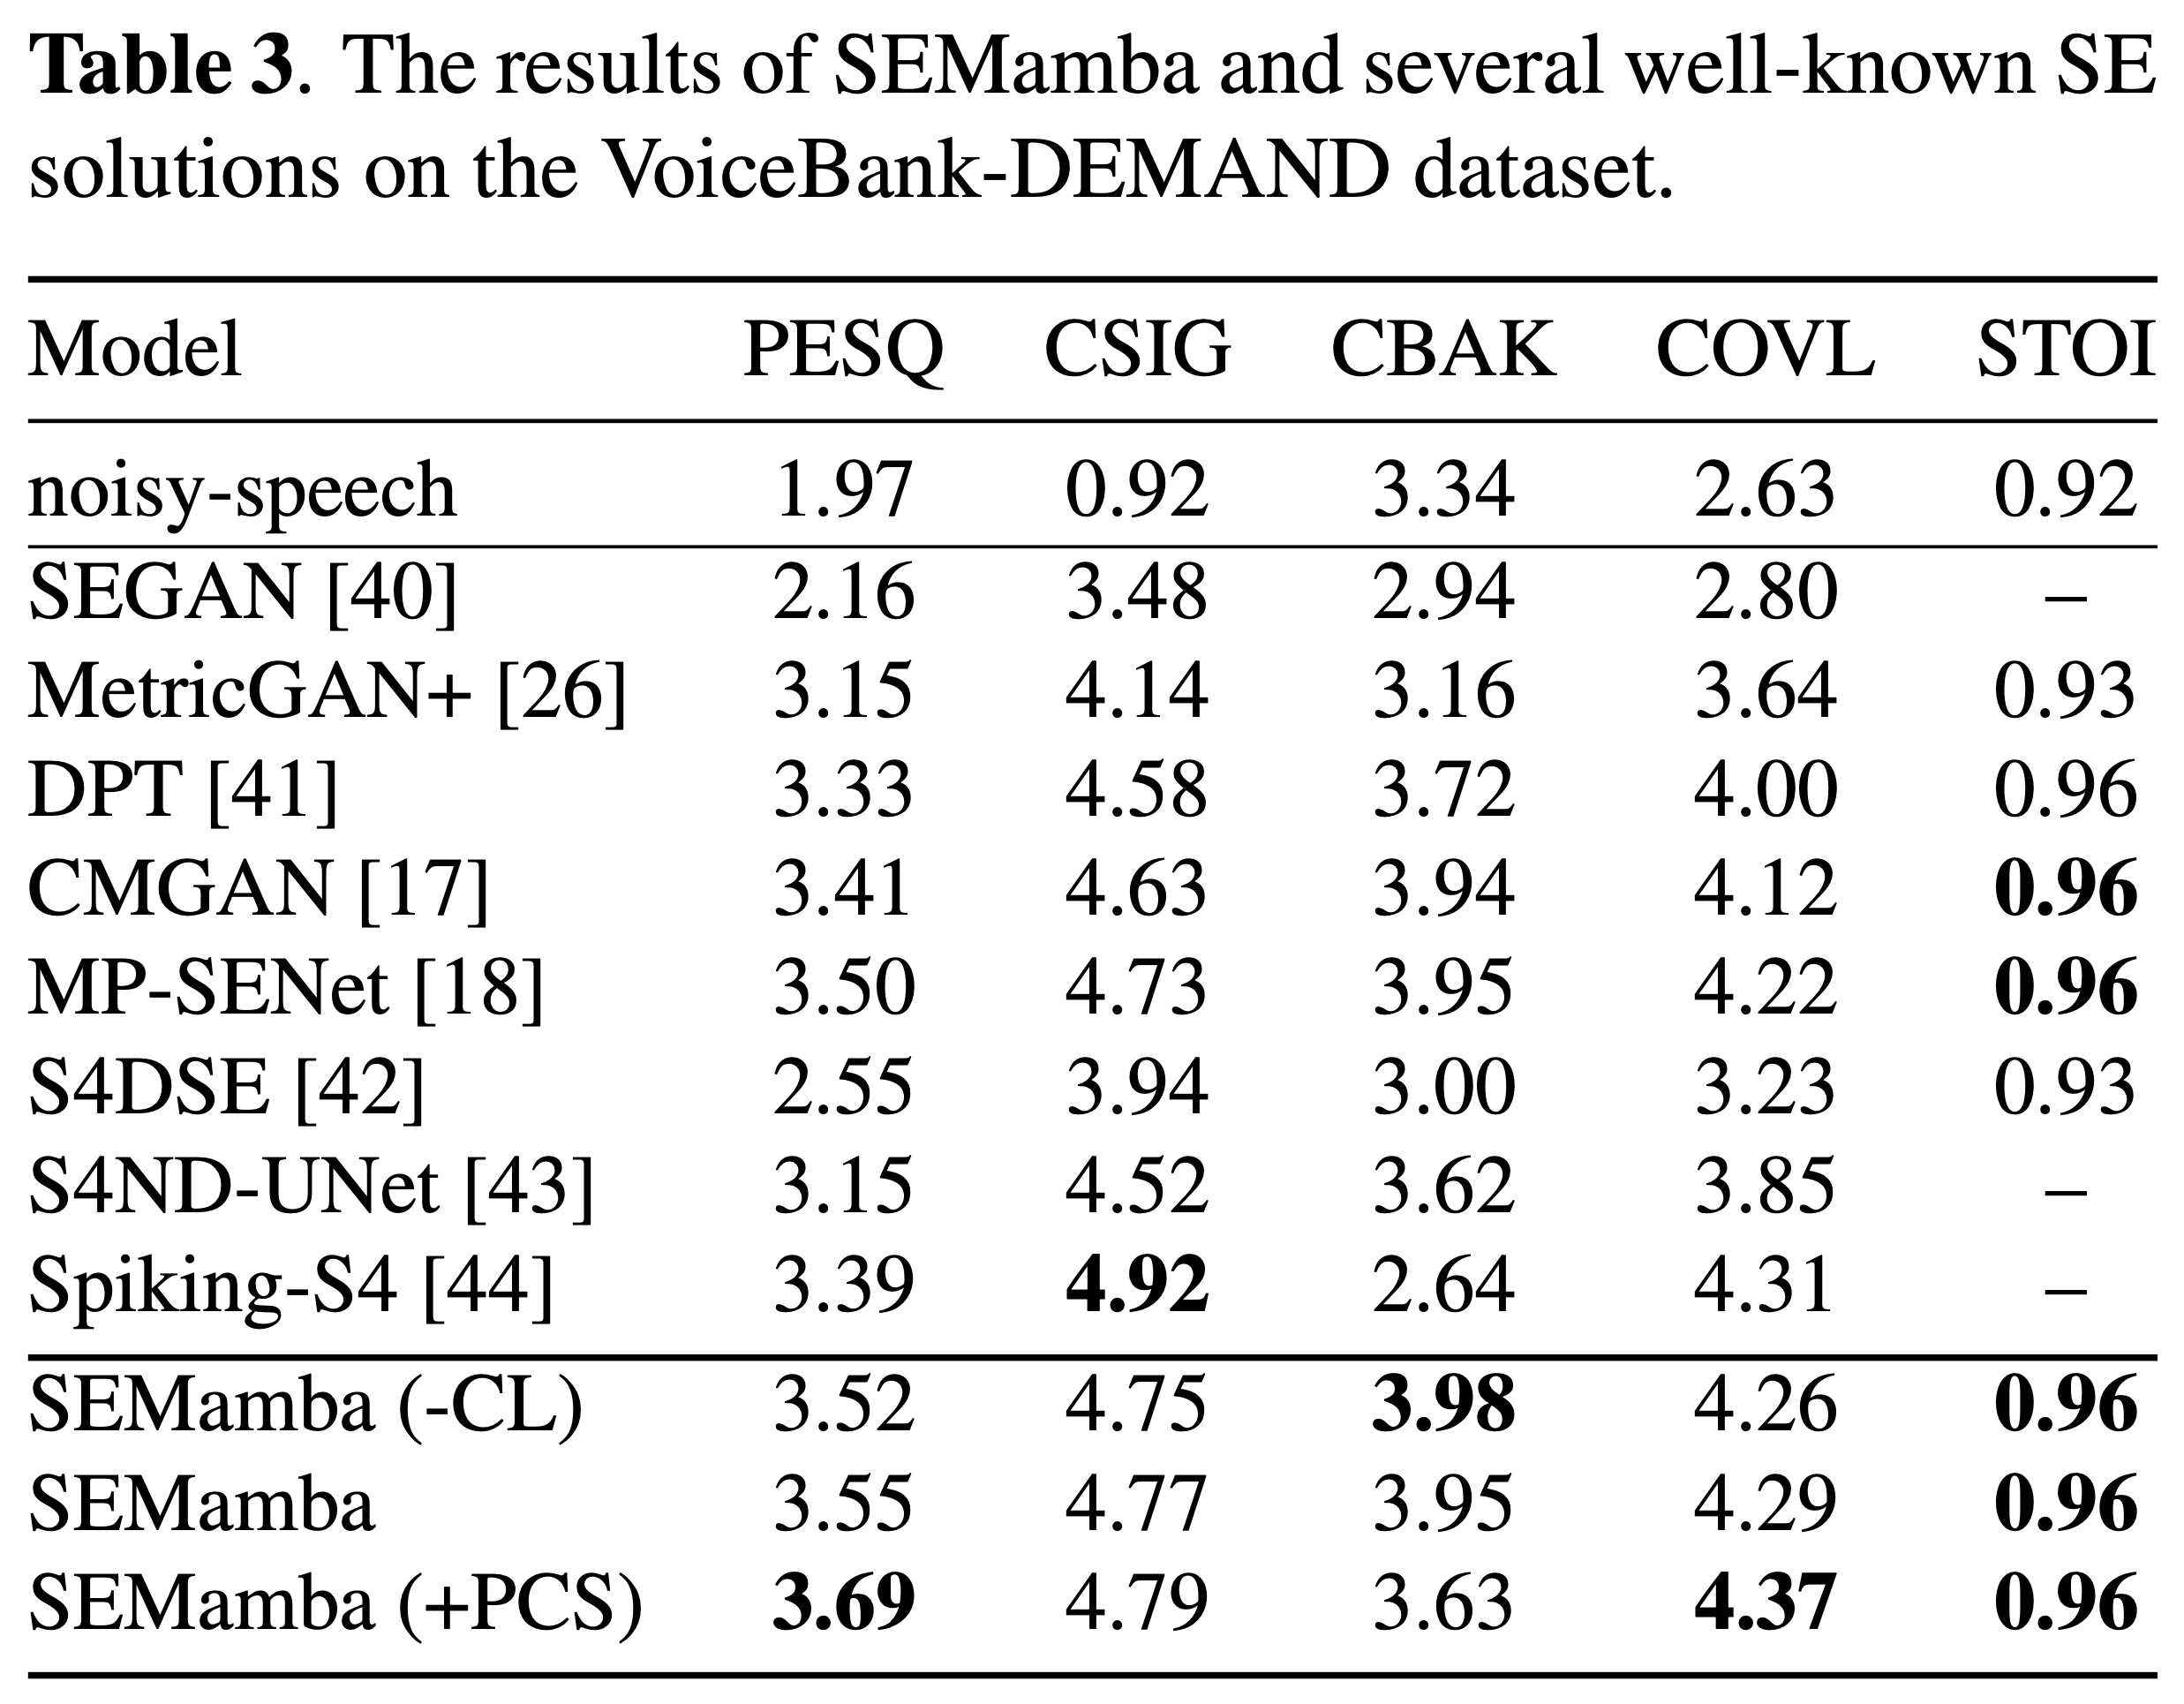
This is the official implementation of the SEMamba paper.
For more details, please refer to: An Investigation of Incorporating Mamba for Speech Enhancement
-
A speech enhancement (SE) challenge aiming to build universal, robust, diverse, and generalizable SE models.
-
The challenge involves diverse distortions, including
- additive noise,
- reverberation,
- clipping,
- bandwidth limitations,
with all types of sampling frequencies supported by a single model.
-
Requires handling a large-scale dataset (~1.5 TB) and includes ranking based on 13 metrics in classes of
- non-intrusive,
- intrusive,
- downstream-task-independent,
- downstream-task-dependent,
- subjective
SE metrics.
-
Achieved 4th place among 70 participating teams (>20 teams joined to the final stage).
-
Deliver an oral presentation at the NeurIPS 2024 workshop, Vancouver, Canada.
-
Demo website Live Demo Website
The Mamba-2 framework is designed to support both Mamba-1 and Mamba-2 model structures.
git checkout mamba-2* Python >= 3.9
* CUDA >= 12.0
* PyTorch == 2.2.2
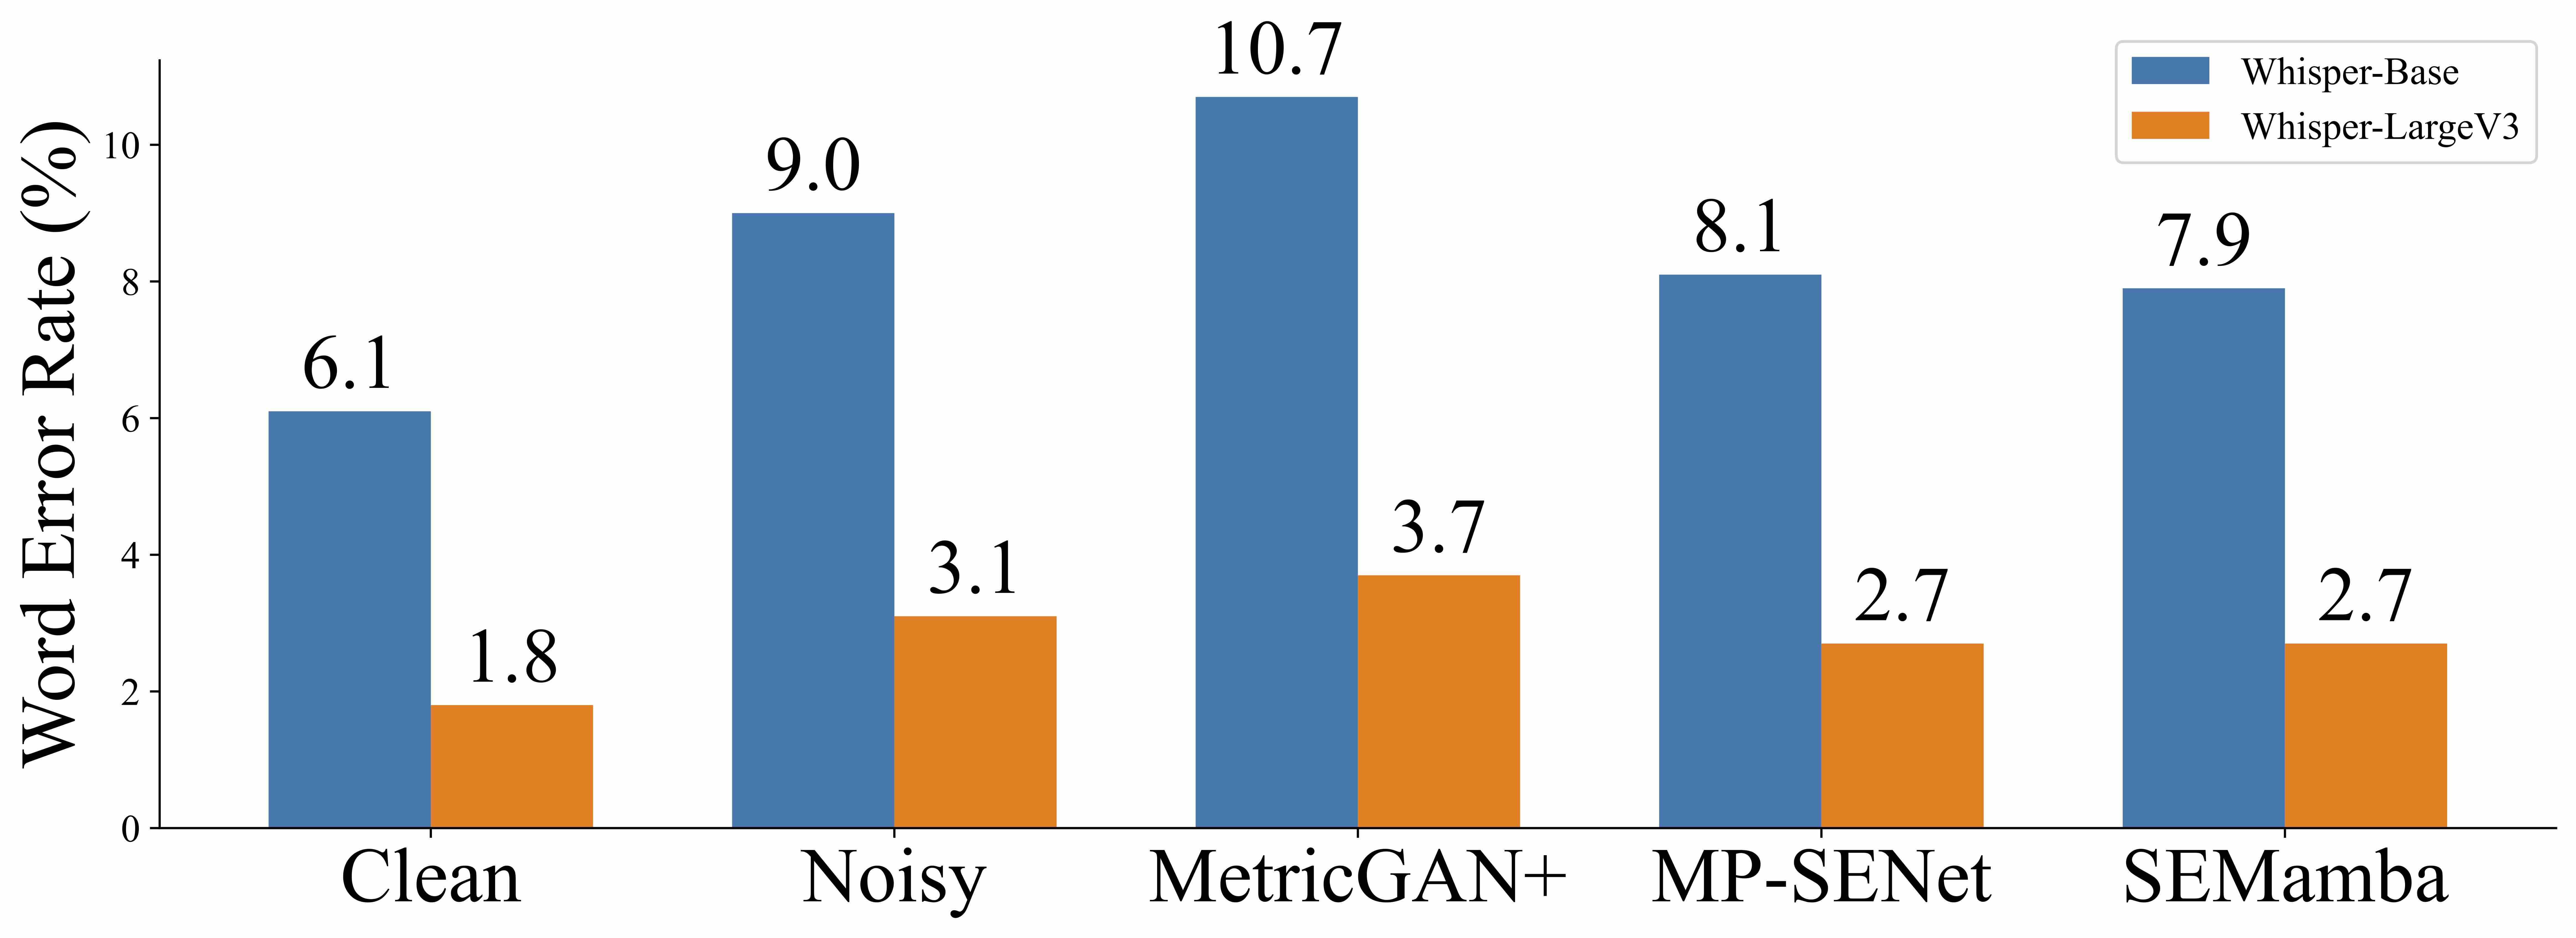
We have tested the ASR results using OpenAI Whisper on the test set of VoiceBank-DEMAND.
The evaluation code will be released in the future.
-
Ensure that both the
nvidia-smiandnvcc -Vcommands show CUDA version 12.0 or higher to verify proper installation and compatibility. -
Currently, it supports only GPUs from the RTX series and newer models. Older GPU models, such as GTX 1080 Ti or Tesla V100, may not support the execution due to hardware limitations.
It is highly recommended to create a separate Python environment to manage dependencies and avoid conflicts.
conda create --name mamba python=3.9
conda activate mambaInstall PyTorch 2.2.2 from the official website. Visit PyTorch Previous Versions for specific installation commands based on your system configuration (OS, CUDA version, etc.).
After setting up the environment and installing PyTorch, install the required Python packages listed in requirements.txt.
pip install -r requirements.txtNavigate to the mamba_install directory and install the package. This step ensures all necessary components are correctly installed.
cd mamba_install
pip install .mamba_install) can help prevent package issues and ensure compatibility between different dependencies. It is recommended to follow these steps carefully to avoid potential conflicts.
CUDA>=12.0 and installed pytorch 2.2.2, you could try mamba 1.2.0.post1 instead of mamba 1.2.0 as follow:
cd mamba-1_2_0_post1
pip install .Create the dataset JSON file using the script sh make_dataset.sh. You may need to modify make_dataset.sh and data/make_dataset_json.py.
Alternatively, you can directly modify the data paths in data/train_clean.json, data/train_noisy.json, etc.
sh run.shNote: You can use tensorboard --logdir exp/path_to_your_exp/logs to check your training log
Modify the --input_folder and --output_folder parameters in pretrained.sh to point to your desired input and output directories. Then, run the script.
sh pretrained.shThere are two methods to implement the PCS (Perceptual Contrast Stretching) method in SEMamba:
- Use PCS as Training Target:
- Run the
sh runPCS.shwith the yaml configurationuse_PCS400=True. - Use the pretrained model
sh pretrained.shwithout post-processing--post_processing_PCS False.
- Use PCS as Post-Processing:
- Run the
sh run.shwith the yaml configurationuse_PCS400=False. - Use the pretrained model
sh pretrained.shwith post-processing--post_processing_PCS True.
The evaluation metrics is calculated via: CMGAN
The evaluation code will be released in the future.
The implementation of Perceptual Contrast Stretching (PCS) as discussed in our paper can be found at PCS400.
We would like to express our gratitude to the authors of MP-SENet, CMGAN, HiFi-GAN, and NSPP.
If you find the paper useful in your research, please cite:
@article{chao2024investigation,
  title={An Investigation of Incorporating Mamba for Speech Enhancement},
  author={Chao, Rong and Cheng, Wen-Huang and La Quatra, Moreno and Siniscalchi, Sabato Marco and Yang, Chao-Han Huck and Fu, Szu-Wei and Tsao, Yu},
  journal={arXiv preprint arXiv:2405.06573},
  year={2024}
}


