The Drug Discovery Game is an interactive game exploring the process of drug discovery based on actual data from drugs in clinical trials or on the market. Players grow a core fragment from pre-defined vectors, guided by biophysical and pharmacological assay data. The aim is to develop a final compound within a specified budget with a potency close to that of the published compound. This serves as both an educative tool for training medicinal chemists in robust decision making, but also as a tool for training machine learning algorithms in the decisions made by pharmaceutical research scientists. It is developed by researchers from the University of Oxford in collaboration with scientists from Roche. Latest documentation at: https://drug-discovery-game.readthedocs.io/en/latest/
If you don't already have git installed on your machine, you can follow the steps in this tutorial to get started.
If you do have git installed, open your terminal, move to the directory you want to install the repo and run:
git clone https://github.com/SABSR3-Group-2/drug_discovery_game.git
Following successful cloning, navigate to the root directory by running:
cd drug_discovery_game
It's recommended that you set up a virtual environment to install the dependencies in. We recommend installing miniconda version=4.9.2 and then setting up a virtual environment by running something like:
conda env create --name dd_game --file final_env.yml
This should install all the dependencies necessary for the game to run.
The game is limited to scaffold molecules with two vector positions and your data should resemble data/picket_data.csv.
As a minimum, the file should have columns [smiles, Atag, Btag] (not case-sensitive) additionally, data for pic50, clearance_mouse, clearance_human,
logd and pampa are needed for full functionality. Since the names for these values can vary between datasets, please
navigate to game_scripts/select_mols.py and at the bottom of read_mols() change the column names (e.g. 'pic50_mmp12') to those that are in your raw_data file.
Ensuring you are in the root directory and replacing the two arguments with the name of your data file and the smile string for your scaffold, run the preprocessing pipeline by typing a command like the following into your terminal:
python game_scripts/preprocessing.py my_raw_data.csv OC(=Ccc210)
The preprocessing can take quite some time (the default data takes ~20 mins on a 2015 MacBook Pro). Once it is finished it will
create an output csv in data/ with a name in the format my_raw_data_processed.csv. You can now start the game.
Ensuring you are in the root directory and have the dependencies installed, type the following into your terminal to start the game:
python game_scripts/gameloop.py
If you want to use the default MMP12 dataset, simply press ENTER as instructed to start the game.
Otherwise, if you are using a different but compatible dataset, you will be prompted to enter the name of the file containing the data and subsequently the smile string for your central scaffold.
A GUI should then open and you can begin playing - good luck!
The game is built around 4 windows:
- Molecule building
- Virtual assaying
- Analysis
- Final Feedback
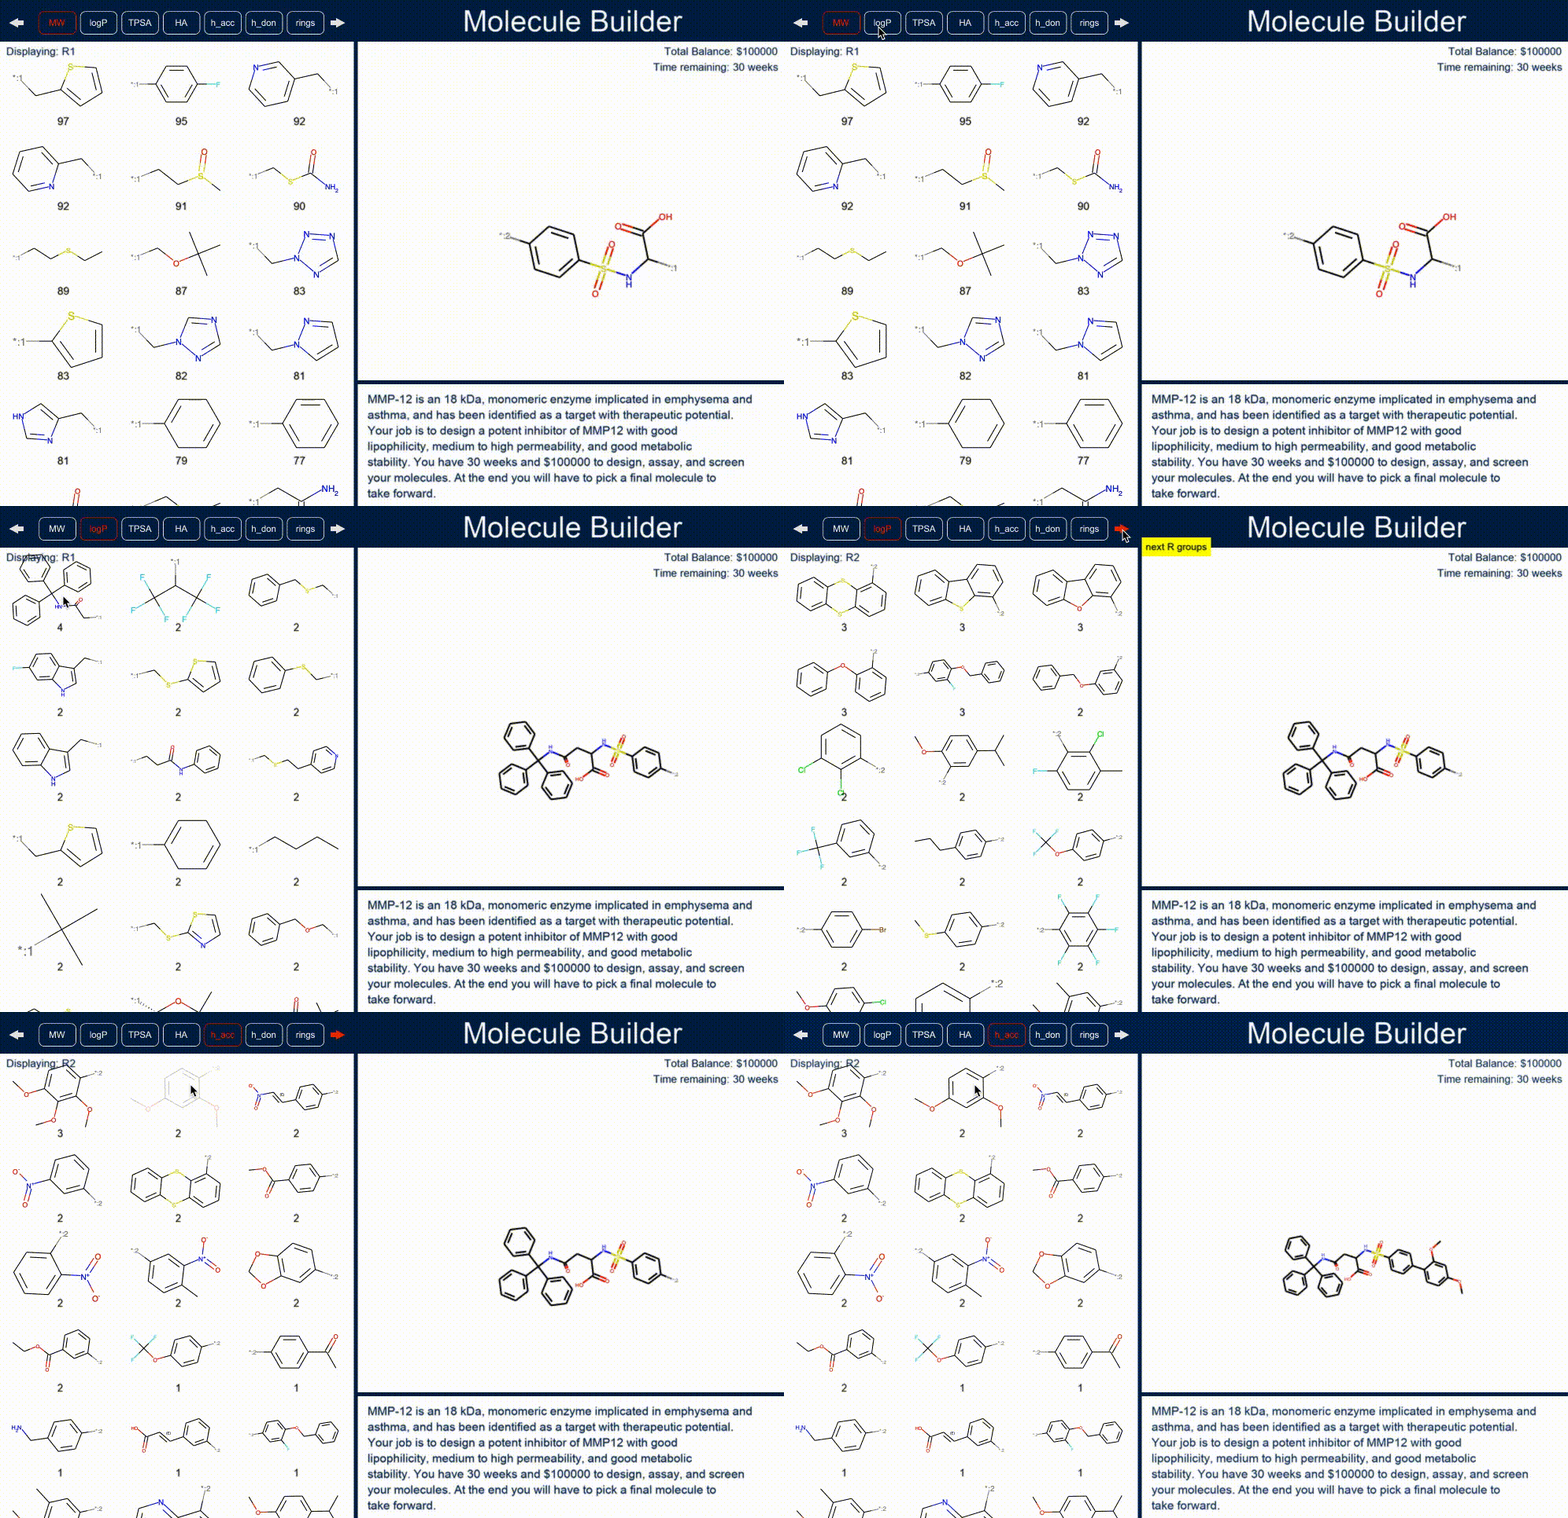
In this window your scaffold will be displayed on the right and you will have an inventory system on the left showing
the fragments that you can add to your scaffold at the first vector position. After selecting this first position, click
the right arrow at the top of the page to view the second inventory of fragments. You can navigate back and forth by
clicking the arrows at the top. When you have a molecule you are happy with press the right arrow key to advance to
the next window.
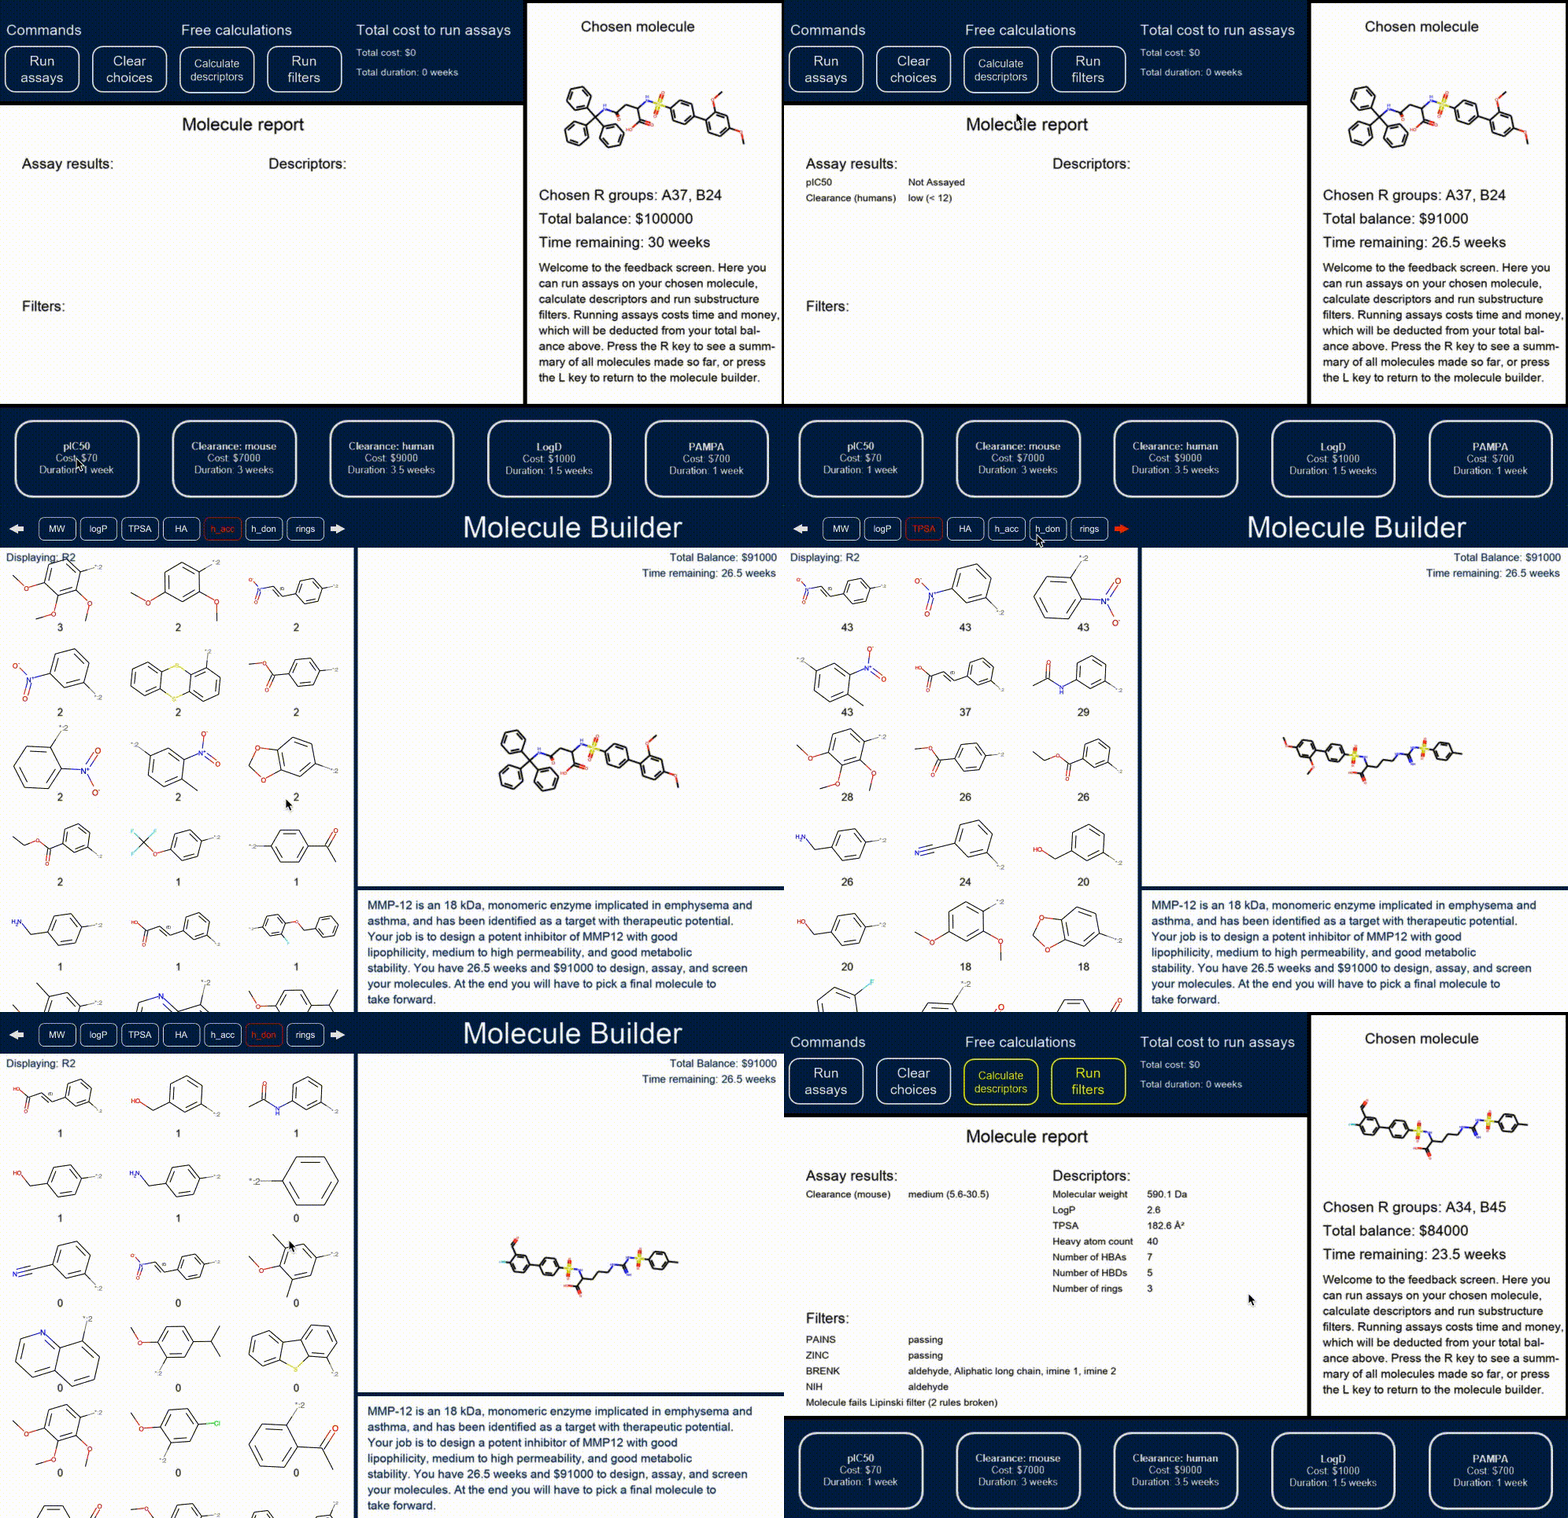
In this window, you can get experimental and calculated data for your chosen molecule. Free calculations are available and implemented using RDKit, including the calculation of molecular properties using the 'Calculate descriptors' button, and running substructure filters using the 'Run filters' button.
Five different experimental assays are available, shown along the bottom of the screen, which cost time and money. You
can select as many assays as you want to run in parallel, and the total cost and duration of the selected assays are
tallied and shown at the top of the screen. After selecting the assays you would like to run, you can execute them using
the 'Run assays' button or clear your choices using the 'Clear choices' button. The costs will then be deducted from
your total balance and time, shown on the right. You cannot run the same assays more than once for the same molecule.
Once you have run assays or calculated properties for a chosen molecule, this data will be recorded and displayed in the
final analysis screen. You can move between the molecule builder and analysis screens using the left and right
arrows, respectively.
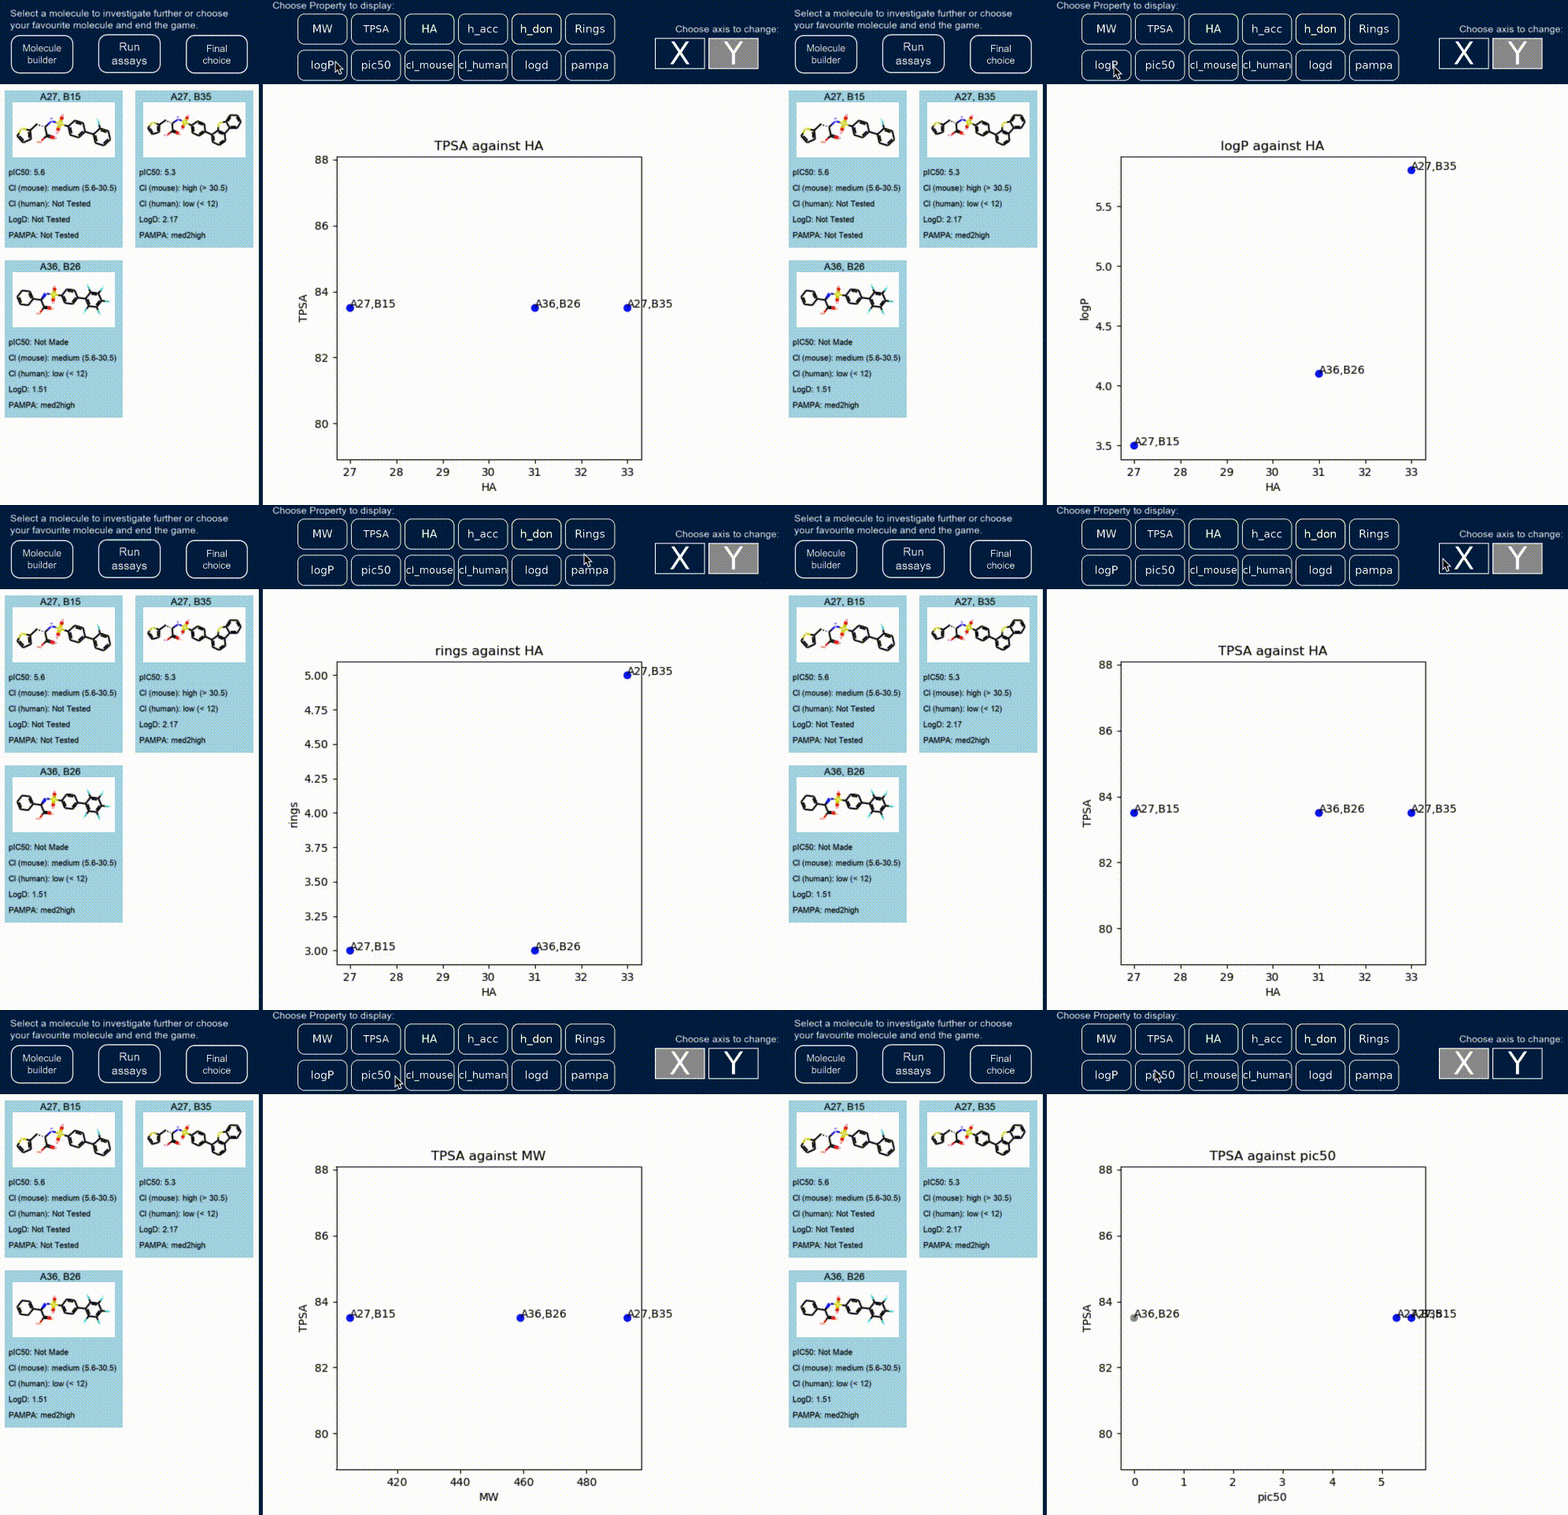
On the left-hand side of the screen are cards representing all the molecules that you have built and assayed so far along with their assay data. You can select molecules that you'd like to investigate further by clicking on the card and navigating to the other views using the 'Molecule builder' and 'Run assays' buttons at the top. On the right-hand side of the screen is a graph that displays calculated or assayed properties of the molecules that you have built. You can change what to display on each axis by selecting the X and Y buttons and selecting different properties. Data points will only appear if they descriptors have been calculated or the assays run for that particular molecule.
If you have decided on your favourite molecule, you can end the game by selecting the 'Final molecule' button. This will
result in the final feedback screen being displayed. All of the data from the molecules and assays that you have run are
saved in a csv file called results.csv, located in the data folder.
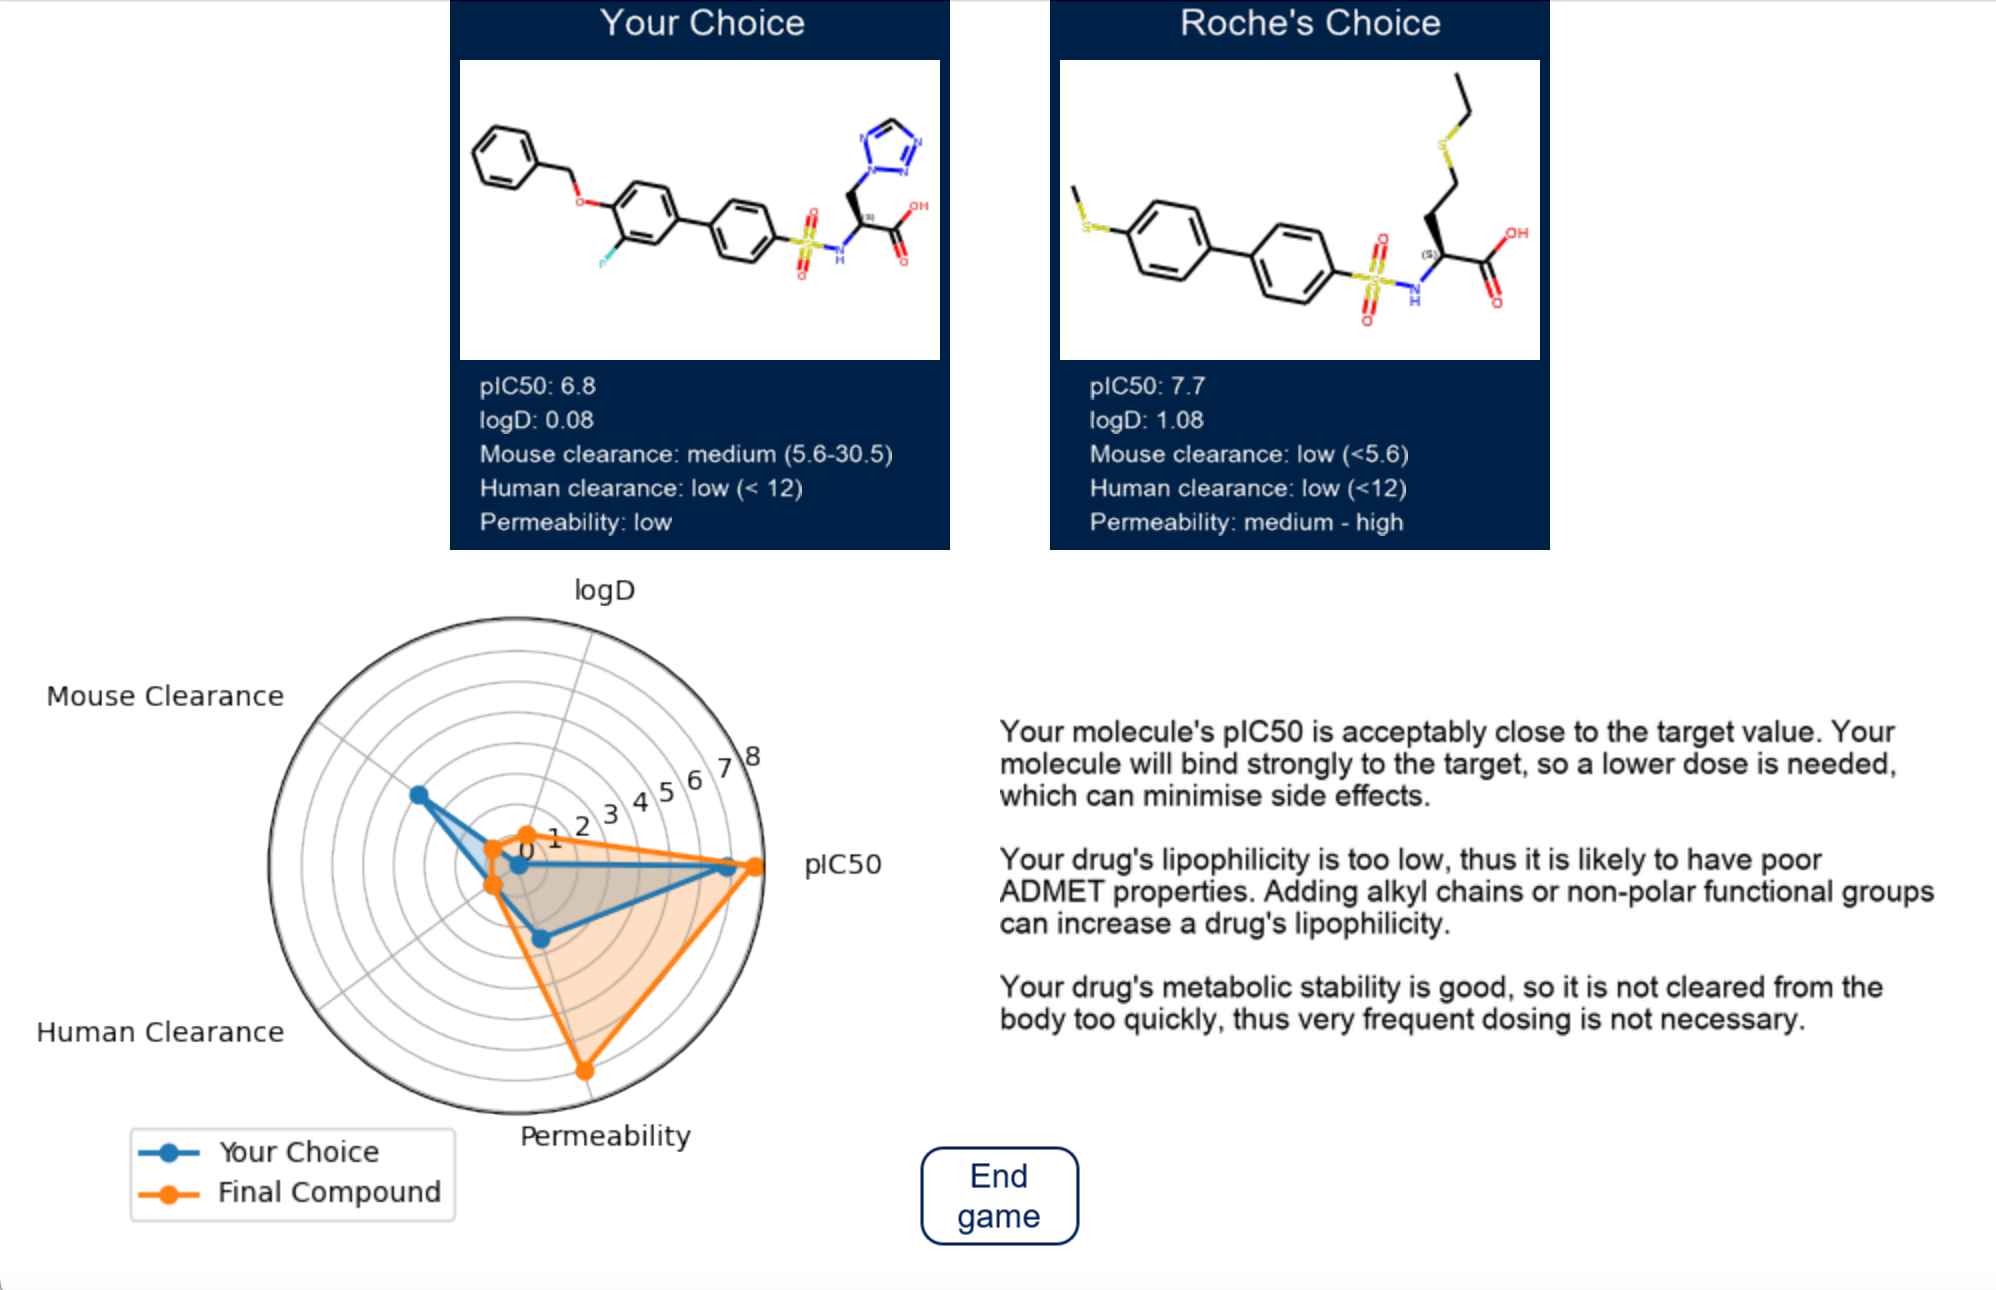
This window compares your chosen final molecule to that chosen by the expert medicinal chemists from Roche, and gives you feedback on your choices. A spider plot compares the critical properties in the brief for both molecules, and where your molecule falls short feedback is given on how it can be improved.
This game was created at the University of Oxford in collaboration with Roche by James Bayne, Matthew Holland, Olivia Simpson and Stephanie Wills with supervision from Anna Carbery, Professor Garrett M. Morris, Dr Torsten Schindler (Roche), Dr Rosa María Rodriguez Sarmiento (Roche) and Professor Paul Brennan. This work was supported by funding from the Engineering and Physical Sciences Research Council (EPSRC) [grant number EP/S024093/1]
We are always very keen to hear your comments, thoughts and suggestions. Do please open an issue with any feedback.


