


![]()
![]()
Additional documentation can be found at the Marlin Home Page. Please let us know if Marlin misbehaves in any way. Volunteers are standing by!
- All motors X, Y, Z, E0, Z2
- SD Card
- LCD FSMC
- EEPROM on flash emulation
- Bed and hotend temp
- Z probe, filament runout and end stops
- Heat bed heater (inverted pin, be very careful and make sure you have the line #define HEATER_BED_INVERTING true)
- Hotend heater
- Wifi UART
- Buzzer
- Touch Screen
- Definition created for trigorilla pro board and pins
- Power Loss detect
- At this time, this version is not supported by the stock bootloader as an SD card update.
- Special thanks to Korbinian Heel [@inib]
- Special thanks to Slava Novgorodov [@Slava N] for sharing and making the video of the direct installation method
- Just an USB type-A cable included with your printer
- Everything is preconfigured to work with the stock version, if it's your first time compiling Marlin, this can help you How compile Marlin Tutorial
- If you got some errors, try use Auto Build Marlin
- If you get an error like
Error: [Errno 2] No such file or directorymake sure the directory string is not too long.
- Turn off and disconnect AC power
- Move the jumper SW1 to USB and remove JP1 jumper

- JP1 It is connected to the pin BOOT0, which blocks the programming, it should be removed.
- SW1 Power the board from the USB port or from the external 24V source, for security purposes change this position at least while doing the programming.
- Download STM32 Flasher
- See this video
- Restores all jumpers to their original position
- Finished!
- As you saw in the video, it is possible to make a backup of your stock firmware. in case you did not, in the precompiled folder, you will find this backup. The flash process is the same seen in the video.
-
ST-LINK USB debugger or ST development board like NUCLEO Boards
-
Dupont Jumper cables
-
Soldering iron
-
Male Pin Header
-
If you don't know how to weld, go very carefully haha
- Everything is preconfigured to work with the stock version, if it's your first time compiling Marlin, this can help you How compile Marlin Tutorial
- If you got some errors, try use Auto Build Marlin
- Turn off and disconnect AC power
- Cut and weld jumper cables

- Move the jumper SW1 to USB and remove JP1 jumper
- JP1 It is connected to the pin BOOT0, which blocks the programming, it should be removed only when the table has the firmware stock. After this it doesn't matter if you put it on or not.
- SW1 Power the board from the USB port or from the external 24V source, for security purposes change this position at least while doing the programming.
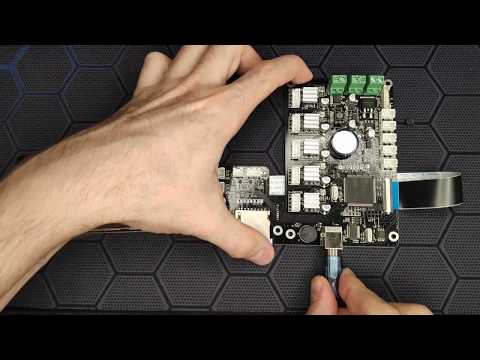
- Connect the SDW pins (SWDIO, SWCLK and GND) to your debugger don’t need VCC 5v or 3.3v (please don't connect it you could damage your board)
- Plug the USB cable on trgirilla pro.
- Open STM32 ST-LINK Utility
- Open file (1) Browse this route
Marlin-Anycubic-Predator-Trigorilla-PRO\.pio\build\trigorilla_proand select firmware.bin - Click connect to target (2)
- Program verify (3)
- Start (4)

- Disconnect usb debugger before testing or motors will stutter, returns the jumpers JP1 and SW1 to the initial position
- Finished!
Marlin 2.0 takes this popular RepRap firmware to the next level by adding support for much faster 32-bit and ARM-based boards while improving support for 8-bit AVR boards. Read about Marlin's decision to use a "Hardware Abstraction Layer" below.
Download earlier versions of Marlin on the Releases page.
To build Marlin 2.0 you'll need Arduino IDE 1.8.8 or newer or PlatformIO. Detailed build and install instructions are posted at:
| Platform | MCU | Example Boards |
|---|---|---|
| Arduino AVR | ATmega | RAMPS, Melzi, RAMBo |
| Teensy++ 2.0 | AT90USB1286 | Printrboard |
| Arduino Due | SAM3X8E | RAMPS-FD, RADDS, RAMPS4DUE |
| LPC1768 | ARM® Cortex-M3 | MKS SBASE, Re-ARM, Selena Compact |
| LPC1769 | ARM® Cortex-M3 | Smoothieboard, Azteeg X5 mini, TH3D EZBoard |
| STM32F103 | ARM® Cortex-M3 | Malyan M200, GTM32 Pro, MKS Robin, BTT SKR Mini |
| STM32F401 | ARM® Cortex-M4 | ARMED, Rumba32, SKR Pro, Lerdge, FYSETC S6 |
| STM32F7x6 | ARM® Cortex-M7 | The Borg, RemRam V1 |
| SAMD51P20A | ARM® Cortex-M4 | Adafruit Grand Central M4 |
| Teensy 3.5 | ARM® Cortex-M4 | |
| Teensy 3.6 | ARM® Cortex-M4 |
- Submit Bug Fixes as Pull Requests to the (bugfix-2.0.x) branch.
- Submit New Features to the (dev-2.1.x) branch.
- Follow the Coding Standards to gain points with the maintainers.
- Please submit your questions and concerns to the Issue Queue.
For best results getting help with configuration and troubleshooting, please use the following resources:
- Marlin Documentation - Official Marlin documentation
- Marlin Discord - Discuss issues with Marlin users and developers
- Facebook Group "Marlin Firmware"
- RepRap.org Marlin Forum
- Tom's 3D Forums
- Facebook Group "Marlin Firmware for 3D Printers"
- Marlin Configuration on YouTube
The current Marlin dev team consists of:
- Scott Lahteine [@thinkyhead] - USA Donate / Flattr:
- Roxanne Neufeld [@Roxy-3D] - USA
- Chris Pepper [@p3p] - UK
- Bob Kuhn [@Bob-the-Kuhn] - USA
- João Brazio [@jbrazio] - Portugal
- Erik van der Zalm [@ErikZalm] - Netherlands
Marlin is published under the GPL license because we believe in open development. The GPL comes with both rights and obligations. Whether you use Marlin firmware as the driver for your open or closed-source product, you must keep Marlin open, and you must provide your compatible Marlin source code to end users upon request. The most straightforward way to comply with the Marlin license is to make a fork of Marlin on Github, perform your modifications, and direct users to your modified fork.
While we can't prevent the use of this code in products (3D printers, CNC, etc.) that are closed source or crippled by a patent, we would prefer that you choose another firmware or, better yet, make your own.