On-premises Active Directory Deployed in the Cloud (Azure)
This tutorial outlines the implementation of on-premises Active Directory within Azure Virtual Machines.
Environments and Technologies Used
- Microsoft Azure (Virtual Machines/Compute)
- Remote Desktop
- Active Directory Domain Services
- PowerShell
Operating Systems Used
- Windows Server 2022 Datacenter - x64 Gen2
- Windows 10 Pro, version 22H2 - x64 Gen 1
Objectives
- Create Resources
- Ensure Connectivity between the client and Domain Controller
- Install Active Directory
- Create an Admin and Normal User Account in AD
- Join Client-1 to your domain (saboyatech.com)
- Setup Remote Desktop for non-administrative users on Client-1
- Create a PowerShell script to add additional users and attempt to log into client-1 with one of the users
Deployment and Configuration Steps
"Setup Resources in Azure"
Domain Controller VM
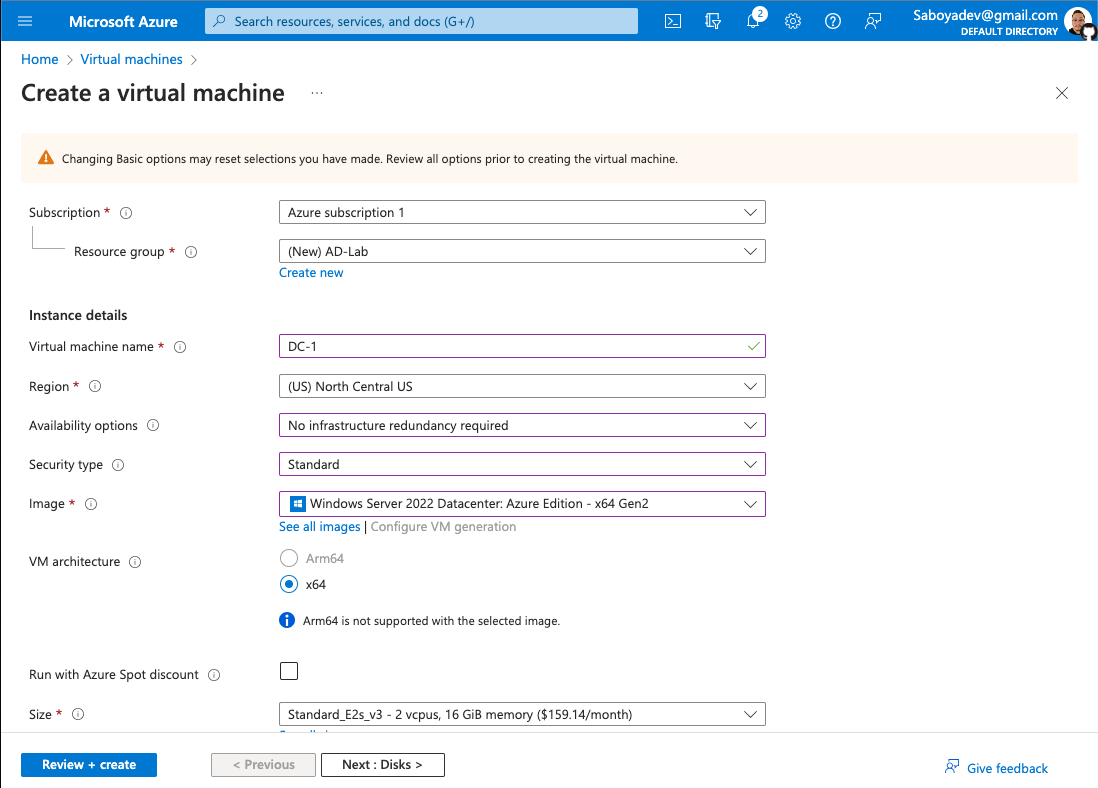
- Create the Domain Controller VM (Windows Server 2022) and name it“DC-1”
- Create a resource group that will be used by all the VMs
- Make sure to select at least a 2vcpus so the process will be smoother
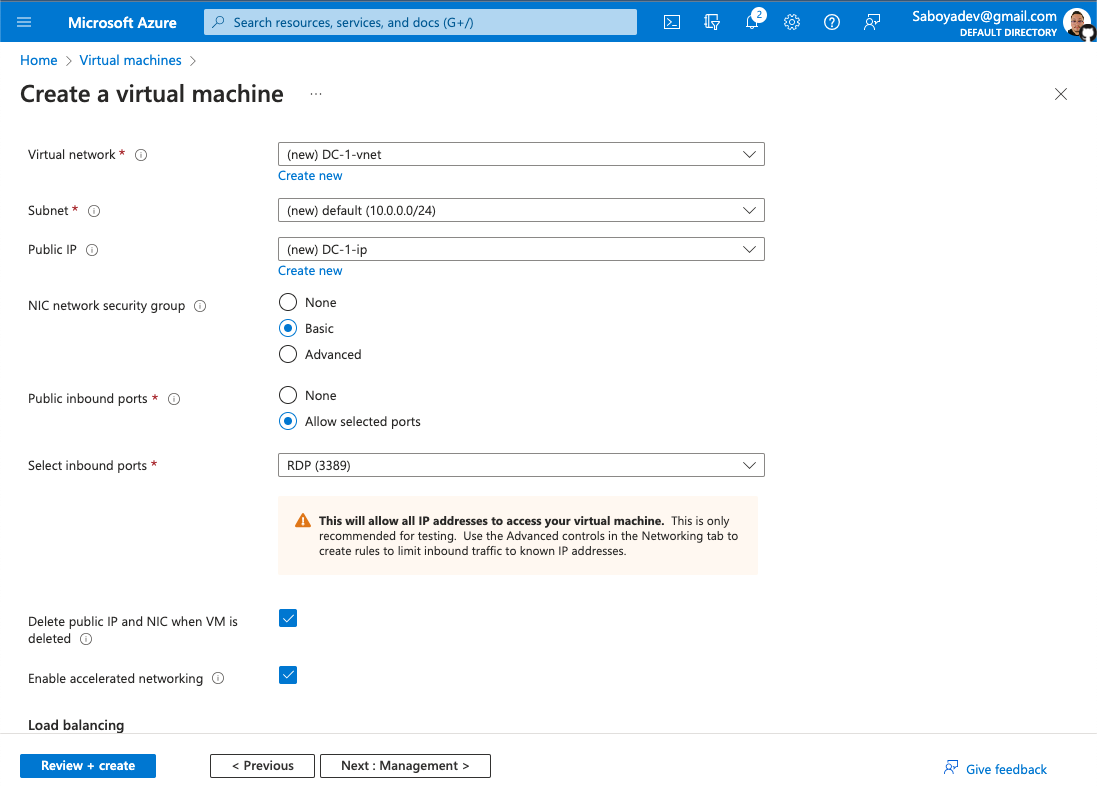
- Remember the name of the vnet being created since it will be used by the client VM.
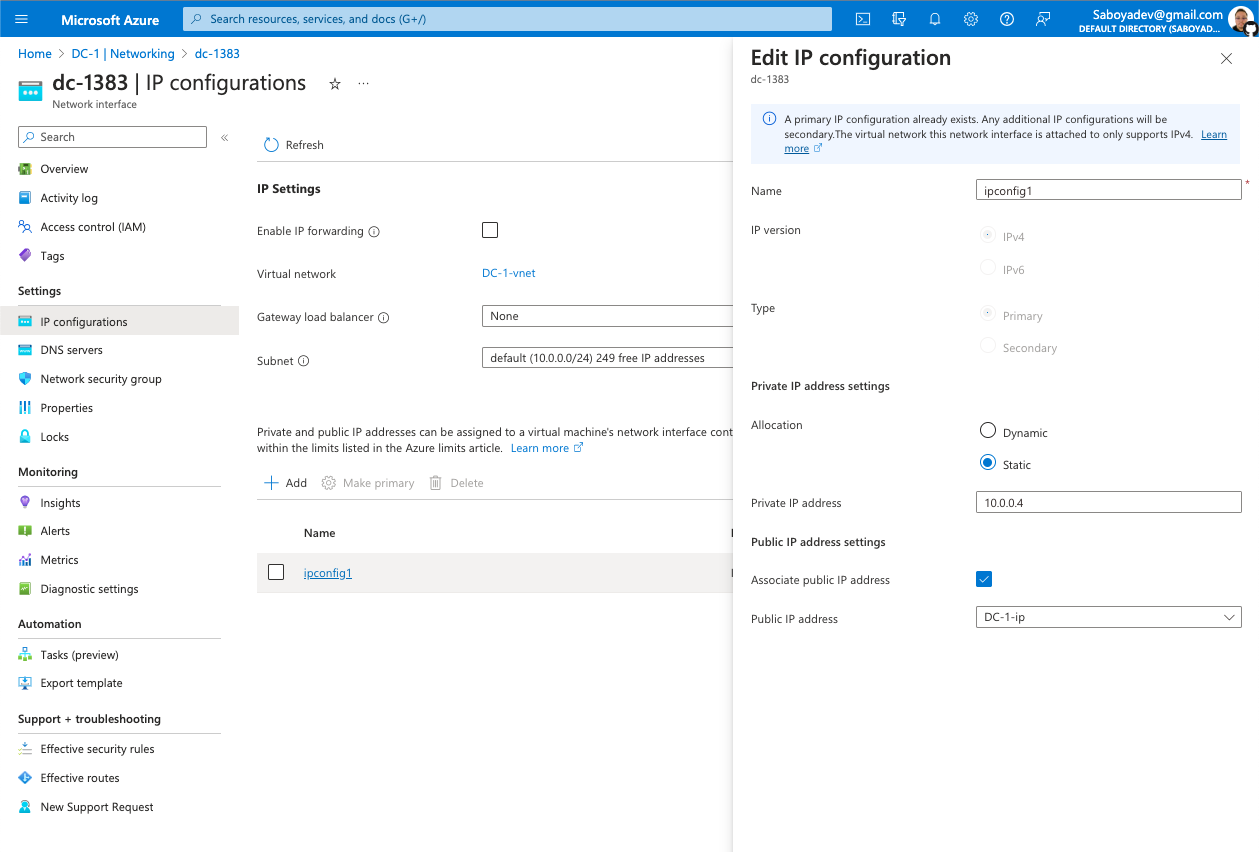
- Set the Domain Controller’s NIC Private IP address to be static by going to the Networking settings, select the Network Interface dc-1383, go to the IP configurations, and click on ipconfig1
Client VM
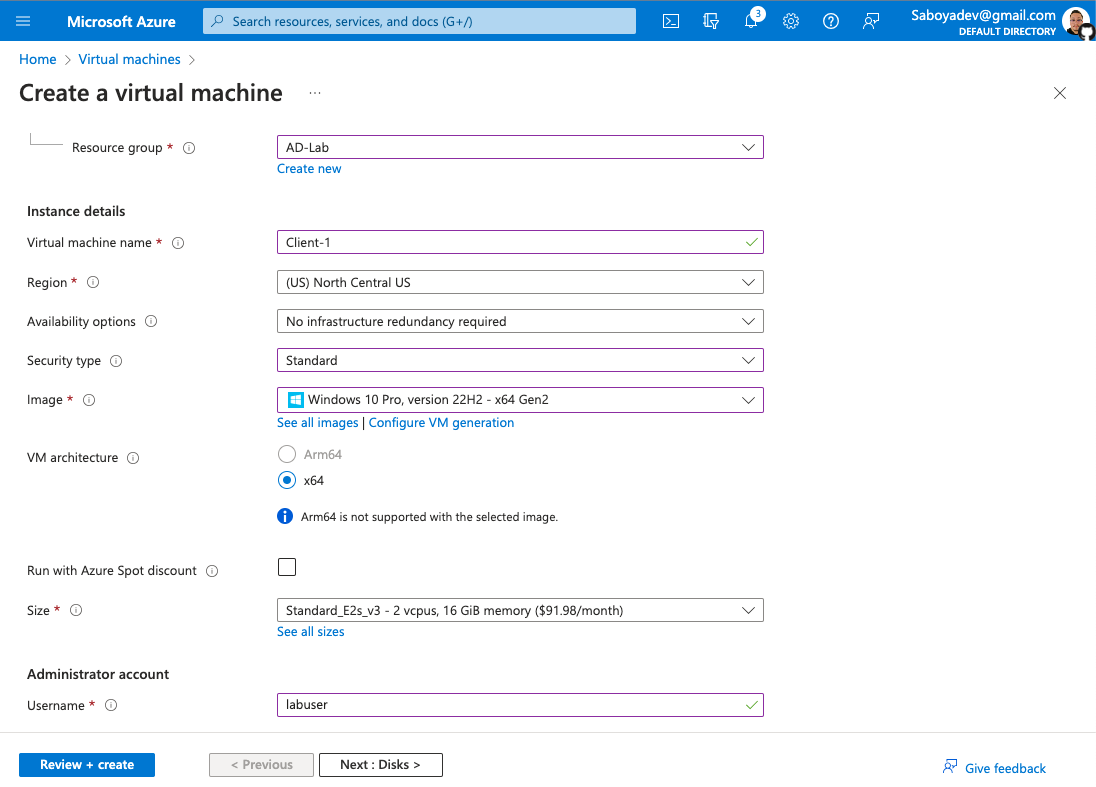
- Create the Client VM (Windows 10 Pro) and name it “Client-1”.
- Use the same Resource Group and vnet that was created in the previous step
"Ensure Connectivity Between the Client and Domain Controller"
Network Topology
- Ensure that both VMs are in the same vnet (you can check the topology with Network Watcher)
Ping DC-1
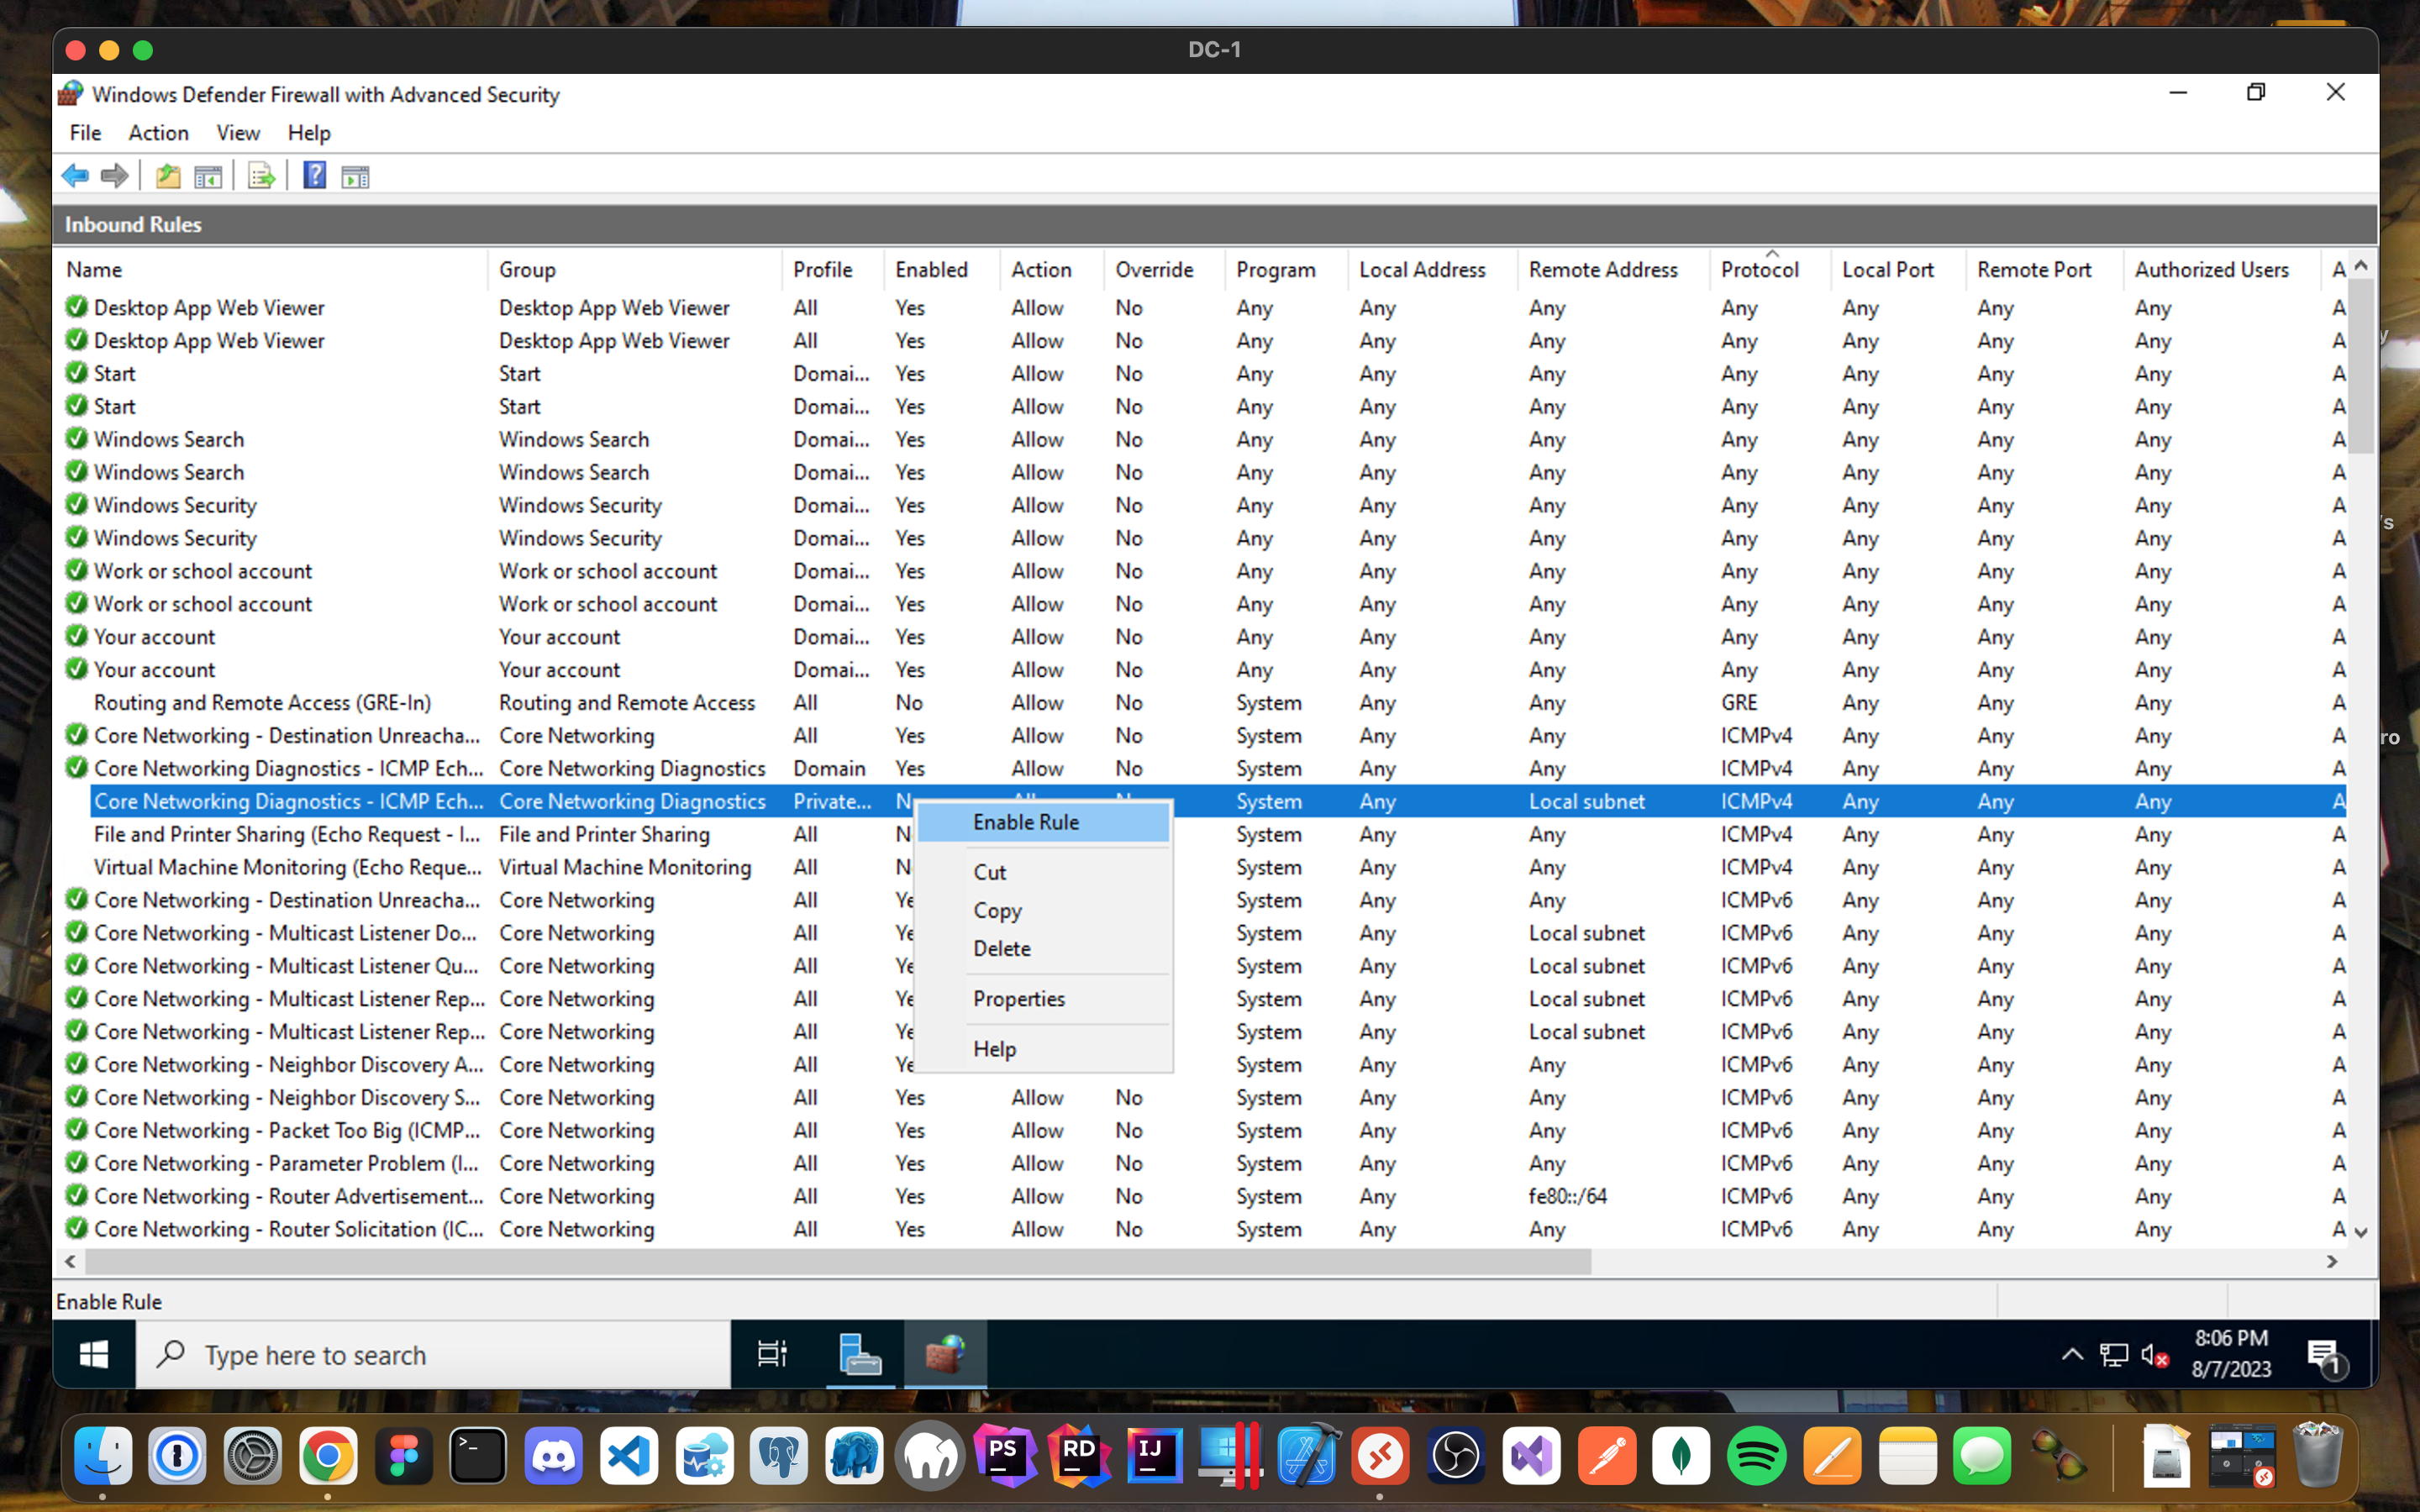
- Login to DC-1 and go to Windows Defender Firewall with Advanced Security to enable ICMPv4 traffic on ICMP Echo under Local subnet
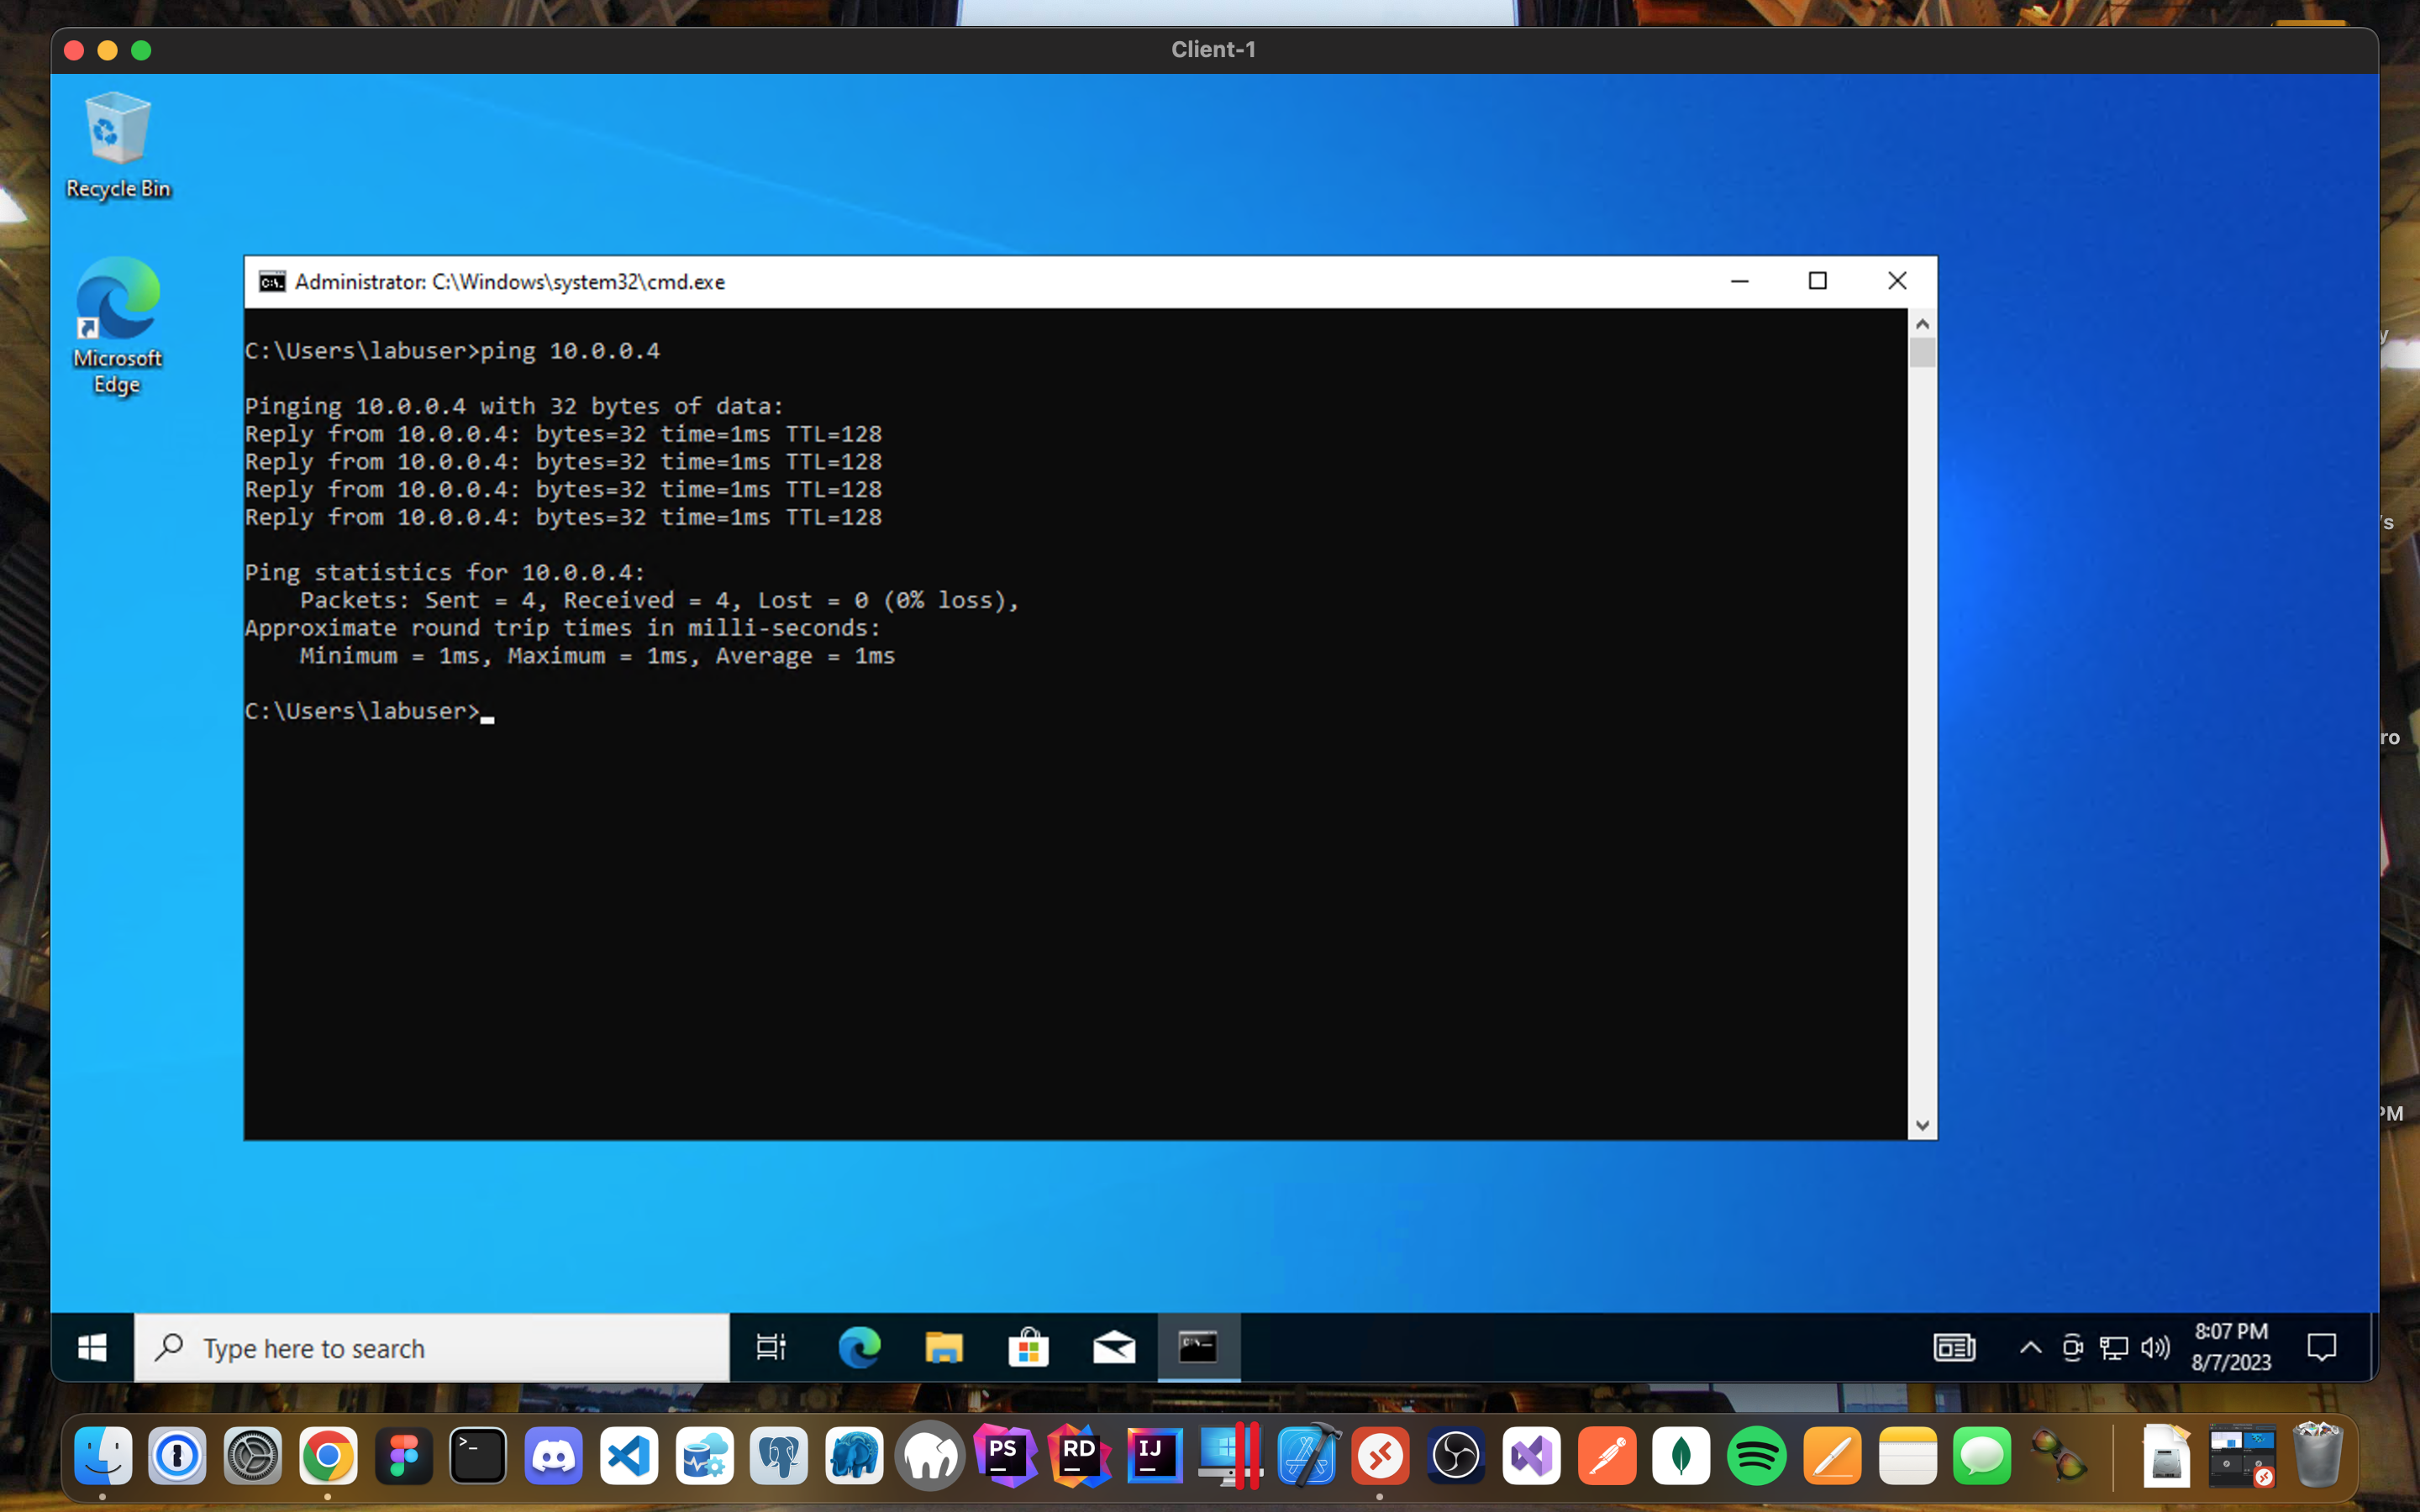
- Login to Client-1 with Remote Desktop and ping DC-1’s private IP address
ping <DC-1's Local IP address>"Active Directory"
Installation:
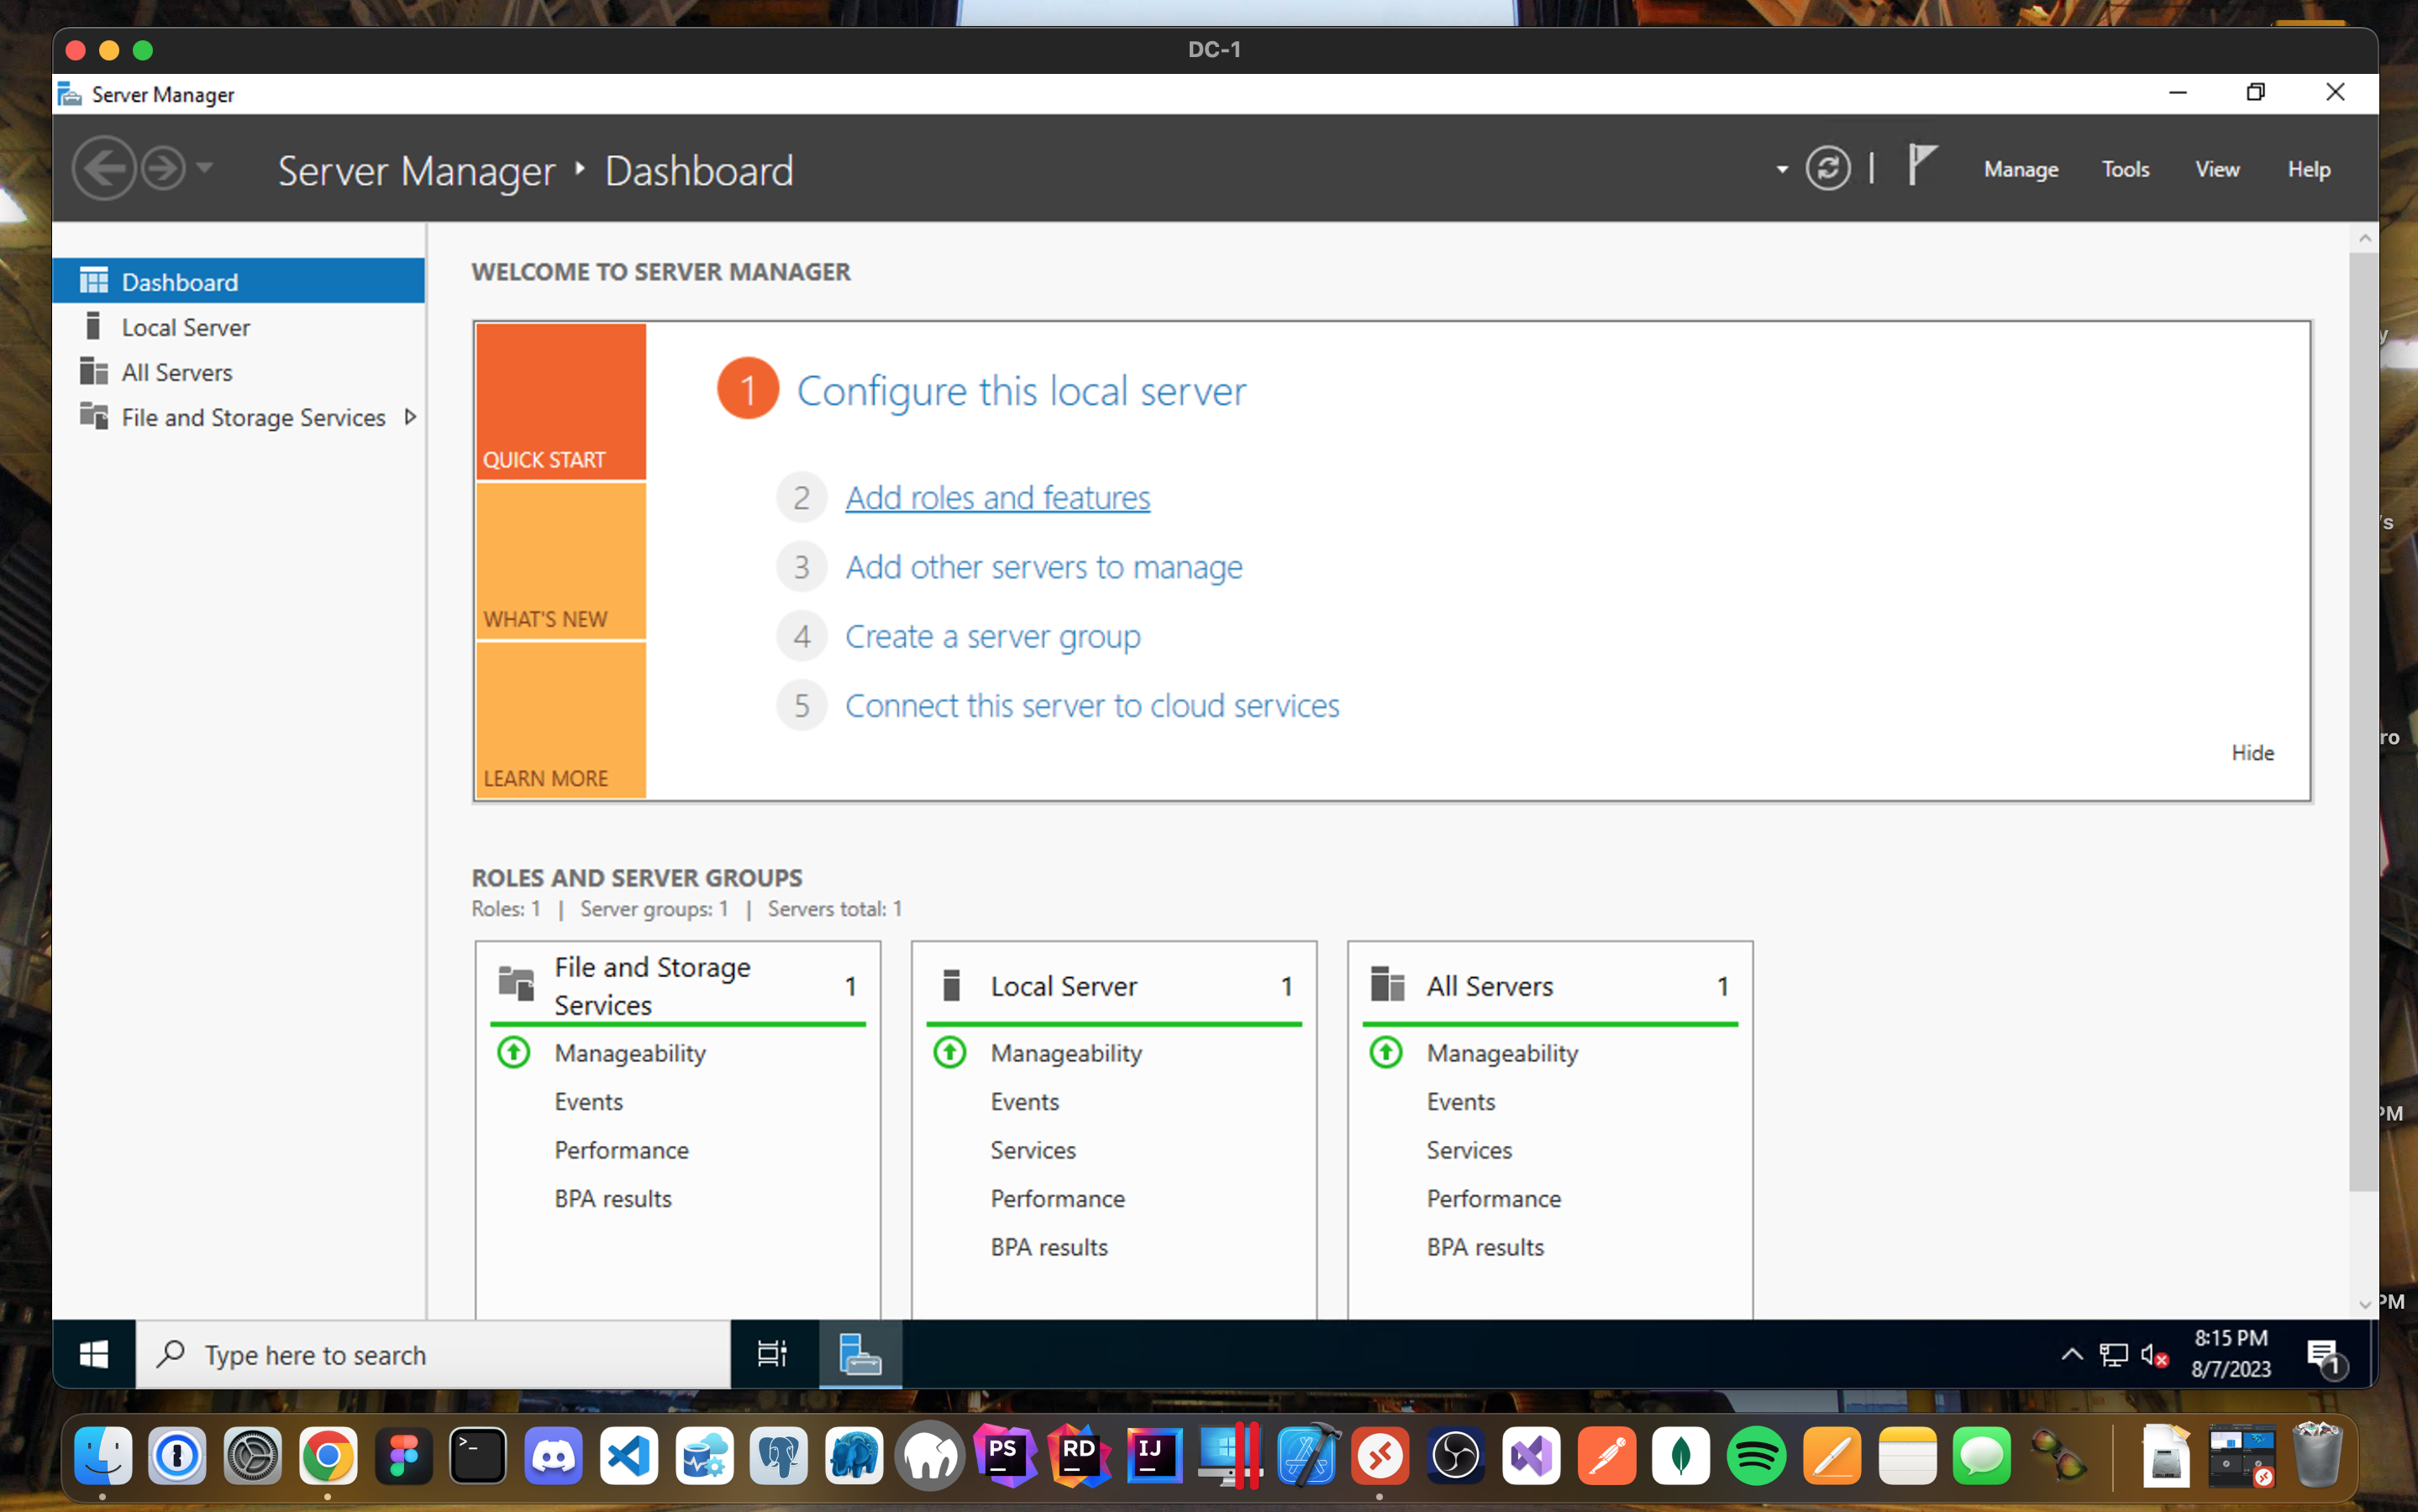
- Login to DC-1 and select Add roles and features on the dashboard of Server Manager.
- Installation type is Role-based or feature-based installation.
- Select DC-1 as your server to add Active Directory.
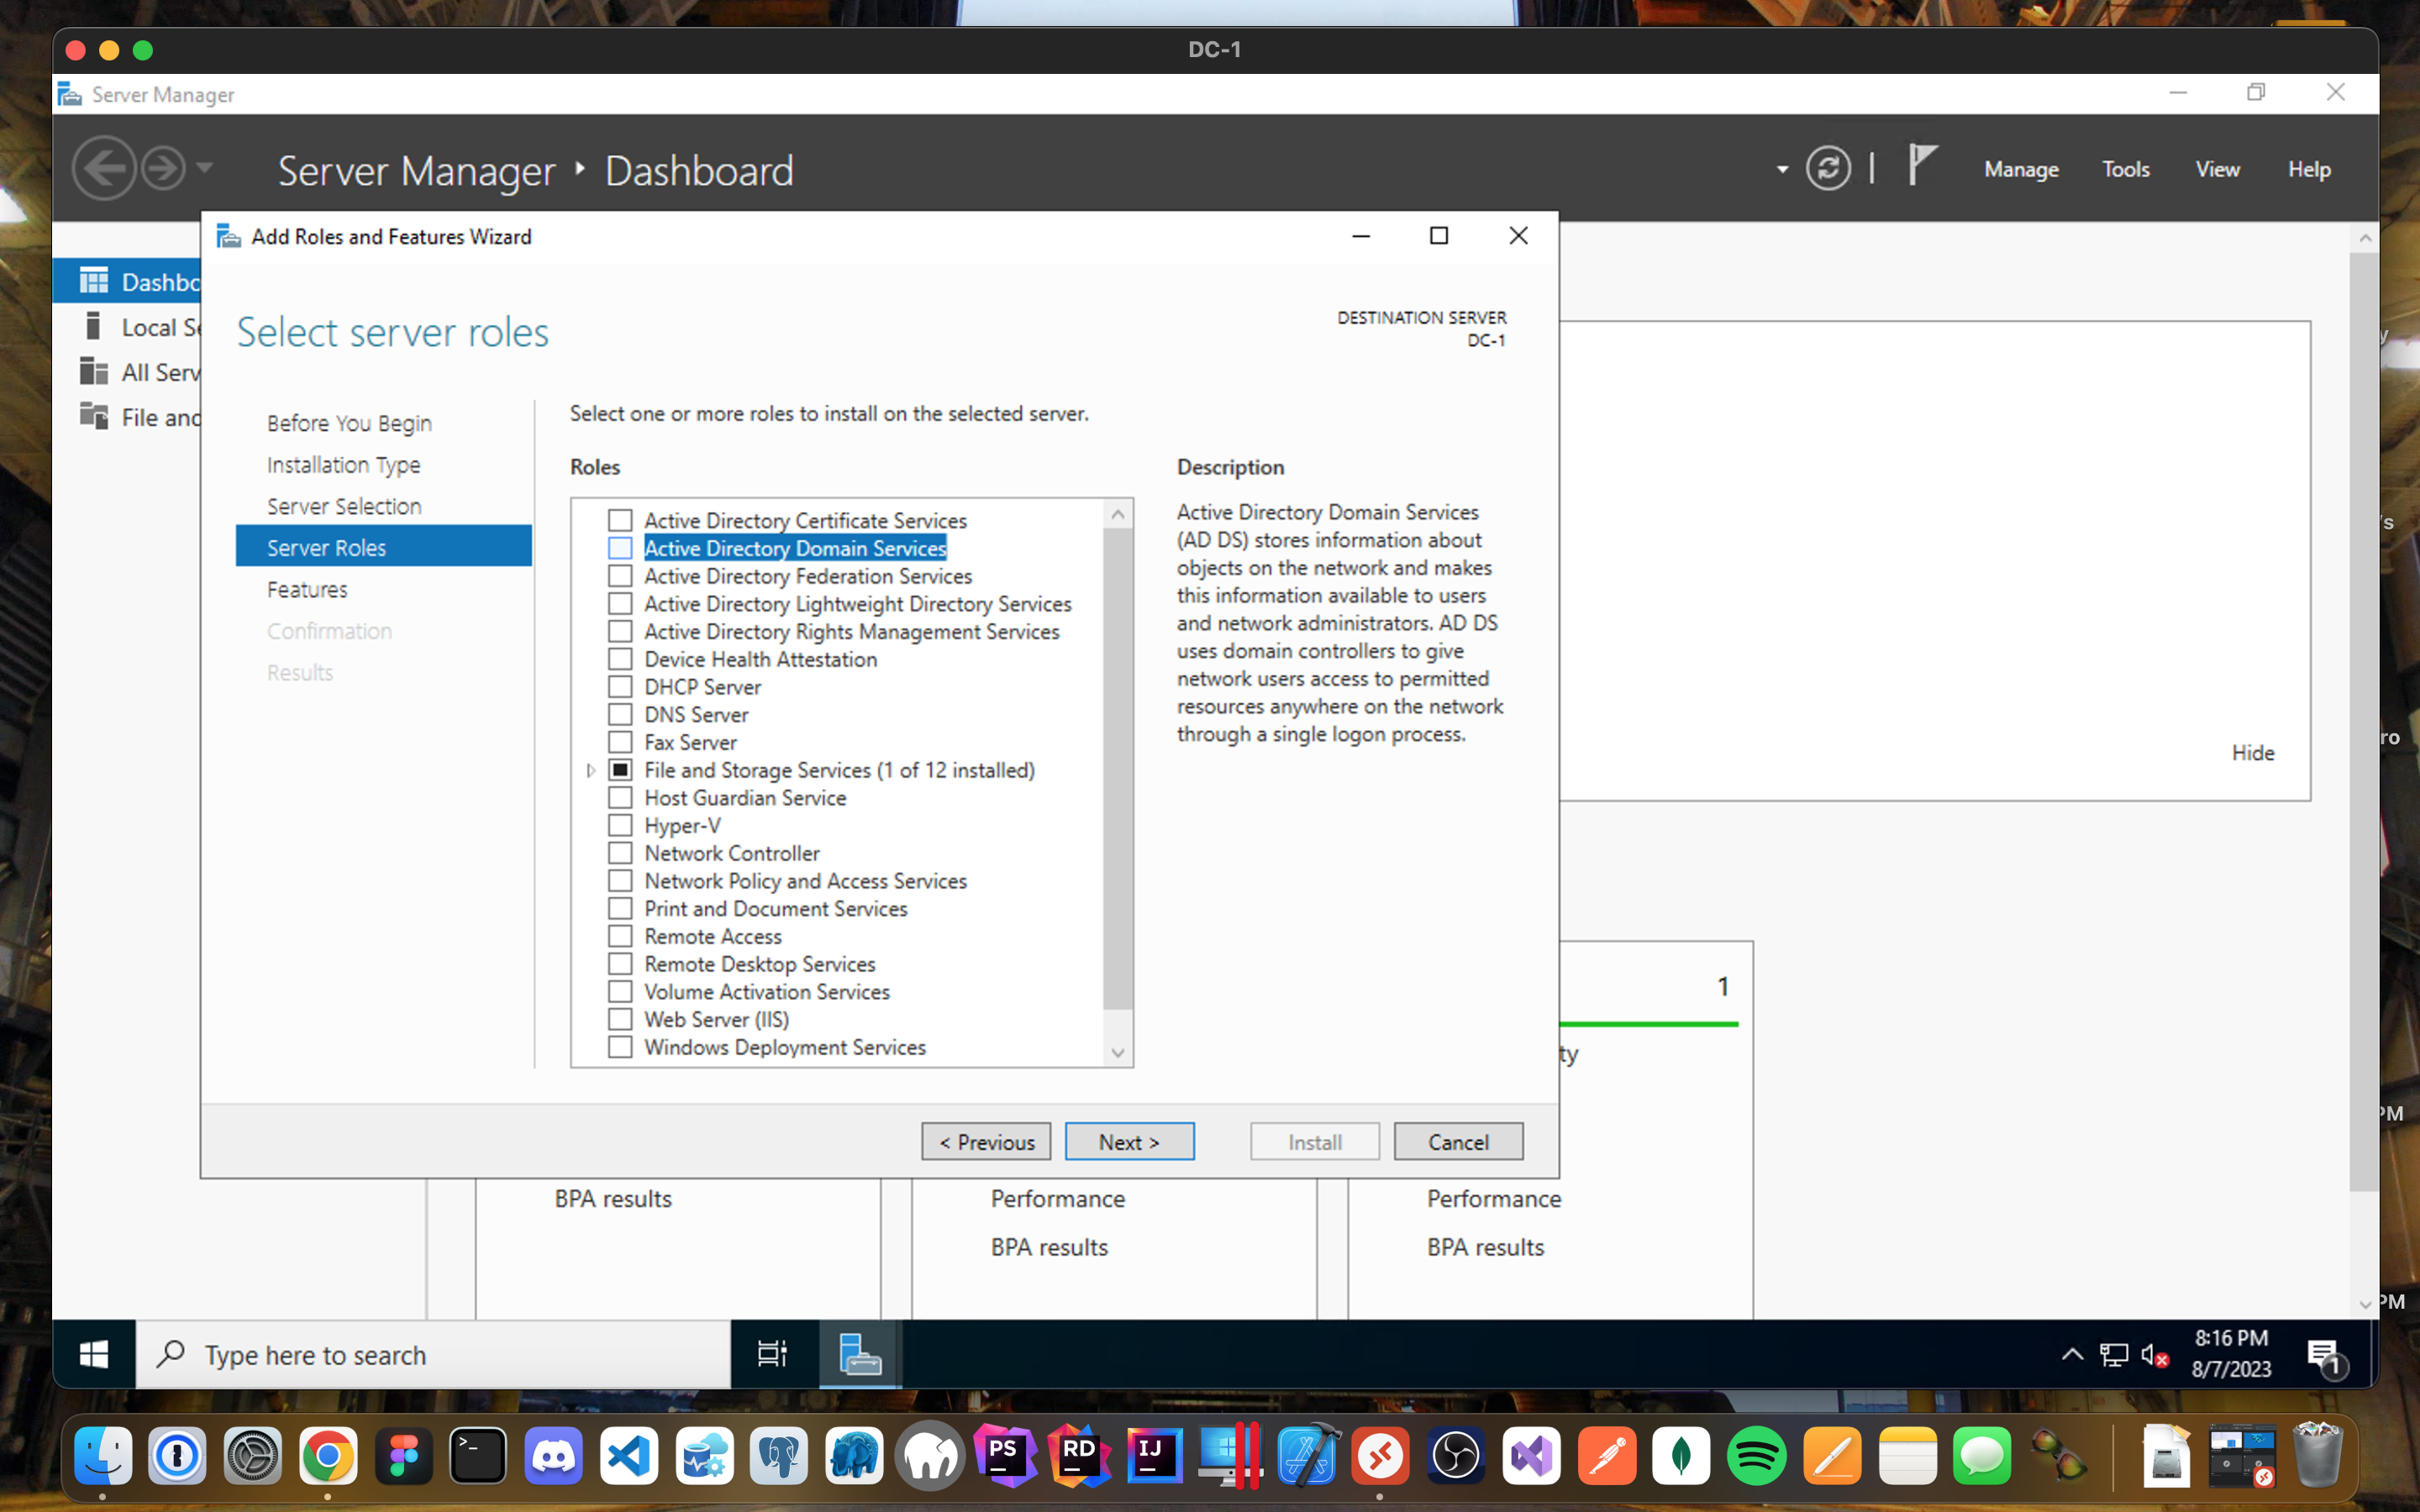
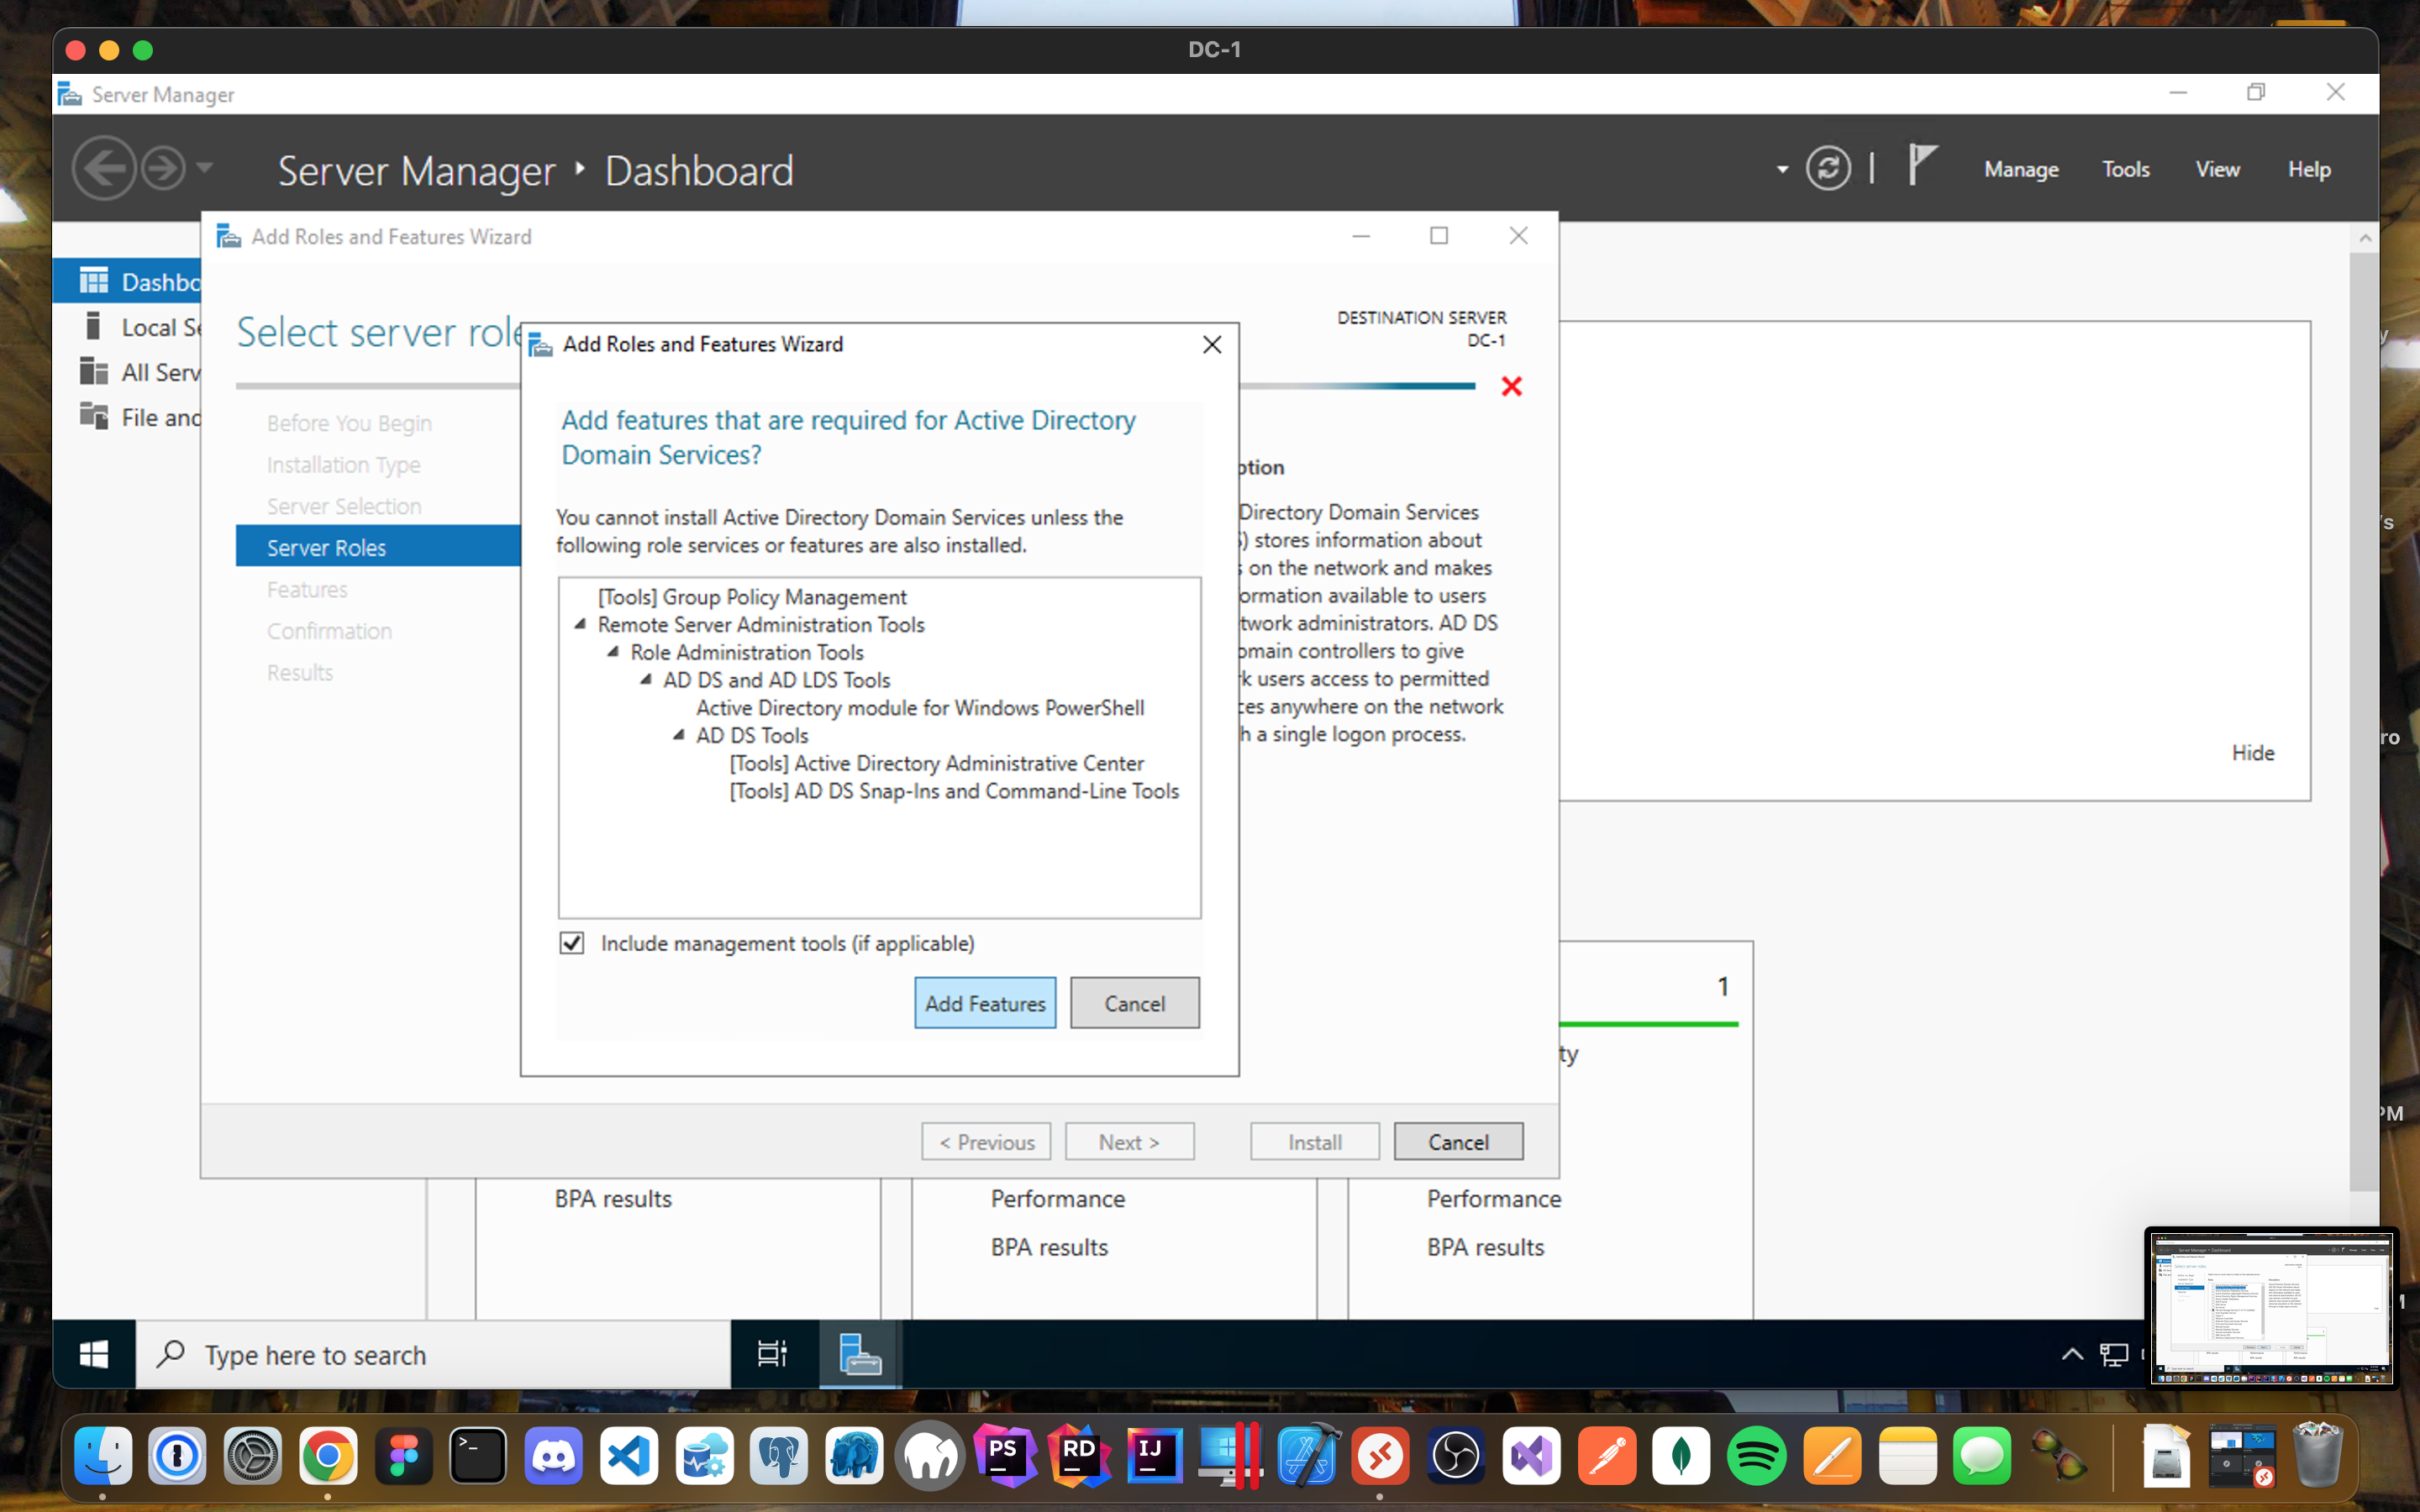
- When you select Active Directory Domain Services, you will get prompted with additional role services to install.
- Select Add Features.
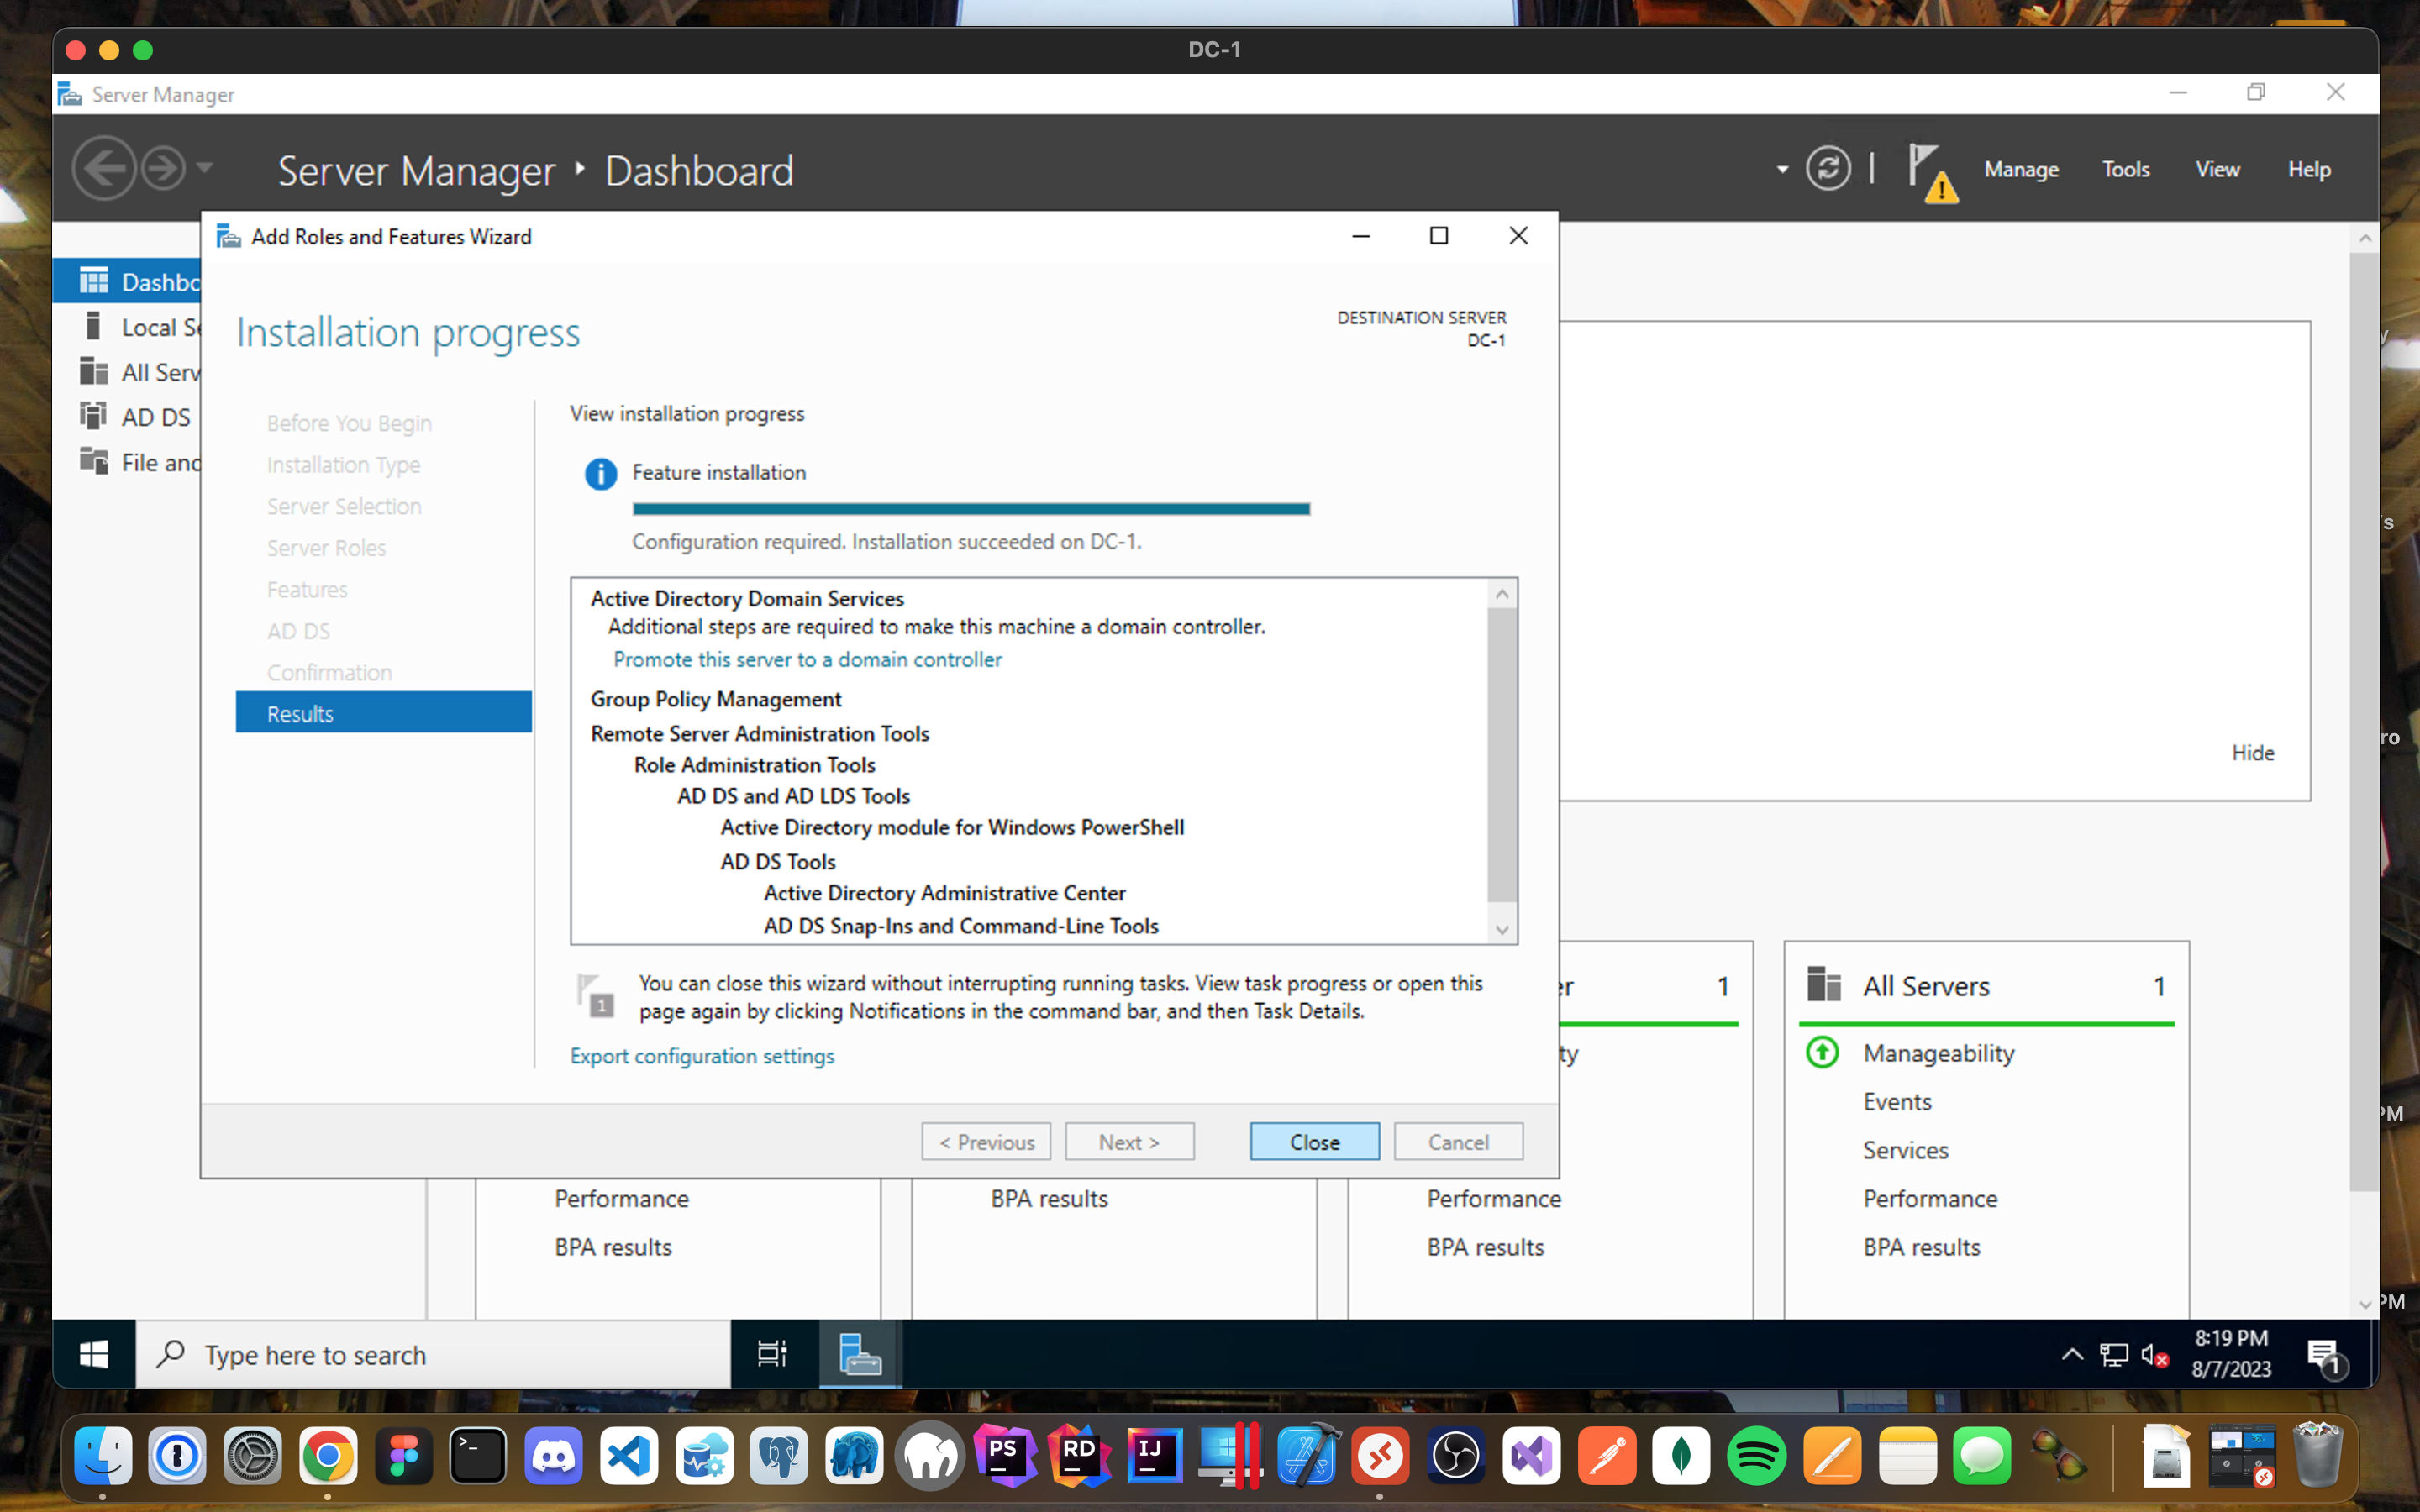
- Go through the remaining process of the installation.
Promote DC-1 as a Domain Controller:
- Click on Promote this server to a domain controller.
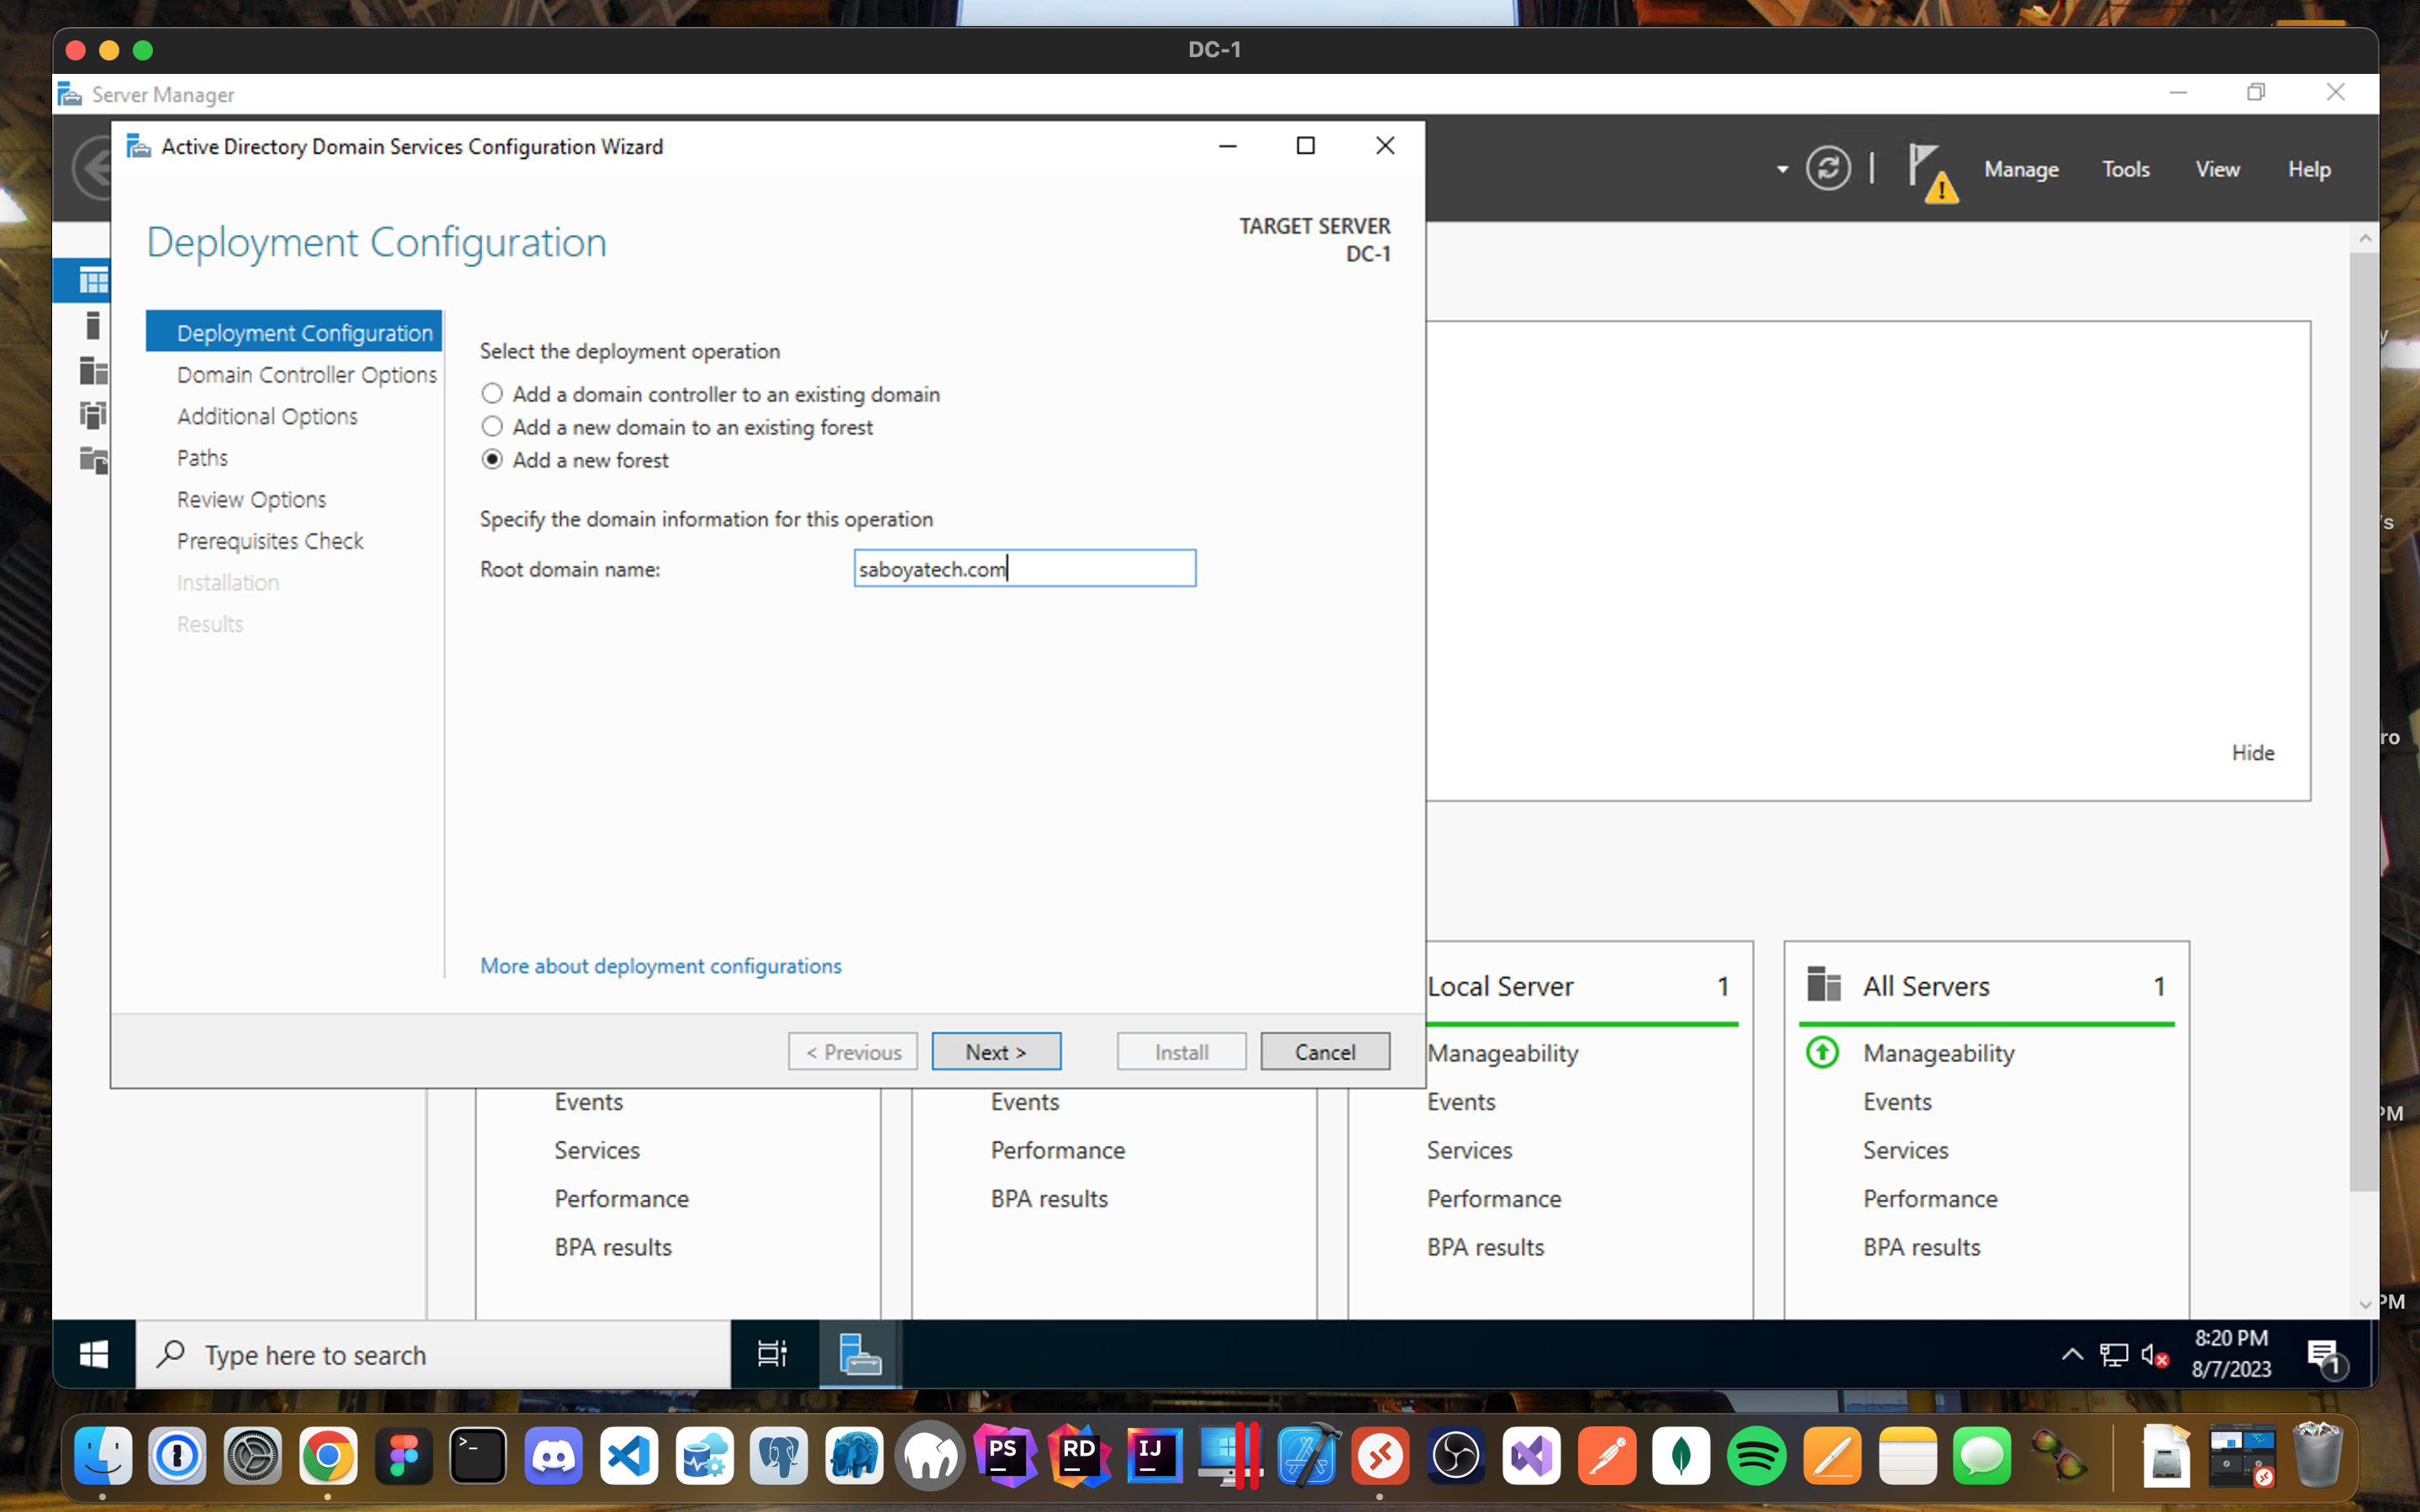
- Setup a new forest and create the root domain name, I just decided to call it saboyatech.com
- Setup a DSRM password.
- Skip the DNS Options.
- Confirm the Automatic NetBIOS domain name created (Should be the domain name you created with out the .com, .net, etc all UPPERCASE).
- You could leave the paths all default.
- Finish the installation and Restart the VM.
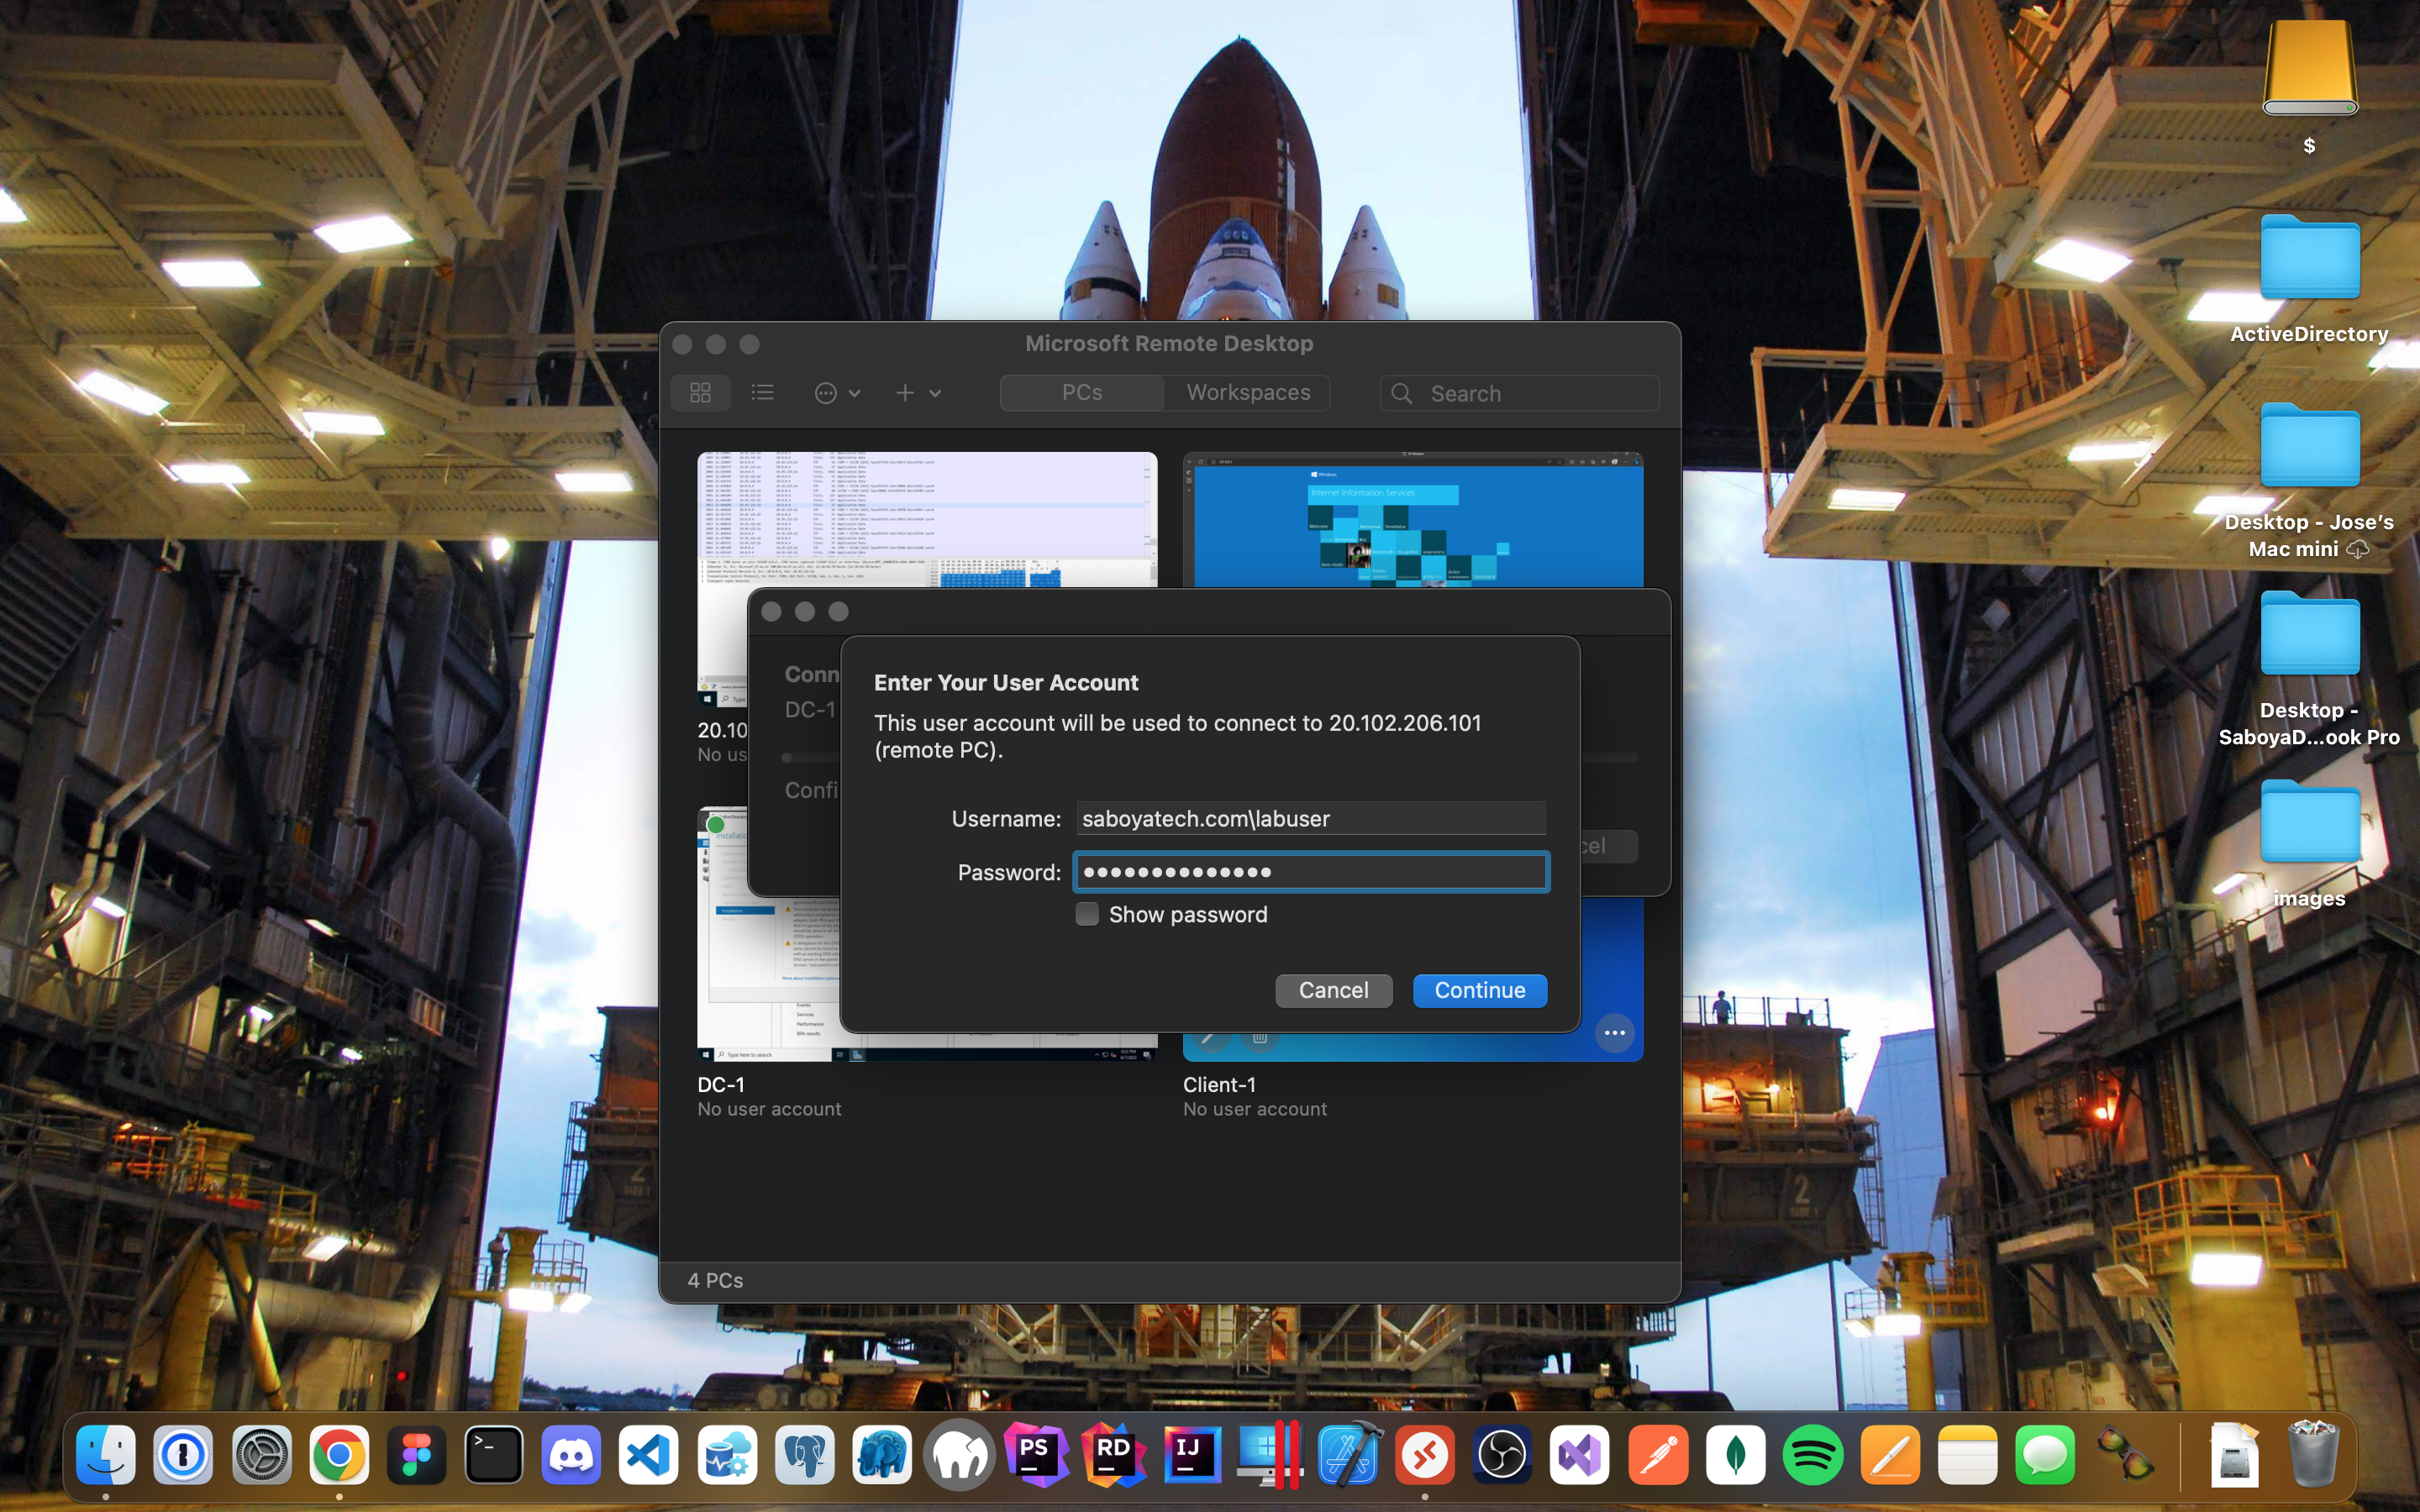
- Log back into DC-1 as User: saboyatech.com\labuser.
"Create Users in AD"
Active Directory Users and Computers:
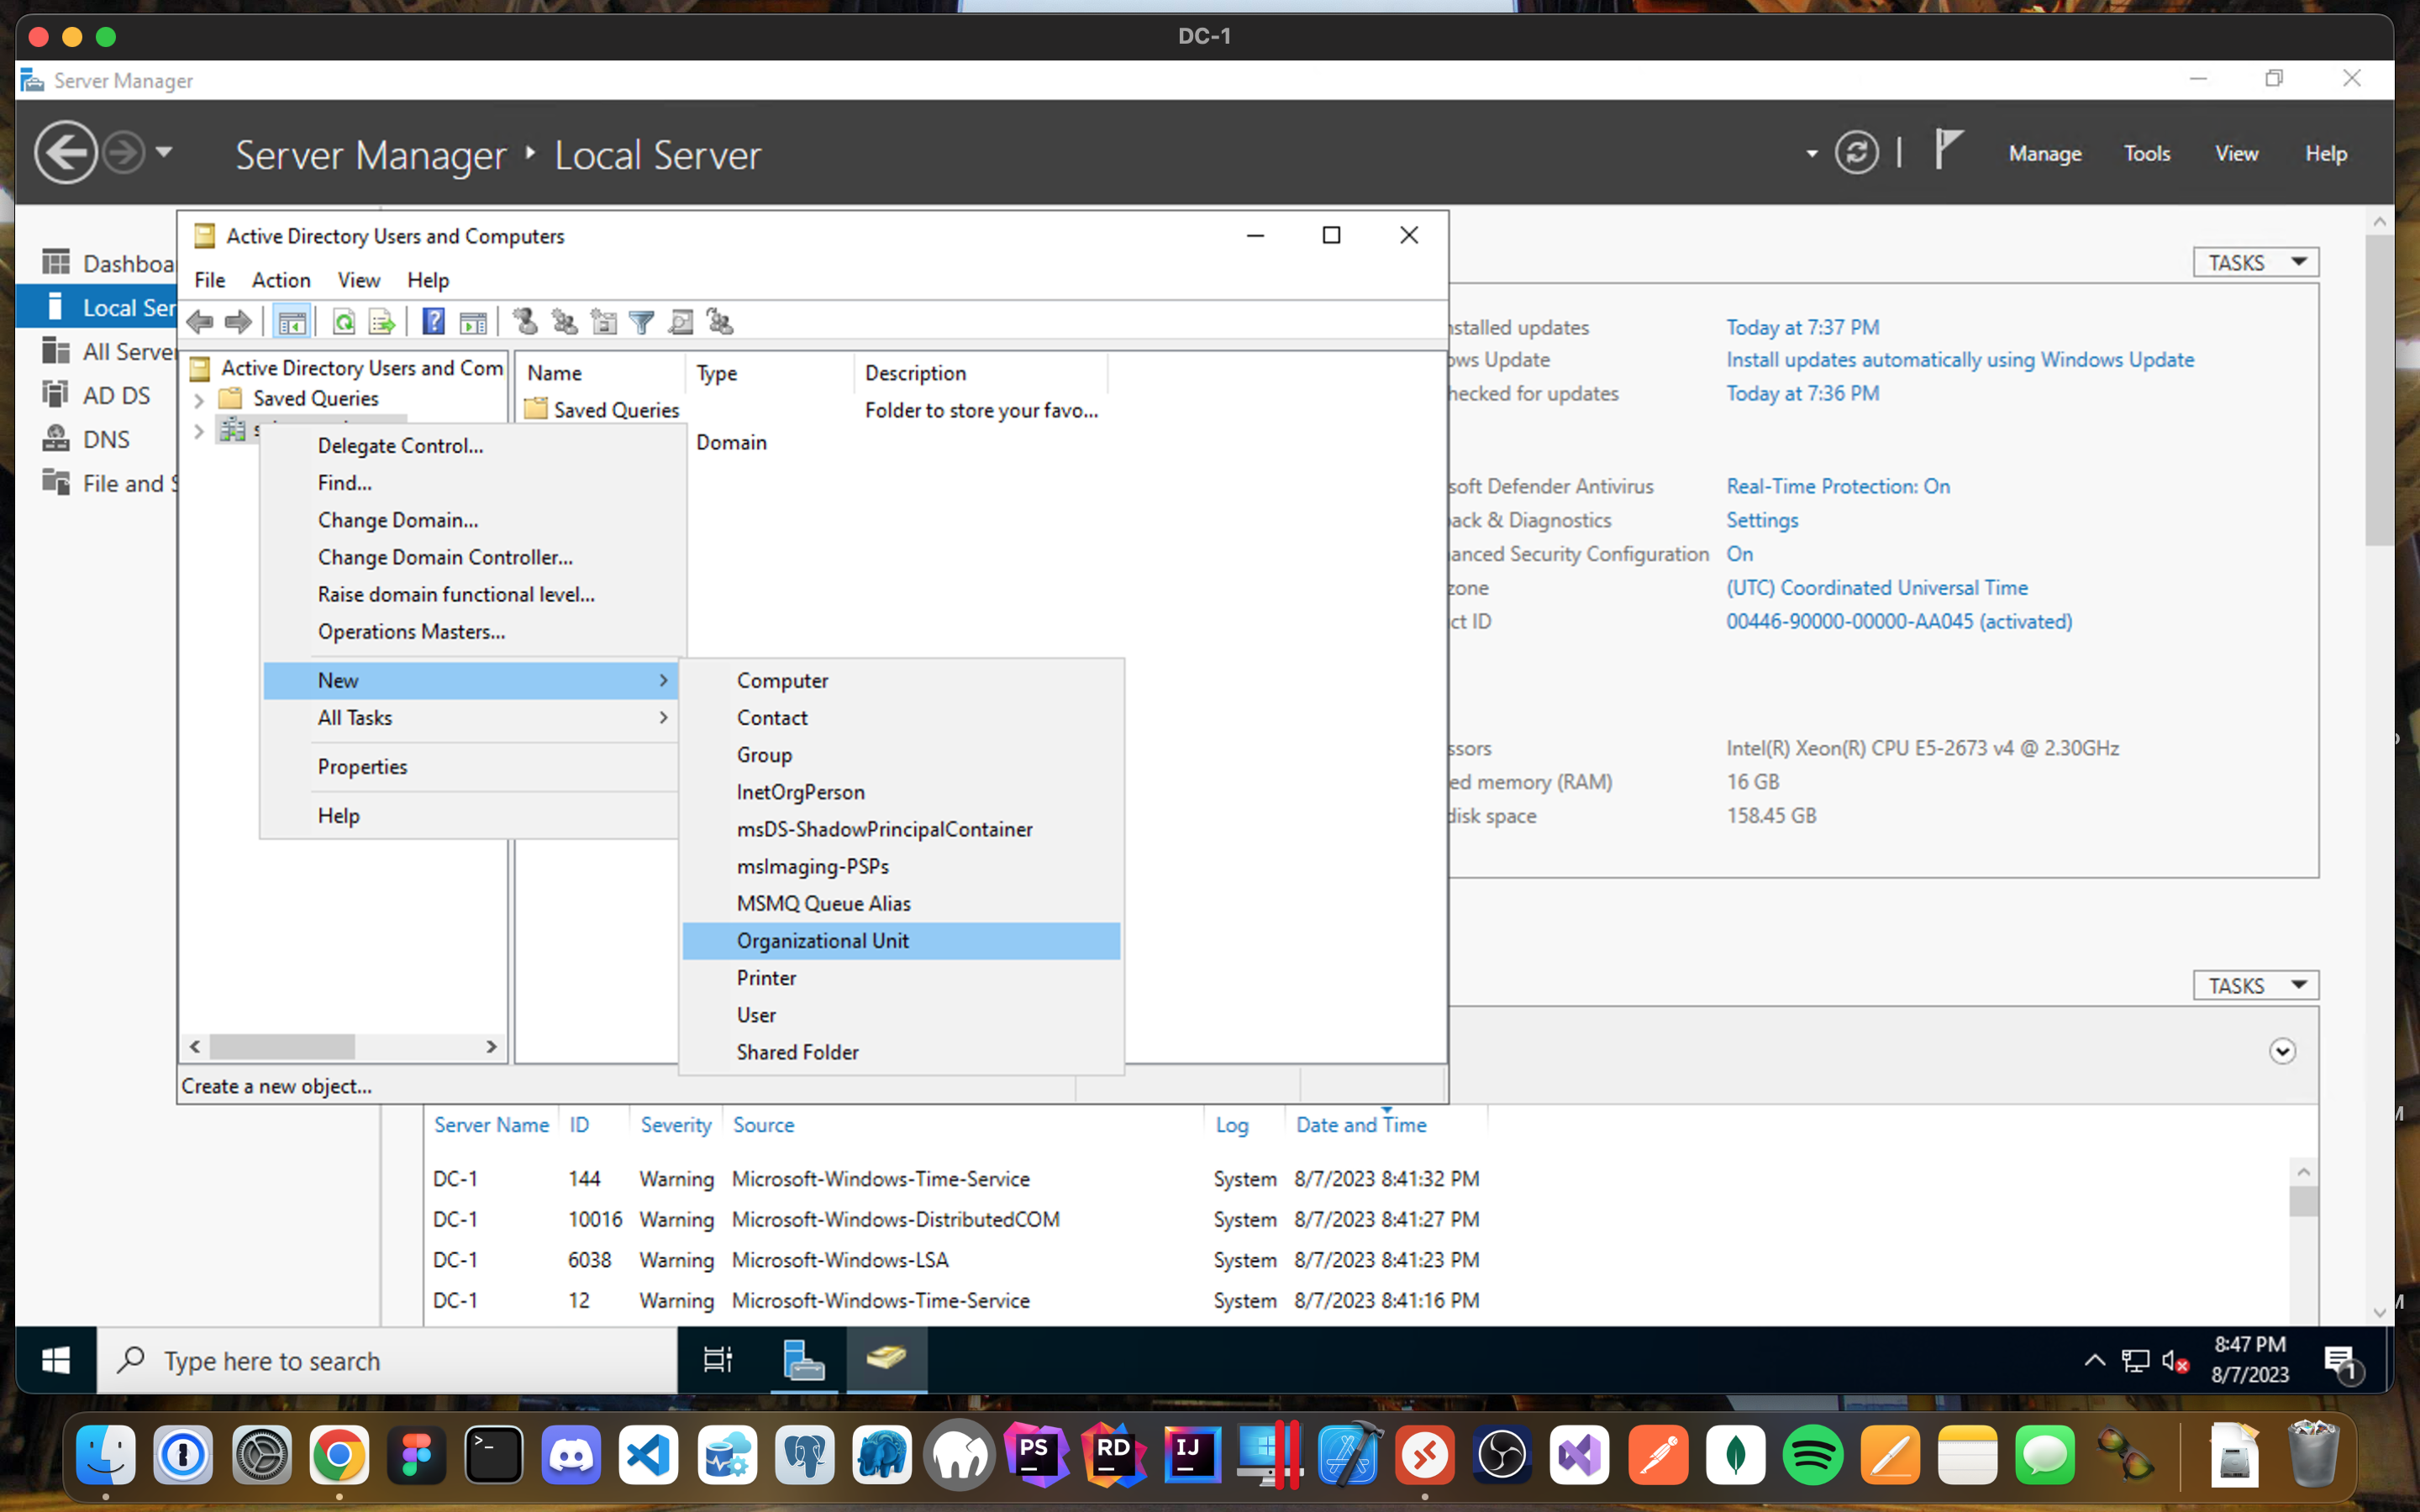
- Create two Organizational Units (OUs) called “_EMPLOYEES” and "_ADMINS" by right clicking the domain, select New and Organizational Unit.
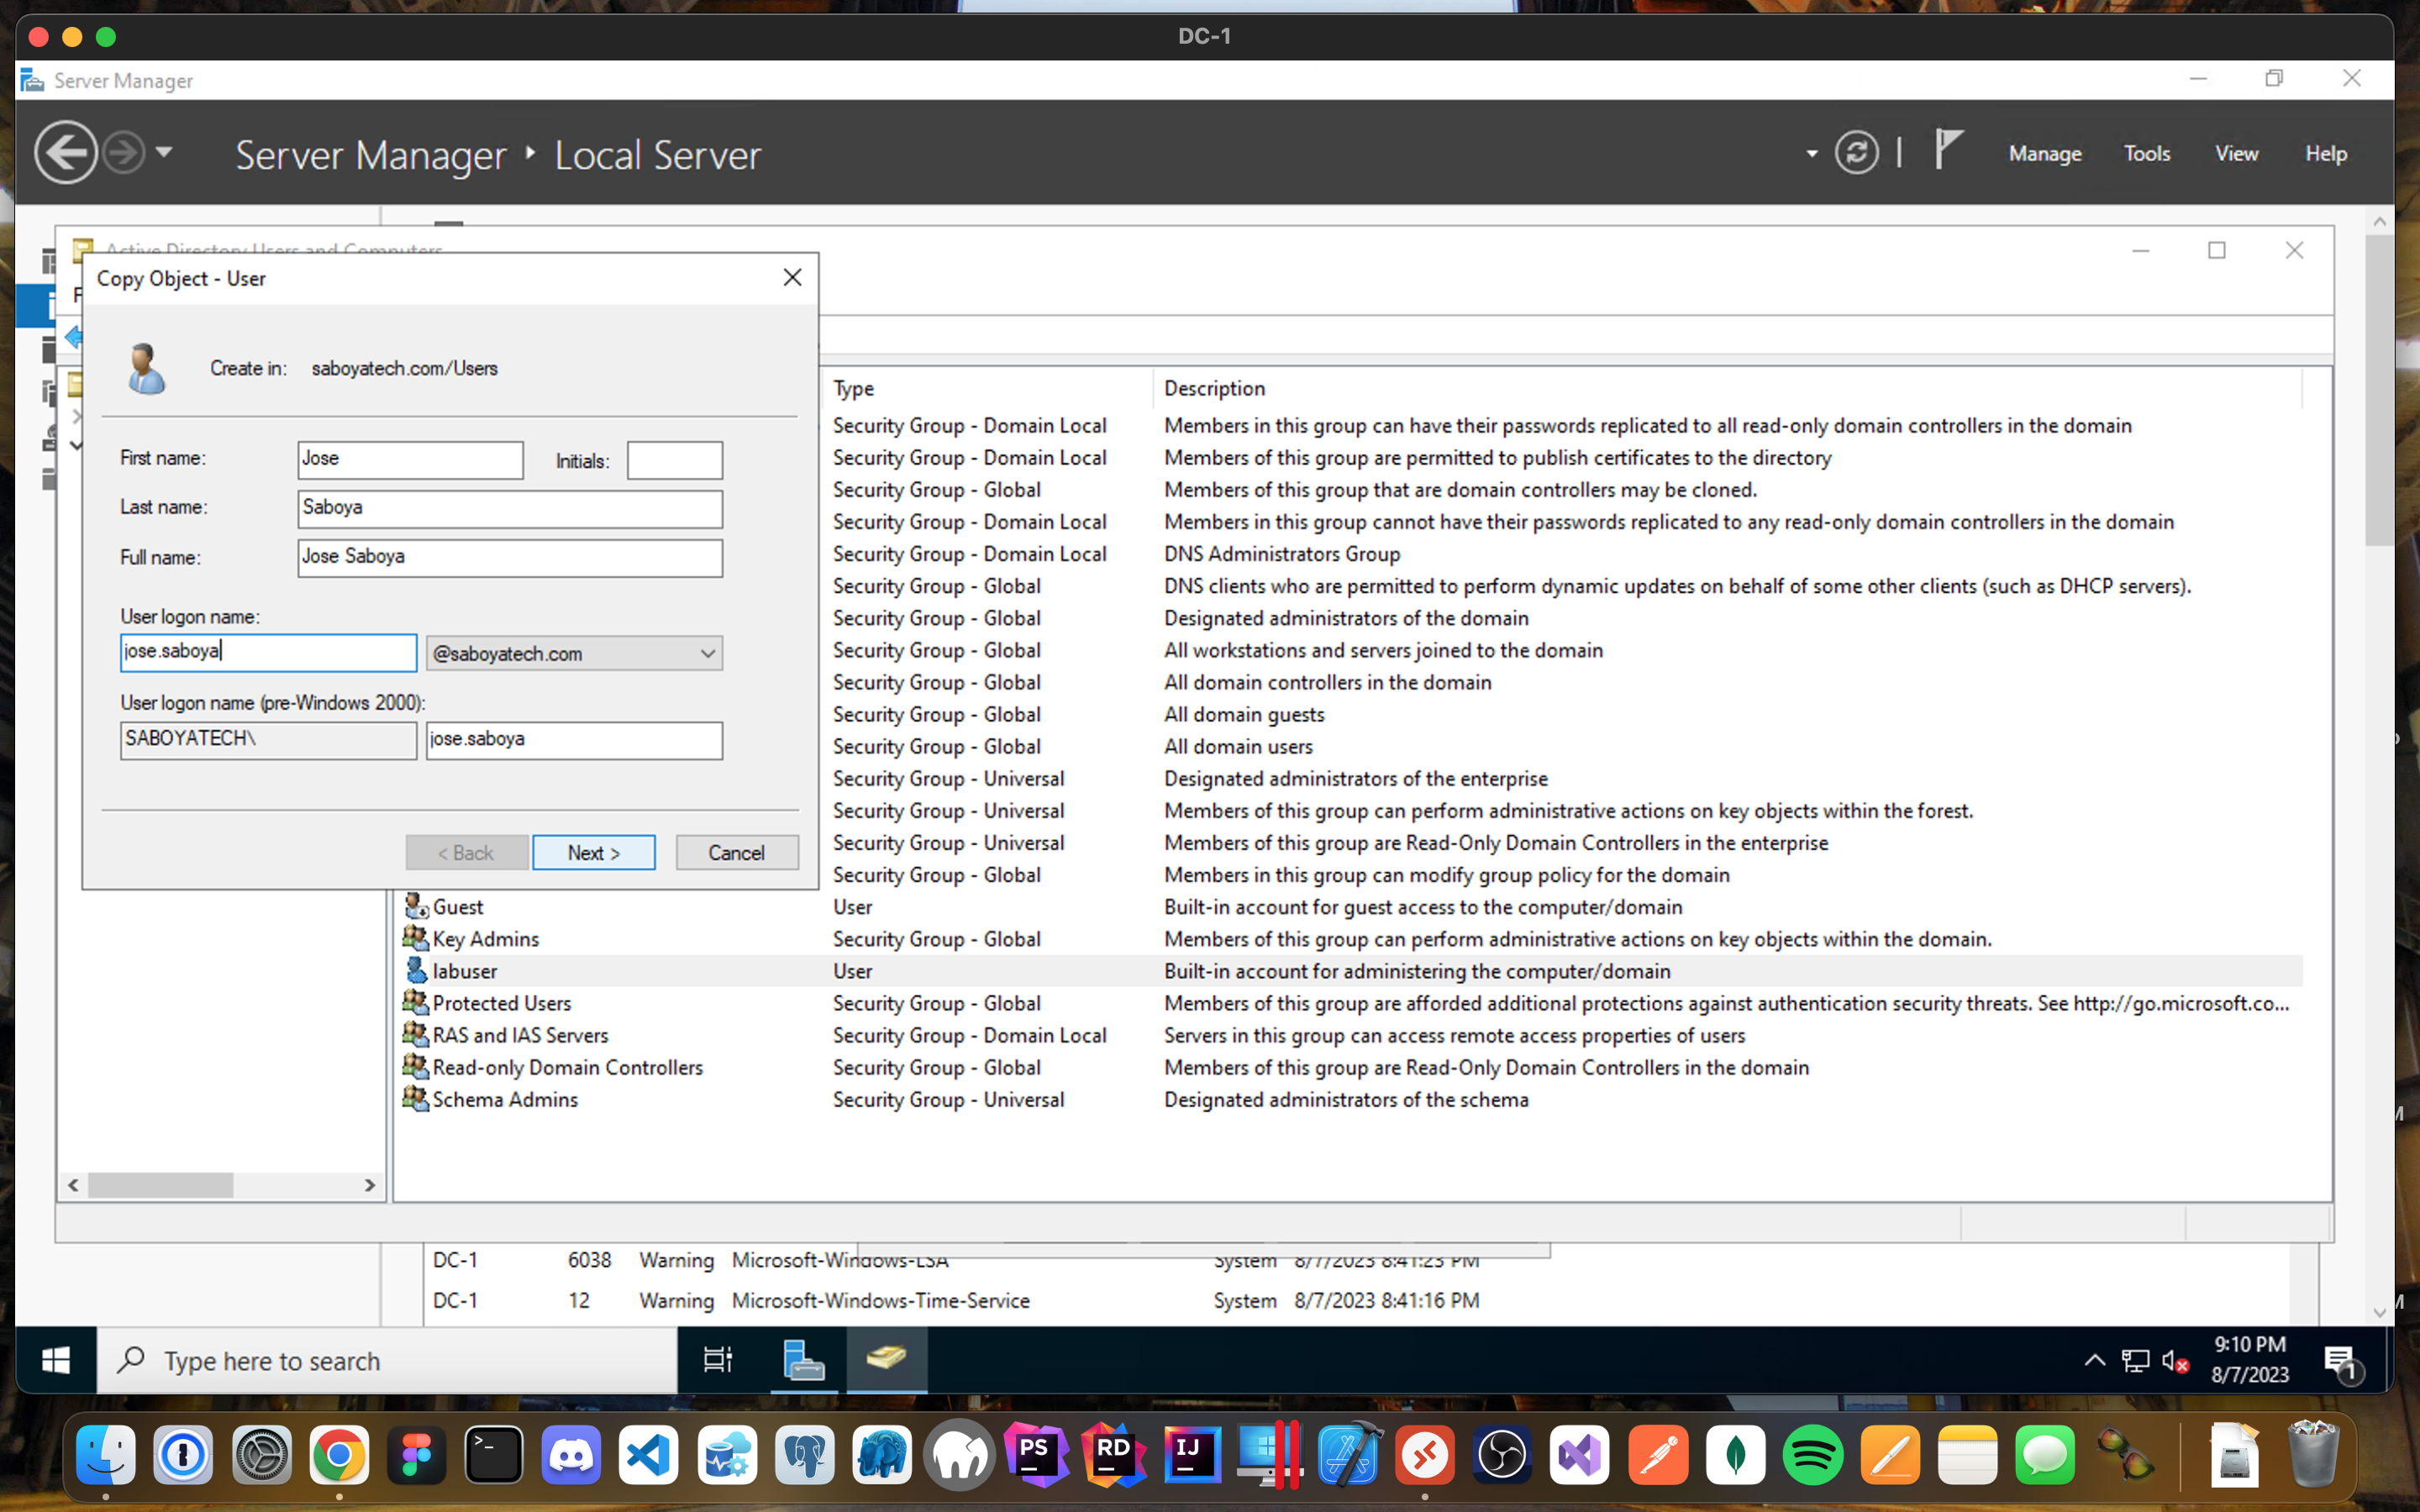
- Create a new admin but instead of creating it from scratch, you can copy another admin object and clone it to safe you from having to add manually every single group.
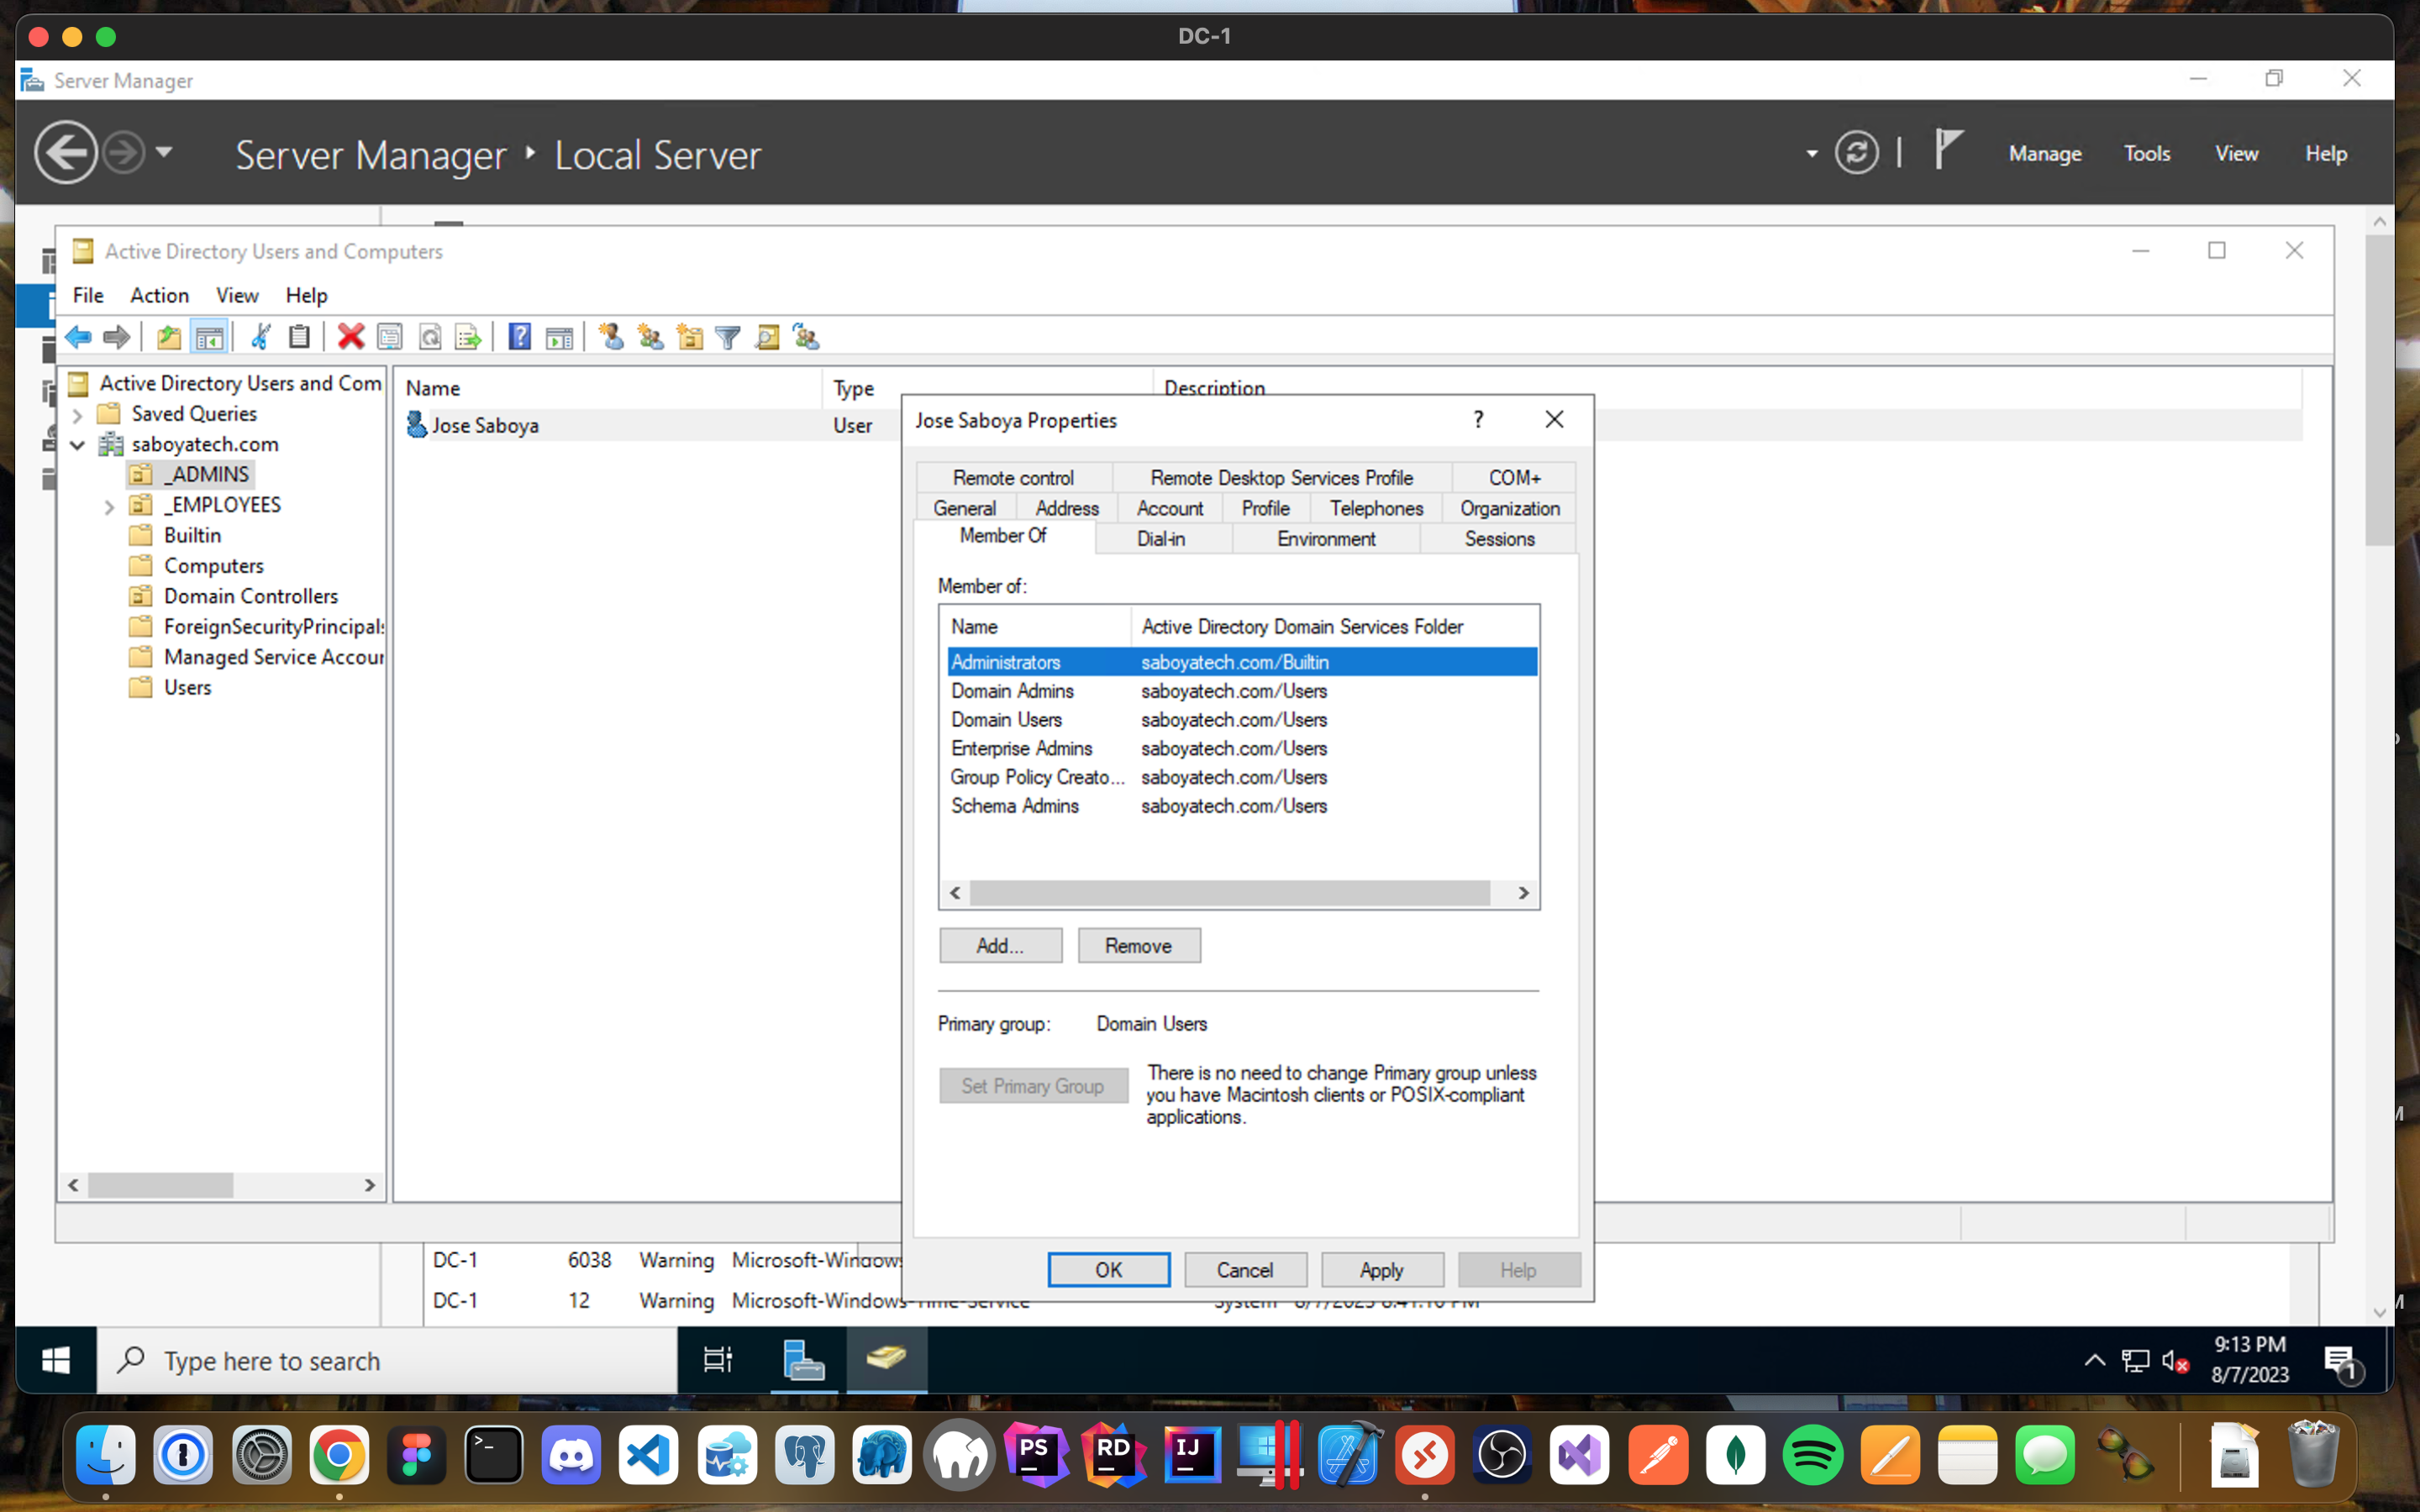
- Notice how this Admin is already a member of the different Security Groups, since we cloned an Admin user.
- Logout from the Remote Desktop connection to DC-1 and log back in now as “saboyatech.com\jose.saboya” (replace it with the user you created). I will now use jose.saboya as my admin account from now on:
"Join Computers to Domain (saboyatech.com)"
DNS:
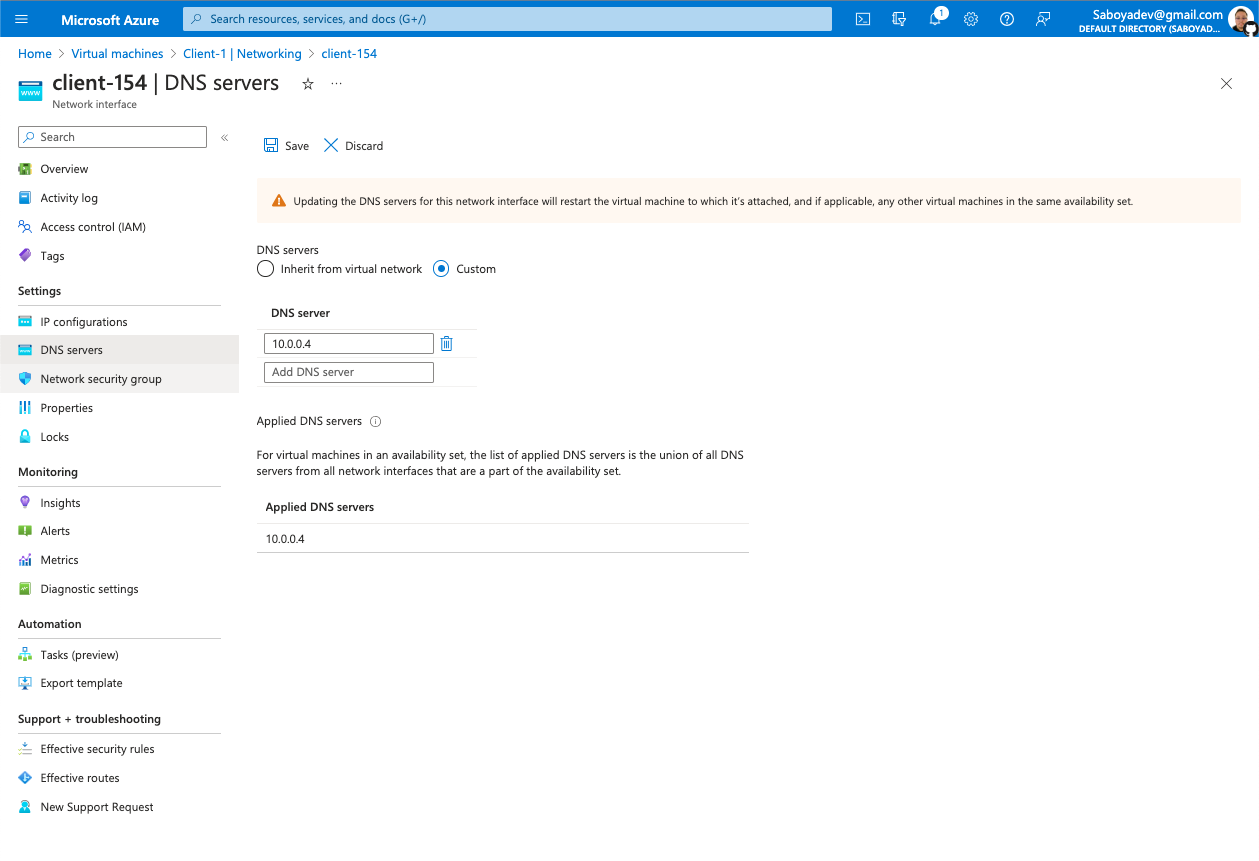
- From the Azure Portal, set Client-1’s DNS settings to the DC’s Private IP address.
- Restart Client-1.
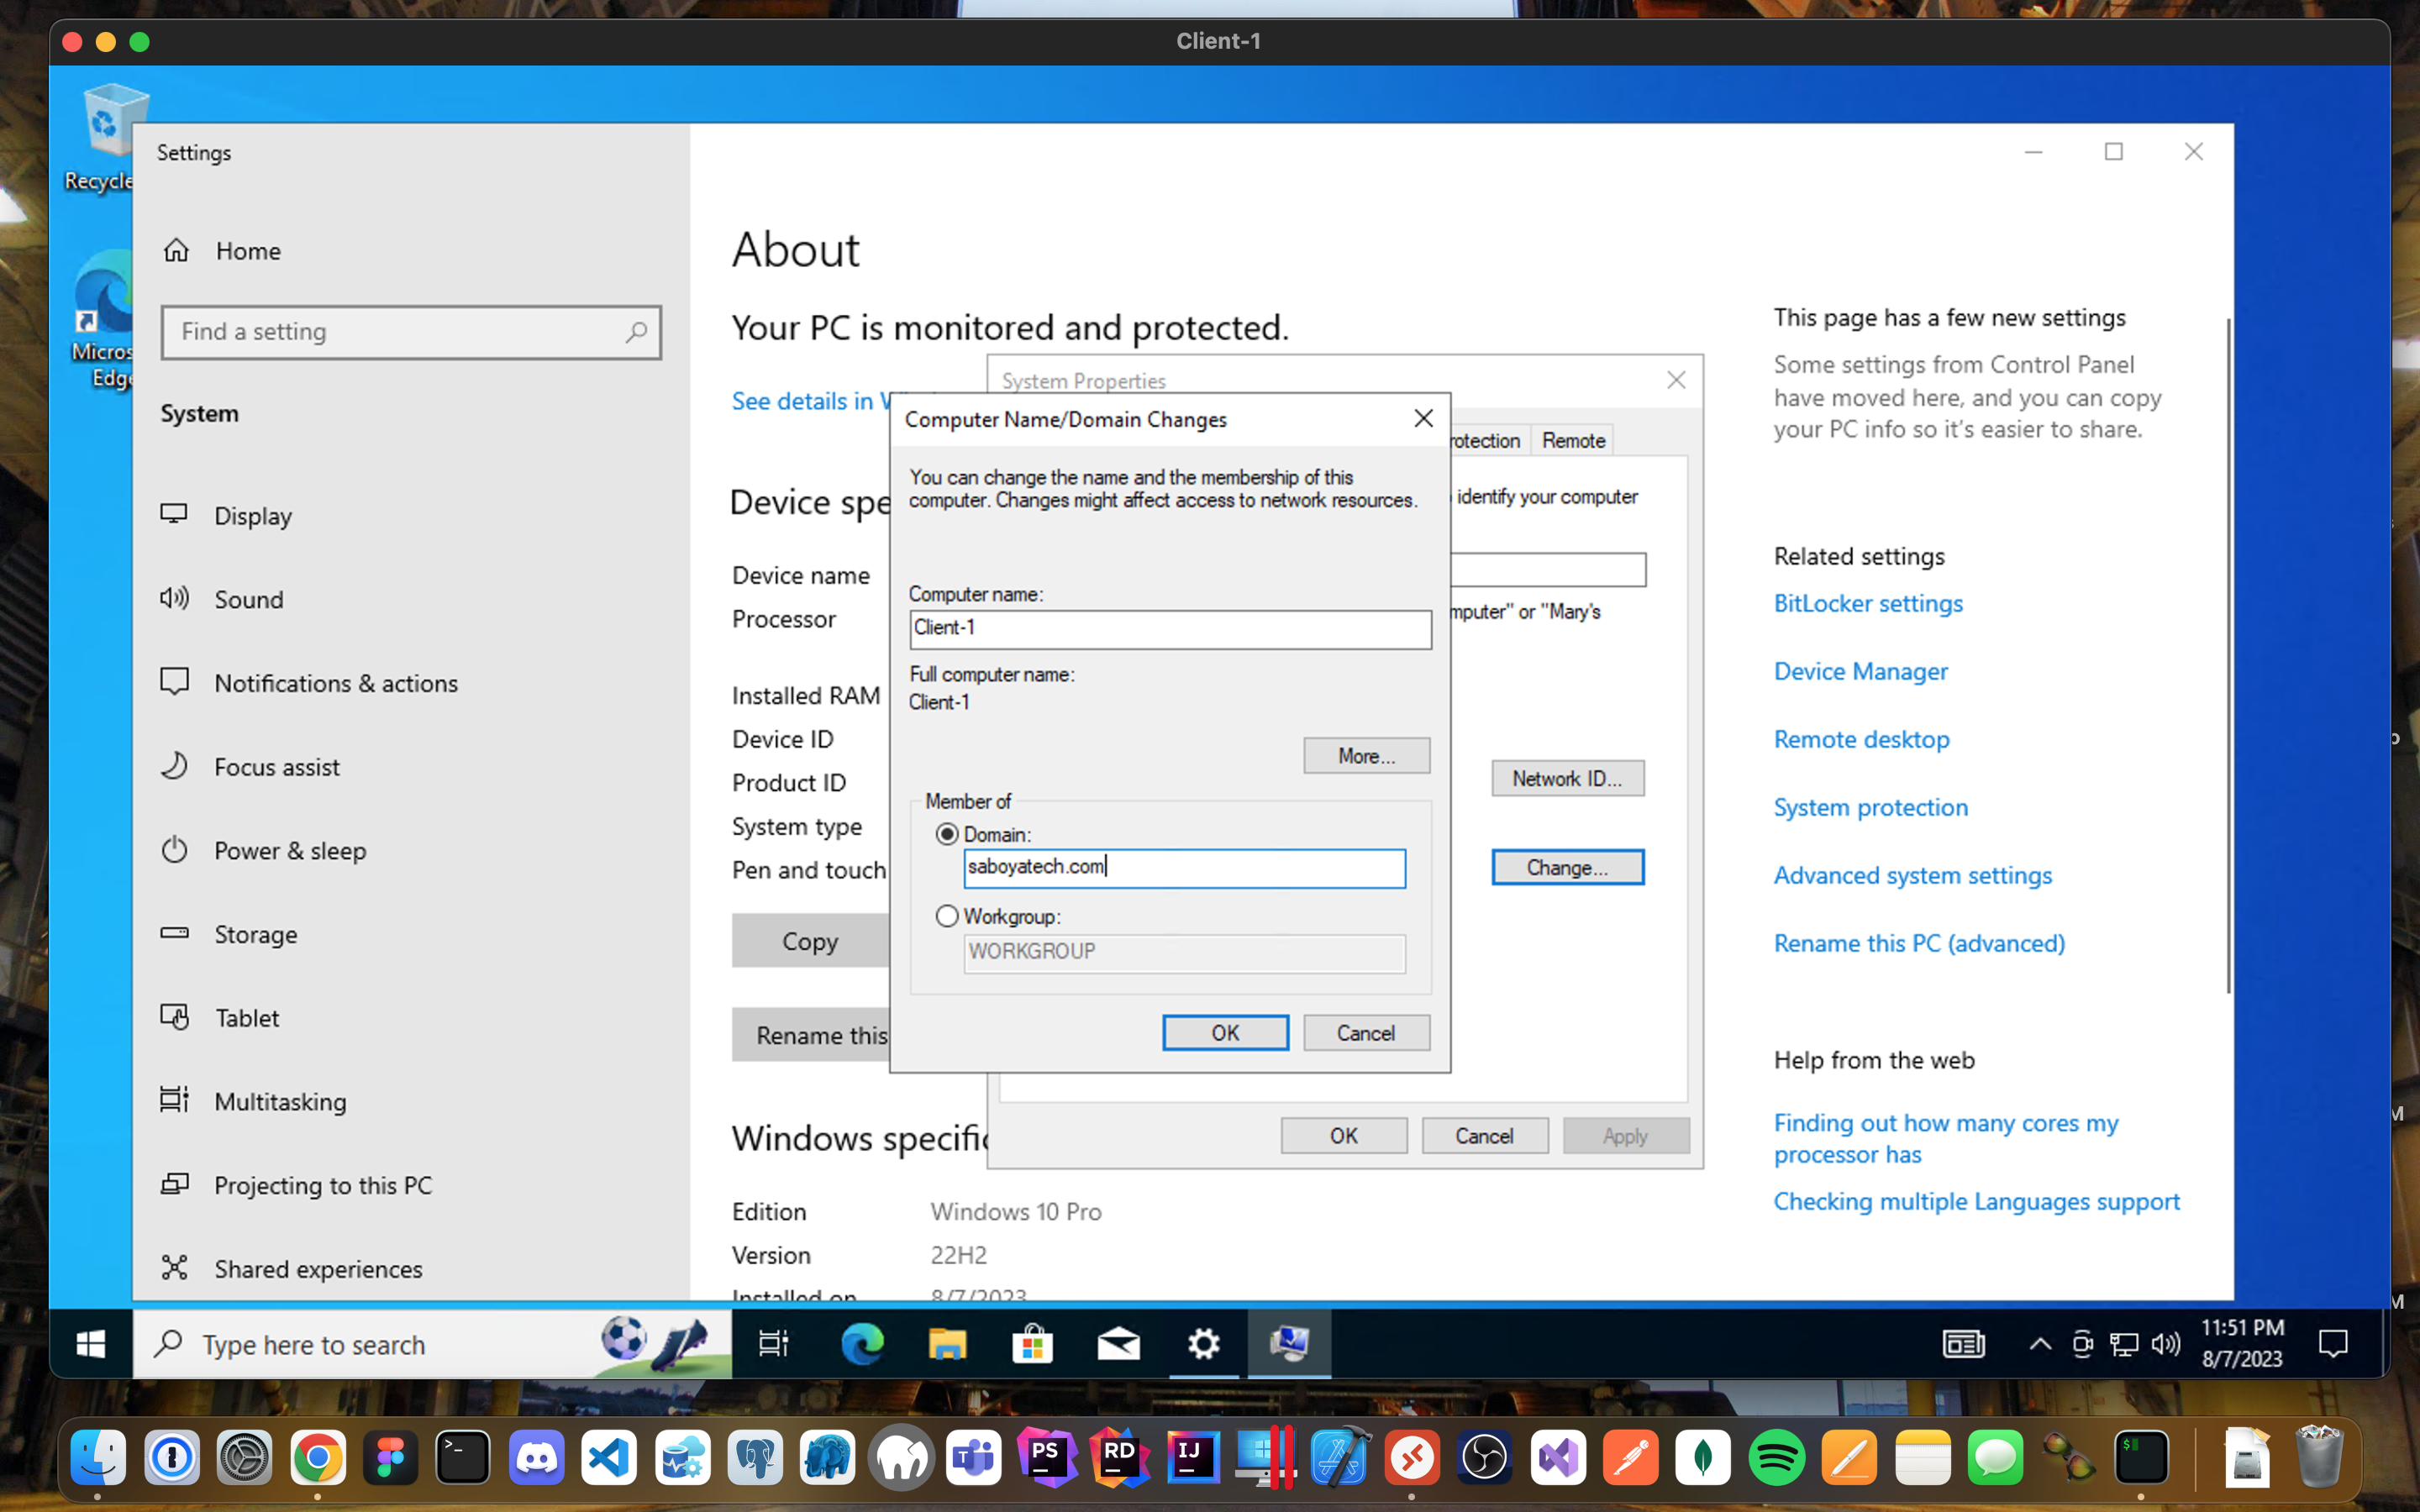
Join Domain:
- Login to Client-1 (Remote Desktop) as the original local admin (labuser).
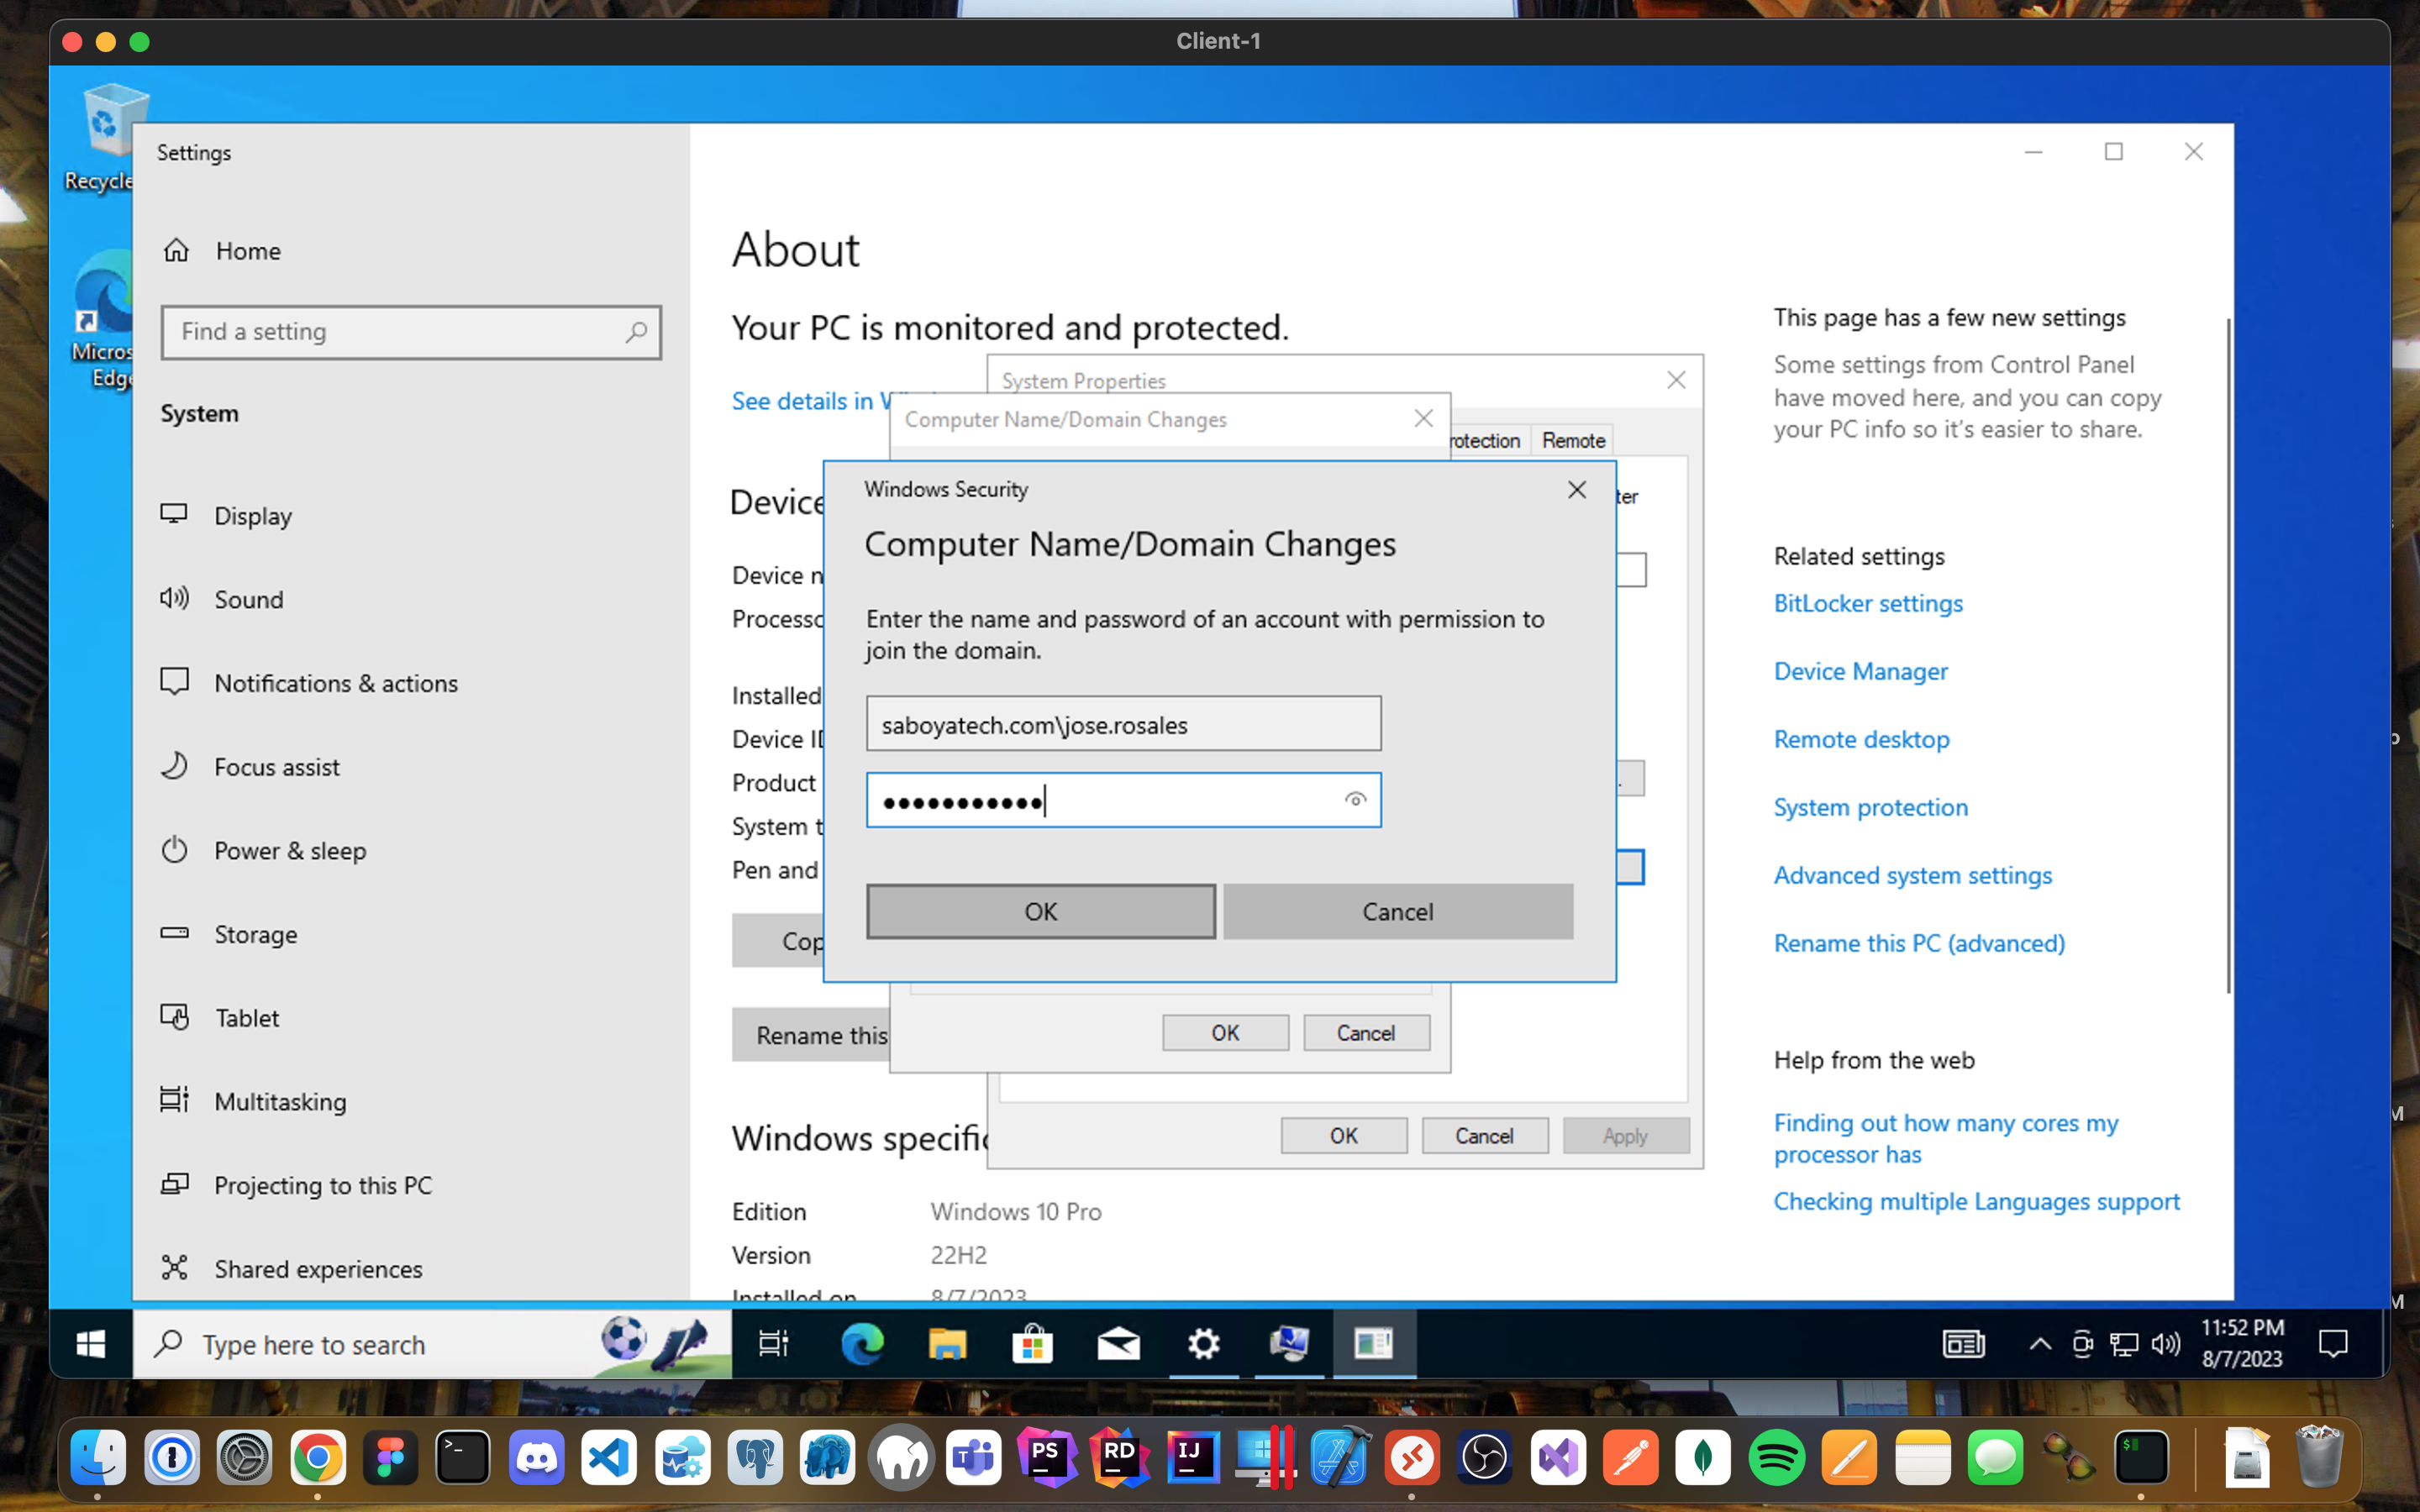
- Once you have input the domain that you want to join, it will prompt you for an admin to authorize the request.
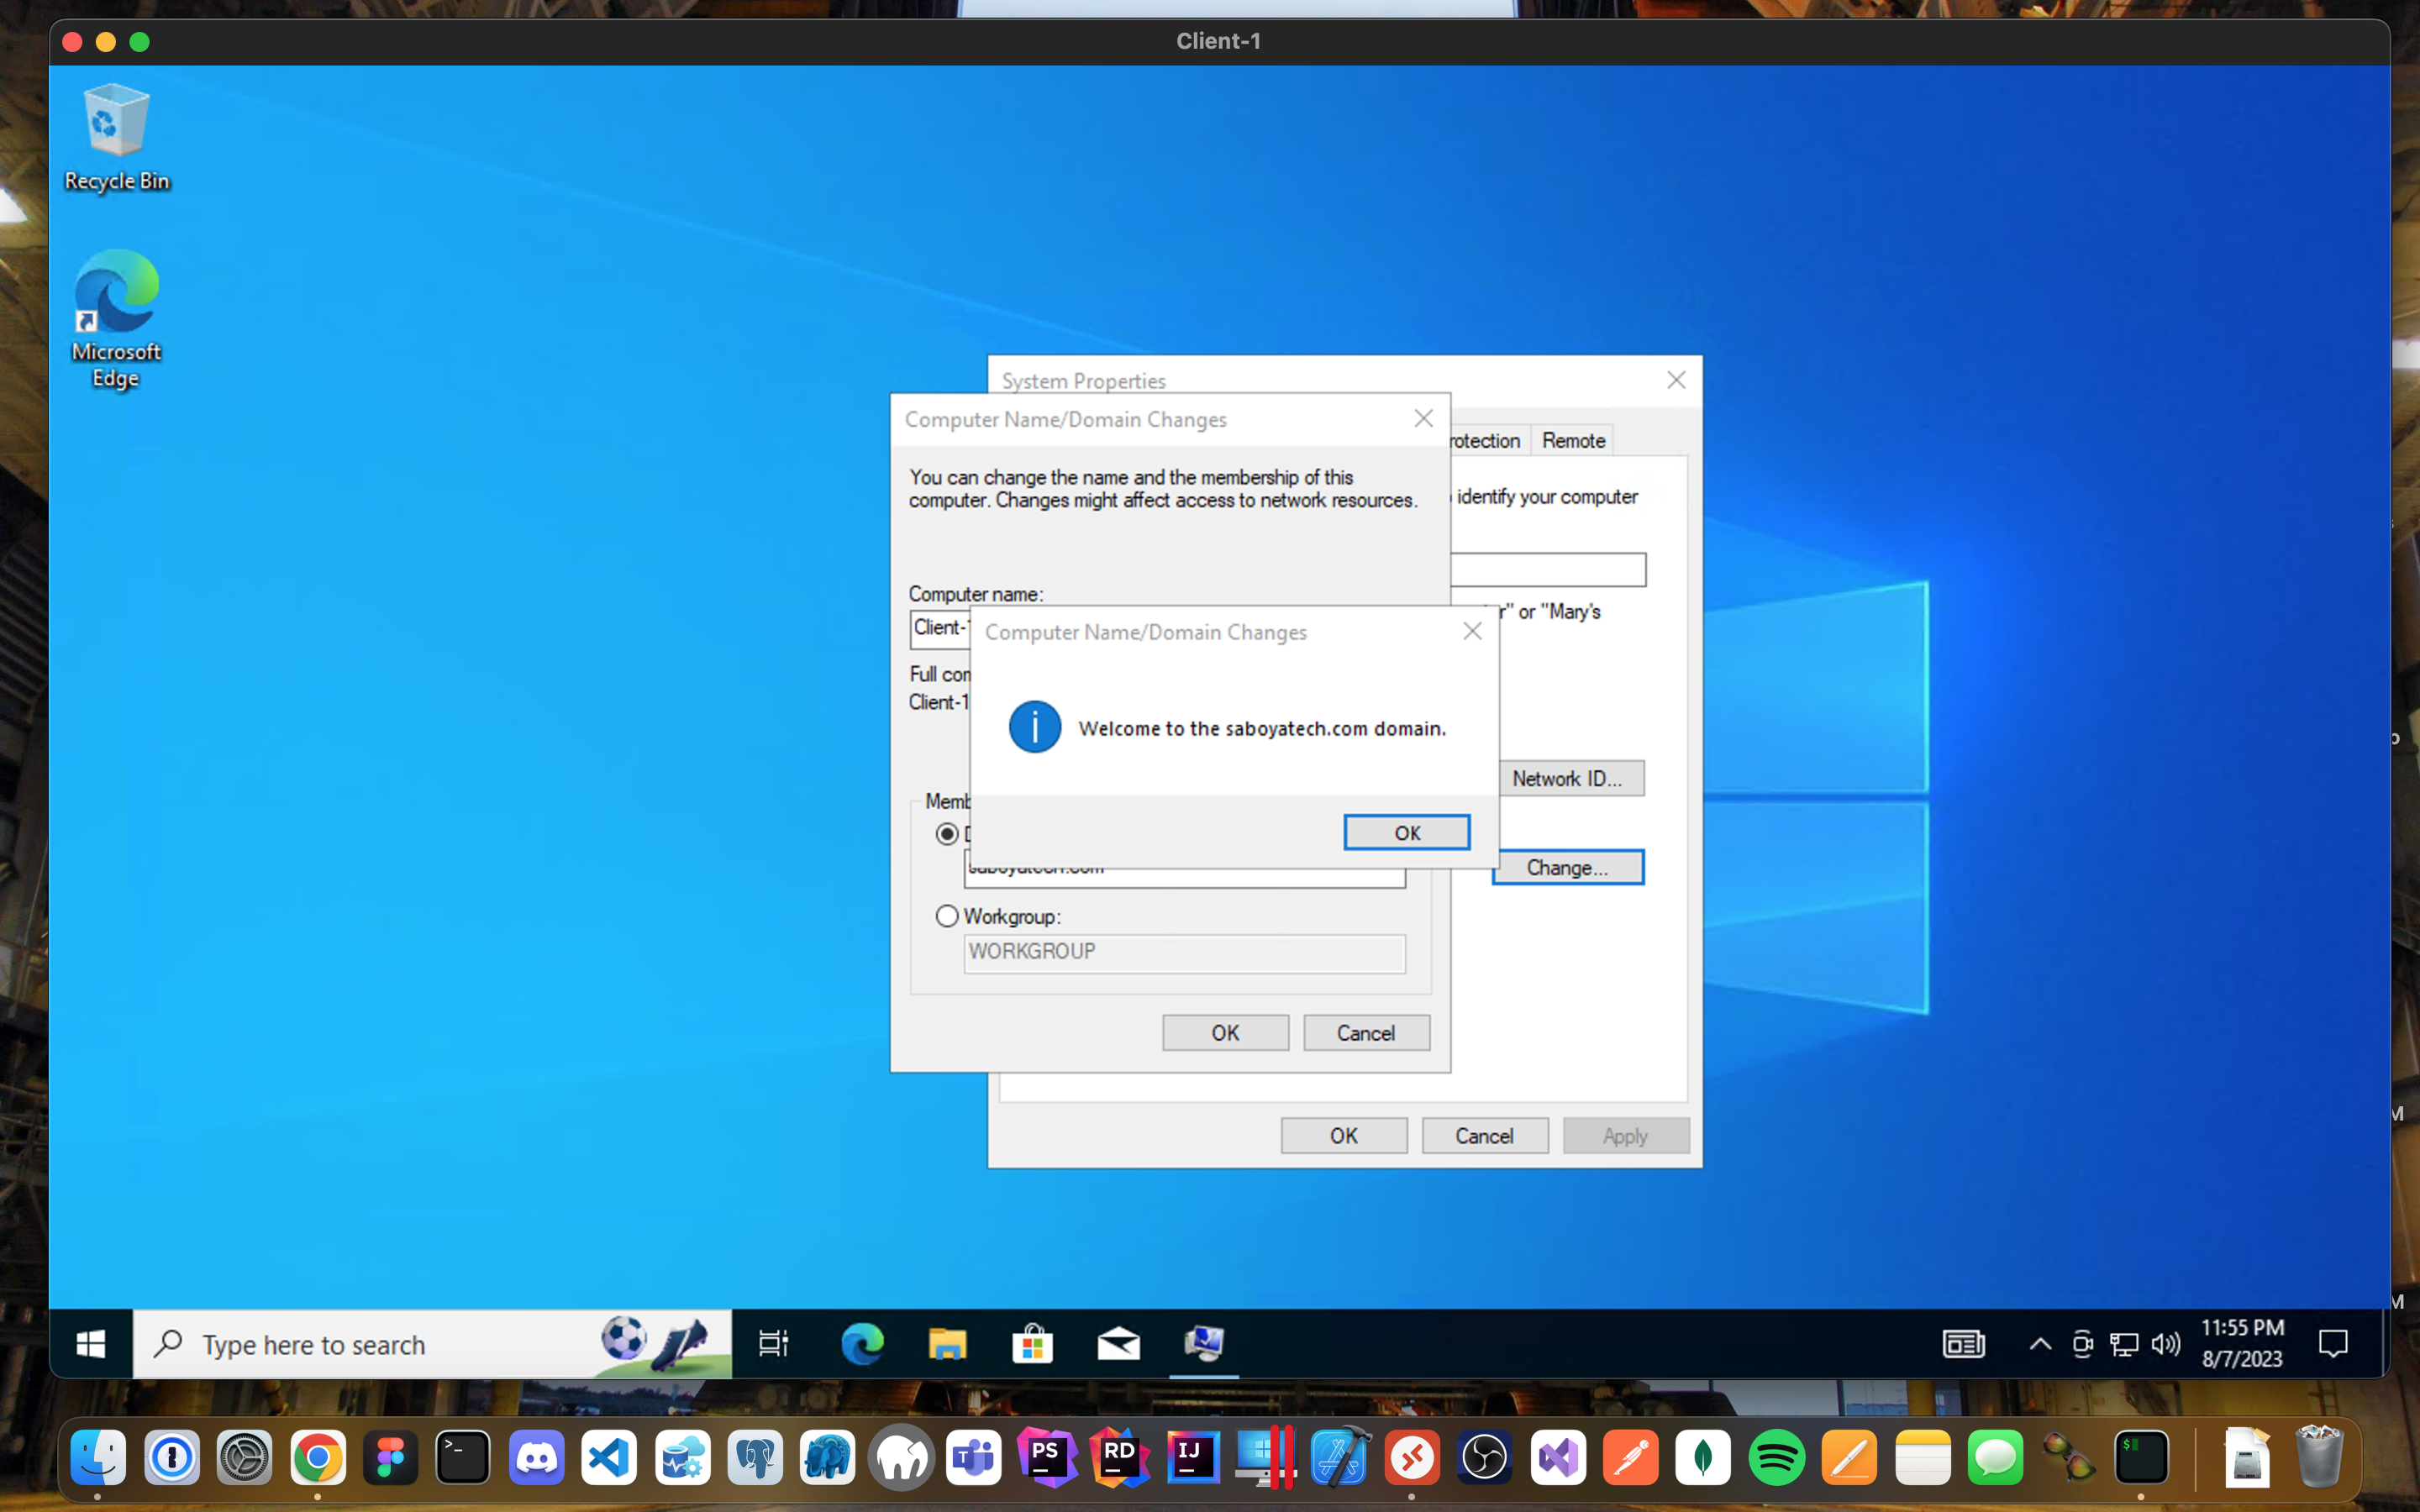
- The computer will restart.
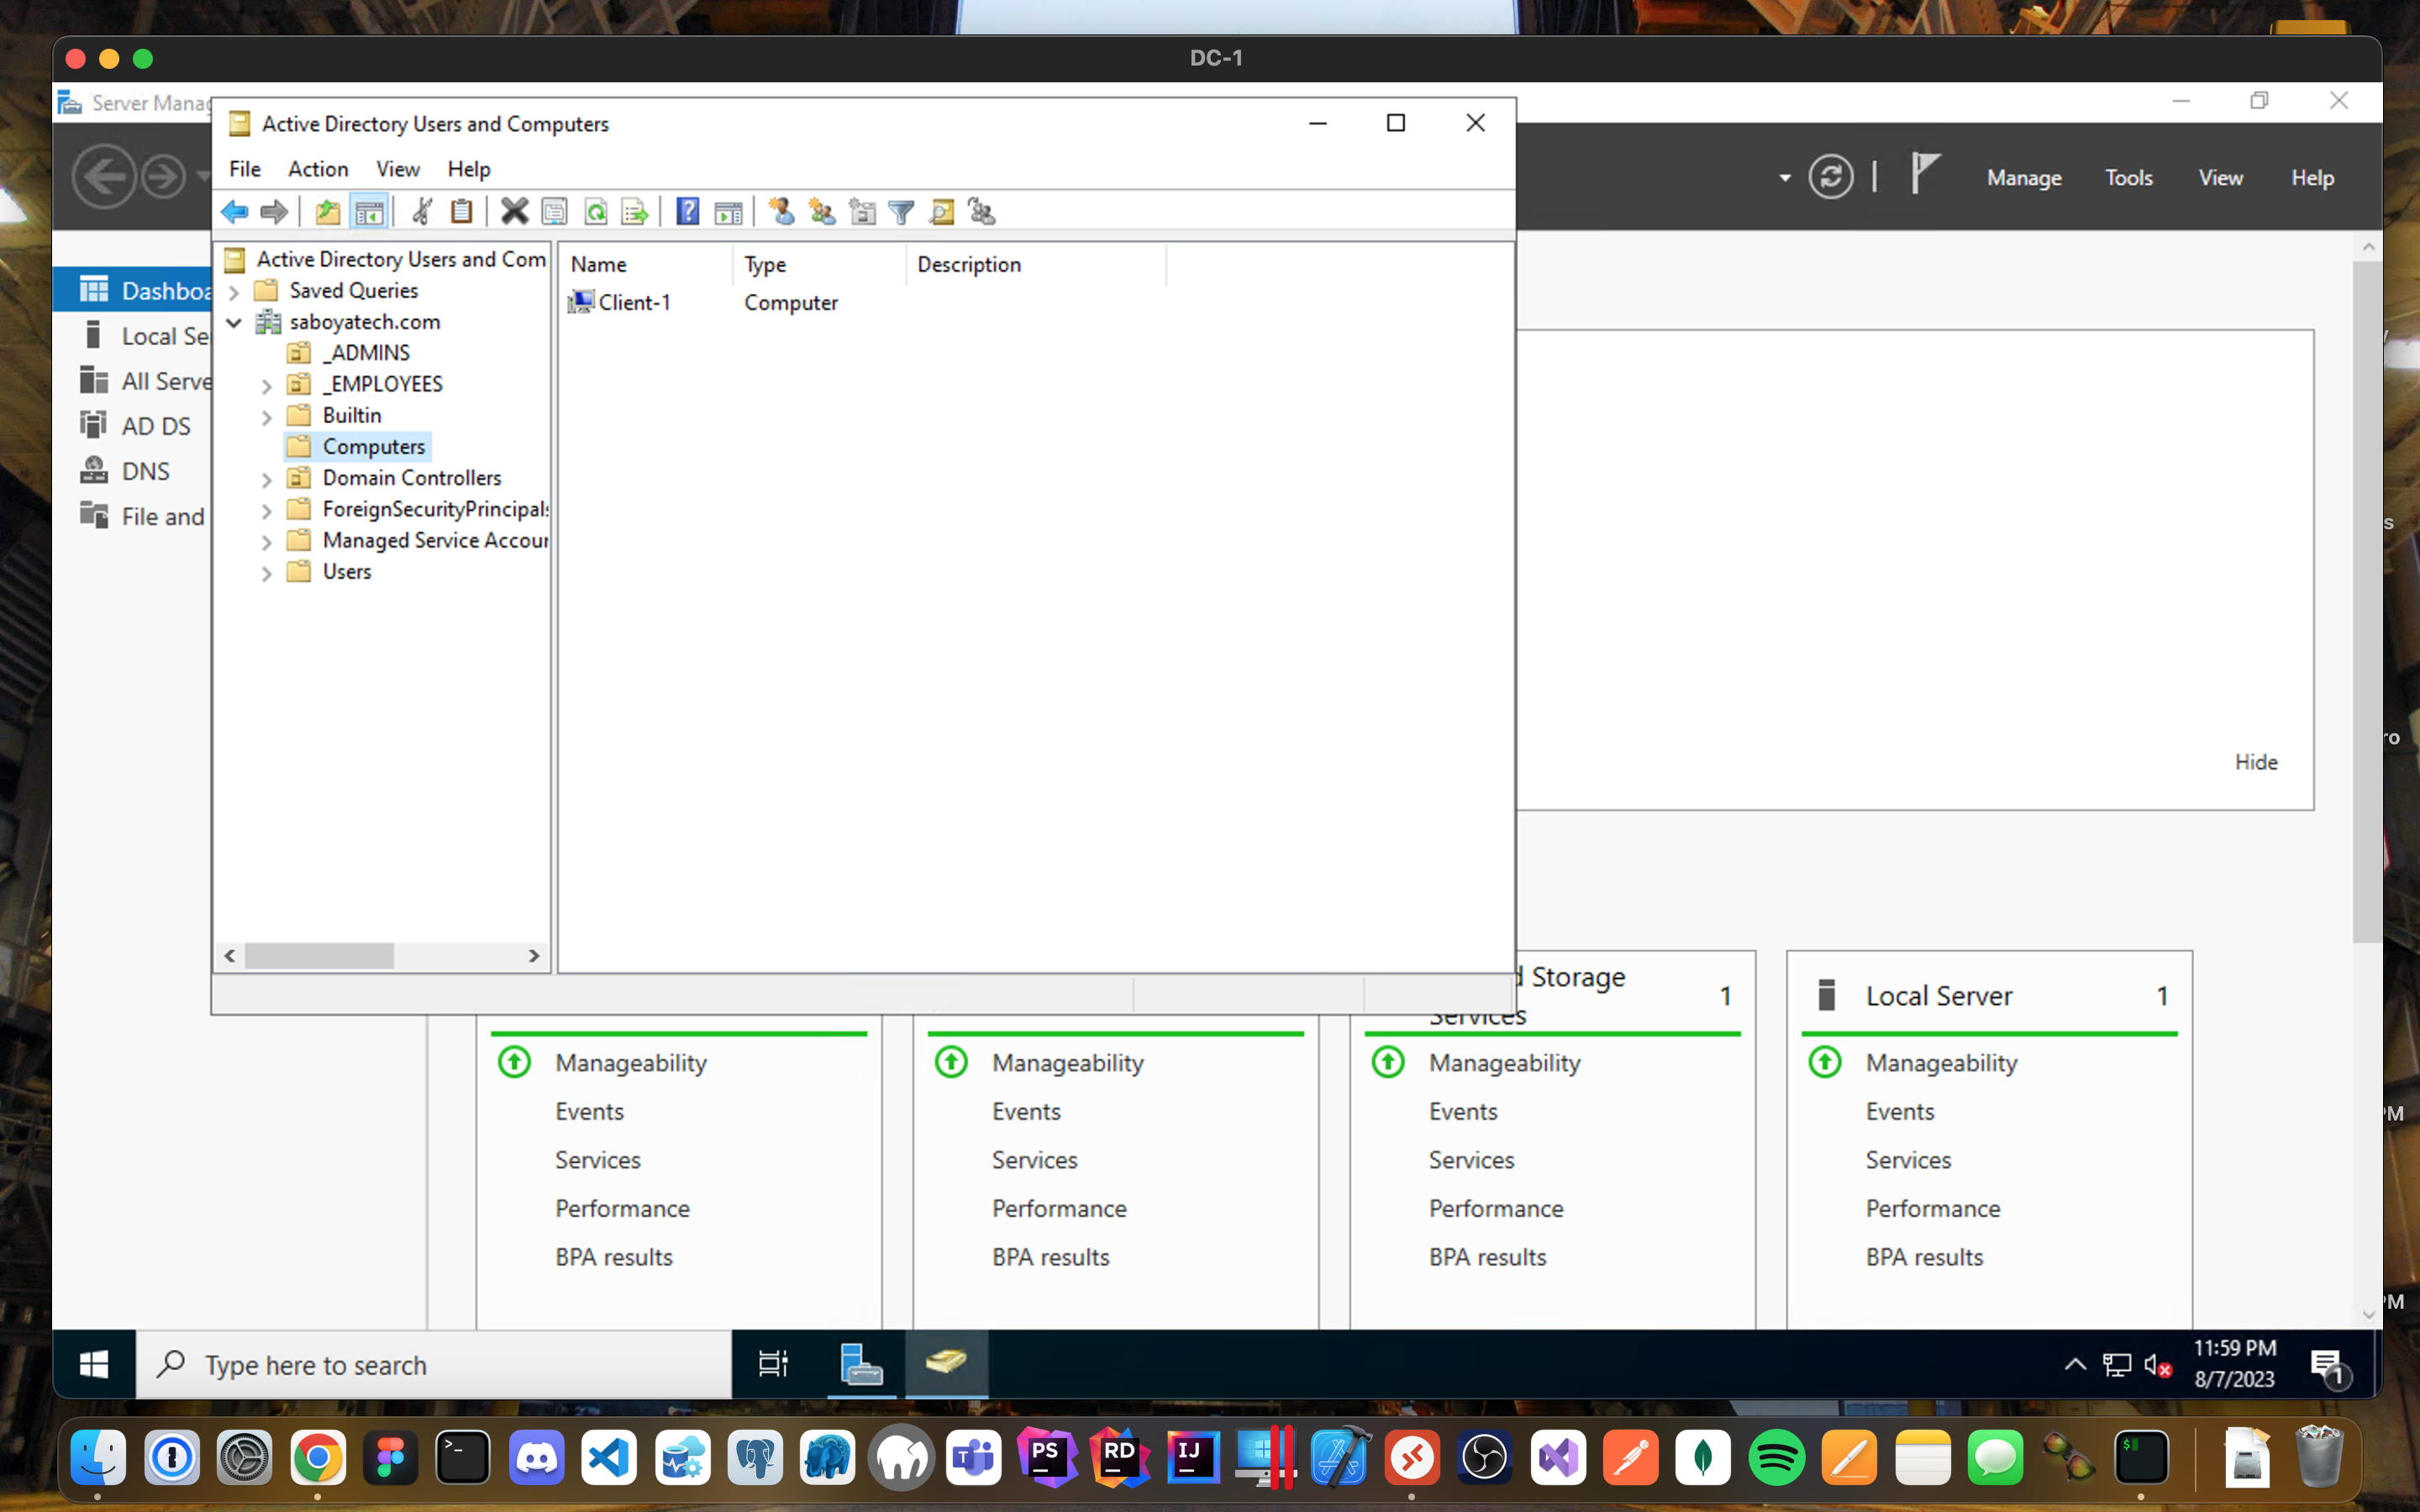
- Login to the DC-1 (Remote Desktop) and verify Client-1 shows up in Active Directory Users and Computers (ADUC) inside the “Computers” container on the root of the domain.
"Remote Desktop for Non-Admin Users"
-
Log into Client-1 as saboyatech.com\jose.saboya and open system properties.
-
Click “Remote Desktop”.
-
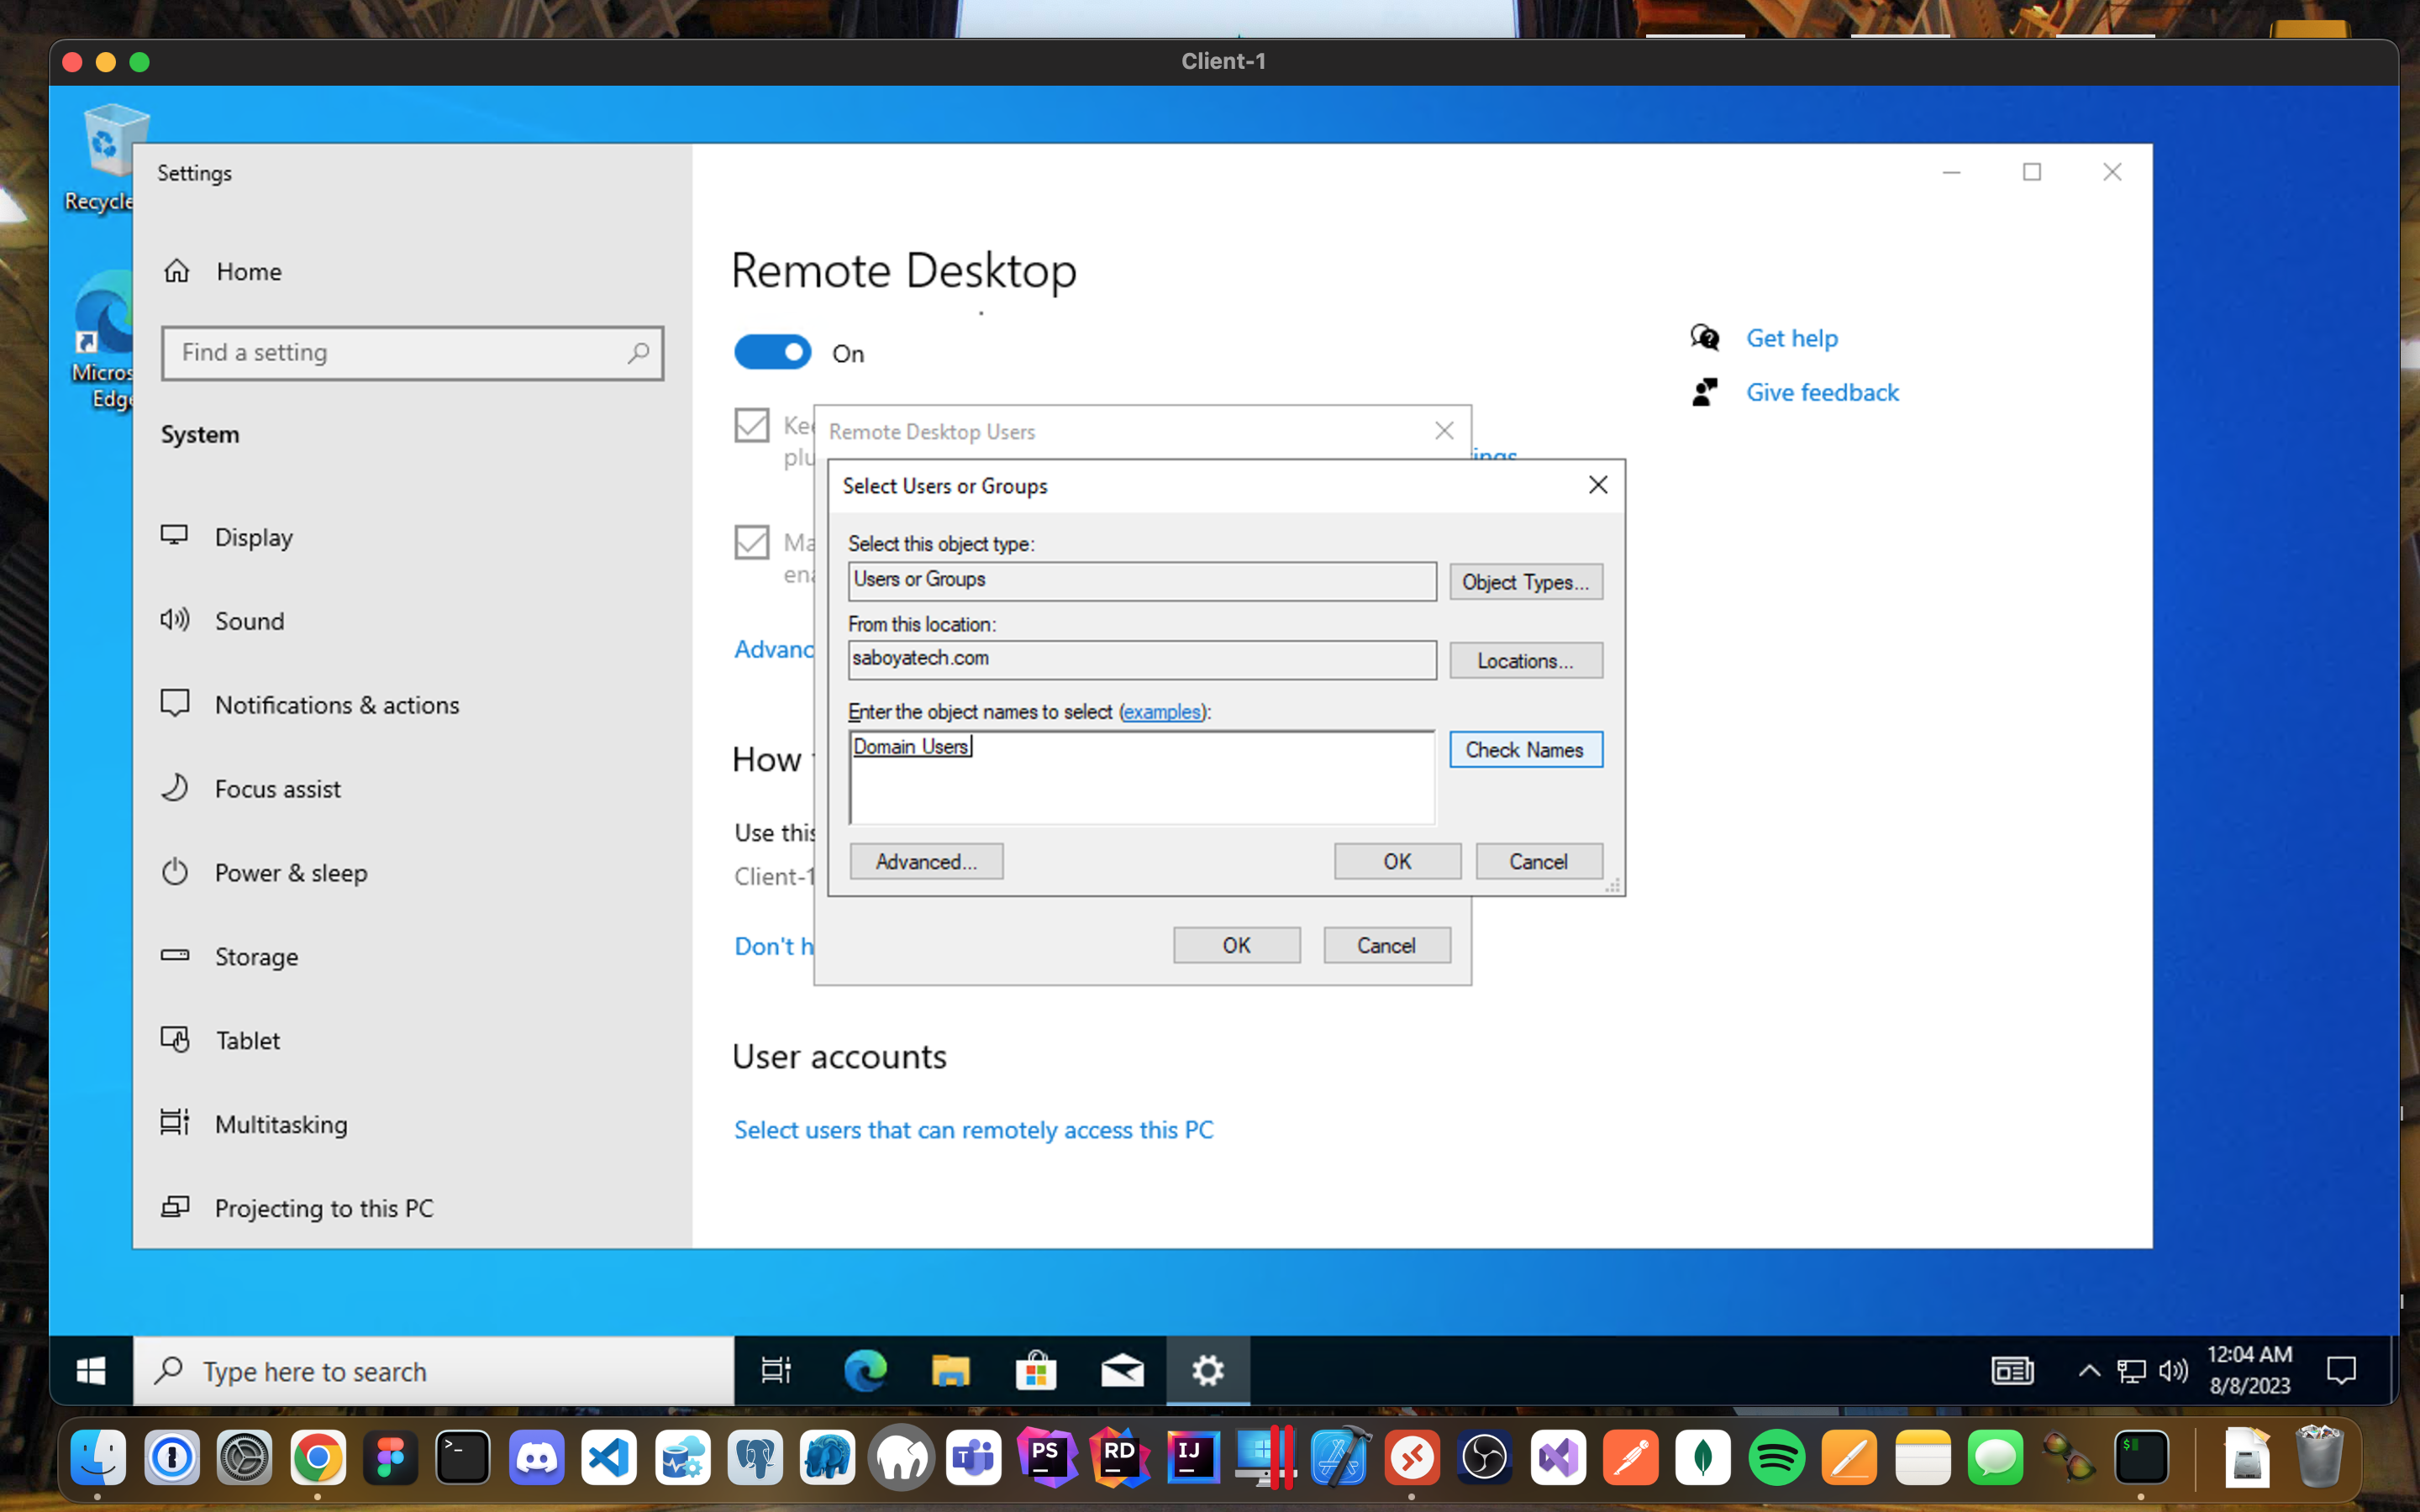
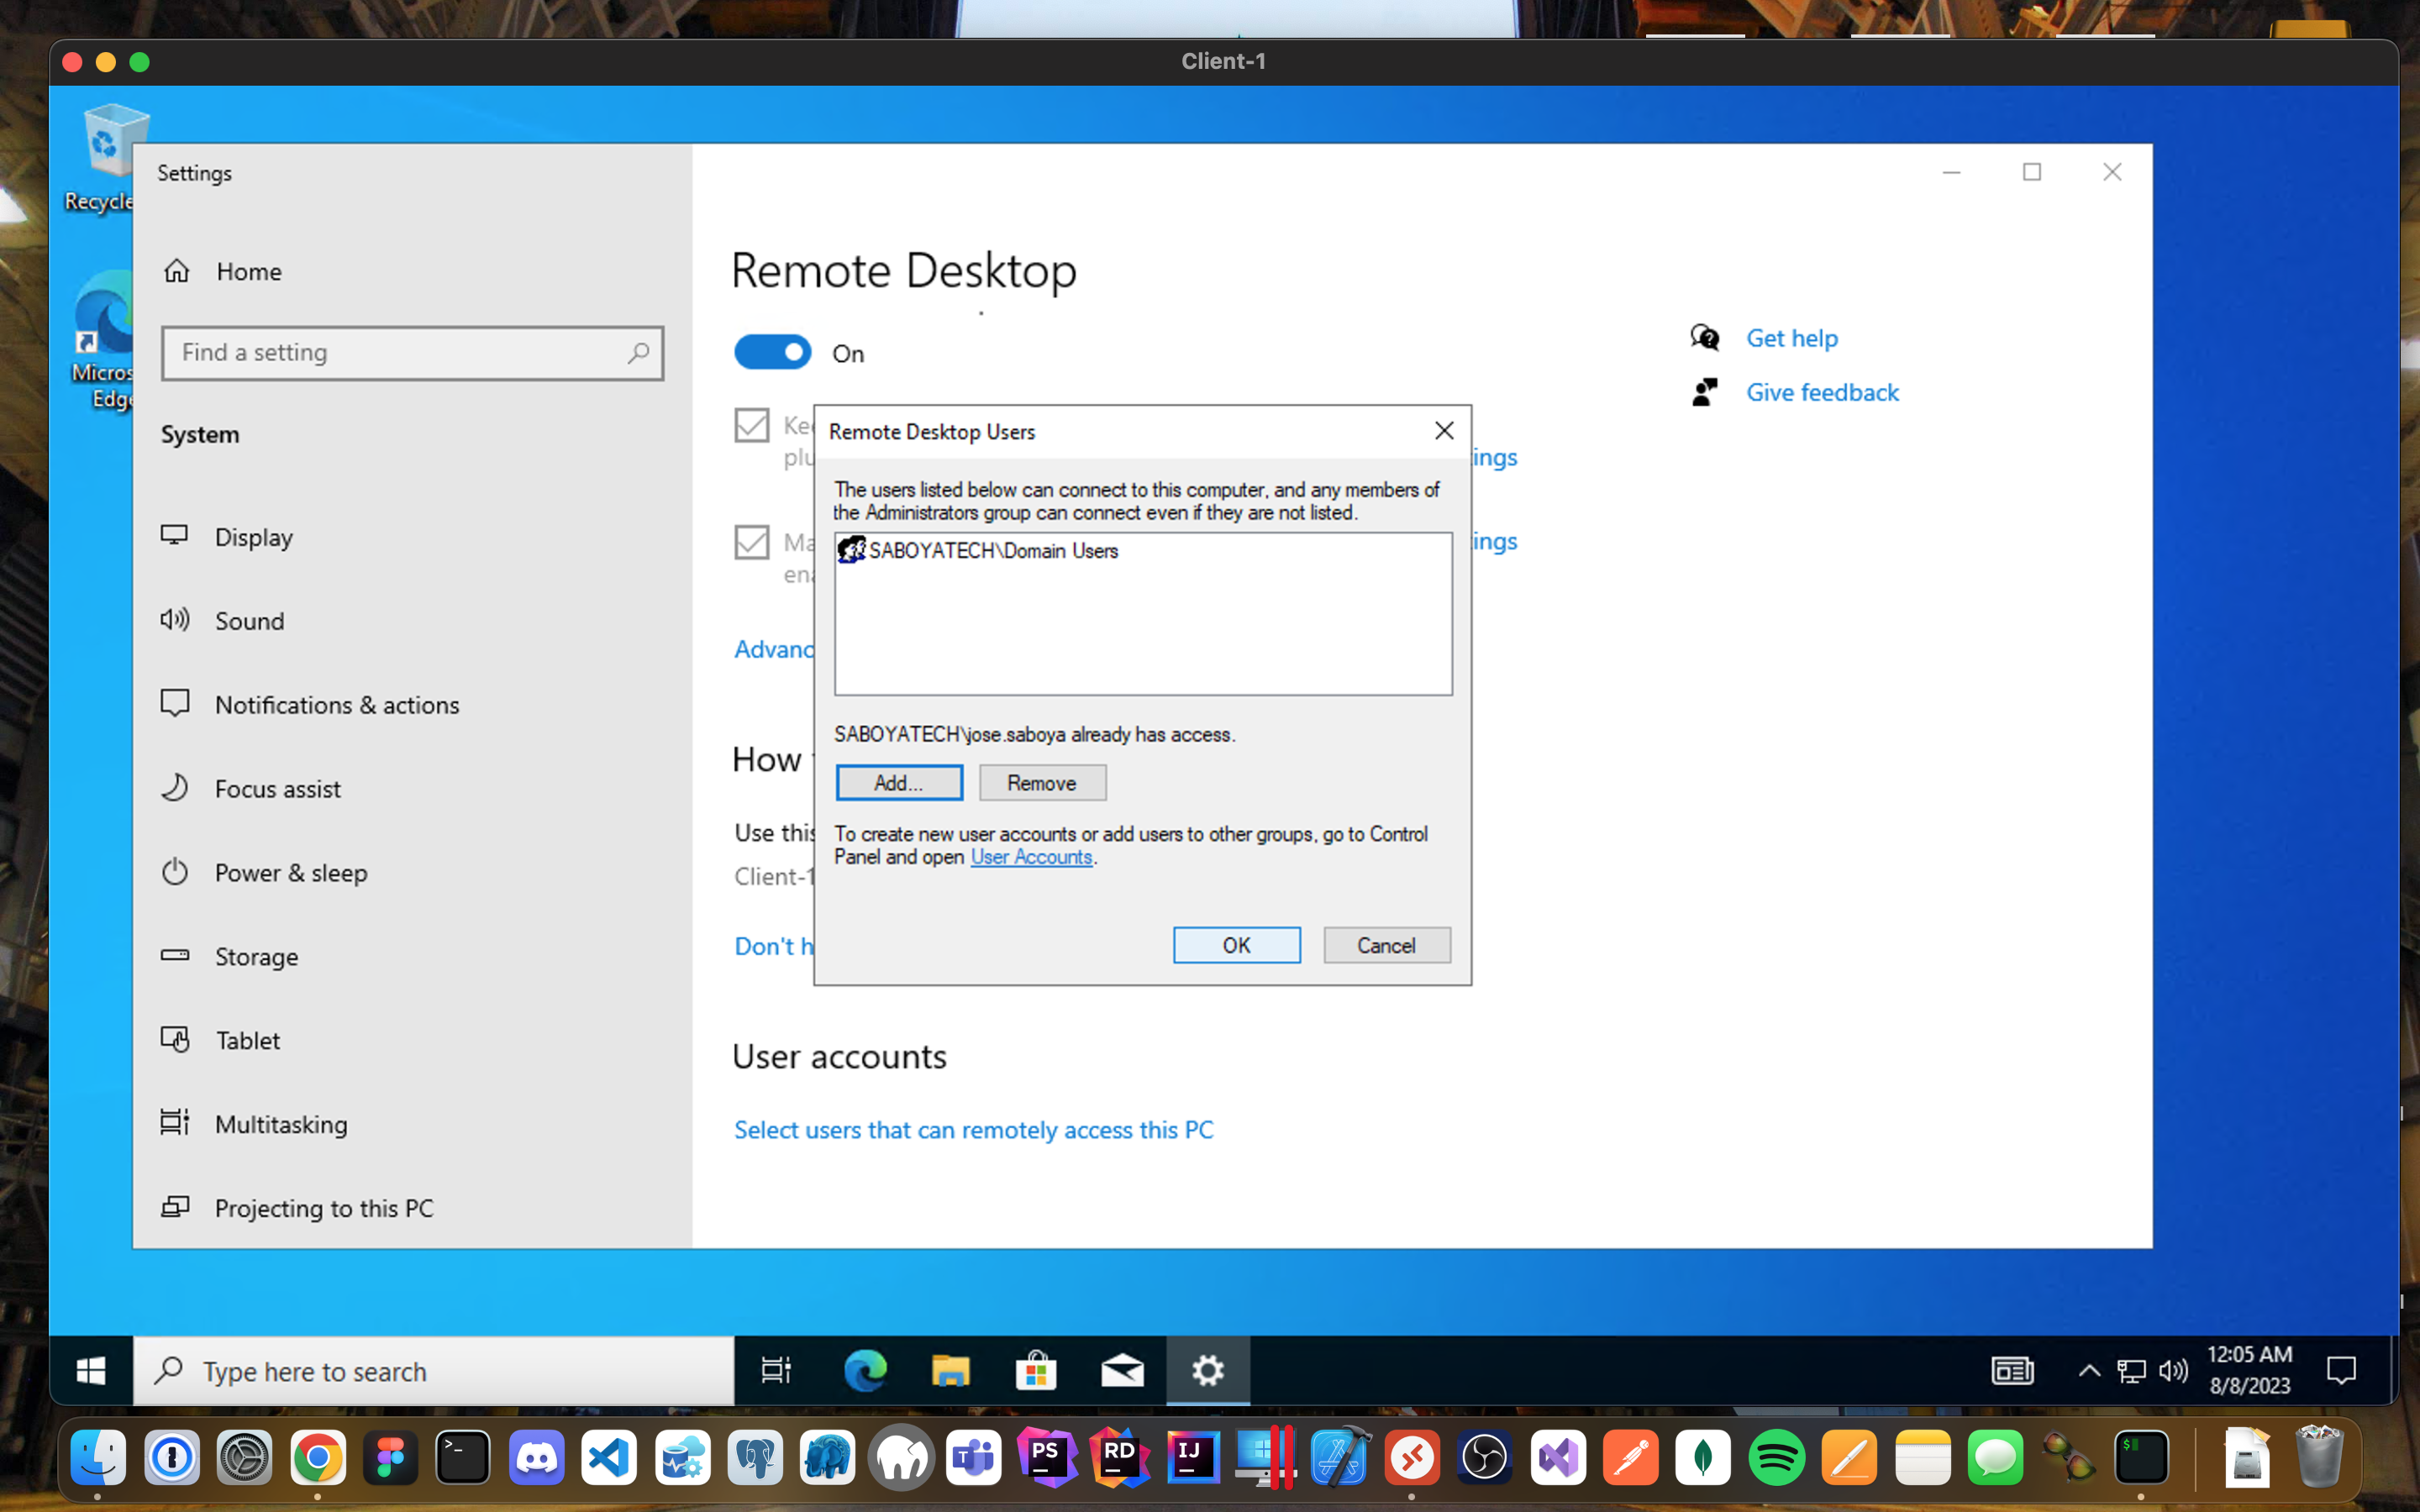
Allow “Domain Users” access to remote desktop.
-
You can now log into Client-1 as a normal, non-administrative user now.
-
Normally you’d want to do this with Group Policy that allows you to change MANY systems at once (maybe a future lab):
"Automate User Creation"
PowerShell Magic:
- Login to DC-1 with the admin account ex: saboyatech.com\jose.saboya
- Open PowerShell_ise as an administrator.
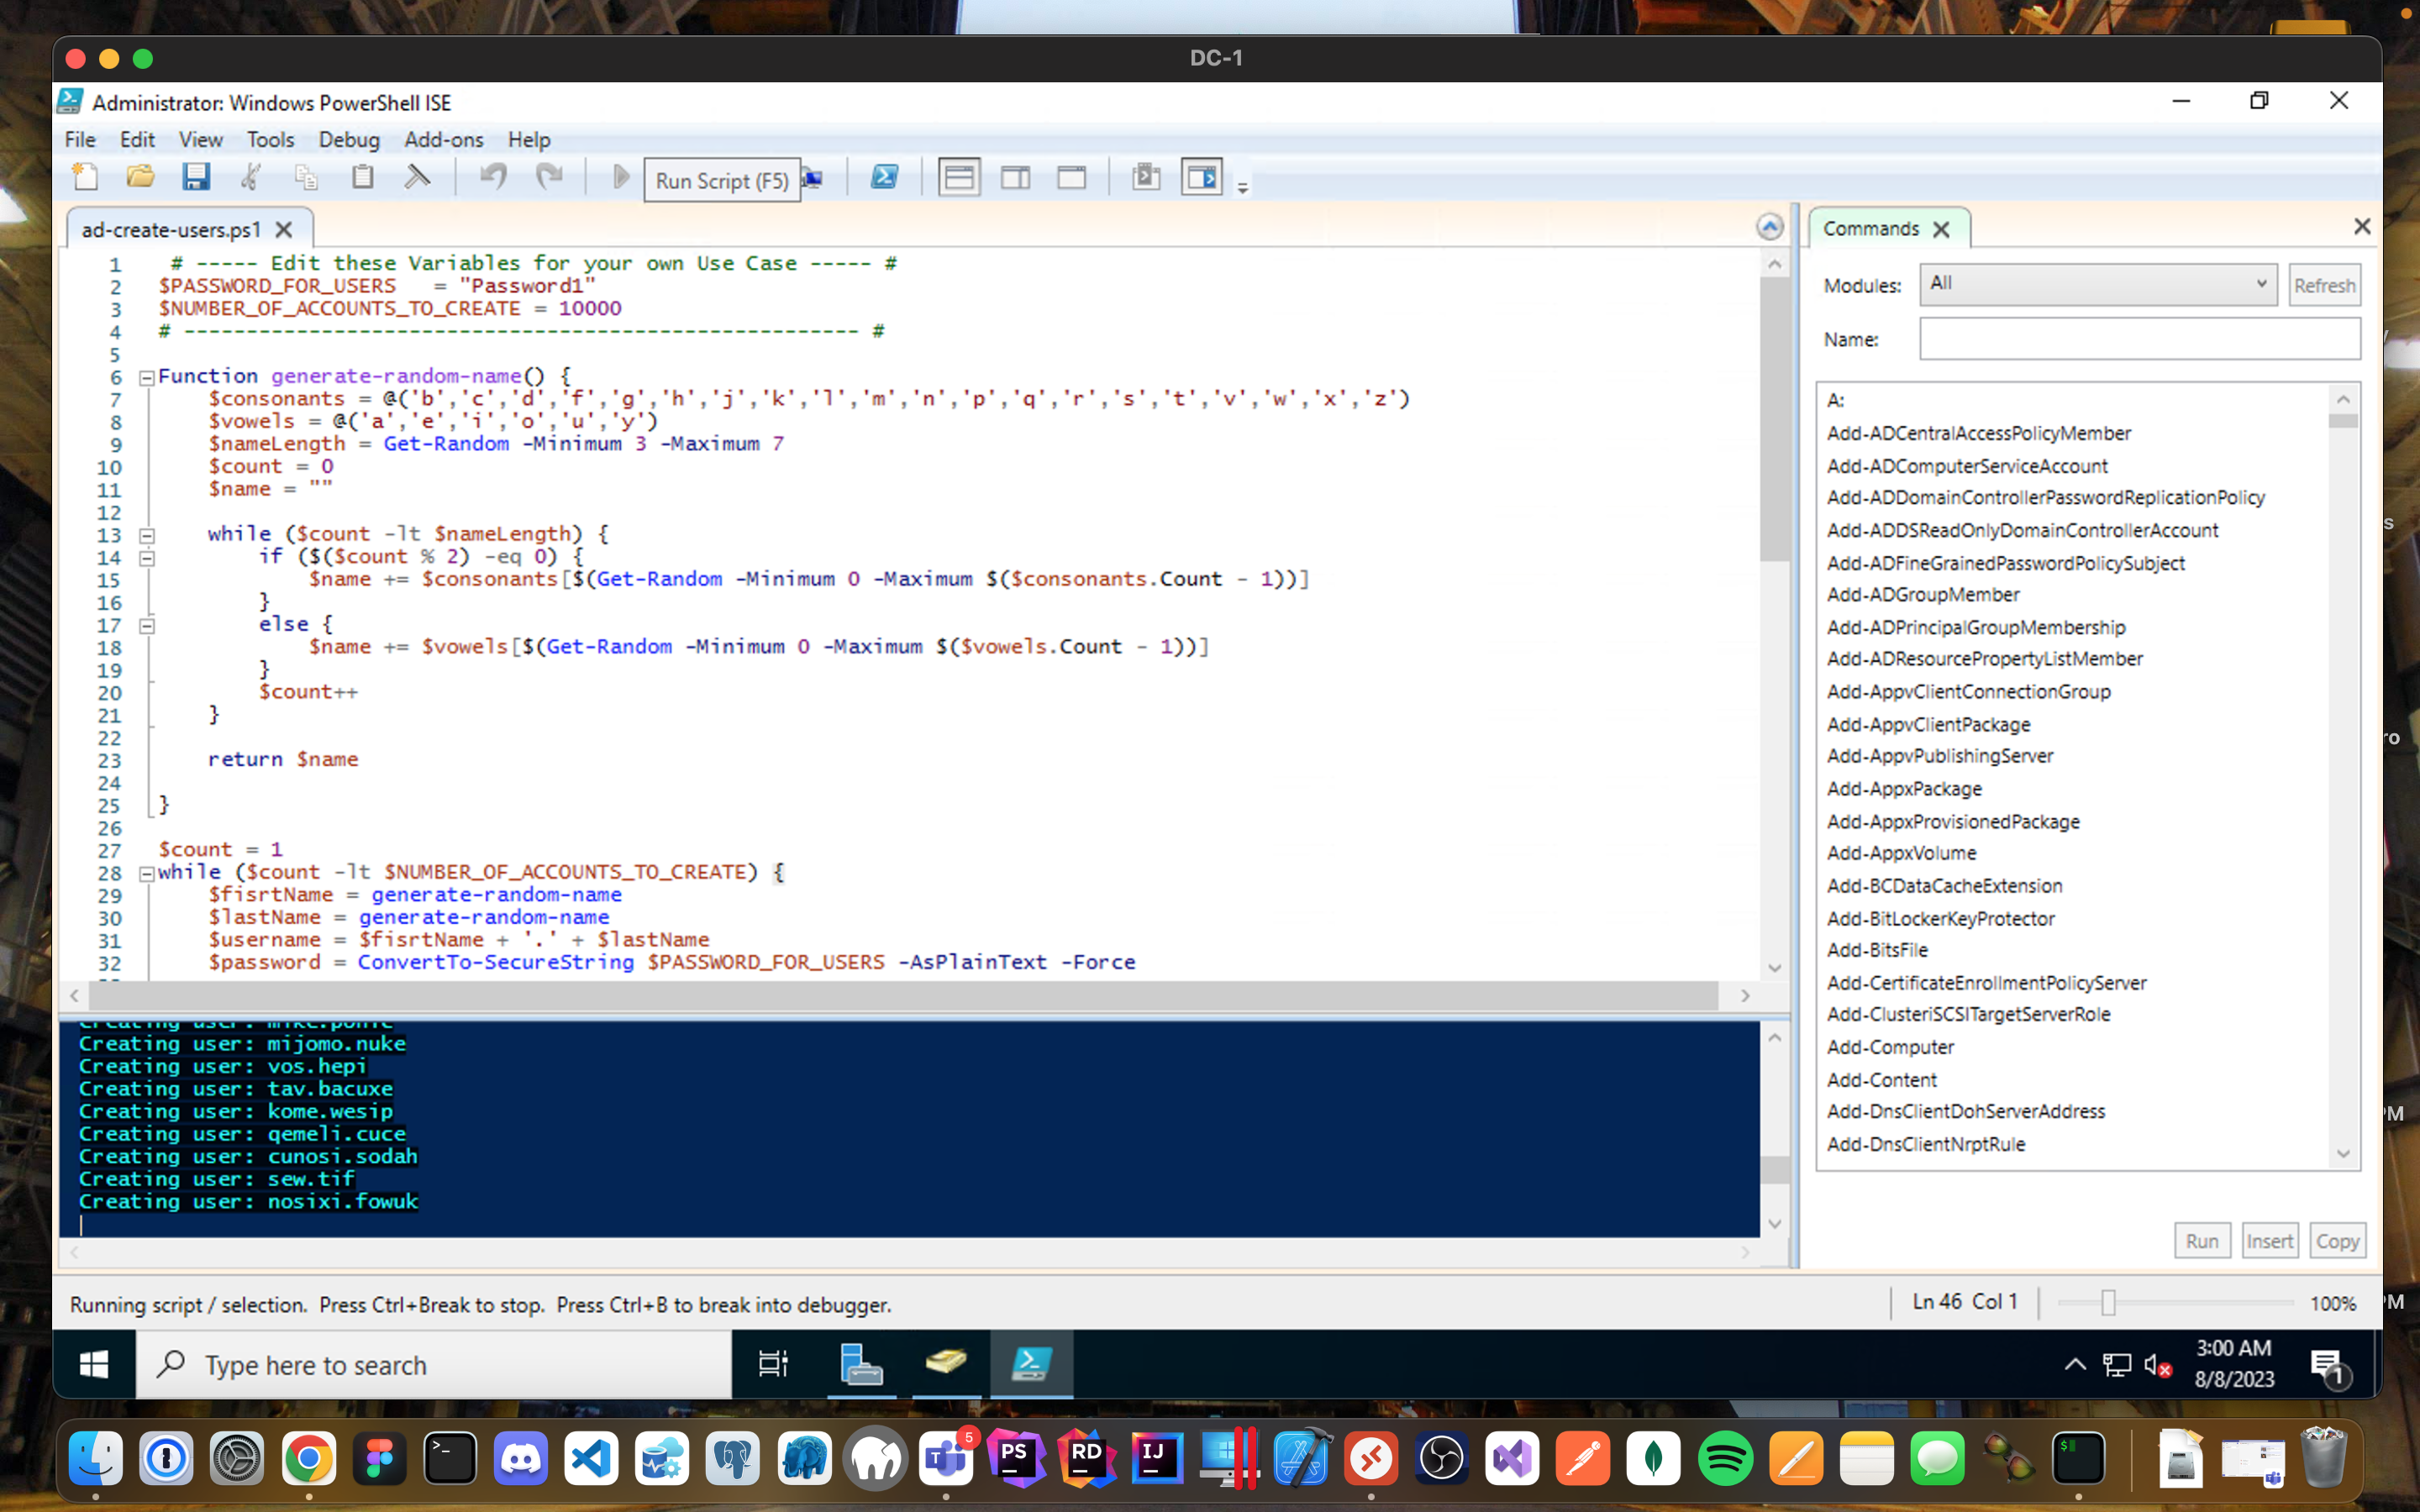
- Create a new File and paste the contents of this script.
- Run the script and observe the accounts being created.
- The script will automatically create 10k users automatically and placed them into the _EMPLOYEES OU.
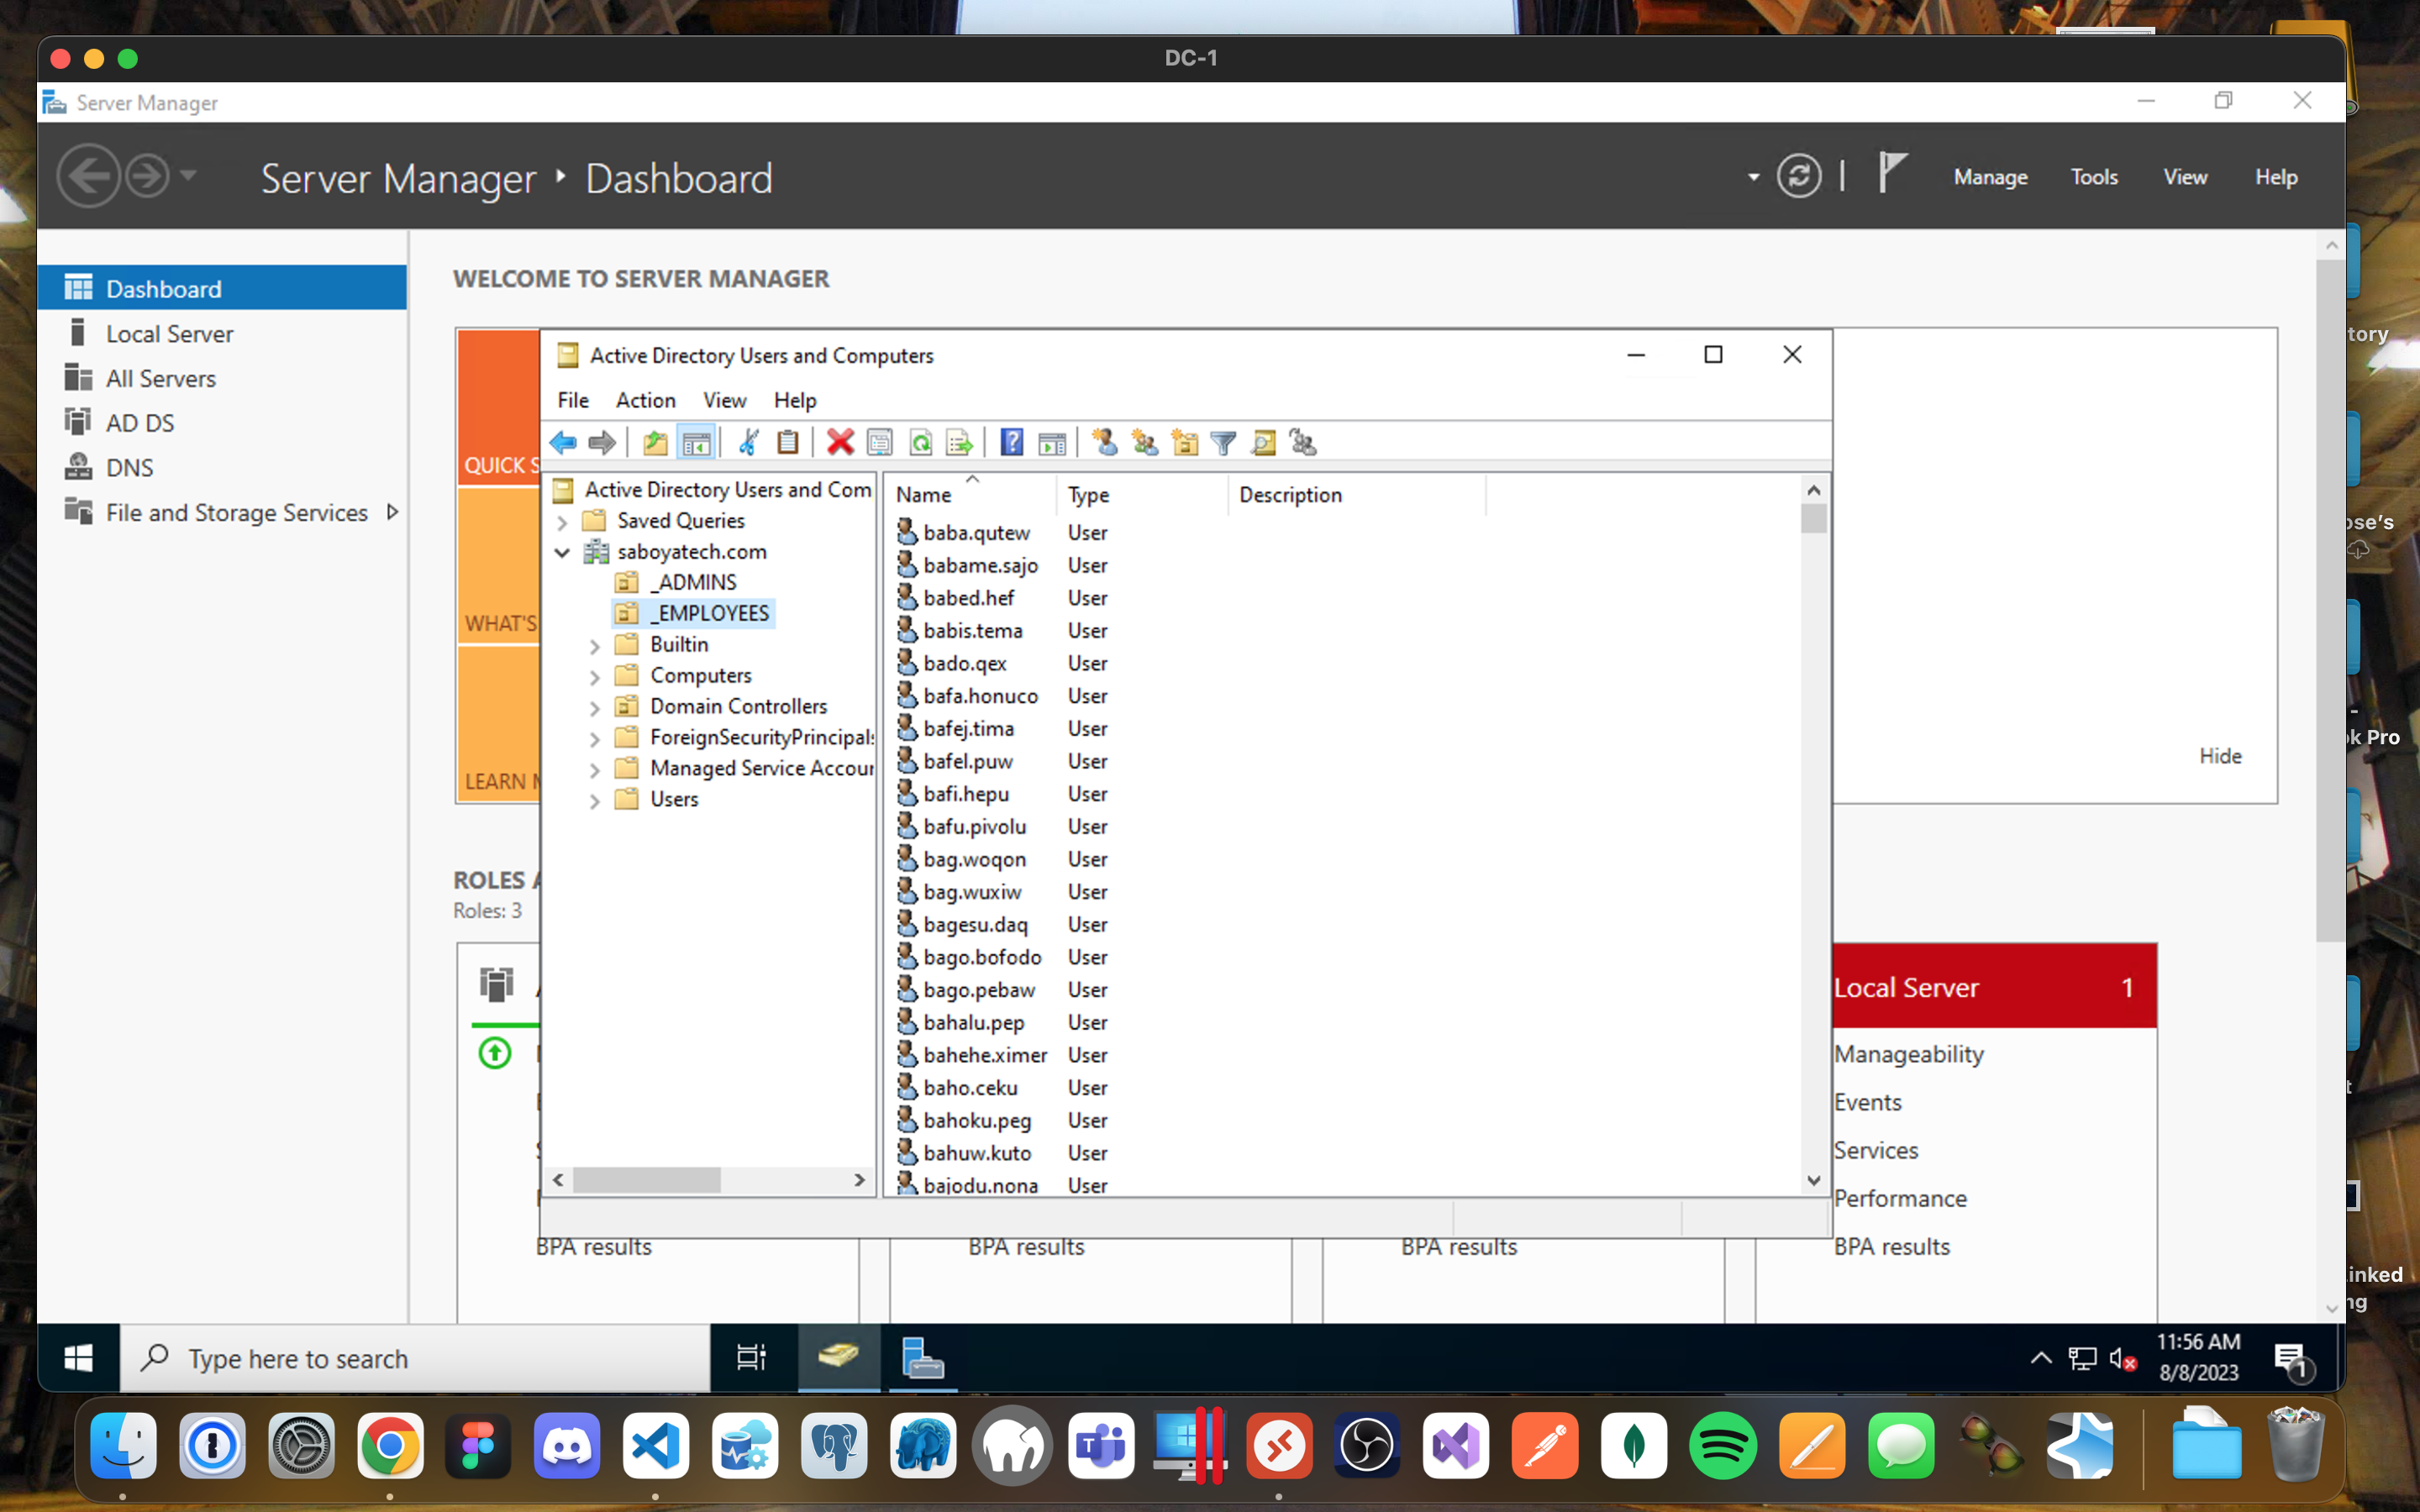
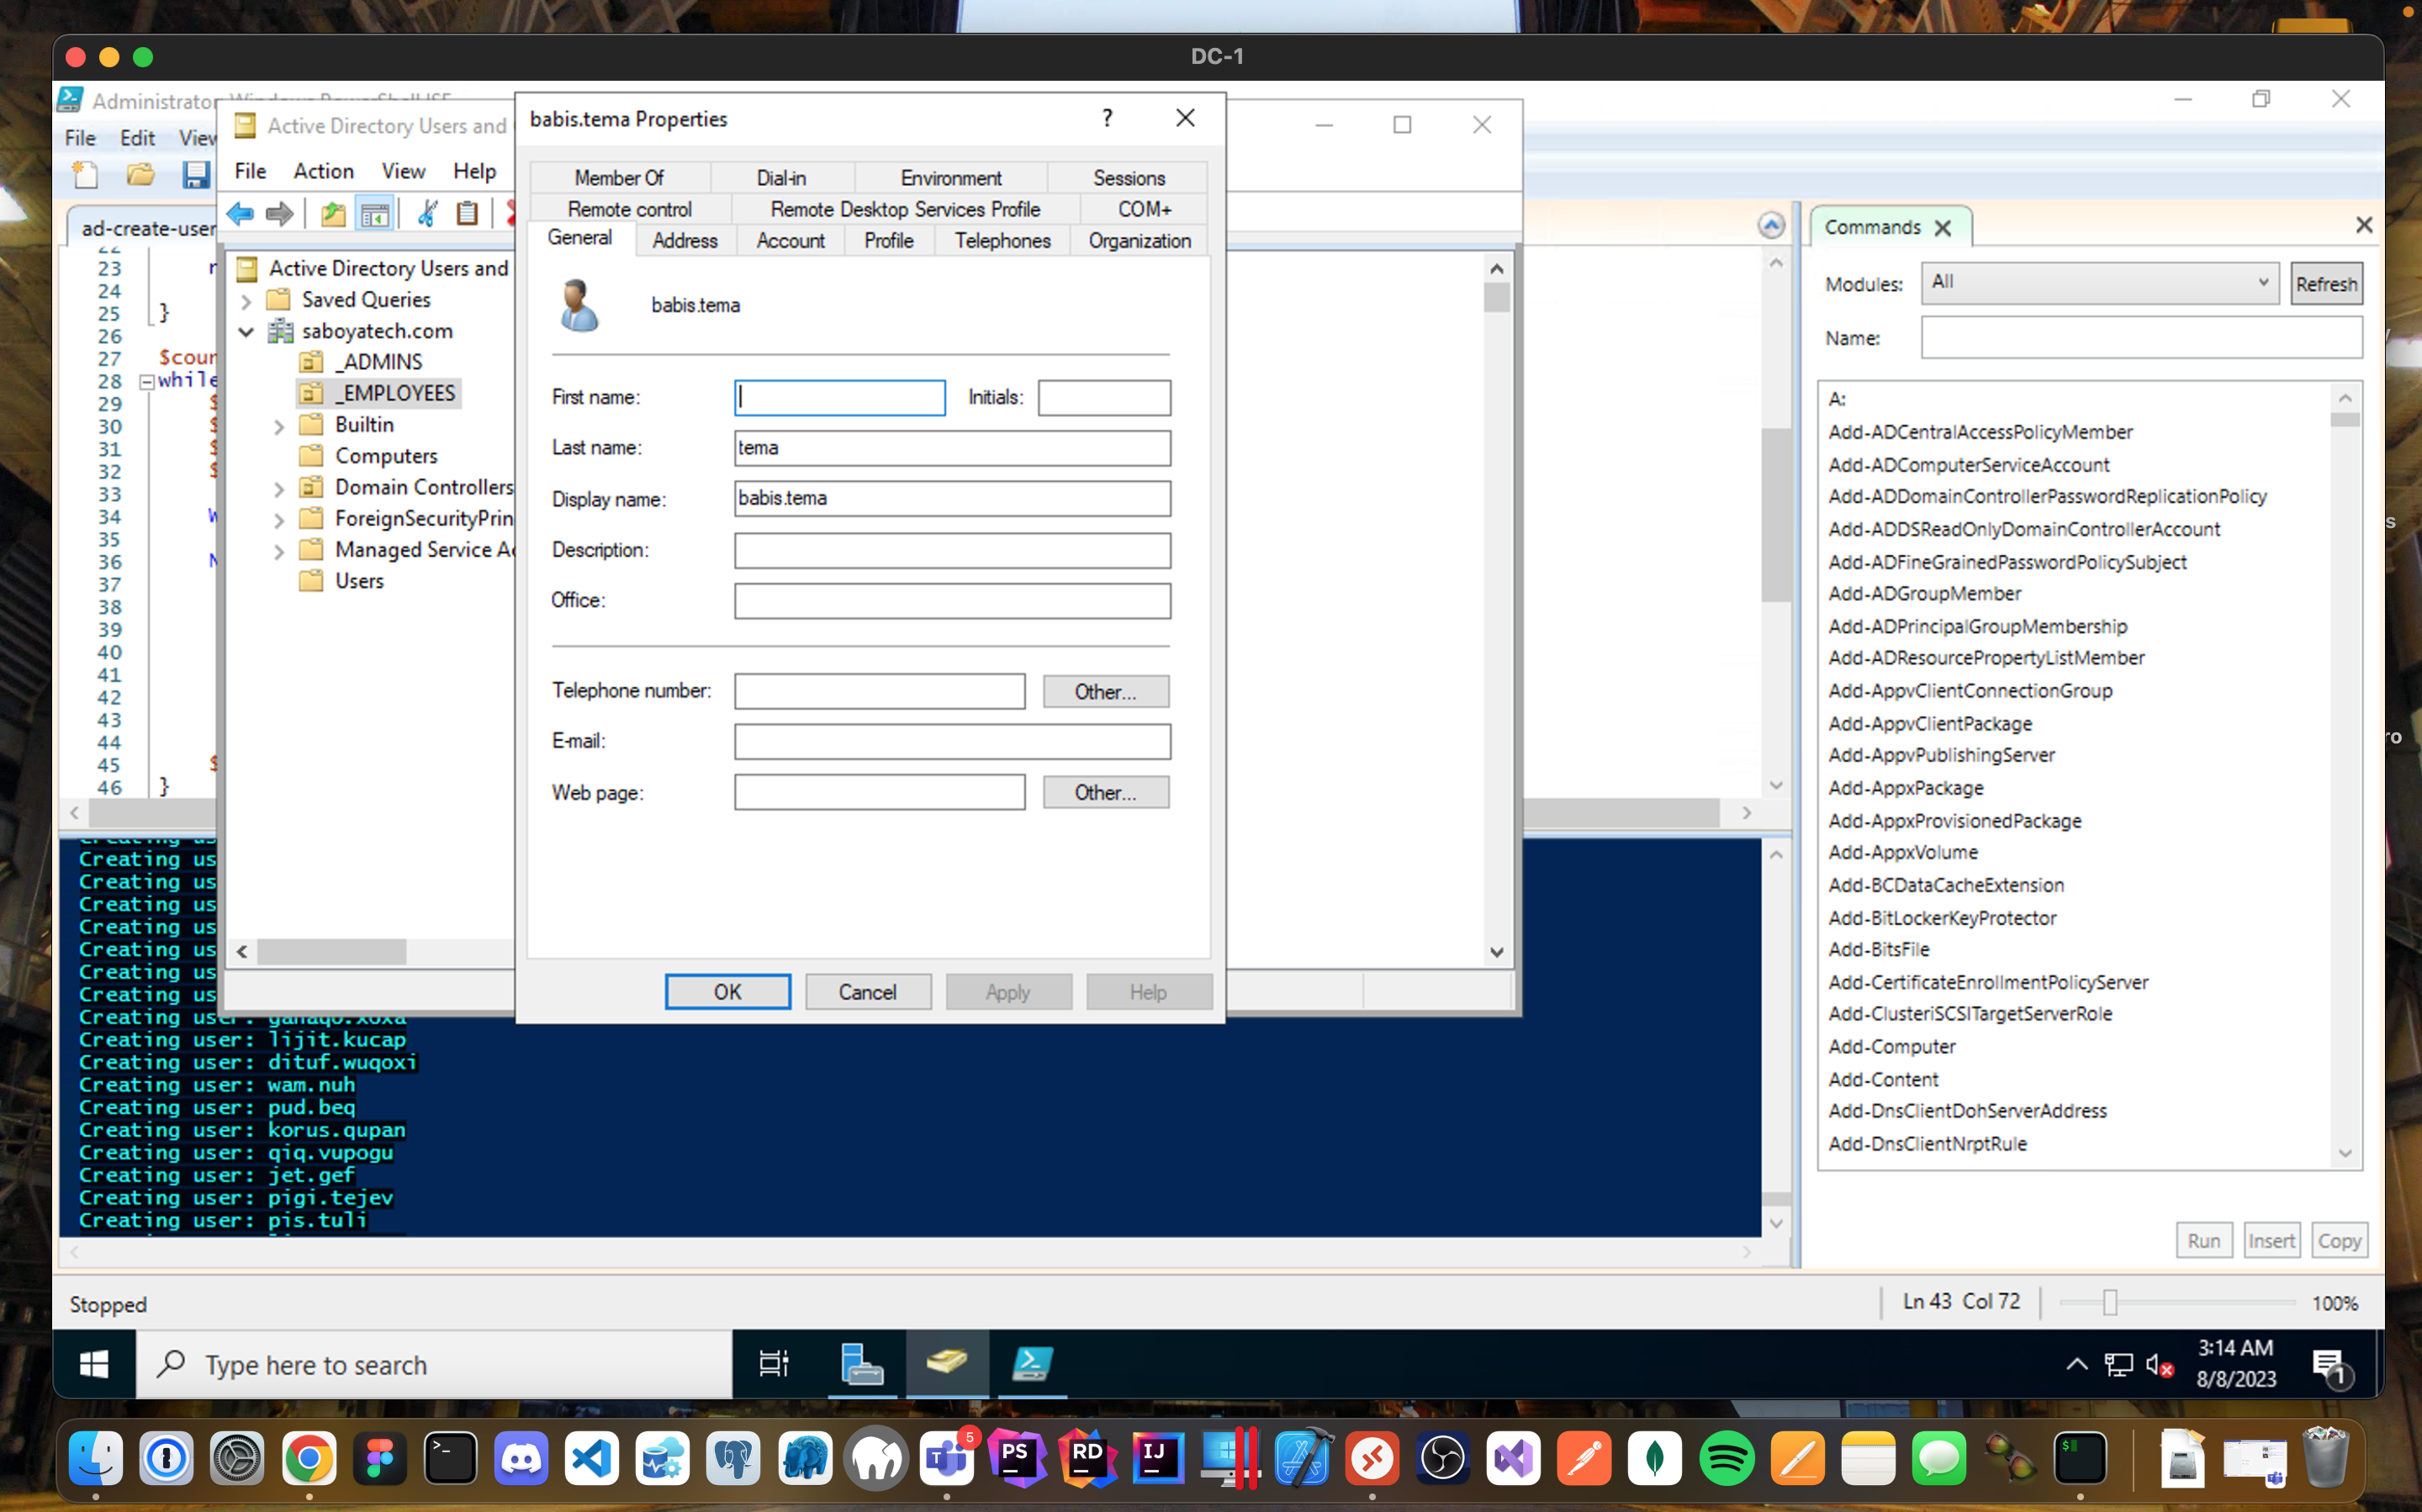
- When finished, open ADUC (Active Directory Users and Computers) and observe the accounts in the appropriate OU.
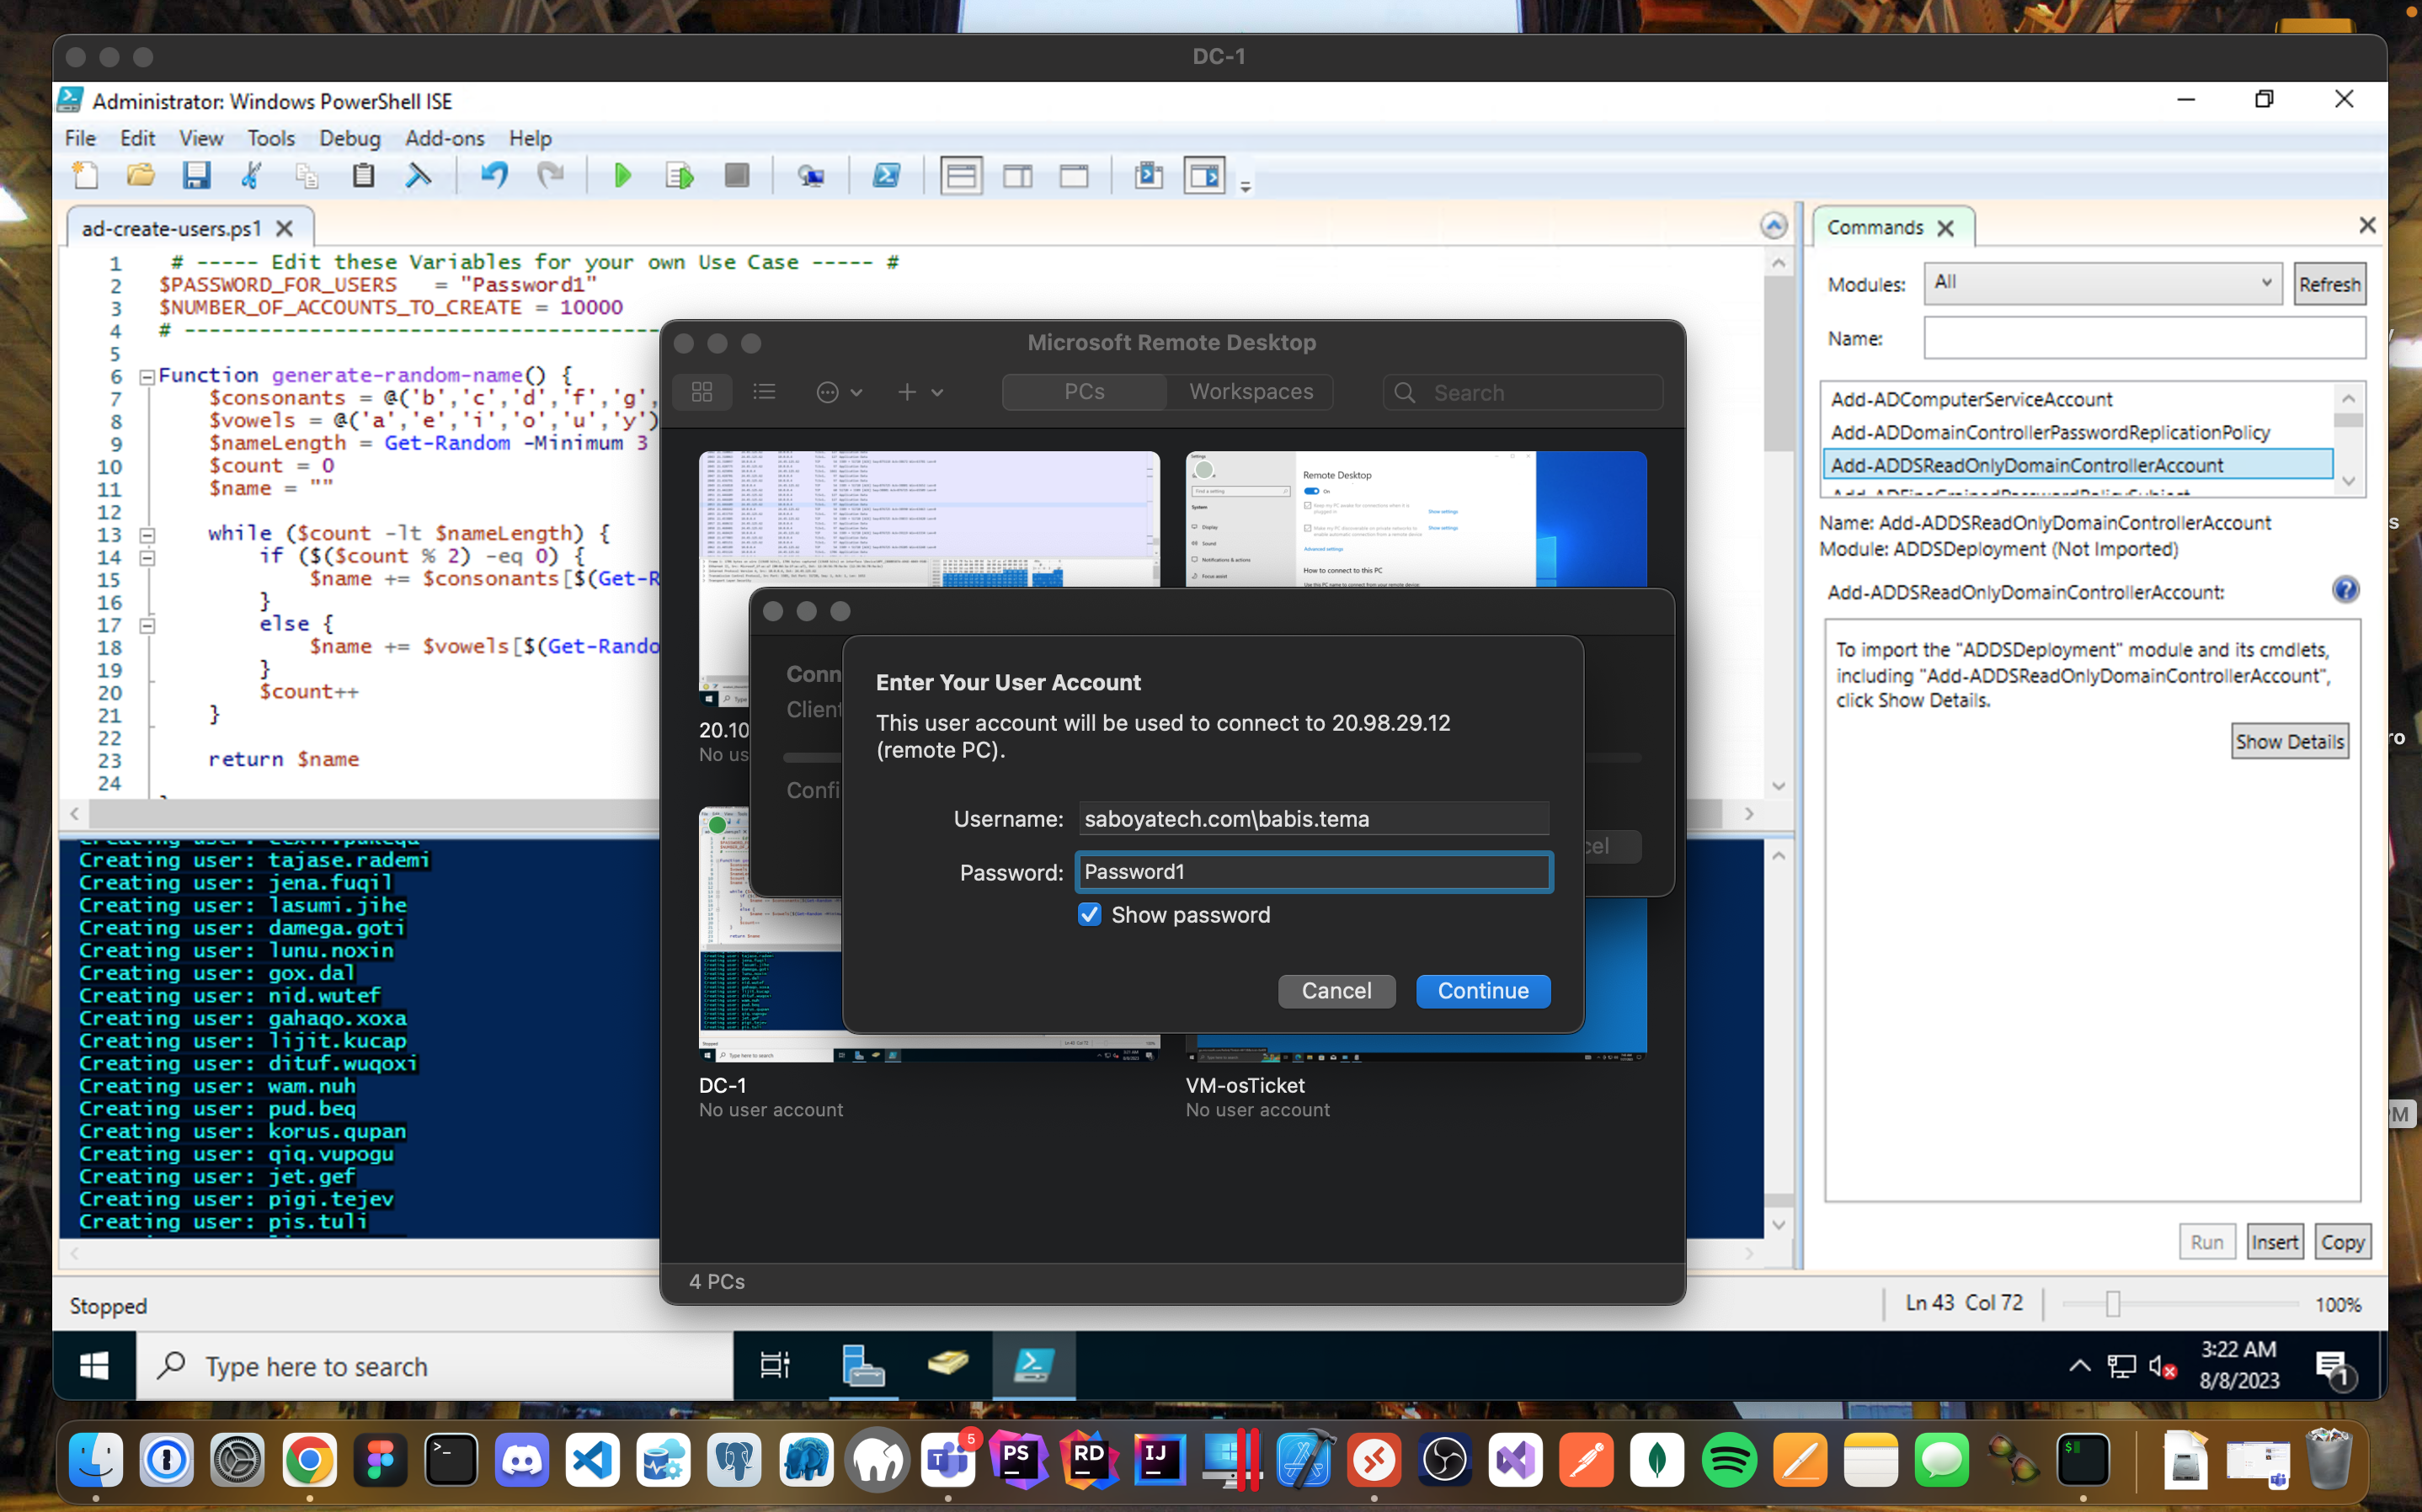
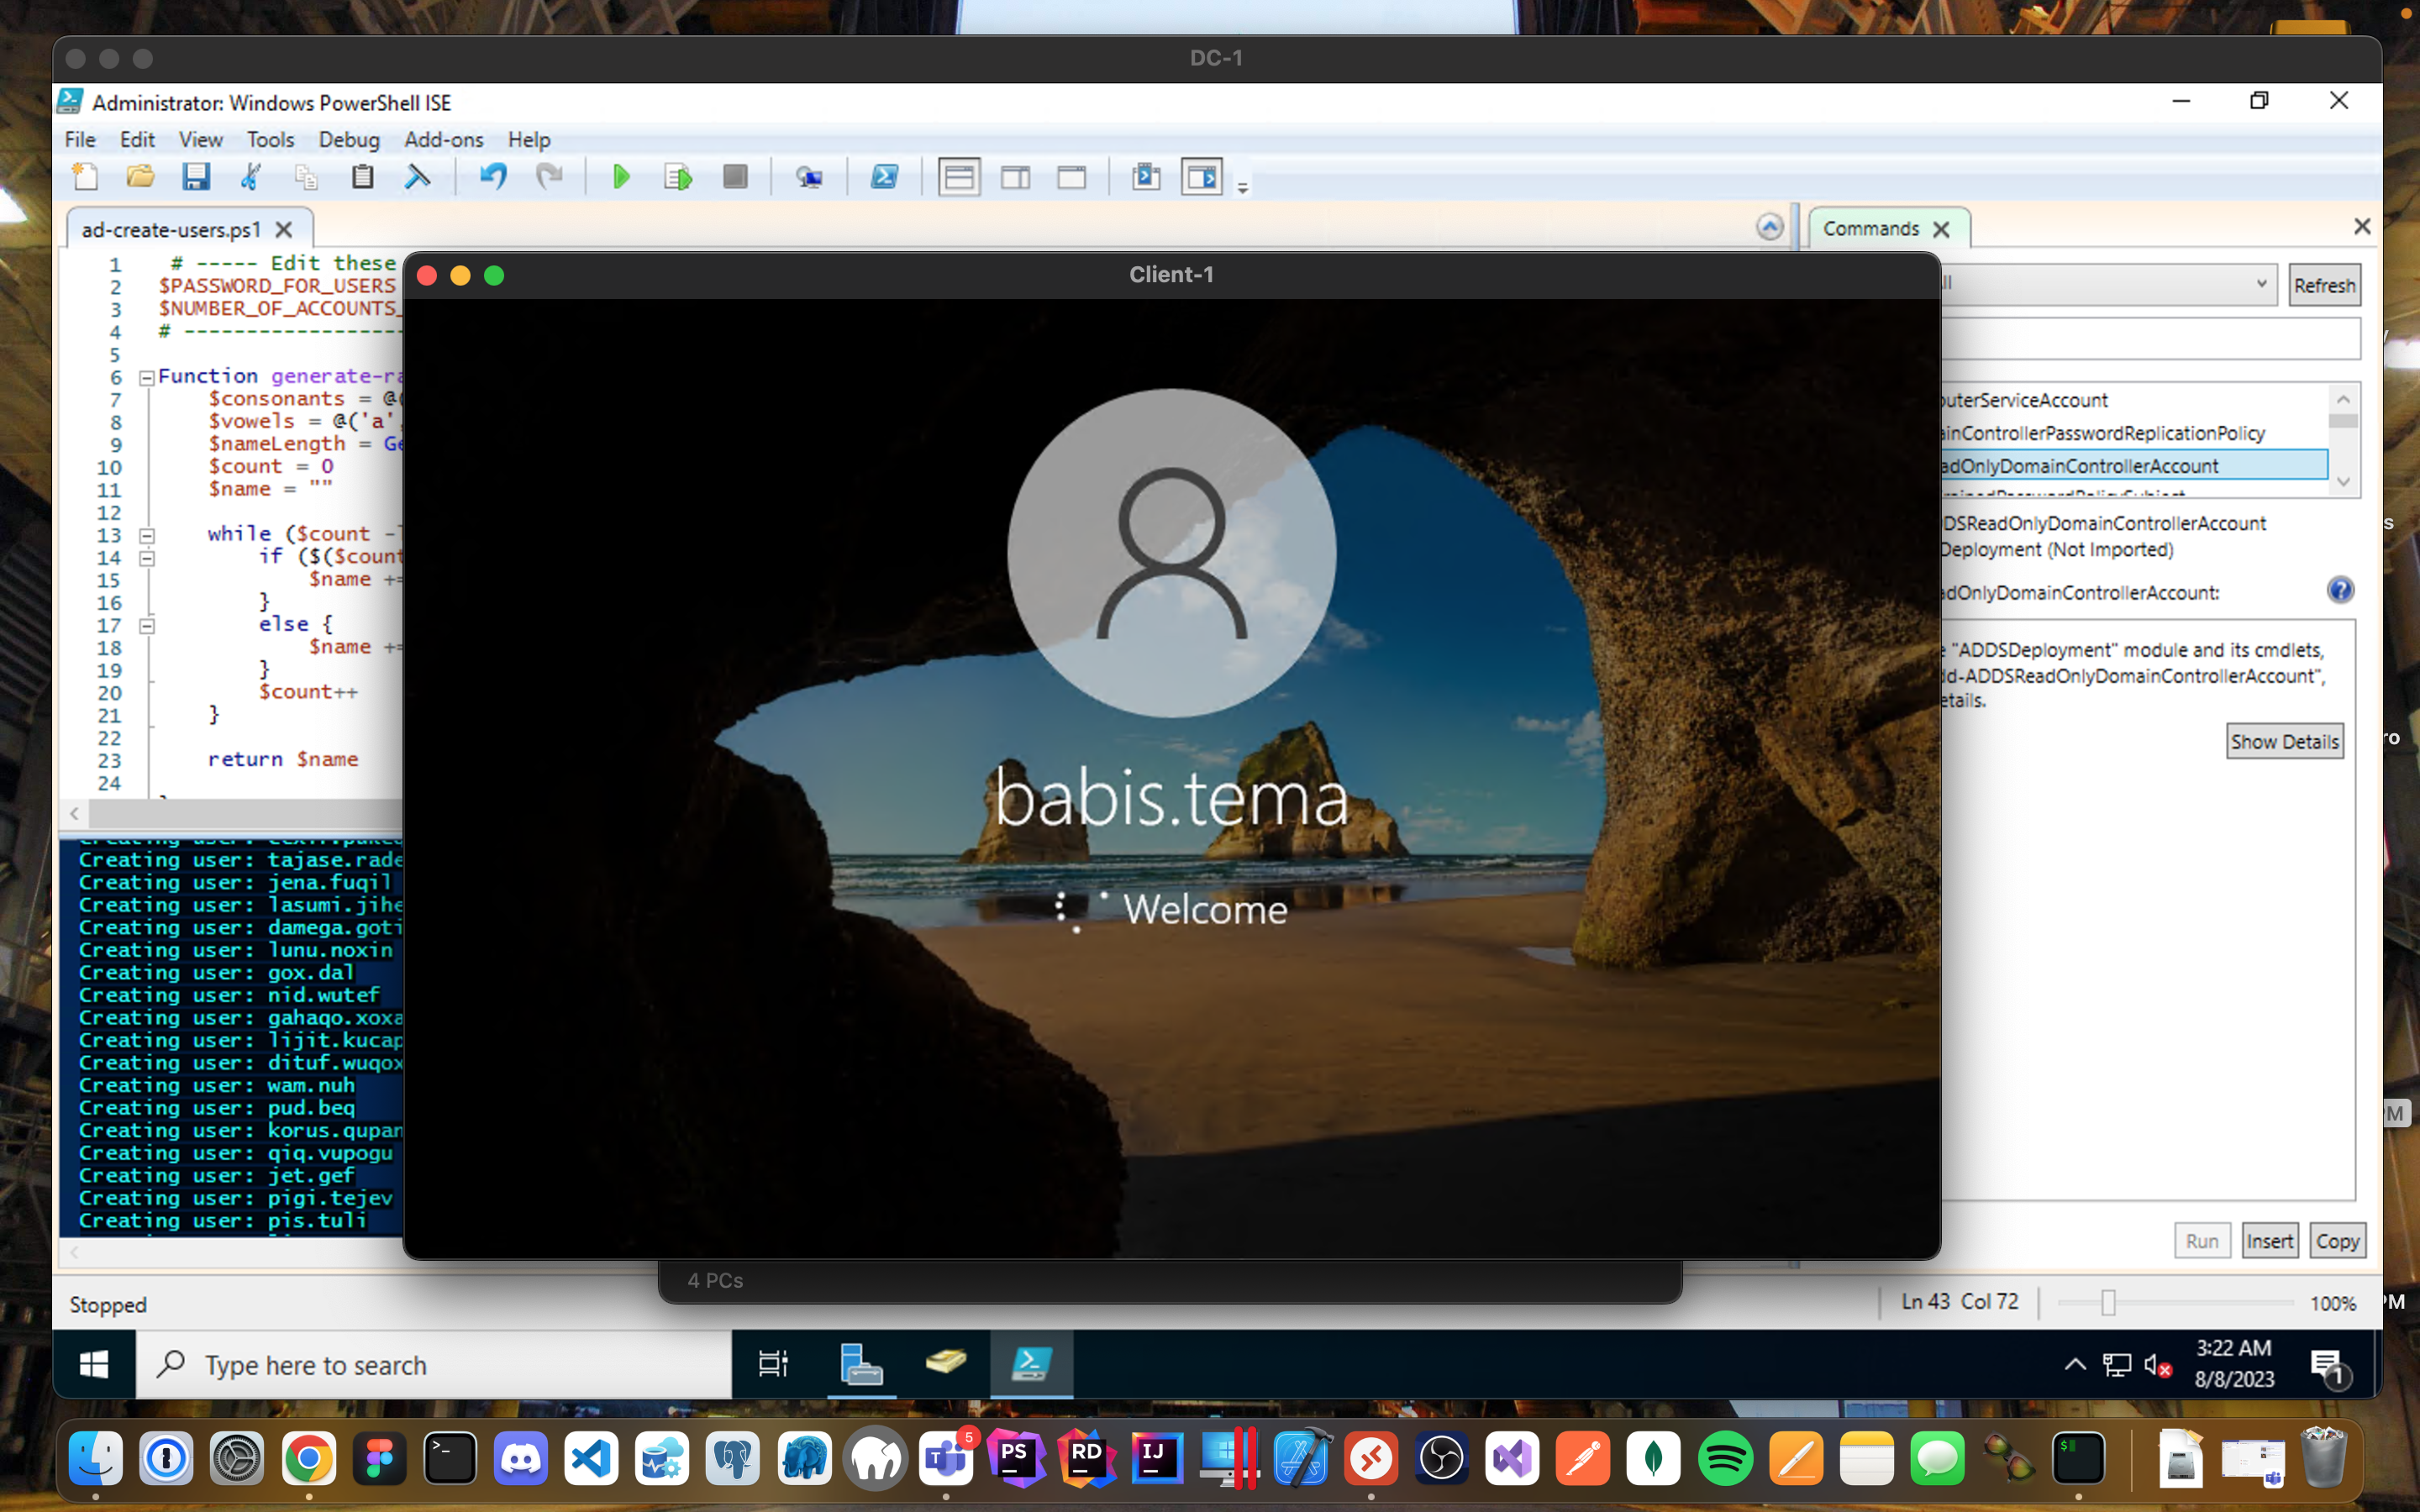
- Pick a random user and try to log into client-1.
- Tip: Take note of the password in the PowerShellscript.


