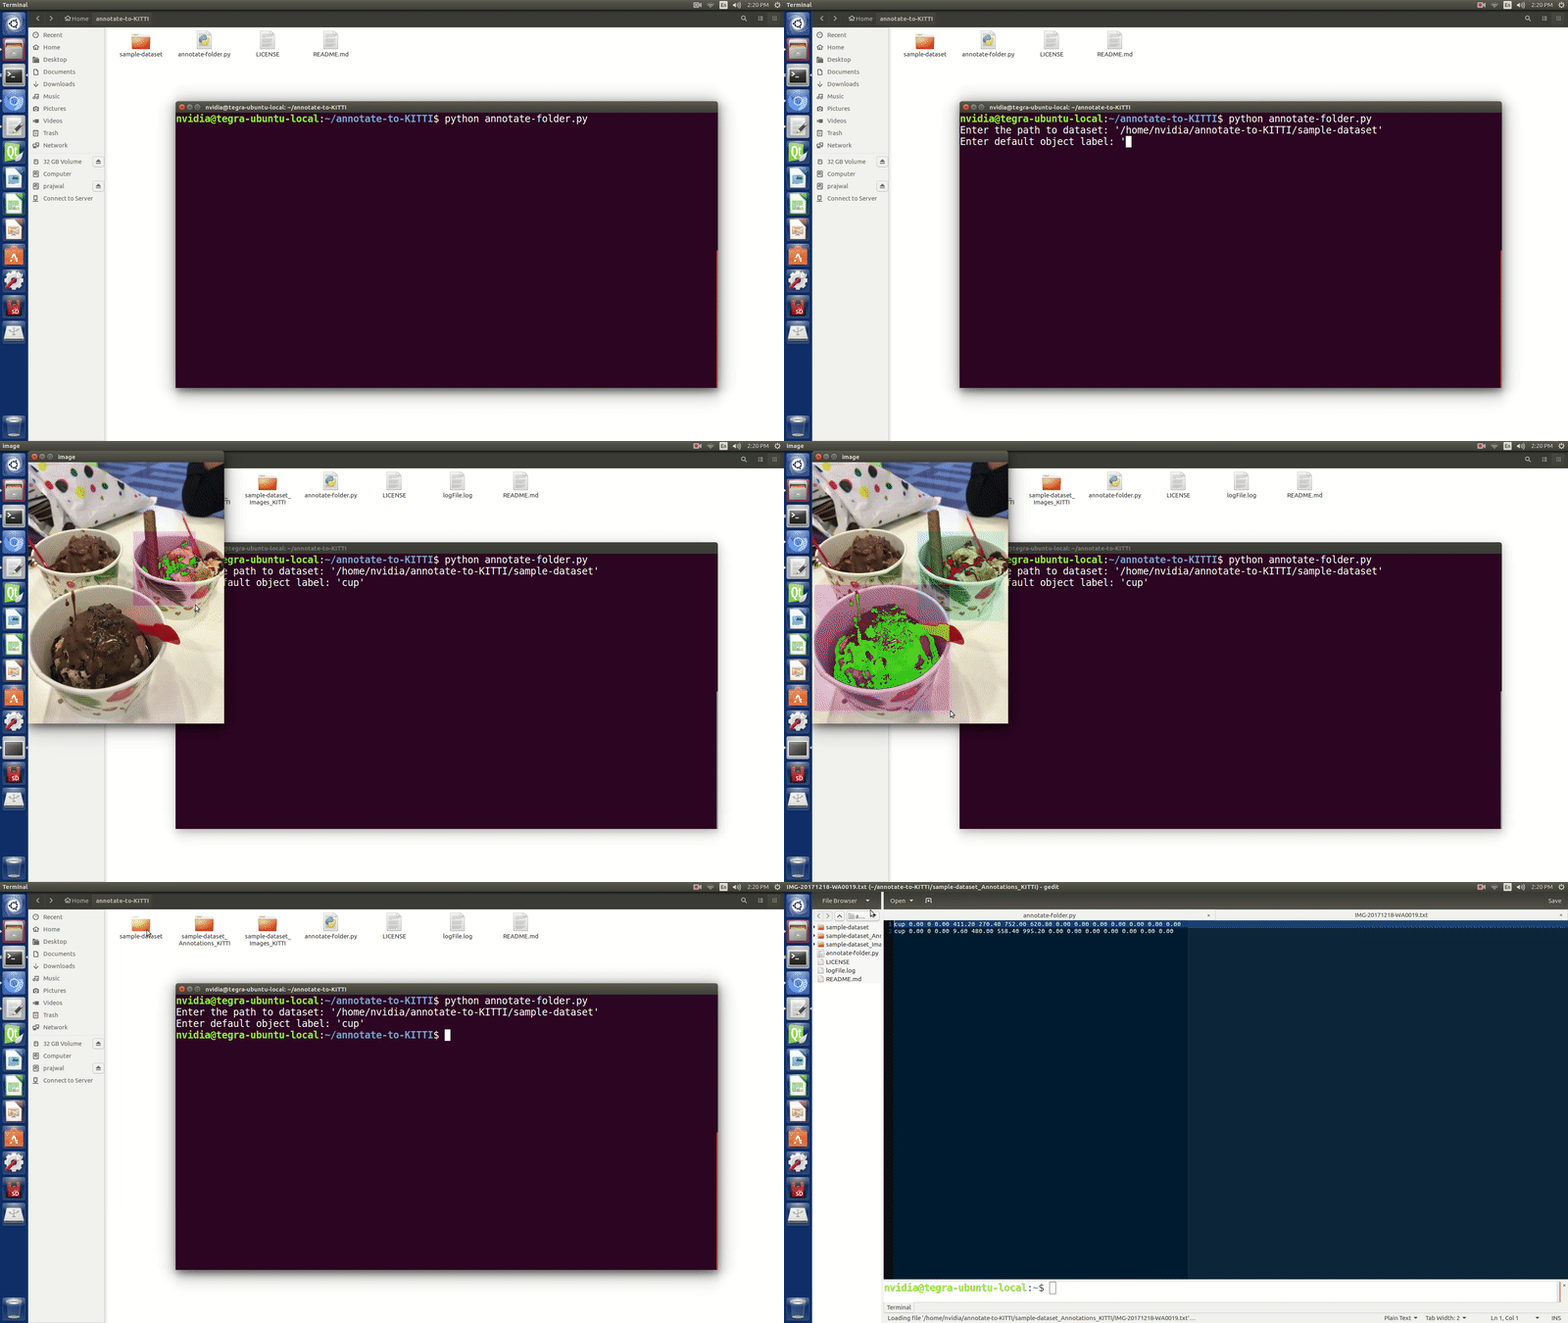
This repository hosts a python script that can be used to draw ground-truth bounding boxes for a given folder of images and generate corresponding annotations in KITTI Vision data format. Detailed information of KITTI Vision benchmark suite can be found here. Discussion on the data format of KITTI has been addressed in this issue. KITTI data format can be used for training an object detection model using Nvidia's DIGITS, one of the most popular tools for developing deep learning models for object classification/detection/segmentation tasks.
Annotations play an important role in training an object detection model. It is often a tough task to find annotations/labels corresponding to the dataset we would want to train on. Most of the times, we would have to rely on a third party software to annotate our dataset which might end up being costly and a little too overdone for the task we are trying to accomplish. For this reason, this simple, yet effective, annotation script has been developed in order to annotate small datasets with a few hundred images.
- Python 2.7
- OpenCV 2.4
- Numpy 2.12
First, clone the repository to a desired location using the following command.
git clone https://github.com/SaiPrajwal95/annotate-to-KITTI.git
Then migrate to the local repository and type the following command to get started with the annotation process.
cd annotate-to-KITTI
python annotate-folder.py
- The script asks for the location of the image dataset initially. It can be entered as: '/path/to/image/dataset'. Notice that there is no tailing '/' after the dataset folder's name.
- It also asks for the default label for your dataset. This is very useful in single object detection task where the label stays the same. Once you enter the label like: 'people' initially, you won't be asked to enter the label for any other image in the dataset.
- To start annotating, maximize the image (if required) and left-click and drag the mouse to create a bounding box to cover the object of interest.
- Press 'l' to change the label and enter the name of the label for the upcoming bounding boxes in that image. Note that for every new image that pops, the label will go back to being the default label.
- Press 'c' to cancel the latest ground-truth annotation if you aren't satisfied with it.
- Press 'n' to skip the image if you don't want an annotation file for that image.
- Press 'q' to save the annotations in KITTI format into a folder in current path. The script also saves the corresponding copy of that image into a folder in current path.
- Press 'Esc' key to exit the annotation process. Good thing about this script is that you could continue from where you left off when you start the script again. So, annotate, relax, and continue whenever you can.
