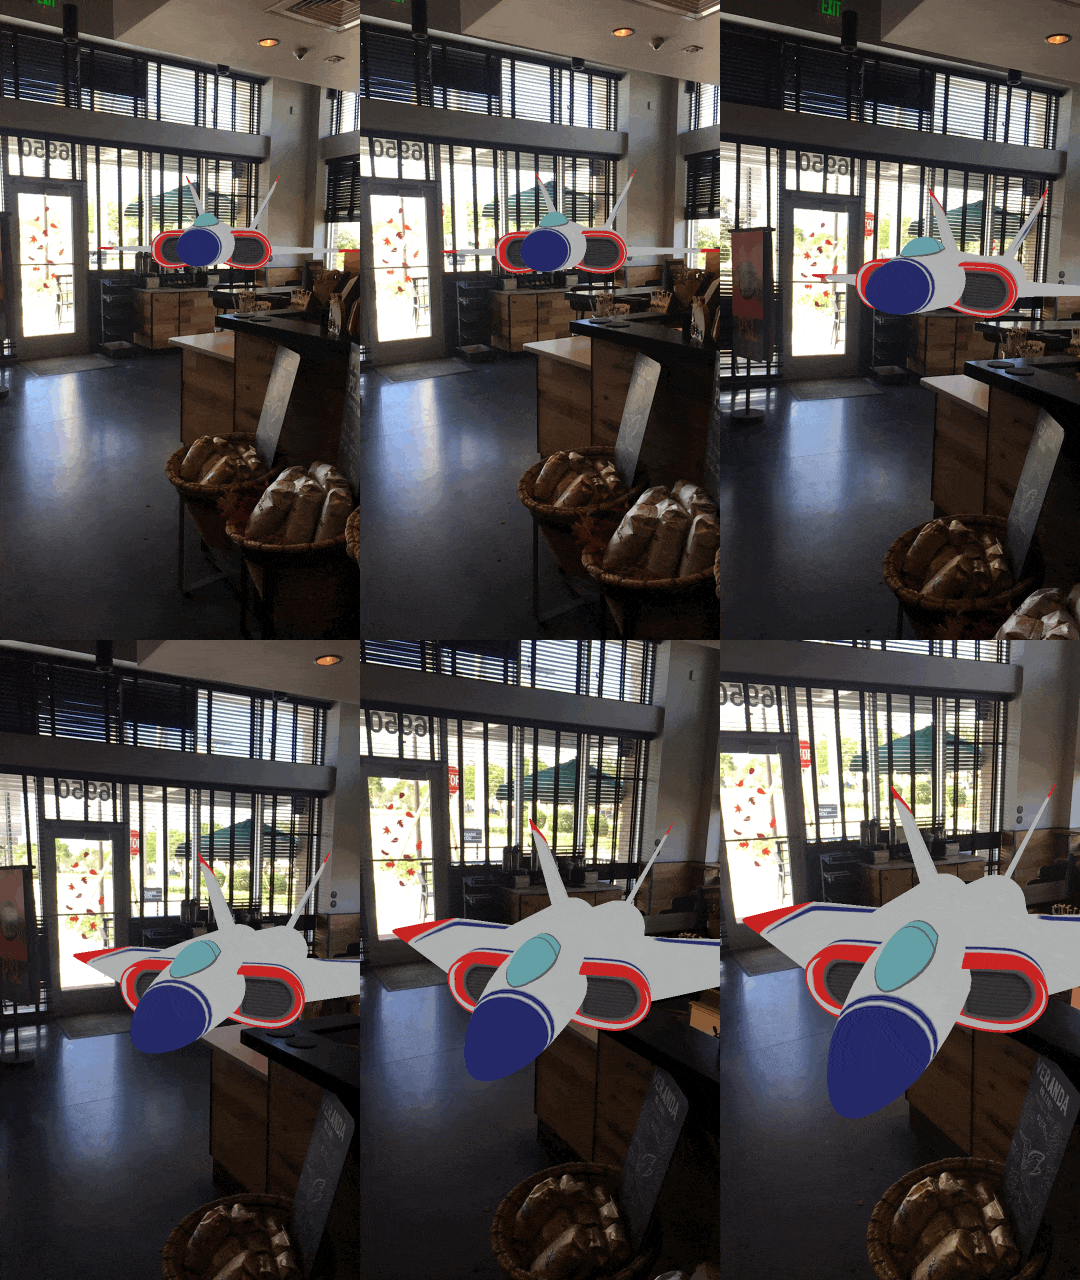
An iOS Framework that enables developers to capture videos 📹, photos 🌄, Live Photos 🎇, and GIFs 🎆 with ARKit content.
In other words, you NO LONGER have to screen record/screenshot to capture videos 📹 and photos 🌄 of your awesome ARKit apps!
| Table of Contents | Description |
|---|---|
| Documentation | Describes the configuration options ARVideoKit offers |
| Preview | Displays 2 GIF images captured using the supported gif method in ARVideoKit |
| Key Features | Lists the key features ARVideoKit offers |
| Compatibility | Describes the ARVideoKit device and iOS compatibality |
| Example Project | Explains how to run the example project provided in this repository |
| Installation | Describes the Manual option to install ARVideoKit |
| Implementation | Lists the steps needed, notes, and reference for more options |
| Publishing to the App Store | Describes the steps required before submitting an application using ARVideoKit to the App Store. |
| License | Describes ARVideoKit license |
| 👾 Initialized with SpriteKit👇 | 🚀 Initialized with SceneKit 👇 |
|---|
✅ Capture Photos from ARSCNView and ARSKView
✅ Capture Live Photos & GIFs from ARSCNView and ARSKView
✅ Record Videos from ARSCNView and ARSKView
✅ Pause/Resume video
✅ Allow device's Music playing in the background while recording a video
✅ Returns rendered and raw buffers in a protocol method for additional Image & Video processing
ARVideoKit is compatible on iOS devices that support both ARKit and Metal. Check Apple's iOS Device Compatibility Reference for more information.
ARVideoKit requires:
- iOS 11
- Swift 3.2 or higher
To try the example project, simply clone this repository and open ARVideoKit-Example.xcodeproj project file.
It's recommended to test SKViewController by assigning it as the initial view controller.
Drag the ARVideoKit.framework file as an embedded binary of your project targets. ARVideoKit.framework can be found in the /Framework/ folder of this repository.
-
import ARVideoKitin the application delegateAppDelegate.swiftand aUIViewControllerwith anARKitscene. -
In the application delegate
AppDelegate.swift, add this 👇 in order to allow the framework access and identify the supported device orientations. Recommended if the application supports landscape orientations.
func application(_ application: UIApplication, supportedInterfaceOrientationsFor window: UIWindow?) -> UIInterfaceOrientationMask {
return ViewAR.orientation
}
- In the selected
UIViewControllerclass, create an optional typeRecordARglobal variable.
var recorder:RecordAR?
Initializing RecordAR with ARSCNView
recorder = RecordAR(ARSceneKit: sceneView)
Initializing RecordAR with ARSKView
recorder = RecordAR(ARSpriteKit: SKSceneView)
- Call the
prepare()method inviewWillAppear(_ animated: Bool)
let configuration = ARWorldTrackingConfiguration()
recorder?.prepare(configuration)
- Call the
rest()method inviewWillDisappear(_ animated: Bool)
recorder?.rest()
- Call the
record()method in the proper method to start recording.
@IBAction func startRecording(_ sender: UIButton) {
recorder?.record()
}
- Call the
stopAndExport()method in the proper method to stop recording.
@IBAction func stopRecording(_ sender: UIButton) {
recorder?.stopAndExport()
}
Make sure you add the usage description of the camera, microphone, and photo library in the app's Info.plist.
<key>NSCameraUsageDescription</key>
<string>AR Camera</string>
<key>NSPhotoLibraryAddUsageDescription</key>
<string>Export AR Media</string>
<key>NSPhotoLibraryUsageDescription</key>
<string>Export AR Media</string>
<key>NSMicrophoneUsageDescription</key>
<string>Audiovisual Recording</string>
Check RecordAR documentation for more options!
Before publishing to the App Store make sure to add the ARVideoKit License to your app licences list.
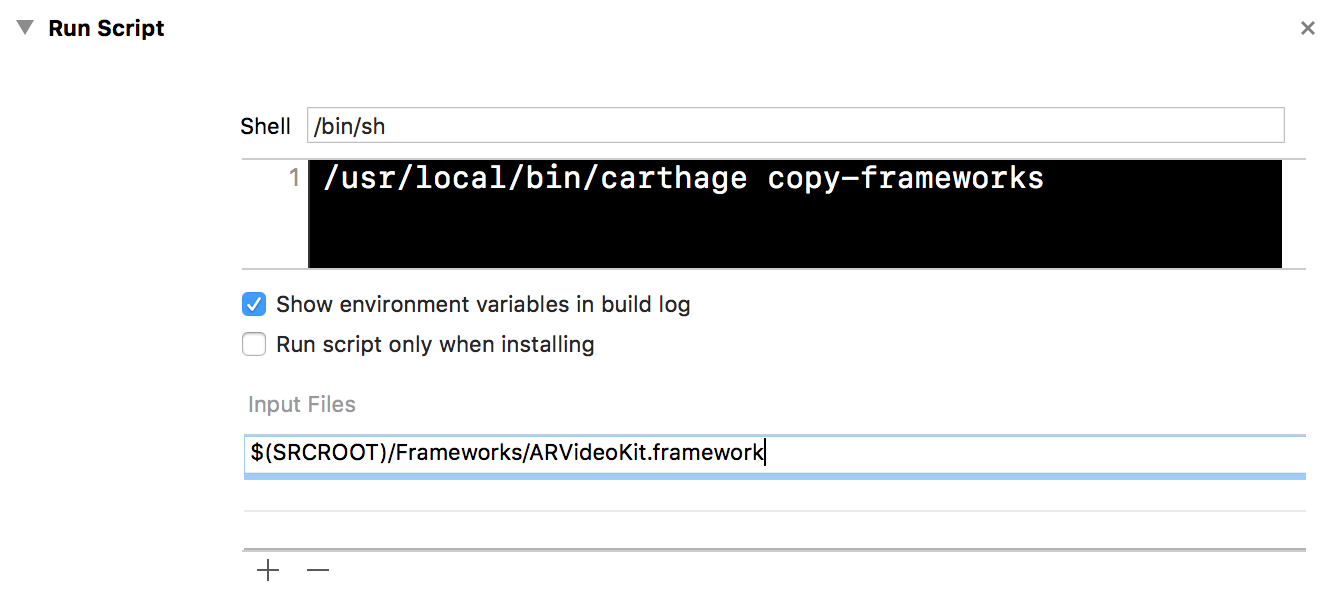
Additionally, you MUST strip out the simulator architectures from the framework before pushing an application to the App Store.
To do so, follow those steps:
- Install Carthage
Download
Carthage.pkgfrom here
Or install with Homebrew using this command
brew install carthage
- Go to your project target's
Build Phase
- Add a new
Run Script Phase
- Add the following command to the
Run Script Phase
/usr/local/bin/carthage copy-frameworks
- Finally, add
ARVideoKit.frameworkfile path as anInput File. In my case, I have it in a folder namedFrameworksinside my project folder
Copyright 2017 Ahmed Fathi Bekhit
ARVideoKit is licensed under the Apache License, Version 2.0 (the "License"); you may not use this file except in compliance with the License. You may obtain a copy of the License at
http://www.apache.org/licenses/LICENSE-2.0
Unless required by applicable law or agreed to in writing, software distributed under the License is distributed on an "AS IS" BASIS, WITHOUT WARRANTIES OR CONDITIONS OF ANY KIND, either express or implied. See the License for the specific language governing permissions and limitations under the License.


