-
python 3.6.5 버전을 설치한다.
- https://www.python.org/downloads/release/python-365/ 링크에서 macOS version을 install하고, install과정에서 (Add Python 3.6 to PATH) 체크박스를 선택함으로써 Python 3.6.5버젼을 환경변수로 세팅한다. (전에 Python3를 install 했더라면, python3를 downgrade 시켜줘야 한다...)
-
virtualenv를 다운받는다.
- $sudo pip install virtualenv
-
가상환경을 만들어 준다.
- $virtualenv --python==python3 (가상환경디렉토리 이름)
-
가상환경으로 작업하려면 가상환경디렉토리가 있는 디렉토리에서 아래의 명령어 실행
- $source (가상환경디렉토리 이름)/bin/actviate
- $pip install tensorflow==1.8
- $pip install --upgrade Cython
- $pip install --upgrade contextlib2
- $pip install --upgrade pillow
- $pip install --upgrade lxml
- $pip install --upgrade jupyter
- $pip install --upgrade matplotlib
- $pip install --upgrade pandas
3. Clone this Repository
- $git clone https://github.com/tensorflow/models
- 아래의 명령어로 protobuf 설치
- $brew install protobuf
- models/research 디렉토리로 이동
- $protoc object_detection/protos/*.proto --python_out=.
- 위 명령어 실행시 protos 디렉토리에 이름이 '_pb2.py'라고 끝나는 파일들이 많이 생성되 있을 것이다.
- $export PYTHONPATH=$PYTHONPATH:/PATH-TO/models/research:/PATH-TO/models/research/slim
- 위의 명령으로 임시로 환경변수를 등록할 수 있다. (/PATH-TO 대신 models를 저장한 디렉토리 경로를 작성해 주면 된다.)
- 위의 방법으로 하면 터미널을 끄고 킬 때마다 저 명령어를 실행 해줘야 한다.
- 터미널을 껏다가 켜도 계속 환경변수가 유지 되게 하고 싶으면 $open ~/.bash_profile 명령어를 통해 .bash_profile 을 열어 맨 밑줄에 PYTHONPATH=$PYTHONPATH:/PATH-TO/models/research:/PATH-TO/models/research/slim 을 추가 해주면 된다.
-
models/research 디렉토리로 이동한 뒤, 밑에 명령어를 실행하자
-
위의 이미지와 같이 잘 동작하면 제대로 환경설정이 된 것이고, 위의 라이브러리를 잘 설치 했는데 에러가 난다면, tensorflow 버젼(tensorflow 1.8 버젼 추천)이나 터미널을 껏다 켰는데 환경변수 등록하는 것을 잊은 건 아닌지 한번 확인해보자.
이미지 라벨링 하기 전에 사전 작업은 자신이 학습 할 사진을 200장 정도 모아, models/research/object_detection/images
디렉토리에(images 디렉토리는 기존에 없을테니, 새로 만들면 된다.) train 과 test 폴더를 생성해 주고, train과 test 폴더에
사진을 각각 넣어준다.
- LabelImg Repository 클릭
- $git clone https://github.com/tzutalin/labelImg 명령어로 repository 다운
- $brew install qt
- $brew install libxml2
- 다운받은 repository의 LabelImg 디렉토리 안으로 들어가서
- $python labelImg.py 명령어 실행
- 위에 첨부한 이미지와 같은 labelimg 에디터가 나오면 이미지를 labeling 해준다. (단축키 w(라벨링), d(다음 사진), a(전 사진))
- labelimg 에디터를 통해 얻은 .xml파일을 위에 이미지와 같이 같은 디렉토리안에 동일한 이름으로 저장한다.
TFRecord 파일 포맷이란
TFRecord 파일은 텐서플로우의 학습 데이타 등을 저장하기 위한 바이너리 데이타 포맷으로,
구글의 Protocol Buffer 포맷으로 데이타를 파일에 Serialize(직렬화) 하여 저장한다.

CSV 파일에서와 같이 숫자나 텍스트 데이타를 읽을때는 크게 지장이 없지만,
이미지 데이타를 읽을 경우 이미지는 JPEG나 PNG 형태의 파일로 저장되어 있고,
이에 대한 메타 데이타와 라벨은 별도의 파일에 저장되어 있기 때문에,
학습 데이타를 읽을때 메타데이타나 라벨용 파일 하나만 읽는 것이 아니라 이미지 파일도 별도로 읽어야 하기 때문에 코드가 복잡해진다.

또한 이미지를 JPG나 PNG 포맷으로 읽어서 매번 디코딩을 하게 되면, 그 성능이 저하되서 학습단계에서 데이타를 읽는 부분에서 많은 성능 저하가 발생한다.

이와 같이 성능과 개발의 편의성을 이유로 TFRecord 파일 포맷을 이용하는 것이 좋다.
- 위와 같은 이유로 TFRecord 파일로 변환하기 위해서 labelImg를 통해 생성한 xml 파일을 먼저 CSV 파일로 변환해야 한다.
- https://github.com/datitran/raccoon_dataset 링크를 클릭하여 repository를 다운받자
- xml_to_csv.py 파일과 generate_tfrecord.py 파일을 복사해 research/object_detection 폴더에 붙혀넣는다.
- xml_to_csv.py 코드를 수정한다.
#from xml_to_csv.py

def main():
    image_path = os.path.join(os.getcwd(), 'annotations')
    xml_df = xml_to_csv(image_path)
    xml_df.to_csv('raccoon_labels.csv', index=None)
    print('Successfully converted xml to csv.')
#revised code

def main():
    for directory in ['train','test']:
        image_path = os.path.join(os.getcwd(), 'images/{}'.format(directory))
        xml_df = xml_to_csv(image_path)
        xml_df.to_csv('data/{}_labels.csv'.format(directory), index=None)
        print('Successfully converted xml to csv.')
- object_detection 디렉토리에 data 디렉토리를 생성한뒤,
python xml_to_csv.py
명령어를 실행하자 그러면 data 디렉토리 안에는 두개의 .csv 파일이 생성된 것을 볼 수 있다.
- generate_tfrecord.py 파일의 코드를 수정한다.
- labelimg에서 라벨링 한 이름을 row_label == '(여기)' 여기 안에 넣어주면 된다.
#from generate_tfrecord.py

def class_text_to_int(row_label):
    if row_label == 'raccoon':
        return 1
    else:
        None
#revised code

def class_text_to_int(row_label):
    if row_label == 'green':
        return 1
    elif row_label == 'red':
        return 2
    else:
        None
- research/object_detection 디렉토리에서 아래의 명령어를 각각 실행시켜주면 된다.
# for test data
$python generate_tfrecord.py --csv_input=data/test_labels.csv  --output_path=test.record  --image_dir=images/test
# for train data
$python generate_tfrecord.py --csv_input=data/train_labels.csv  --output_path=train.record  --image_dir=images/train
- labelmap 생성
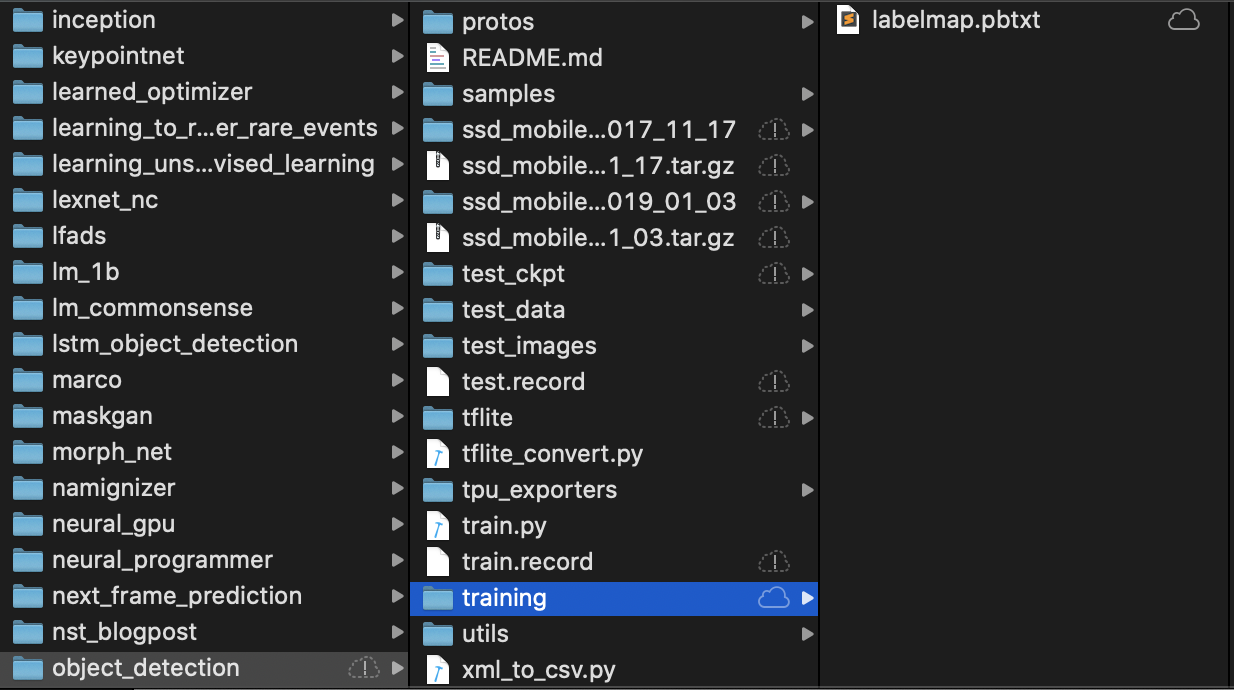
- 아래와 같은 내용으로 labelmap.pbtxt 파일을 생성한다.
item { id: 1 name: 'greenlight' } item { id: 2 name: 'redlight' } - transfer leaning 준비하기
- 미리 train되있는 모델인 ssd_mobilenet_v2_quantized_300x300_coco_2019_01_03 을 사용하여 우리의 학습을 진행 할 것이다.
- 아래의 방법을 이용하여 research/object_detection 디렉토리에 ssd_mobilenet_v2_quantized_300x300_coco_2019_01_03을 다운받자
curl -O http://download.tensorflow.org/models/object_detection/ssd_mobilenet_v2_quantized_300x300_coco_2019_01_03.tar.gz tar xzf ssd_mobilenet_v2_quantized_300x300_coco_2019_01_03.tar.gz- 우리가 모델을 학습시킬 때, 학습의 스타트 포인트를 다운받은 이 파일을 체크포인트로 사용 할 것이다.
- Create training config file
- research/object_detection/samples/configs 디렉토리에 있는 ssd_mobilenet_v2_quantized_300x300_coco.config 파일을 찾아서 research/object_detection/training 디렉토리로 옮기자.
- 아래와 같이 ssd_mobilenet_v2_quantized_300x300_coco.config 파일을 수정
- 9번째 line 수정
num_classes: 90num_classes: 2- 156번째 line 수정
fine_tune_checkpoint: "PATH_TO_BE_CONFIGURED/model.ckpt"fine_tune_checkpoint: "/Users/sangmee/Desktop/sangmee/TFlow/models/research/object_detection/ssd_mobilenet_v2_quantized_300x300_coco_2019_01_03/model.ckpt"- 173~178번째 line 수정
train_input_reader: {
  tf_record_input_reader {
    input_path: "PATH_TO_BE_CONFIGURED/mscoco_train.record-?????-of-00100"
  }
  label_map_path: "PATH_TO_BE_CONFIGURED/mscoco_label_map.pbtxt"
}
train_input_reader: { tf_record_input_reader { input_path: "/Users/sangmee/Desktop/sangmee/TFlow/models/research/object_detection/train.record" } label_map_path: "/Users/sangmee/Desktop/sangmee/TFlow/models/research/object_detection/training/labelmap.pbtxt" }- 180~186번째 line 수정 (num_examples에는 학습시킬 사진의 갯수를 넣는다.)
eval_config: {
  num_examples: 8000
  # Note: The below line limits the evaluation process to 10 evaluations.
  # Remove the below line to evaluate indefinitely.
  max_evals: 10
}
eval_config: { num_examples: 24 # Note: The below line limits the evaluation process to 10 evaluations. # Remove the below line to evaluate indefinitely. max_evals: 10 metrics_set: "coco_detection_metrics" }- 188~195번째 line 수정
eval_input_reader: {
  tf_record_input_reader {
    input_path: "PATH_TO_BE_CONFIGURED/mscoco_val.record-?????-of-00010"
  }
  label_map_path: "PATH_TO_BE_CONFIGURED/mscoco_label_map.pbtxt"
  shuffle: false
  num_readers: 1
}
eval_input_reader: { tf_record_input_reader { input_path: "/Users/sangmee/Desktop/sangmee/TFlow/models/research/object_detection/test.record" } label_map_path: "/Users/sangmee/Desktop/sangmee/TFlow/models/research/object_detection/training/labelmap.pbtxt" shuffle: false num_readers: 1 }
- 우리의 모델 학습의 정확한 검토를 위하여 COCO evaluation metrics를 사용 할 것이다. 그러기 위해 COCO APIs를 설치할 것이다.
- 아래의 명령을 통해 cocoapi를 다운받고, research 디렉토리에 cocoapi디렉토리에 있는 pycocotools를 가져다 놓자.
git clone https://github.com/cocodataset/cocoapi.git
cd cocoapi/PythonAPI
sudo make
cp -r pycocotools <path_to_tensorflow>/models/research/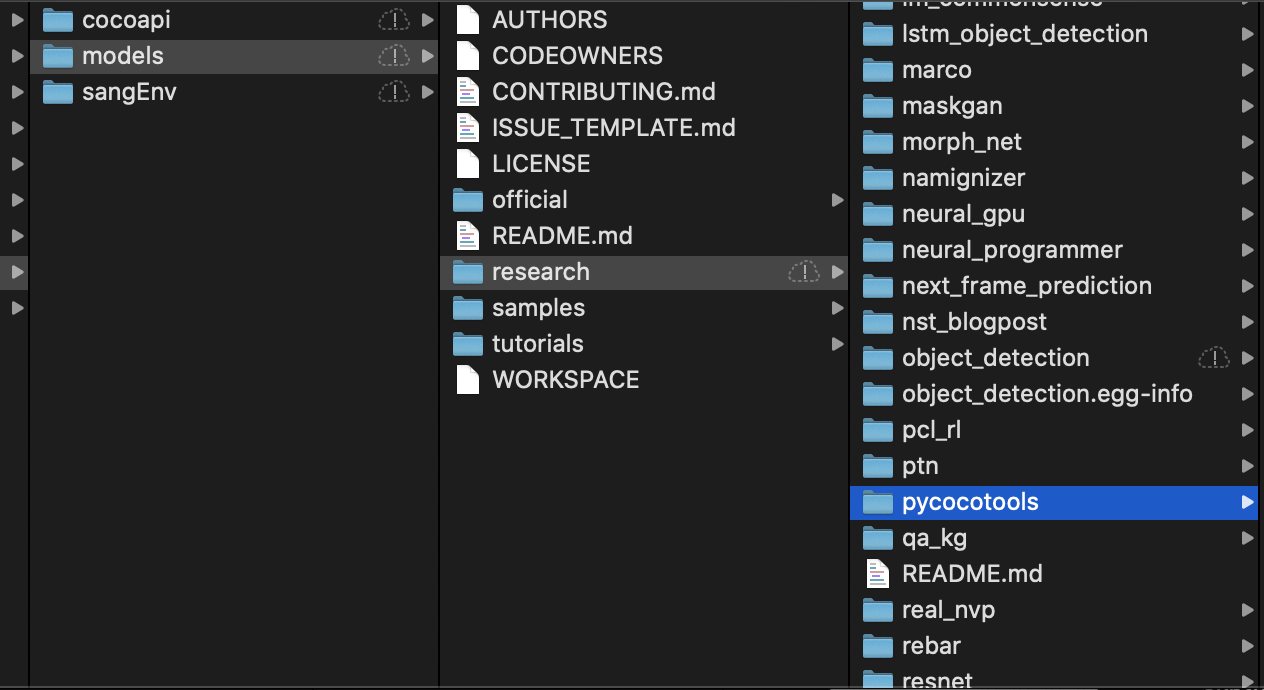
- models/research/object_detection/legacy에 있는 train.py 파일을 models/research/object_detection 경로로 이동시킨다
- research/object_detection디렉토리에서 아래의 명령을 통해 모델 학습을 시작하자
python train.py --train_dir=training/ --pipeline_config_path=training/ssd_mobilenet_v2_quantized_300x300_coco.config - 이때 아래와 같은 오류가 난다면 pip install tensorflow==1.12 명령을 통해 tensorflow 버젼을 1.8.0에서 1.12.0으로 바꿔주자
 혹시 AttributeError: module 'tensorflow._api.v1.compat' has no attribute 'v1'와 같은 오류가 발생한다면, pip install tensorflow==1.14 명령을 통해 tensorflow 버젼을 1.14로 변경해주자
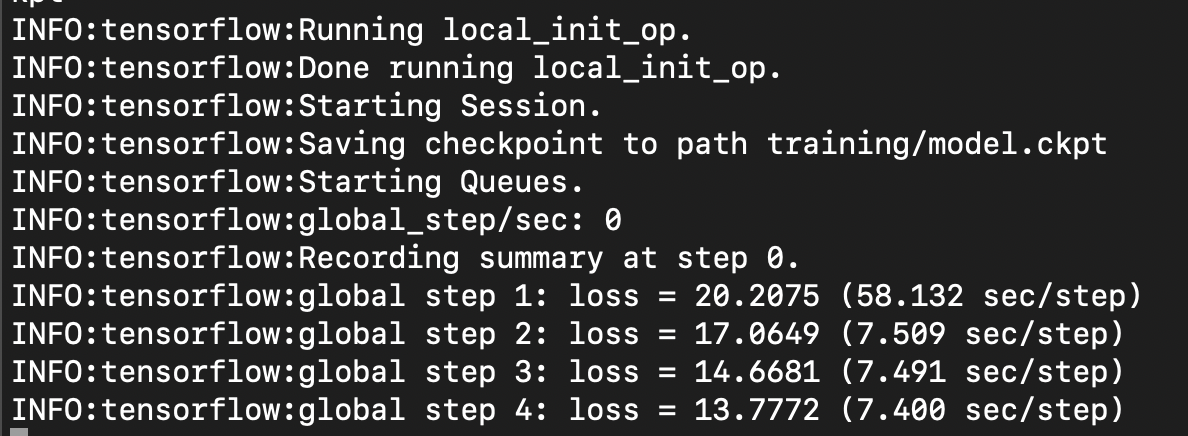
 - 아래와 같이 되면 정상적으로 학습하는 중이다.
- 학습중인 터미널은 그대로 두고 새로운 터미널에서 아래의 작업을 해도 무방하다.
- object_detection/legacy 디렉토리에 있는 eval.py 파일을 object_detection 디렉토리로 옮기자
- object_ 아래의 명령어를 입력하자 (물론 새로운 터미널에서 가상환경에 들어가야 하고, 위에서 언급한 환경변수도 설정해줘야 한다.)
python eval.py --logtostderr --pipeline_config_path=training/ssd_mobilenet_v2_quantized_300x300_coco.config --checkpoint_dir=training/ --eval_dir=training/
- 새로운 터미널을 사용하자.
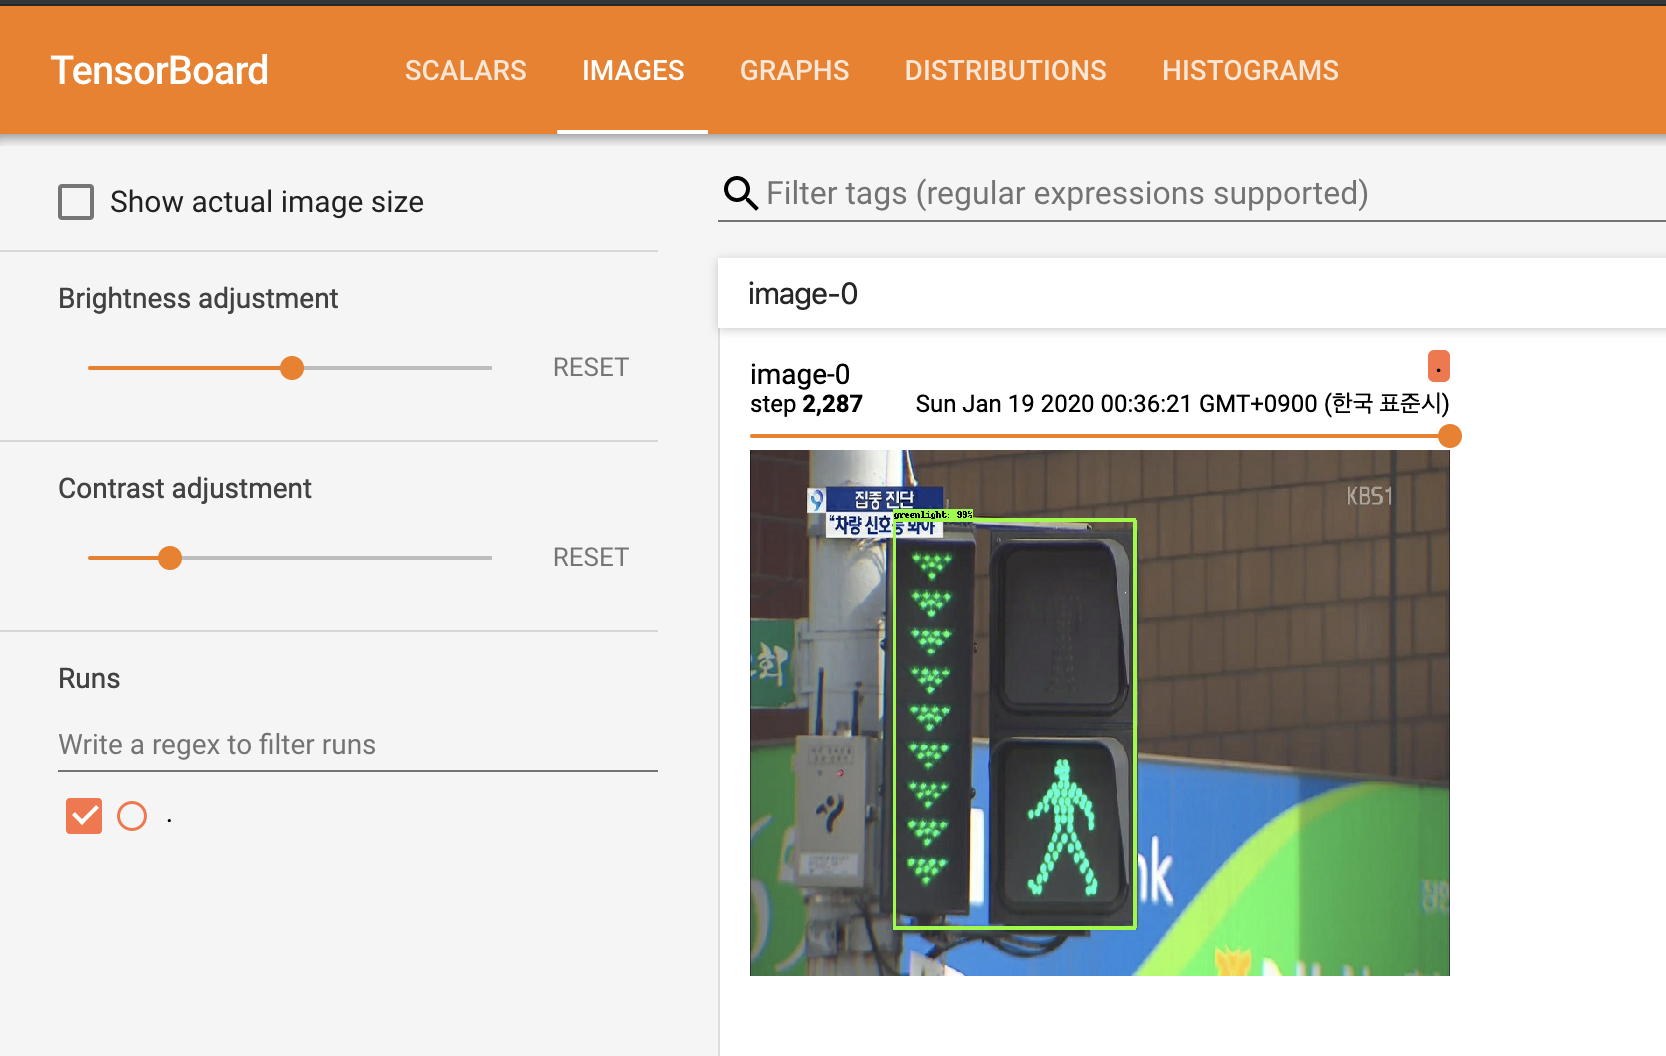
- research/object_detection 디렉토리에서 아래의 명령을 통해 tensorBoard를 실행한다.
tensorboard --logdir=training - http://localhost:6006 주소를 통해서 tensorBoard로 접속하면 Images에서 아래 이미지와 같이 학습된 모습을 볼 수 있다.
- research/object_detection/training 디렉토리 안에 model.ckpt-XXXX 파일이 있을 것이다(XXXX는 step number).
- obeject_detection 디렉토리에서 아래의 명령을 실행하면 inference_graph 디렉토리가 생성될 것이다.
python export_inference_graph.py --input_type image_tensor --pipeline_config_path training/ssd_mobilenet_v2_quantized_300x300_coco.config --trained_checkpoint_prefix training/model.ckpt-XXXX --output_directory inference_graph - 다양한 어플리케이션에서 inference_graph 디렉토리에 있는 frozen_inference_graph.pb 파일을 사용 할 수 있다.

- 아래의 명령을 object_detection 디렉토리에서 실행하자
python export_tflite_ssd_graph.py \
--pipeline_config_path=training/ssd_mobilenet_v2_quantized_300x300_coco.config \
--trained_checkpoint_prefix=training/model.ckpt-237 \
--output_directory=tflite \
--add_postprocessing_op=true
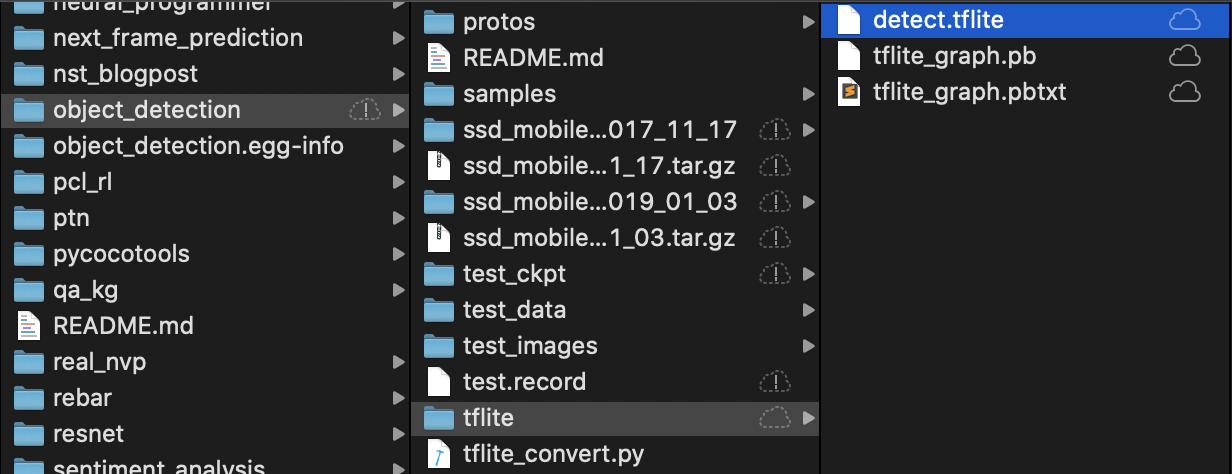
- tflite 디렉토리가 생성될 것이며, 그 디렉토리 안에는 tflite_graph.pb 파일과 tflite_graph.pbtxt 파일이 있을 것이다.
- git clone https://github.com/tensorflow/examples
- 위의 명령을 통해 tensorflow lite를 다운받자
- tensorflow/tensorflow/lite/python 에 있는 tflite_convert.py 파일을 object_detection 폴더에 복사
- 아래의 명령어를 사용해서 tflite 디렉토리 안에 detect.tflite 파일을 생성하자
tflite_convert \
--graph_def_file=tflite/tflite_graph.pb \
--output_file=tflite/detect.tflite \
--output_format=TFLITE \
--input_shapes=1,300,300,3 \
--input_arrays=normalized_input_image_tensor \
--output_arrays='TFLite_Detection_PostProcess','TFLite_Detection_PostProcess:1','TFLite_Detection_PostProcess:2','TFLite_Detection_PostProcess:3' \
--inference_type=QUANTIZED_UINT8 \
--mean_values=128 \
--std_dev_values=127 \
--change_concat_input_ranges=false \
--allow_custom_ops
???
redlight
greenlight
- detect.tflite 파일을 detectx.tflite로 이름 변경해주자.
- examples/lite/examples/object_detection/android/app/src/main/assets 경로에 detectx.tflite파일과 labelmap1.txt 파일을 넣어준다.
- 안드로이드 스튜디오를 실행해보면 정상적으로 작동 할 것이다.
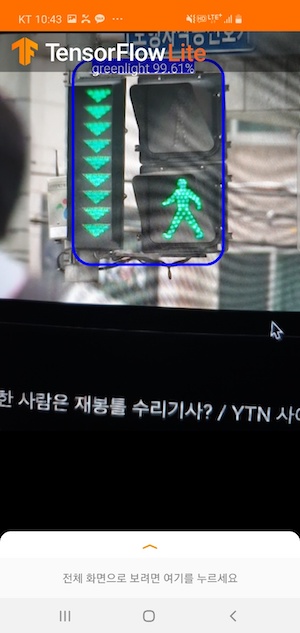
- 다음과 같은 결과가 나온다.


