In this lab you will integrate Docker Enterpise Edition Advanced in to your development pipeline. You will build your application from a Dockerfile and push your image to the Docker Trusted Registry (DTR). DTR will scan your image for vulnerabilities so they can be fixed before your application is deployed. This helps you build more secure apps!
Difficulty: Intermediate
Time: Approximately 90 minutes
Tasks:
- Prerequisites
- Introduction
- Task 1: Accessing PWD
- Task 2: Enable Docker Image Scanning
- Task 3: Create Jenkins User and Organization
- Task 4: Create DTR Repository
- Task 5: Pull / Tag / Push Docker Image
- Task 6: Review Scan Results
- Task 7: Extend with Image Mirroring
- Task 8: Docker Content Trust / Image Signing
- Task 9: Automate with Jenkins
- Conclusion
When you encounter a phrase in between < and > you are meant to substitute in a different value.
We are going to leverage the power of Play With Docker.
The following abbreviations are used in this document:
- UCP = Universal Control Plane
- DTR = Docker Trusted Registry
- DCT = Docker Content Trust
- EE = Docker Enterprise Edition
- CVE = Common Vulnerabilities and Exposures
- PWD = Play With Docker
This lab requires an instance of Docker Enterprise Edition (EE). Docker Enterprise Edition includes Docker Universal Control Plane and Docker Trusted Registry. This lab provides Docker EE.

This workshop is only available to people in a pre-arranged workshop. That may happen through a Docker Meetup, a conference workshop that is being led by someone who has made these arrangements, or special arrangements between Docker and your company. The workshop leader will provide you with the URL to a workshop environment that includes Docker Enterprise Edition. The environment will be based on Play with Docker.
If none of these apply to you, contact your local Docker Meetup Chapter and ask if there are any scheduled workshops. In the meantime, you may be interested in the labs available through the Play with Docker Classroom.
There are three main components to the Play With Docker (PWD) interface.
Play with Docker provides access to the 3 Docker EE hosts in your Cluster. These machines are:
- A Linux-based Docker EE 2.0 (UCP 3.0.1 & 17.06.2-ee11) Manager node
- Three Linux-based Docker EE 2.0 (17.06.2-ee11) Worker nodes
- A Windows Server 2016-based Docker EE 17.06 Worker Node
By clicking a name on the left, the console window will be connected to that node.
Additionally, the PWD screen provides you with a one-click access to the Universal Control Plane (UCP)
web-based management interface as well as the Docker Trusted Registry (DTR) web-based management interface. Clicking on either the UCP or DTR button will bring up the respective server web interface in a new tab.
Throughout the lab you will be asked to provide either hostnames or login credentials that are unique to your environment. These are displayed for you at the bottom of the screen.
Note: There are a limited number of lab connections available for the day. You can use the same session all day by simply keeping your browser connection to the PWD environment open between sessions. This will help us get as many people connected as possible, and prevent you needing to get new credentials and hostnames in every lab. However, if you do lose your connection between sessions simply go to the PWD URL again and you will be given a new session.
This workshop is designed to demonstrate the power of Docker Secrets, Image Promotion, Scanning Engine, and Content Trust. We will walk through creating a few secrets. Deploying a stack that uses the secret. Then we will create a Docker Trusted Registry repository where we can create a promotion policy. The promotion policy leverages the output from Image Scanning result. This is the foundation of creating a Secure Supply Chain. You can read more about secure supply chains for our Secure Supply Chain reference architecture.
-
Navigate in your web browser to the URL the workshop organizer provided to you.
-
Fill out the form, and click
submit. You will then be redirected to the PWD environment.It may take a minute or so to provision out your PWD environment.
We are going to use worker3 for ALL our command line work. Click on worker3 to activate the shell.
Now we need to setup a few variables. We need to create DTR_URL and DTR_USERNAME. But the easiest way is to clone the Workshop Repo and run script.
git clone https://github.com/clemenko/dc18_supply_chain.git
Once cloned, now we can run the var_setup.sh script.
. dc18_supply_chain/scripts/var_setup.sh
Now your PWD environment variables are setup. We will use the variables for some scripting.
Before we create the repositories, let's start with enabling the Docker Image Scanning engine.
-
From the main PWD screen click the
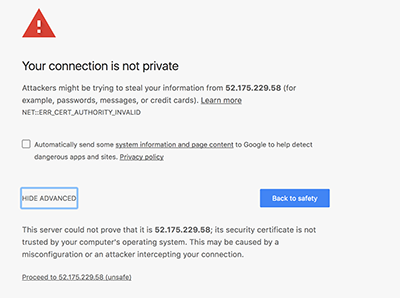
DTRbutton on the left side of the screenNote: Because this is a lab-based install of Docker EE we are using the default self-signed certs. Because of this your browser may display a security warning. It is safe to click through this warning.
In a production environment you would use certs from a trusted certificate authority and would not see this screen.
-
Navigate to
Systemon the left pane, thenSecurity.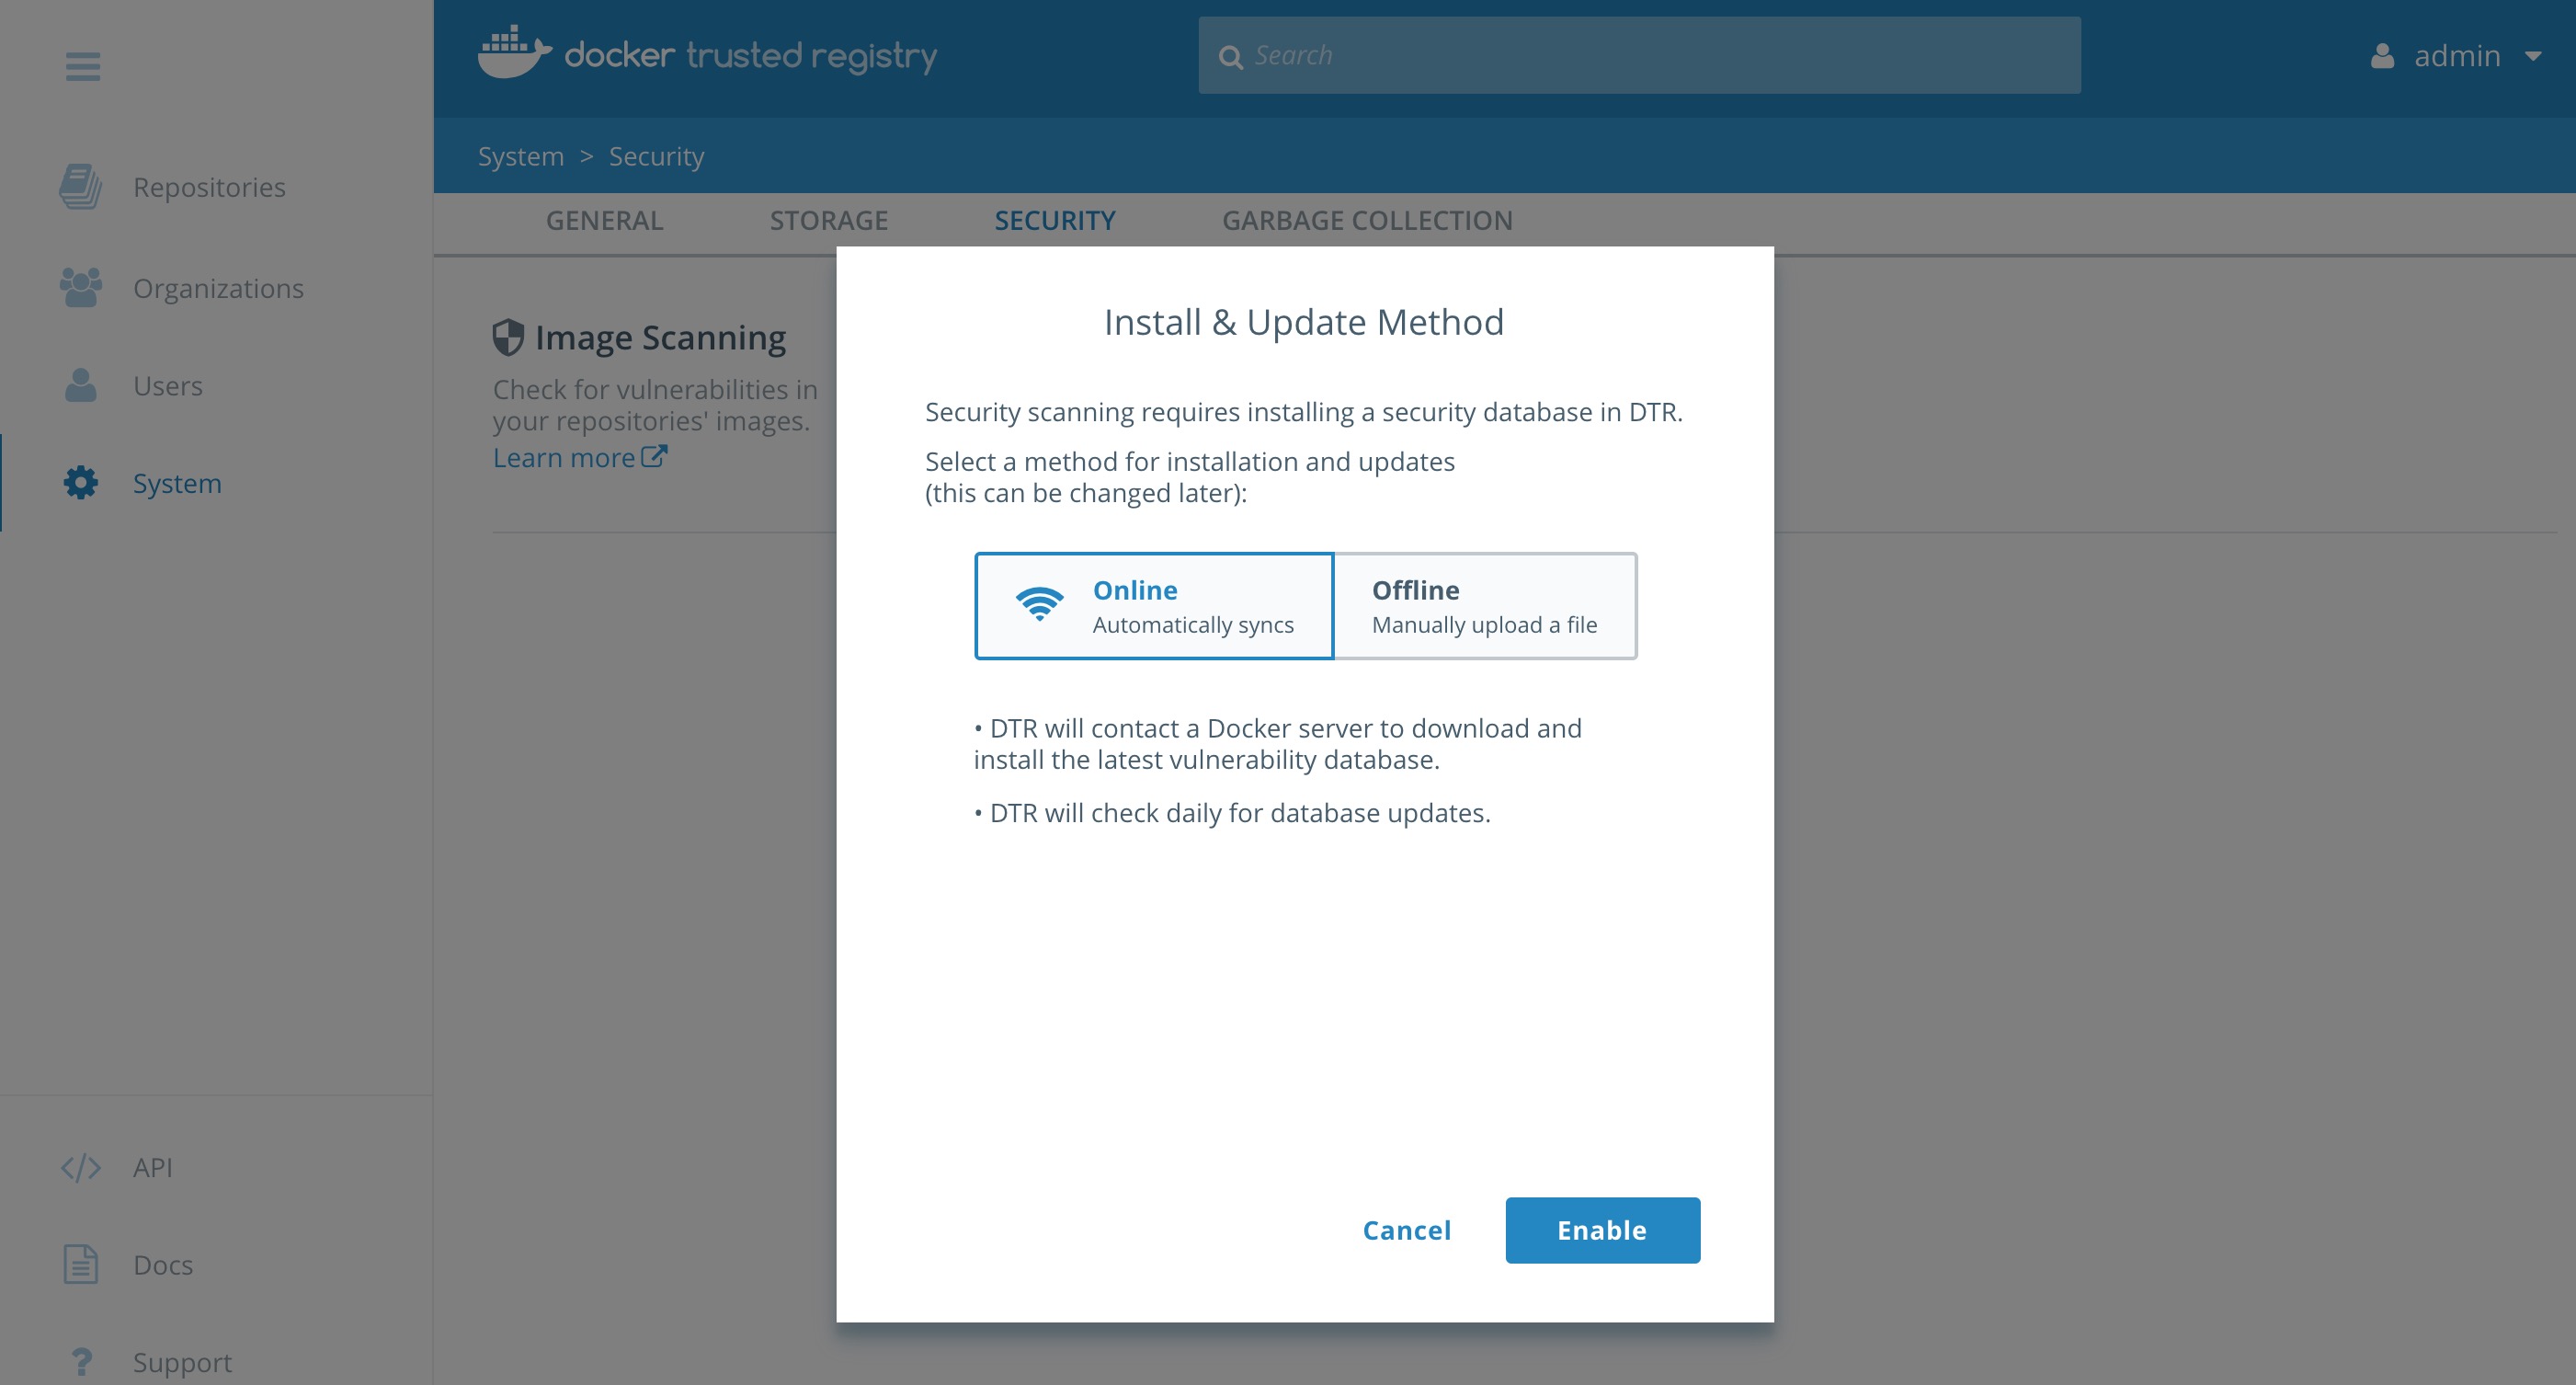
-
Select
Enable Scanning. In the popup leave it inOnlinemode and selectEnable. The CVE database will start downloading. This can take a few minutes. Please be patient for it to complete.


You will notice the yellow banner while DTR is downloading the CVE database. It will take some time to download.
In order to setup our automation we need to create an organization and a user account for Jenkins. We are going to create a user named jenkins in the organization ci.
- From the
PWDmain page click onDTR.

- Once in
DTRnavigate toOrganizationson the left. - Now click
New organization. - Type in
ciand clickSave.

Now we should see the organization named ci.

While remaining in DTR we can create the user from here.
- Click on the organization
ci. - Click
Add user. - Make sure you click the radio button
New. Add a new user namejenkins. Set a simple password that you can remember. Maybeadmin1234?

Now change the permissions for the jenkins account to Org Owner.

Now that we have the jenkins user created we need to add a token for use with DTR's API.
Navigate to Users on the left pane. Click on jenkins, then click the Access Tokens tab.

Click New access token. Enter api into the description field and click Create.
Write down the token that is displayed. You will need this again!
It should look like ee9d7ff2-6fd4-4a41-9971-789e06e0d5d5. Click Done.
Lets add it to the worker3 environment. Replace <TOKEN> with the token from DTR.
#example
#export DTR_TOKEN=ee9d7ff2-6fd4-4a41-9971-789e06e0d5d5
export DTR_TOKEN=<TOKEN>
We now need to access Docker Trusted Registry to setup two repositories.
We have an easy way with a script or the hard way by using the GUI.
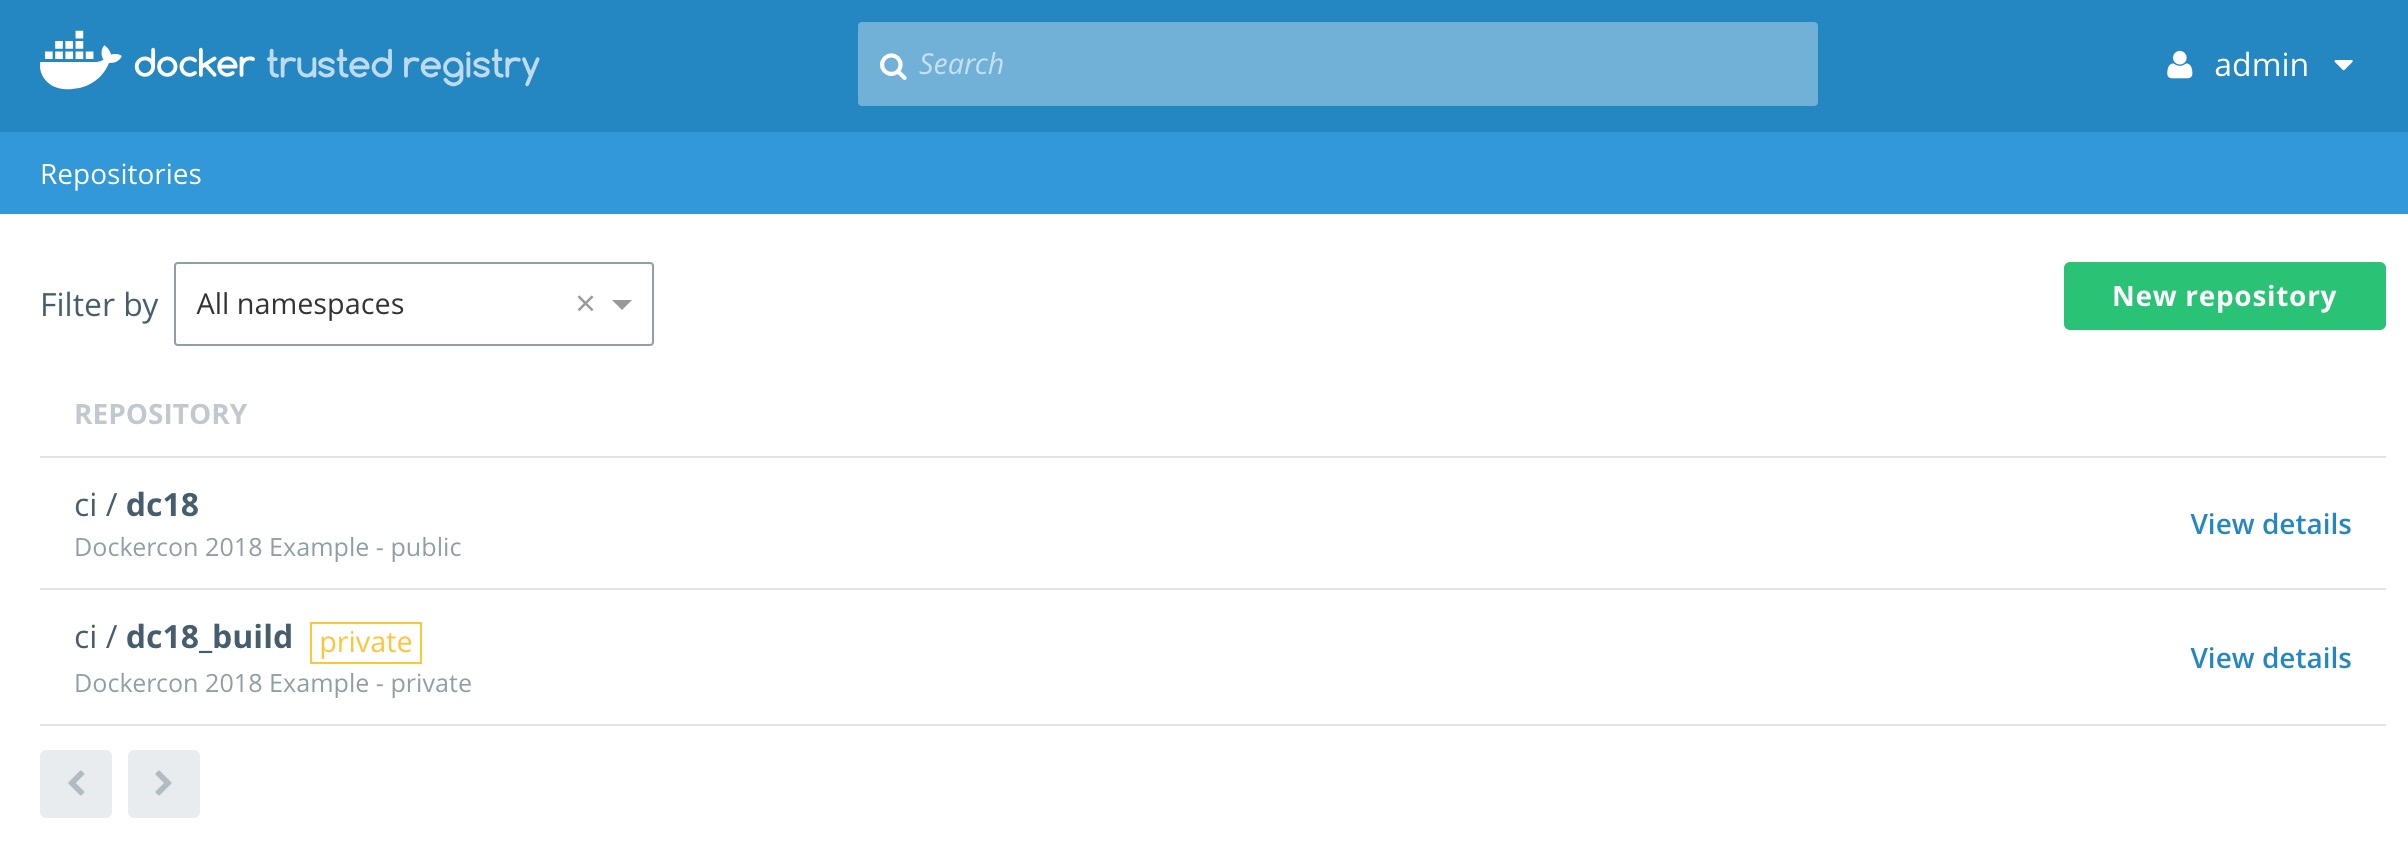
Either way we need to create two repositories, dc18_build and dc18. dc18_build will be used for the private version of the image. dc18 will be the public version once an CVE scan is complete.
Easy Way:
Since we used git clone to copy the repository to worker3 for this workshop, there is a script from that will create the DTR repositories.
./dc18_supply_chain/scripts/create_repos.sh
Feel free to cat the file to see how we are using curl and the API to create the repositories.
[worker3] (local) root@10.20.0.38 ~
$ cat dc18_supply_chain/scripts/create_repos.sh
#!/bin/bash
# requires environment variables: DTR_HOST, DTR_USERNAME and DTR_TOKEN

if [ -z "$DTR_TOKEN" ]; then
  echo " Please create a DTR_TOKEN variable before preceeding..."
  exit
fi

curl -X POST -k -L \
  -u $DTR_USERNAME:$DTR_TOKEN \
  https://$DTR_URL/api/v0/repositories/ci \
  -H 'Content-Type: application/json' \
  -d '{
  "enableManifestLists": true,
  "immutableTags": true,
  "longDescription": "",
  "name": "dc18",
  "scanOnPush": true,
  "shortDescription": "Dockercon 2018 Example - public",
  "visibility": "public"
}'

curl -X POST -k -L \
  -u $DTR_USERNAME:$DTR_TOKEN \
  https://$DTR_URL/api/v0/repositories/ci \
  -H 'Content-Type: application/json' \
  -d '{
  "enableManifestLists": true,
  "immutableTags": true,
  "longDescription": "",
  "name": "dc18_build",
  "scanOnPush": true,
  "shortDescription": "Dockercon 2018 Example - private",
  "visibility": "public"
}'
Hard Way:
-
Navigate to
Repositorieson the left menu and clickNew repository. -
Create that looks like
ci/dc18_build. Make sure you clickPrivate. Do not clickCreateyet! -
Click
Show advanced settingsand then clickOn PushunderSCAN ON PUSH. This will ensure that the CVE scan will start right after every push to this repository. And turn onIMMUTABILITY. Then clickCreate.
-
Now let's create the second repository in a similar fashion. Create a
Publicrepository asadmin/alpinewithSCAN ON PUSHset toOn Push. -
Repeat this for creating the
ci/dc18Publicrepository withSCAN ON PUSHset toOn Push. -
We should have two repositories now.


With the two repositories setup we can now define the promotion policy. The first policy we are going to create is for promoting an image that has passed a scan with zero (0) Critical vulnerabilities. The policy will target the ci/dc_18 repository.
-
Navigate to the
ci/dc18_buildrepository. ClickPromotionsand clickNew promotion policy.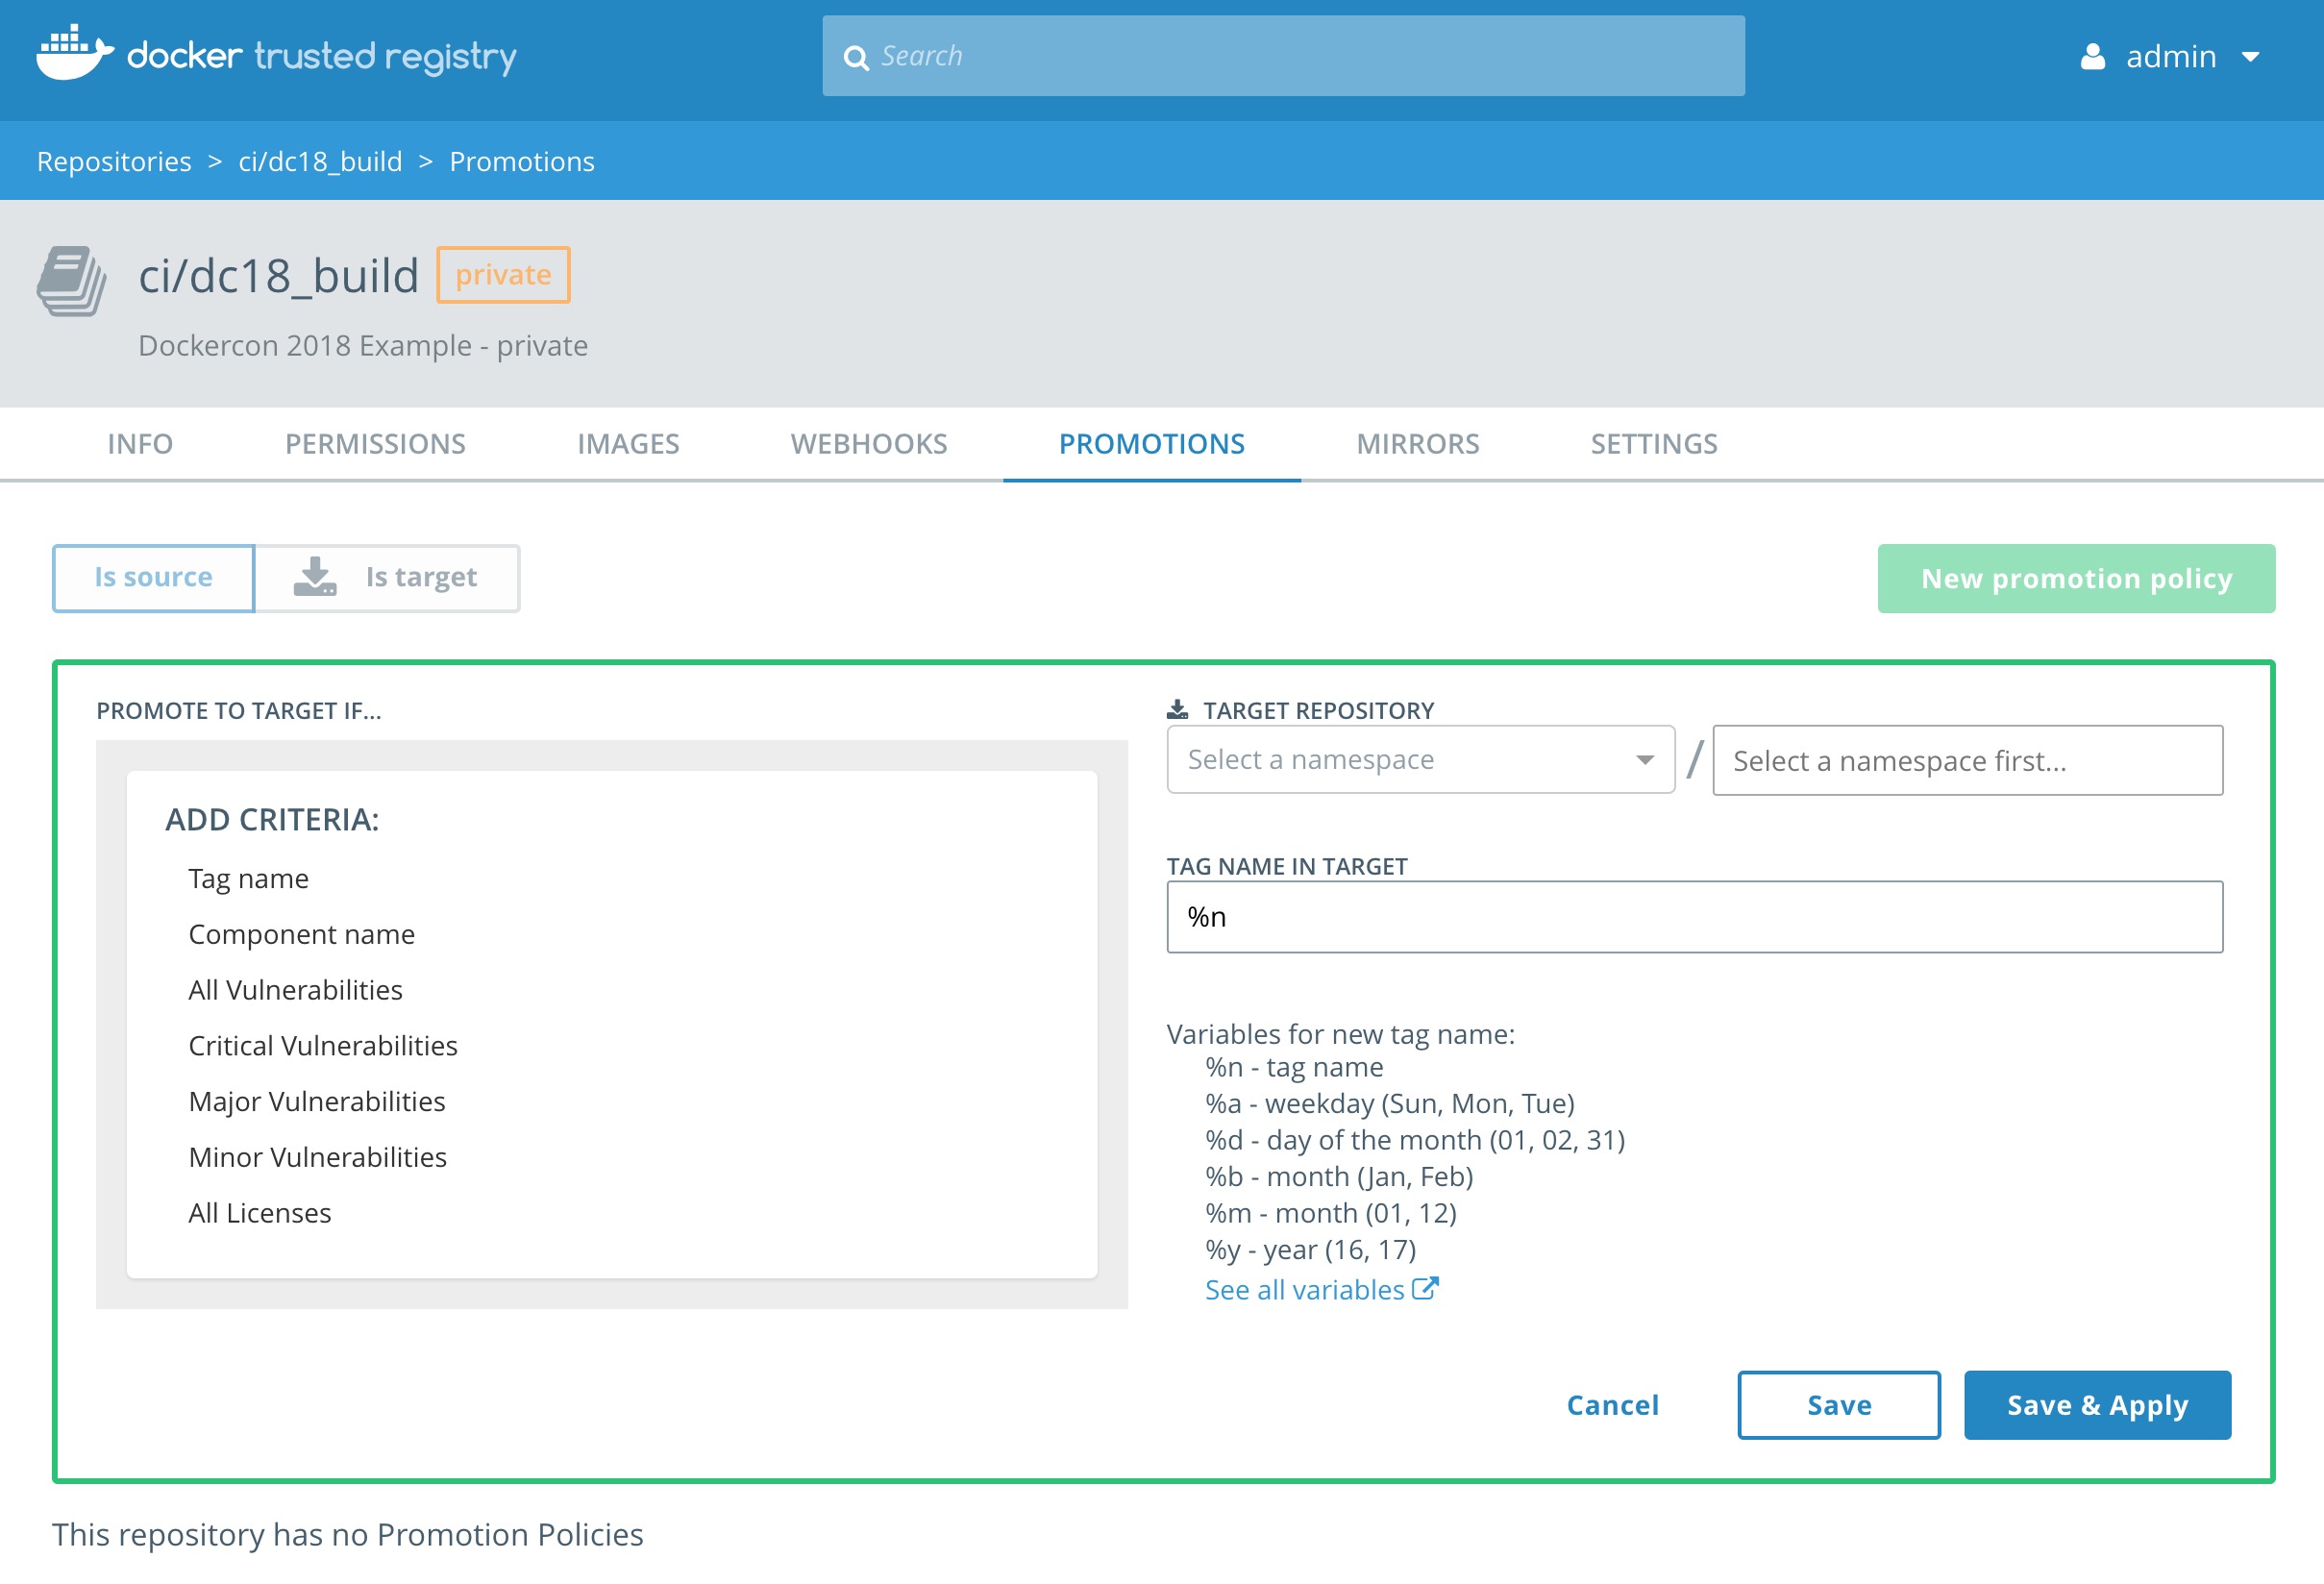
-
In the
PROMOTE TO TARGET IF...box selectCritical Vulnerabilitiesand then checkequals. In the box belowequalsenter the number zero (0) and clickAdd. -
Set the
TARGET REPOSITORYtoci/dc18and clickSave & Apply.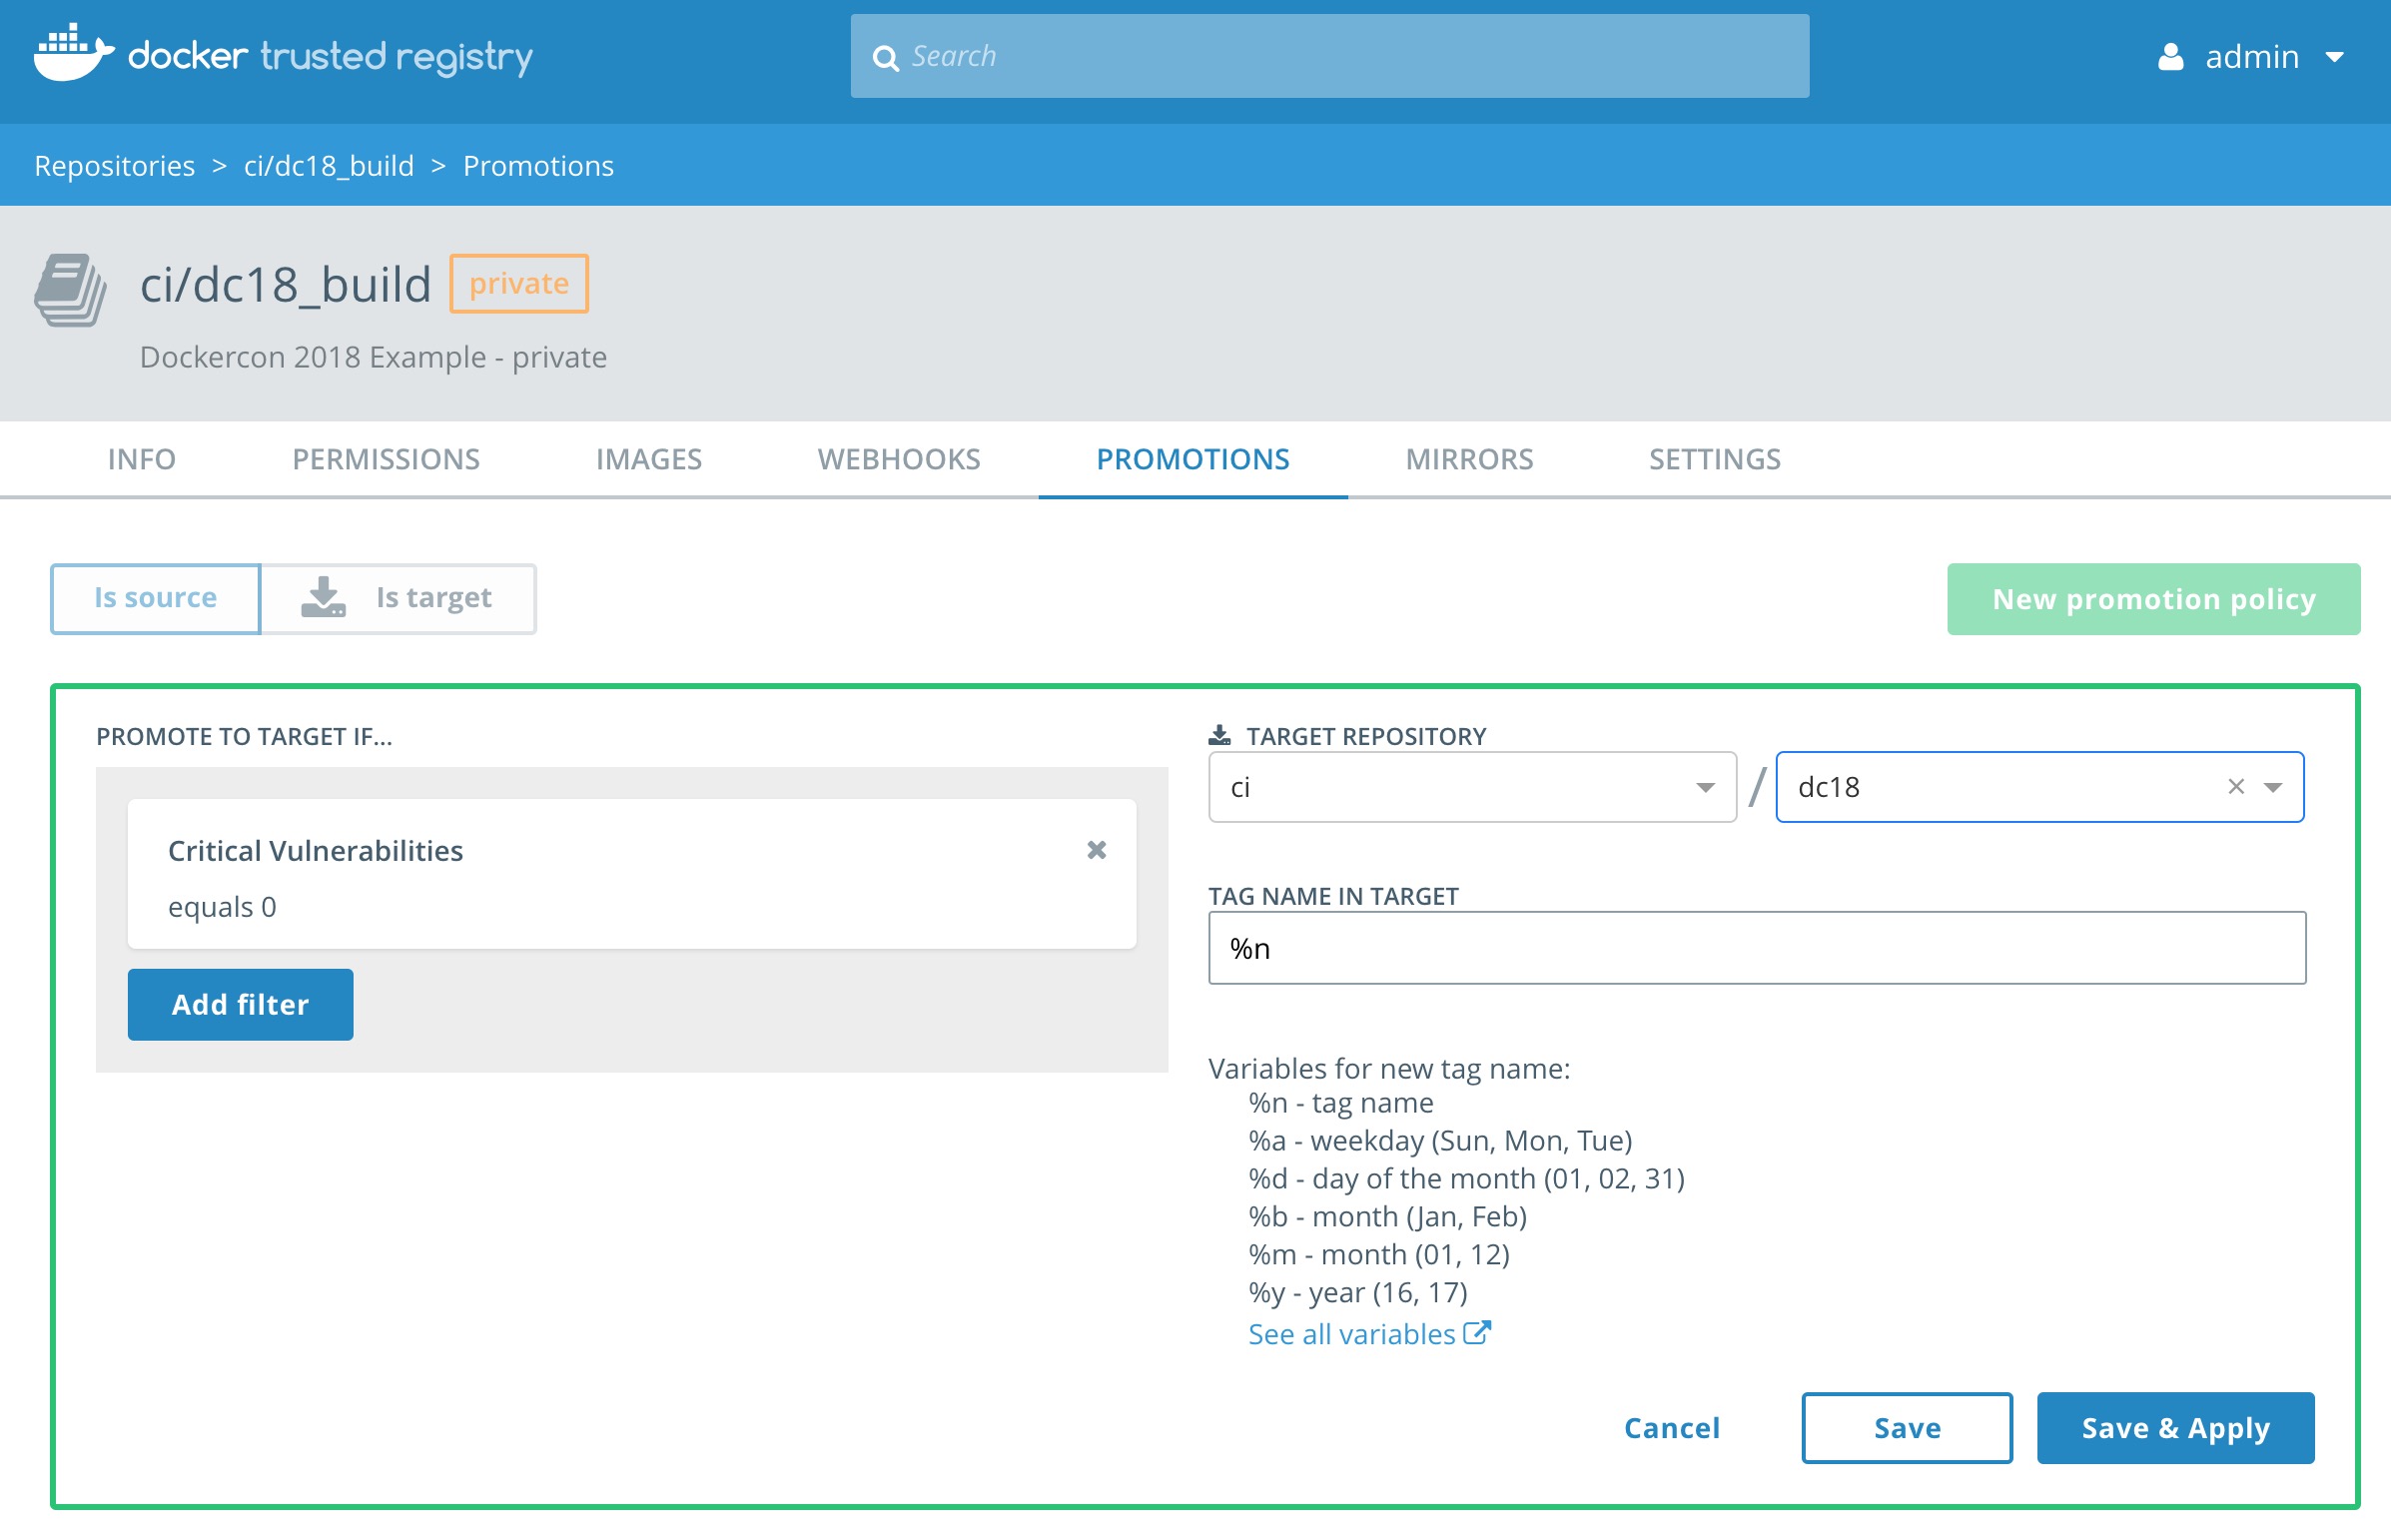


When we push an image to ci/dc18_build it will get scanned. Based on that scan report we could see the image moved to ci/dc18. Lets push a few images to see if it worked.
Lets pull, tag, and push a few images to YOUR DTR.
In order to push and pull images to DTR we will need to take advantage of PWD's Console Access.
- Navigate back to the PWD tab in your browser.
- Click on
worker3. - In the console we should already have a variable called
DTR_URL. Lets check.
echo $DTR_URL
If you are not sure please follow Task 1.1: Set Up Environment Variables.
-
Now we login to our DTR server using your
DTR_TOKENfrom Task 3.3: Create Jenkins DTR Token.docker login -u jenkins -p $DTR_TOKEN $DTR_URL -
Now we can start pulling a few images.
docker pull clemenko/dc18:0.1
docker pull clemenko/dc18:0.2
docker pull clemenko/dc18:0.3
docker pull alpine
This command is pull a few images from hub.docker.com.
-
Now let's tag the image for our DTR instance. We will use the
URLvariable we set before. The tag command looks likedocker image tag <FROM> <TO>.
docker tag clemenko/dc18:0.1 $DTR_URL/ci/dc18_build:0.1 docker tag clemenko/dc18:0.2 $DTR_URL/ci/dc18_build:0.2 docker tag clemenko/dc18:0.3 $DTR_URL/ci/dc18_build:0.3 docker tag alpine $DTR_URL/ci/dc18_build:alpine
7. Now we can `docker push` the images to DTR.
docker push $DTR_URL/ci/dc18_build:0.1 docker push $DTR_URL/ci/dc18_build:0.2 docker push $DTR_URL/ci/dc18_build:0.3 docker push $DTR_URL/ci/dc18_build:alpine
## <a name="task6"></a>Task 6: Review Scan Results
Lets take a good look at the scan results from the images. Please keep in mind this will take a few minutes to complete.
1. Navigate to DTR --> `Repostories` --> `ci/dc18_build` --> `Images`.
Do worry if you see images in a `Scanning...` or `Pending` state. Please click to another tab and click back.

2. Take a look at the details to see exactly what piece of the image is vulnerable.

Click `View details` for an image that has vulnerabilities. How about `0.2`? There are two views for the scanning results, **Layers** and **Components**. The **Layers** view shows which layer of the image had the vulnerable binary. This is extremely useful when diagnosing where the vulnerability is in the Dockerfile.

The vulnerable binary is displayed, along with all the other contents of the layer, when you click the layer itself. In this example there are a few potentially vulnerable binaries:

Now we have a chance to review each vulnerability by clicking the CVE itself, example `CVE-2017-17522`. This will direct you to Mitre's site for CVEs.

Now that we know what is in the image. We should probably act upon it.
### <a name="task6.1"></a>Task 6.1: Hide Vulnerabilities
If we find that they CVE is a false positive. Meaning that it might be disputed, or from OS that you are not using. If this is the case we can simply `hide` the image. This will not remove the fact that the CVE was hidden.
1. Click `hide` for the two CVEs.

If we click back to `Images` we can now see that the image is clean.

Once we have hidden some CVEs we might want to perform a manual promotion of the image.
### <a name="task6.2"></a>Task 6.2: Manually Promote Image
Manual promotions are useful for those times that you need to move an image from a `Private` repository to a `Public` one. To perform a manual promotion :
1. Click on an image's details. Lets go back to `0.2`, now click `Promote`. Lets `Promote` the image to `ci`/`dc18` with a tag of `promoted`.

2. Click `Promote`.
Lets look at the promoted image.
3. Navigate to `ci`/`dc18` --> `Images`. Notice the `PROMOTED` badge next to the TAG.

Now that we use automated and manual promotions. Maybe we can extend promoting images beyond DTR.
## <a name="task7"></a>Task 7: Extend with Image Mirroring
Docker Trusted Registry allows you to create mirroring policies for a repository. When an image gets pushed to a repository and meets a certain criteria, DTR automatically pushes it to repository in another DTR deployment or Docker Hub.
This not only allows you to mirror images but also allows you to create image promotion pipelines that span multiple DTR deployments and datacenters. Let's set one up. How about we mirror an image to [hub.docker.com](https://hub.docker.com)?
1. Go to [hub.docker.com](https://hub.docker.com) and create an login and repository.
2. Navigate to `Repositories` --> `ci`/`dc18` --> `MIRRORS` --> `New mirror`.
Change the `REGISTRY TYPE` to `Docker Hub` and fill out the relevant information like:

3. Click `Connect` and scroll down.
4. Next create a `tag name` Trigger that is equal to `promoted`
5. Leave the `%n` tag renaming the same.
6. Click `Connect`.
7. Click `Save & Apply`.

Since we already had an image that had the tag `promoted` we should see that the image was pushed to [hub.docker.com](https://hub.docker.com). In fact we can click on the [hub](https://hub.docker.com) repository name to see if the image push was successful.

## <a name="task8"></a>Task 8: Docker Content Trust / Image Signing
Docker Content Trust/Notary provides a cryptographic signature for each image. The signature provides security so that the image requested is the image you get. Read [Notary's Architecture](https://docs.docker.com/notary/service_architecture/) to learn more about how Notary is secure. Since Docker EE is "Secure by Default," Docker Trusted Registry comes with the Notary server out of the box.
We can create policy enforcement within Universal Control Plane (UCP) such that **ONLY** signed images from the `ci` team will be allowed to run. Since this workshop is about DTR and Secure Supply Chain we will skip that step.
Let's sign our first Docker image?
1. Right now you should have a promoted image `$DTR_URL/ci/dc18:promoted`. We need to tag it with a new `signed` tag.
docker tag $DTR_URL/ci/dc18:promoted $DTR_URL/ci/dc18:signed
2. Now lets enable DCT.

 ```
 export DOCKER_CONTENT_TRUST=1
 ```

3. And push... It will ask you for a BUNCH of passwords. Do yourself a favor in this workshop and use `admin1234`. :D

 ```
 docker push $DTR_URL/ci/dc18:signed
 ```

 Here is an example output:

 ```
[worker3] (local) root@10.20.0.32 ~/dc18_supply_chain
$ docker push $DTR_URL/ci/dc18:signed
The push refers to a repository [ip172-18-0-24-bcd8s0ddffhg00b2o320.direct.ee-beta2.play-with-docker.com/ci/dc18]
cd7100a72410: Mounted from ci/dc18
signed: digest: sha256:8c03bb07a531c53ad7d0f6e7041b64d81f99c6e493cb39abba56d956b40eacbc size: 528
Signing and pushing trust metadata
You are about to create a new root signing key passphrase. This passphrase
will be used to protect the most sensitive key in your signing system. Please
choose a long, complex passphrase and be careful to keep the password and the
key file itself secure and backed up. It is highly recommended that you use a
password manager to generate the passphrase and keep it safe. There will be no
way to recover this key. You can find the key in your config directory.
Enter passphrase for new root key with ID baf4f85:
Repeat passphrase for new root key with ID baf4f85:
Enter passphrase for new repository key with ID 8688152 (ip172-18-0-24-bcd8s0ddffhg00b2o320.direct.ee-beta2.play-with-docker.com/ci/dc18):
Repeat passphrase for new repository key with ID 8688152 (ip172-18-0-24-bcd8s0ddffhg00b2o320.direct.ee-beta2.play-with-docker.com/ci/dc18):
Finished initializing "ip172-18-0-24-bcd8s0ddffhg00b2o320.direct.ee-beta2.play-with-docker.com/ci/dc18"
Successfully signed "ip172-18-0-24-bcd8s0ddffhg00b2o320.direct.ee-beta2.play-with-docker.com/ci/dc18":signed
Again please use the same password. It will simplify this part of the workshop.
In order to automate we need to deploy Jenkins. If you want I can point you to a few Docker Compose yamls. OR we have the easy way. The easy, aka script, deploys Jenkins as a docker stack deploy.
-
Take a look at the script. Also notice the script will check variables, and then runs
docker run.cat ./dc18_supply_chain/scripts/jenkins.sh -
Then run
./dc18_supply_chain/scripts/jenkins.sh -
Pay attention to the url AND Jenkins password. It will look like :
[worker3] (local) root@10.20.0.25 ~/ $ dc18_supply_chain/scripts/jenkins.sh ========================================================================================================= Jenkins URL : http://ip172-18-0-20-bcelih5dffhg00b2thog.direct.ee-beta2.play-with-docker.com:8080 ========================================================================================================= Waiting for Jenkins to start................ ========================================================================================================= Jenkins Setup Password = d32eda1cf2464b818826fd82b4f7c2cb ========================================================================================================= -
Now navigate to
http://$DOCS_URL:8080by clicking on the url in the terminal. Let's start the setup of Jenkins and enter the password. It may take a minute or two for theUnlock Jenkinspage to load. Be patient.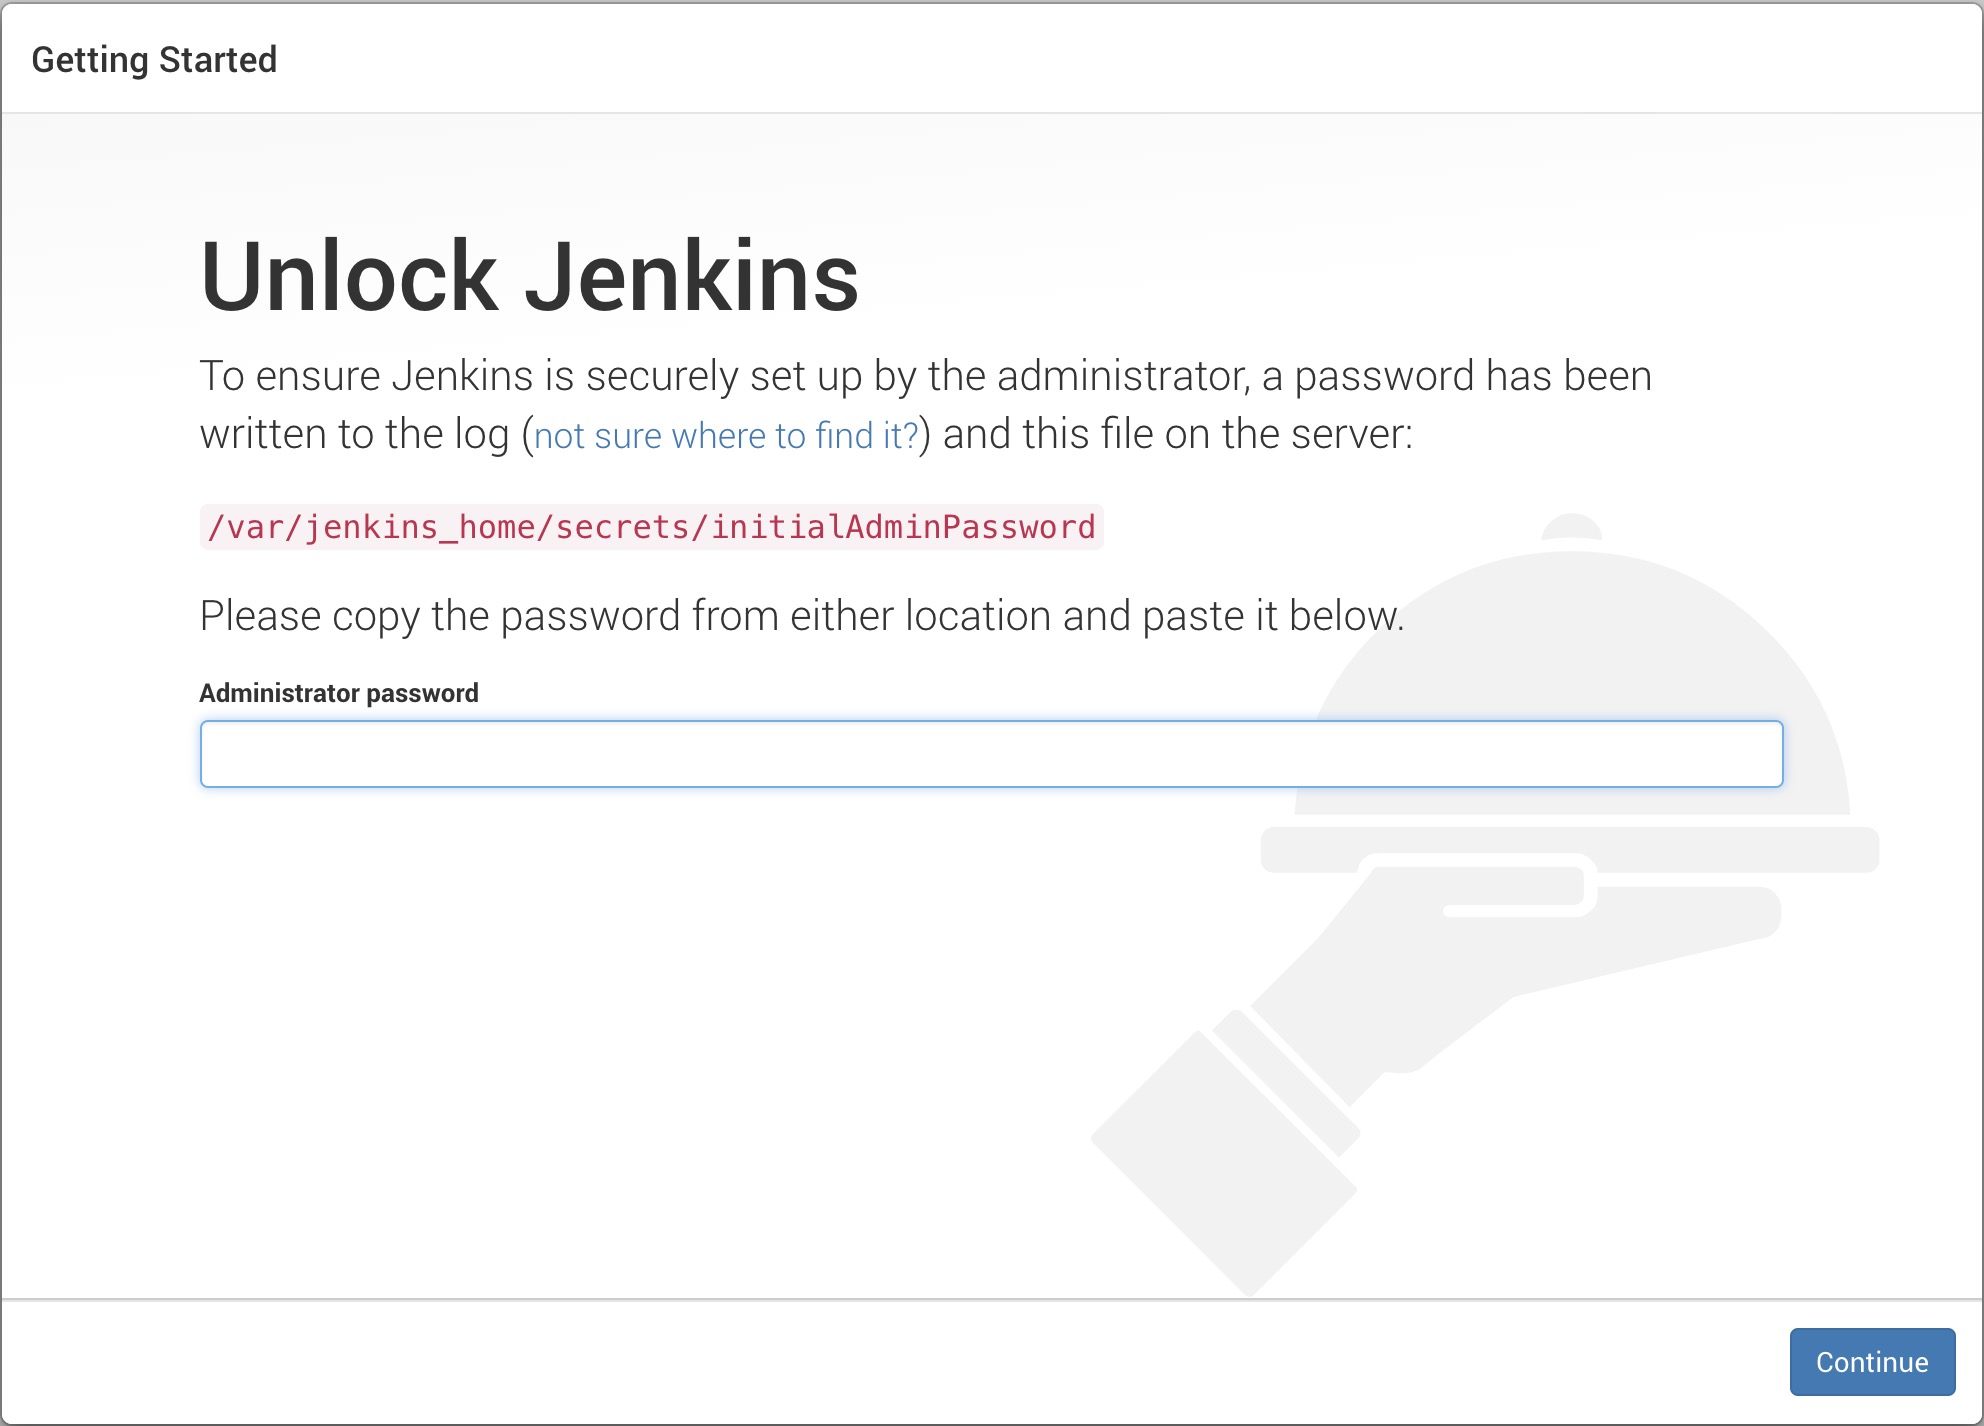
-
Click
Select plugins to install.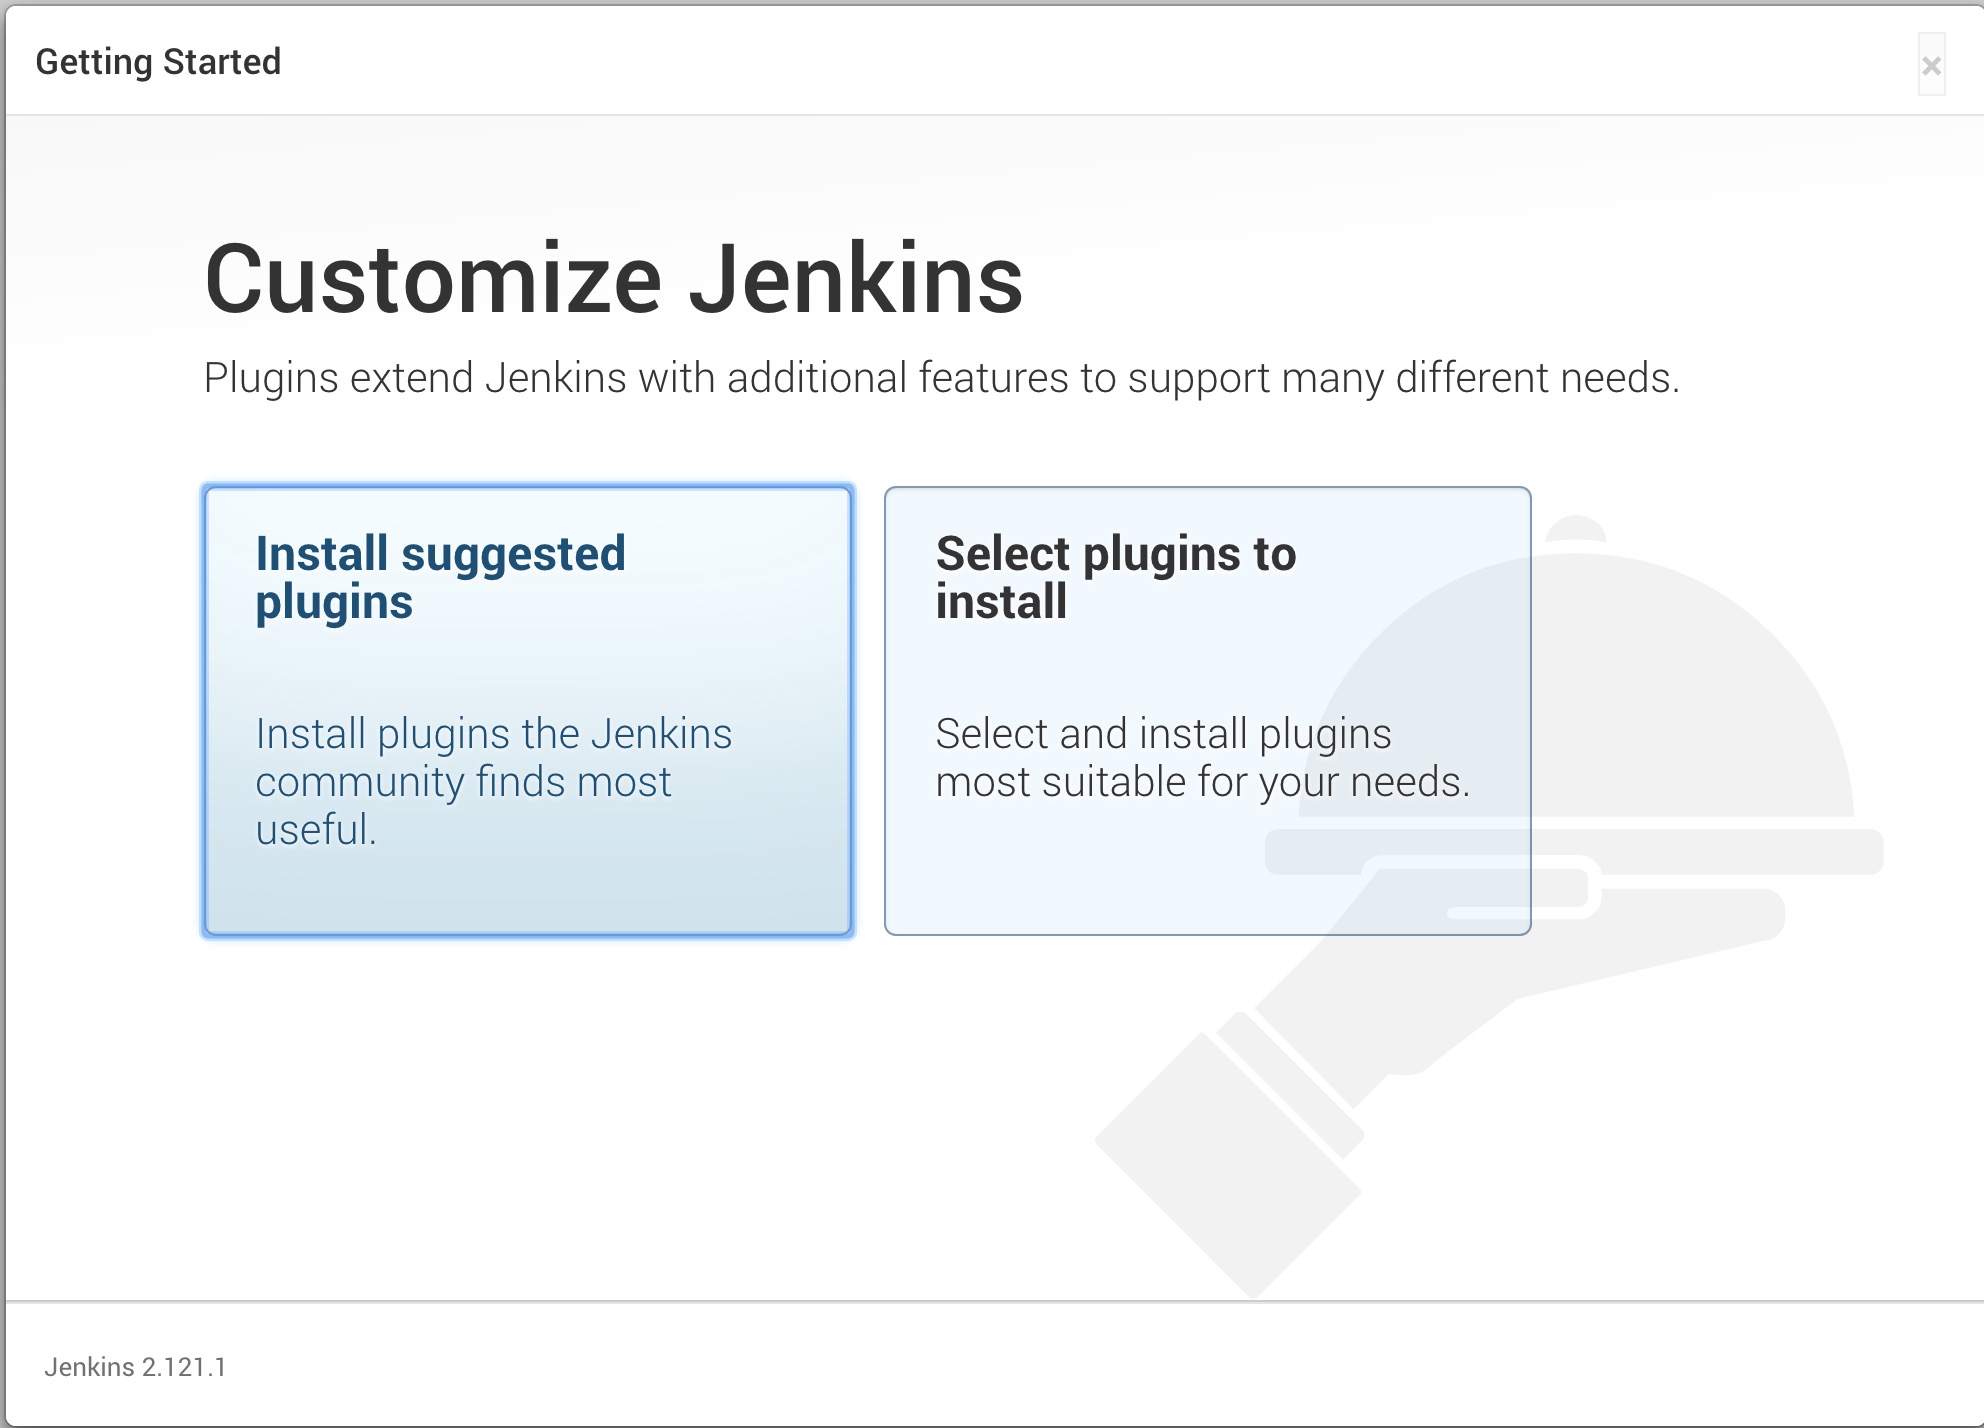
-
We don't need to install ANY plugins. Click
noneat the top.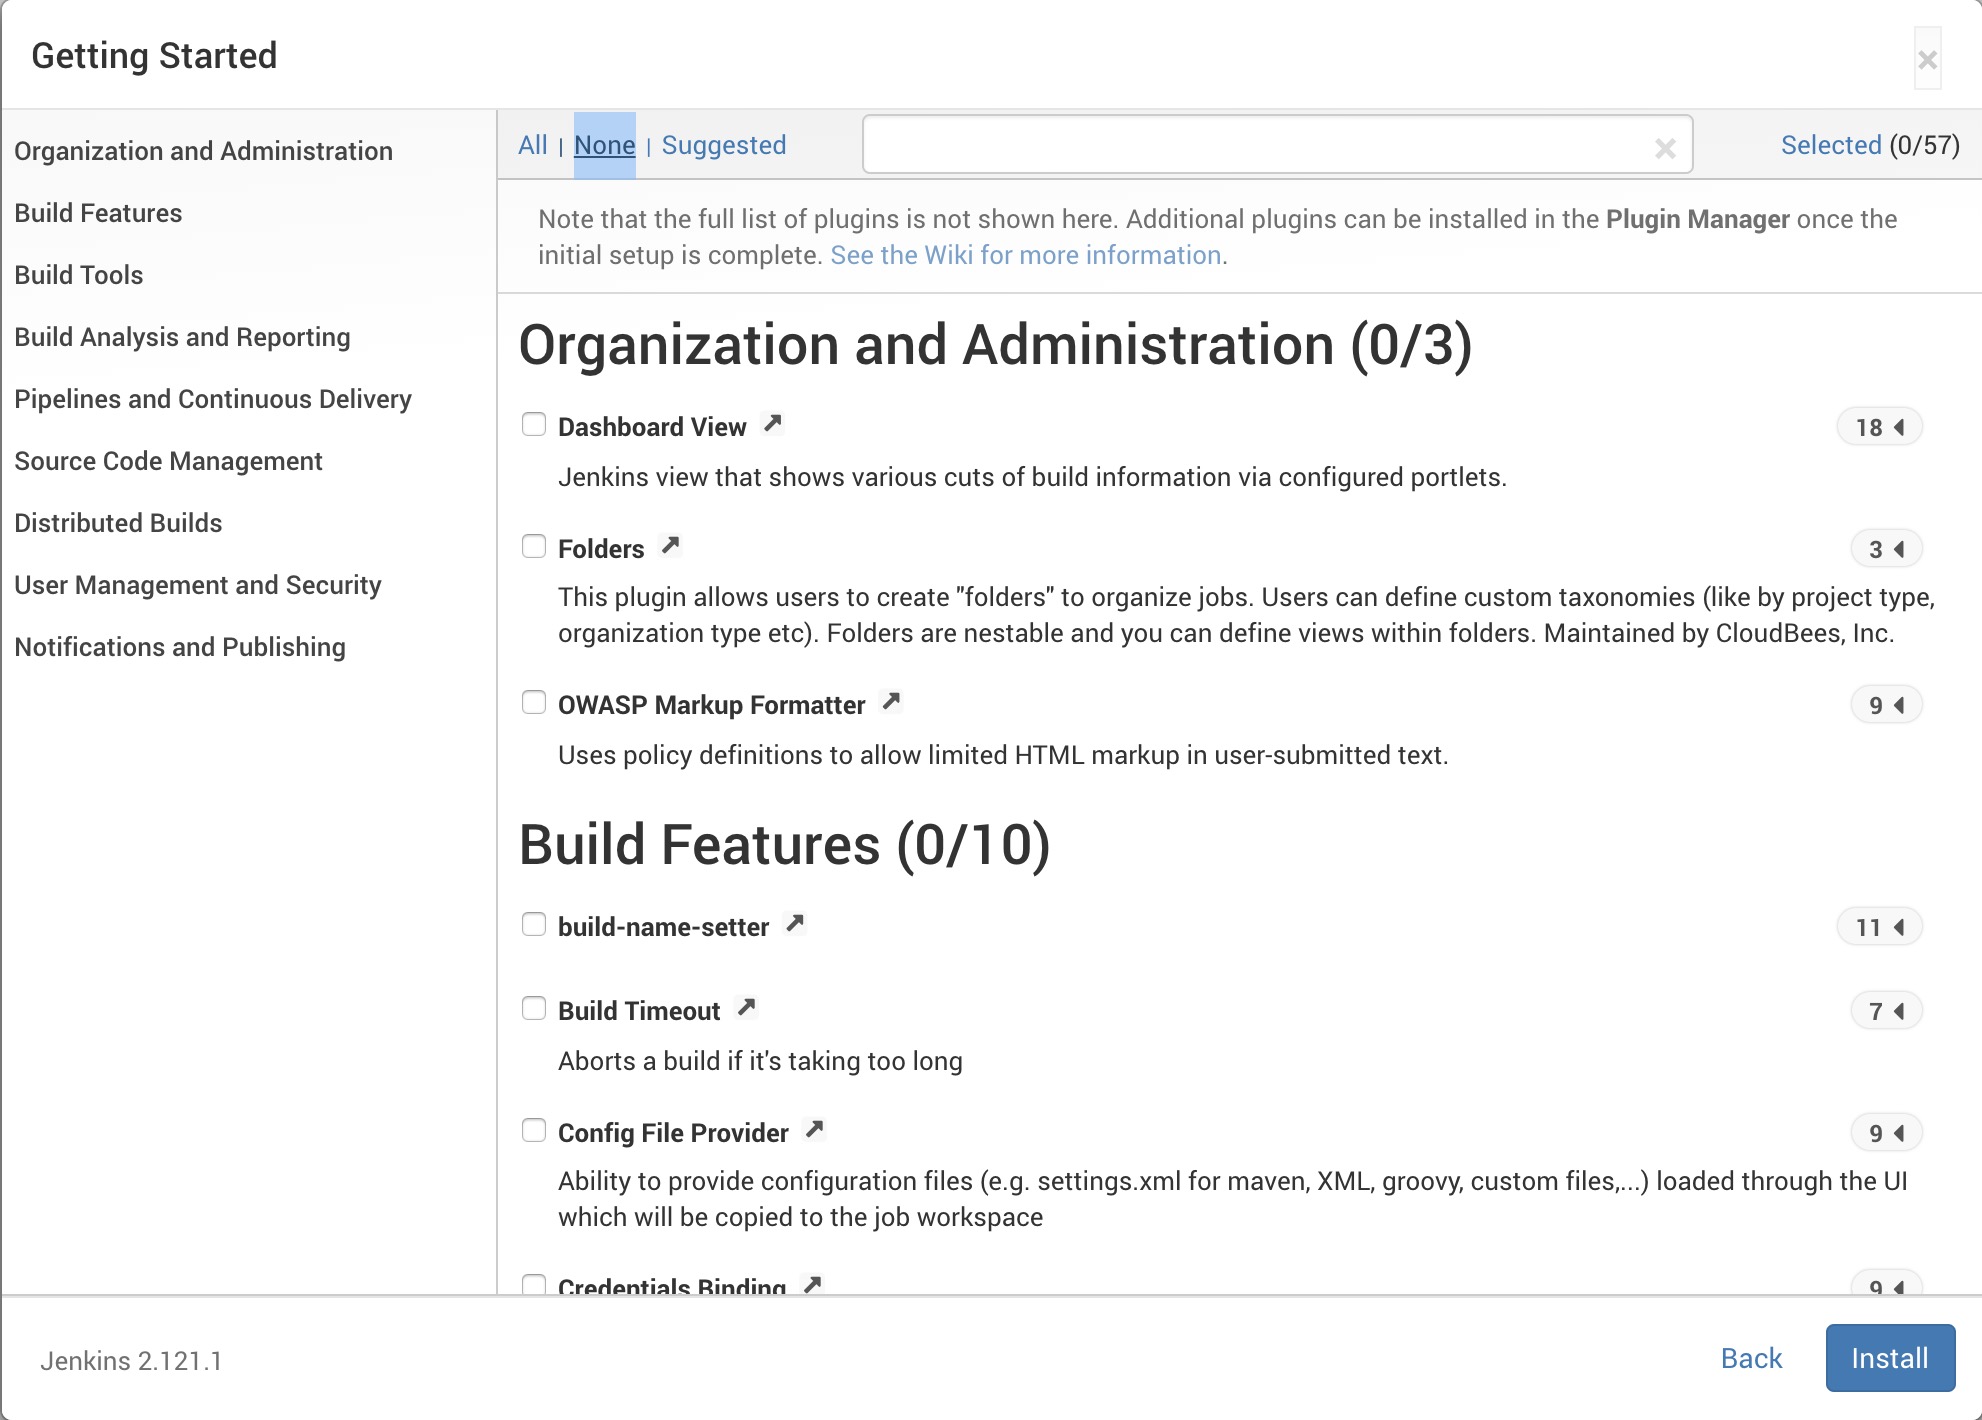
-
Next Click
Continue as adminin the lower right hand corner. We don't need to create another username for Jenkins.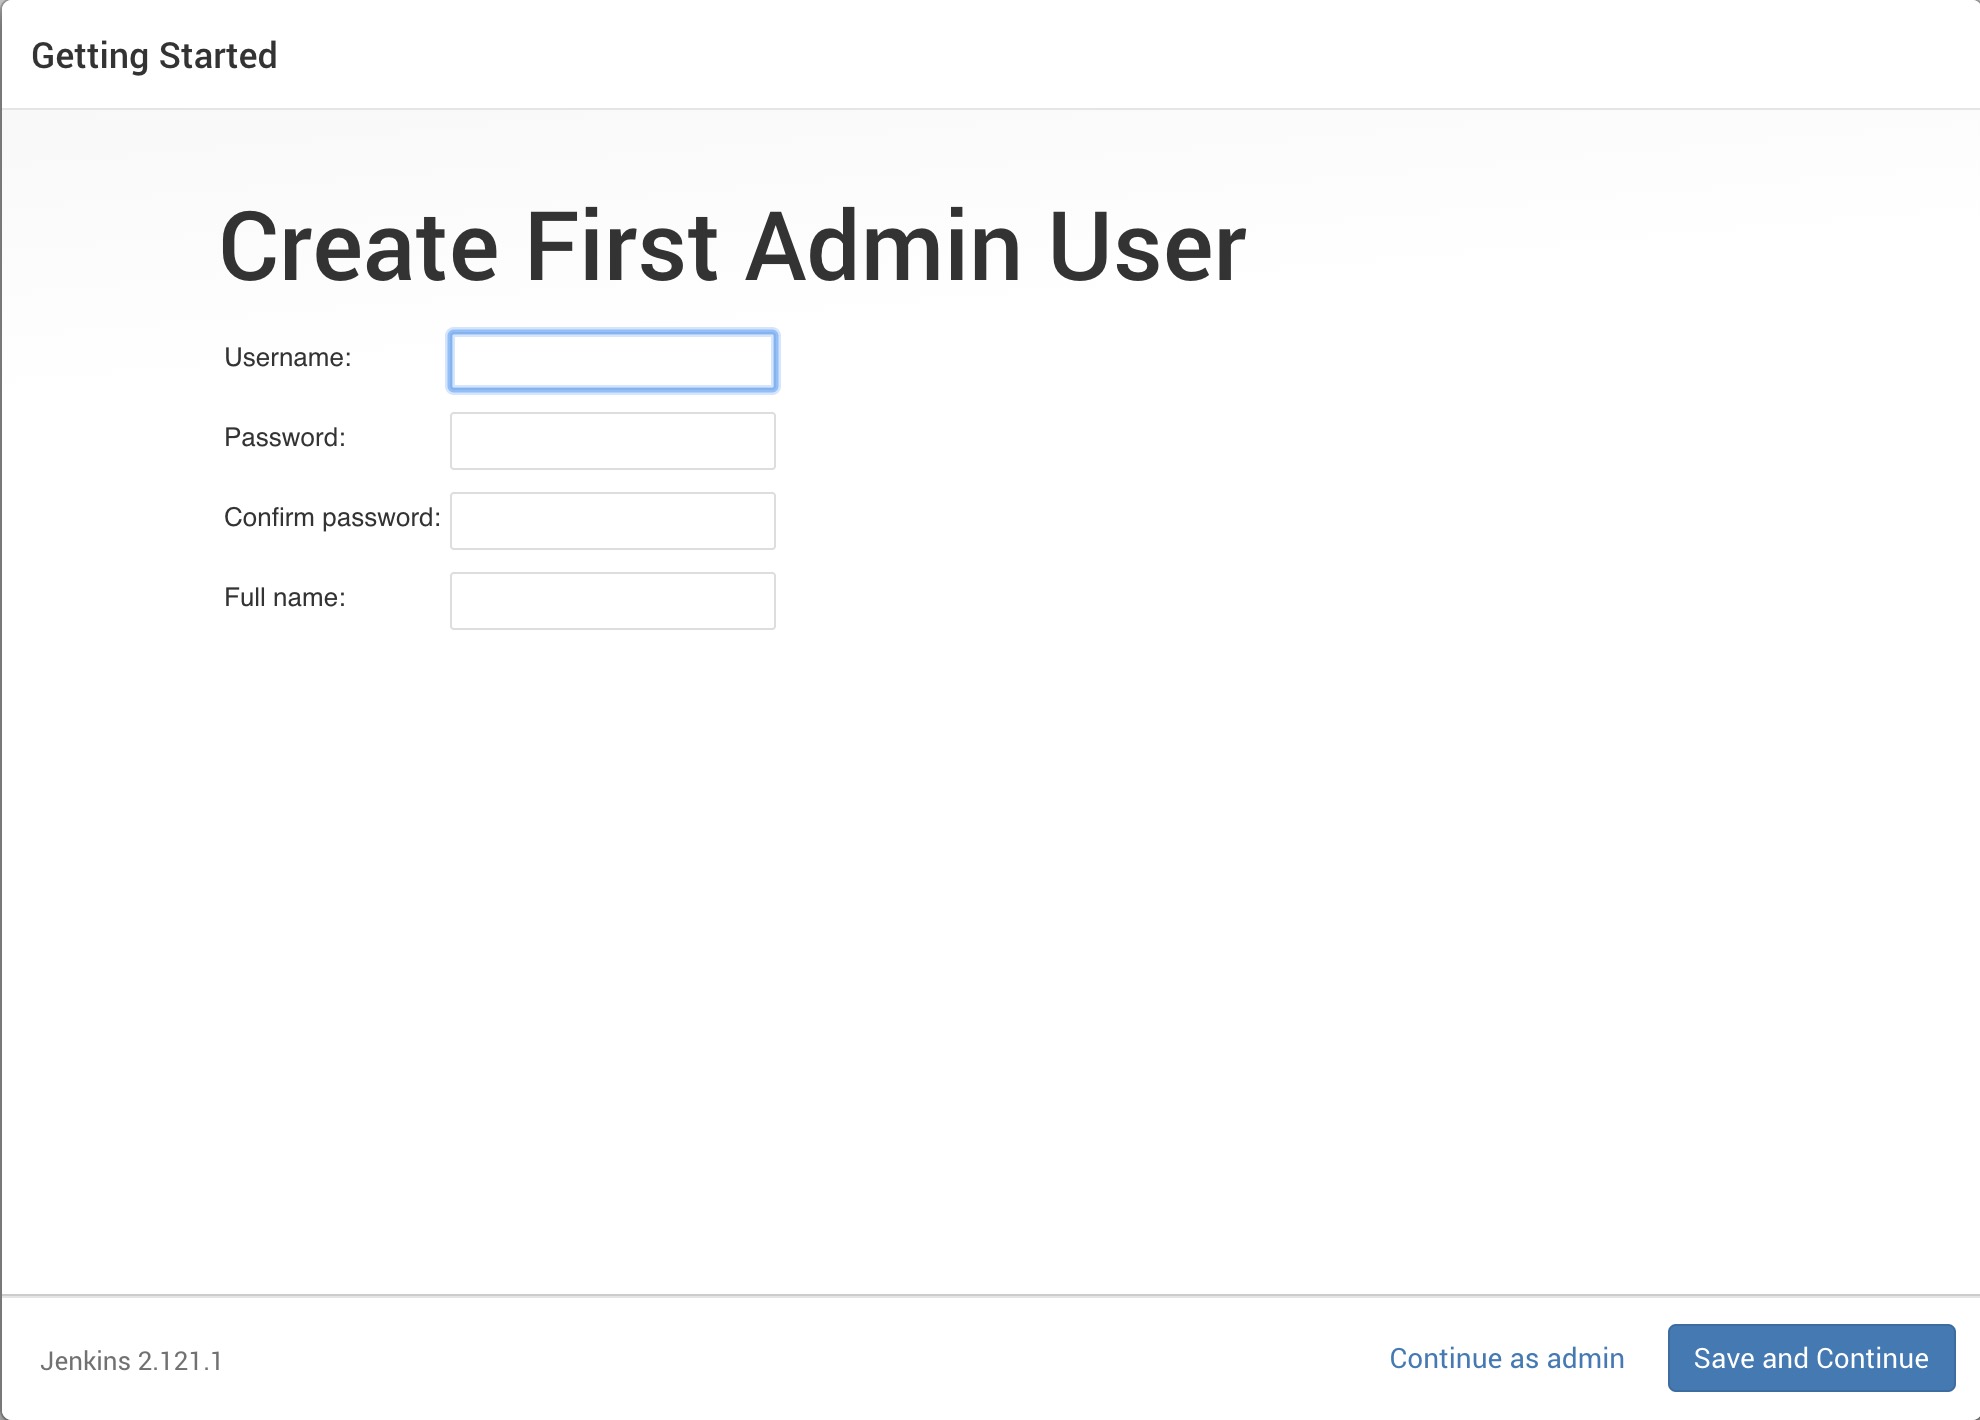
-
Next for Instance Configuration click
Save and Finish.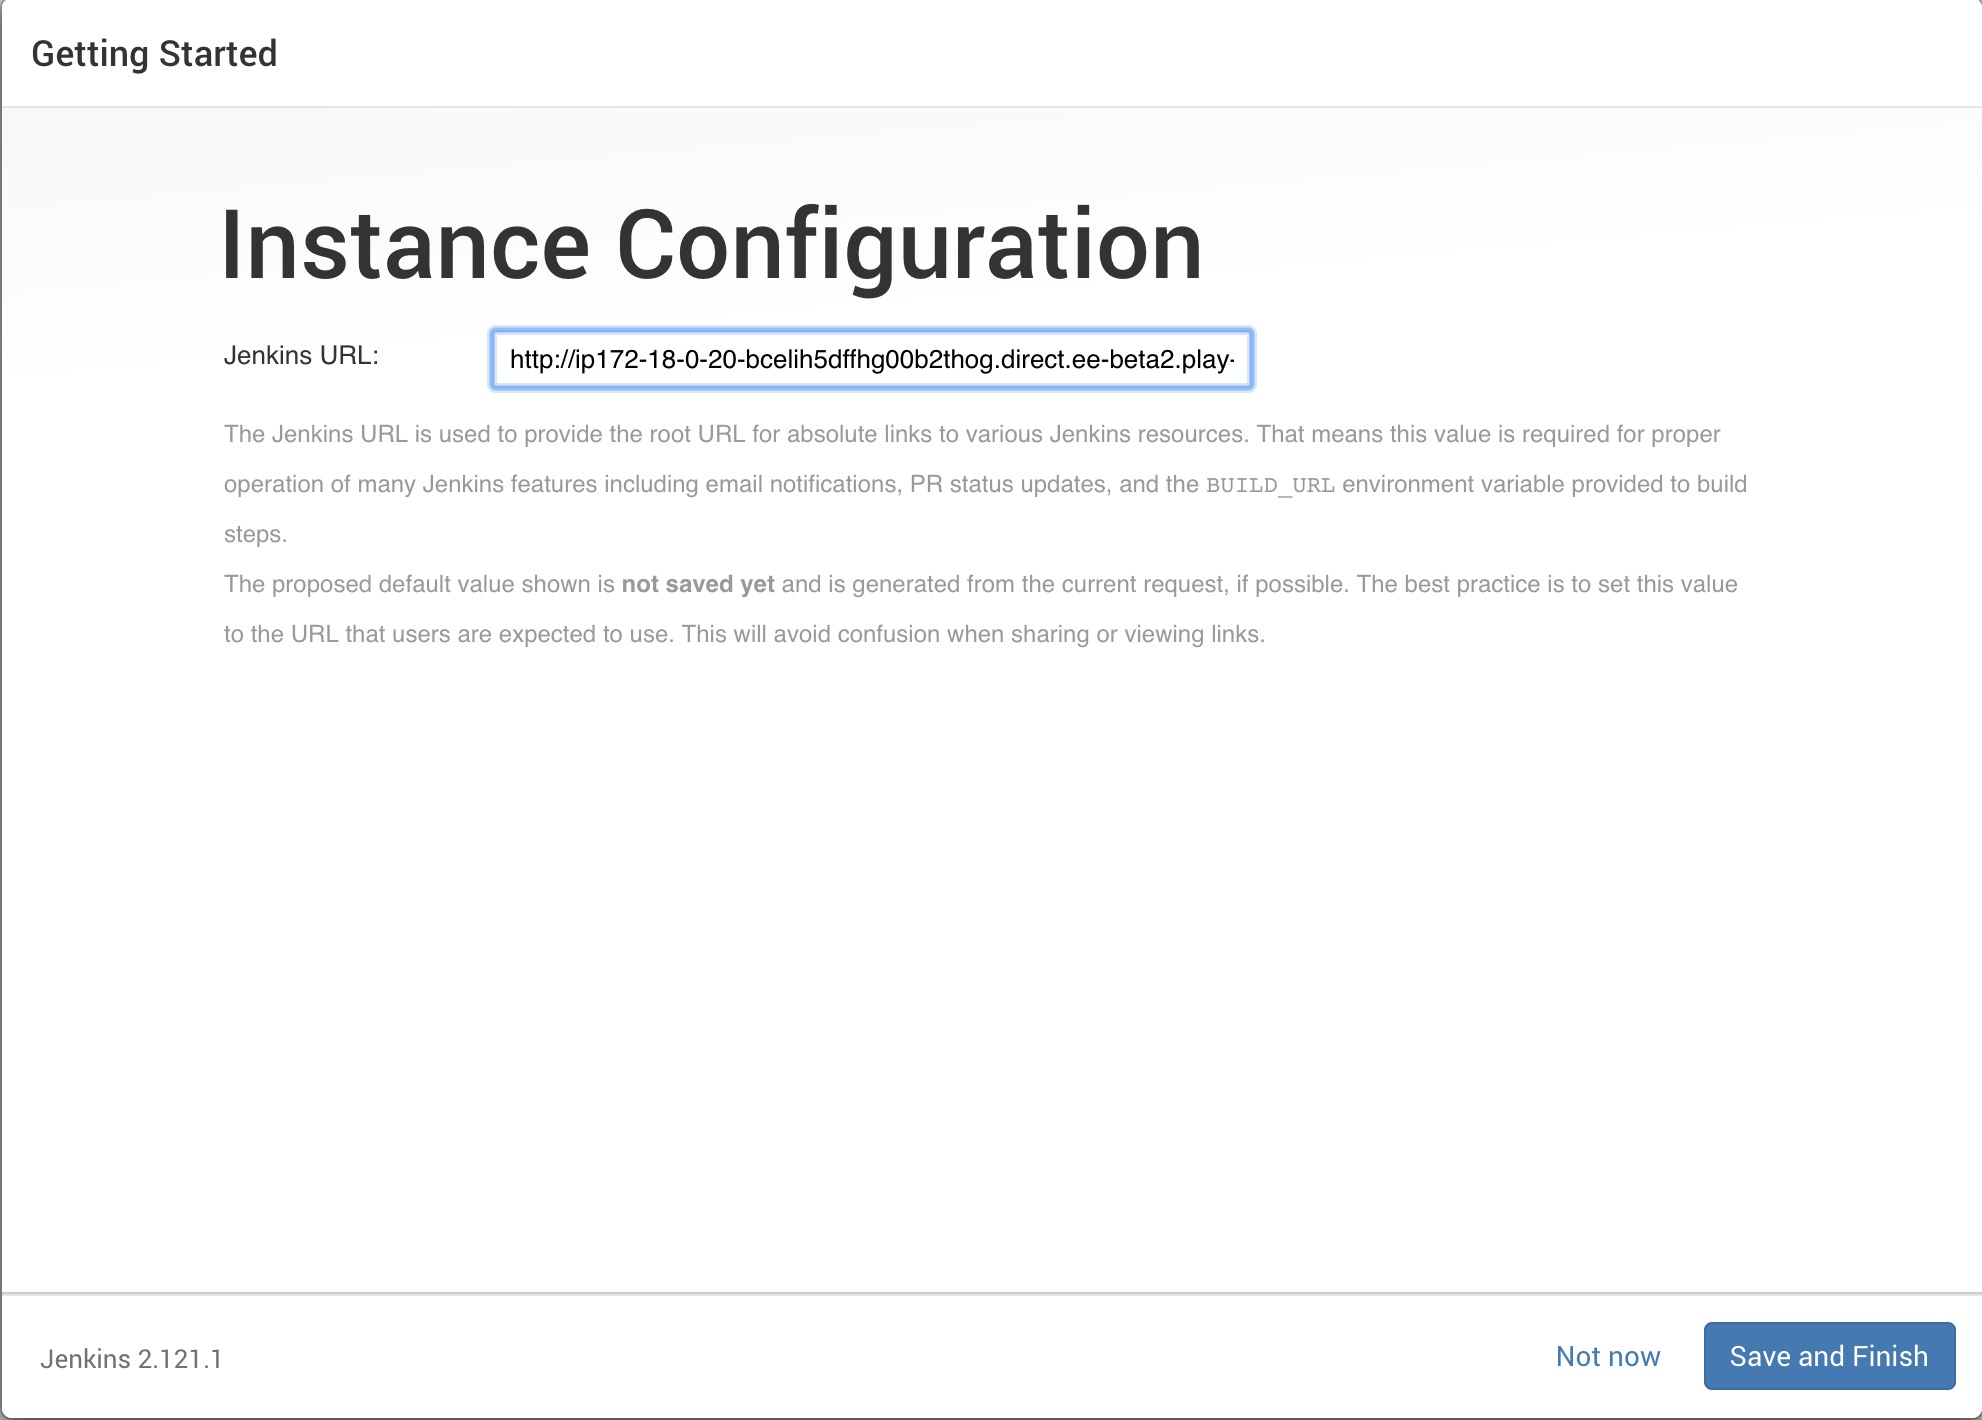
-
And we are done installing Jenkins. Click
Start using Jenkins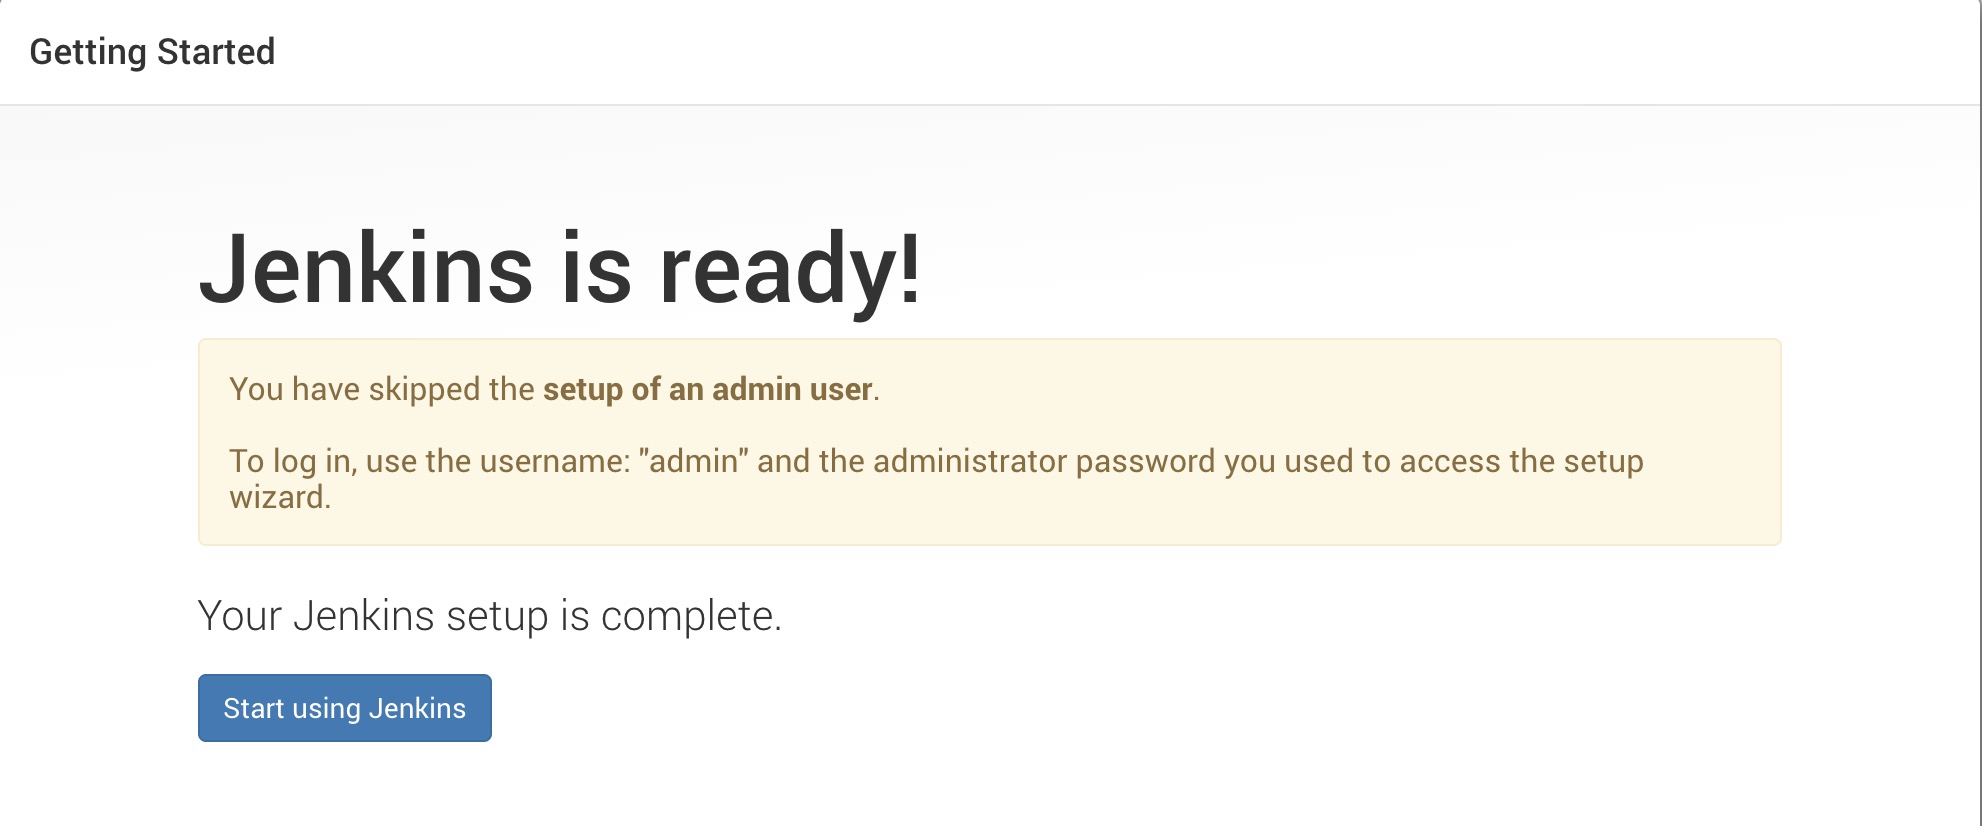


Now that we have Jenkins setup and running we can create our first "Item" or job.
-
Click on
New itemin the upper left.
-
Since we didn't install any plugins we should only see a
Freestyle project. Enter a name likeci_dc18, clickFreestyle projectand then clickOK.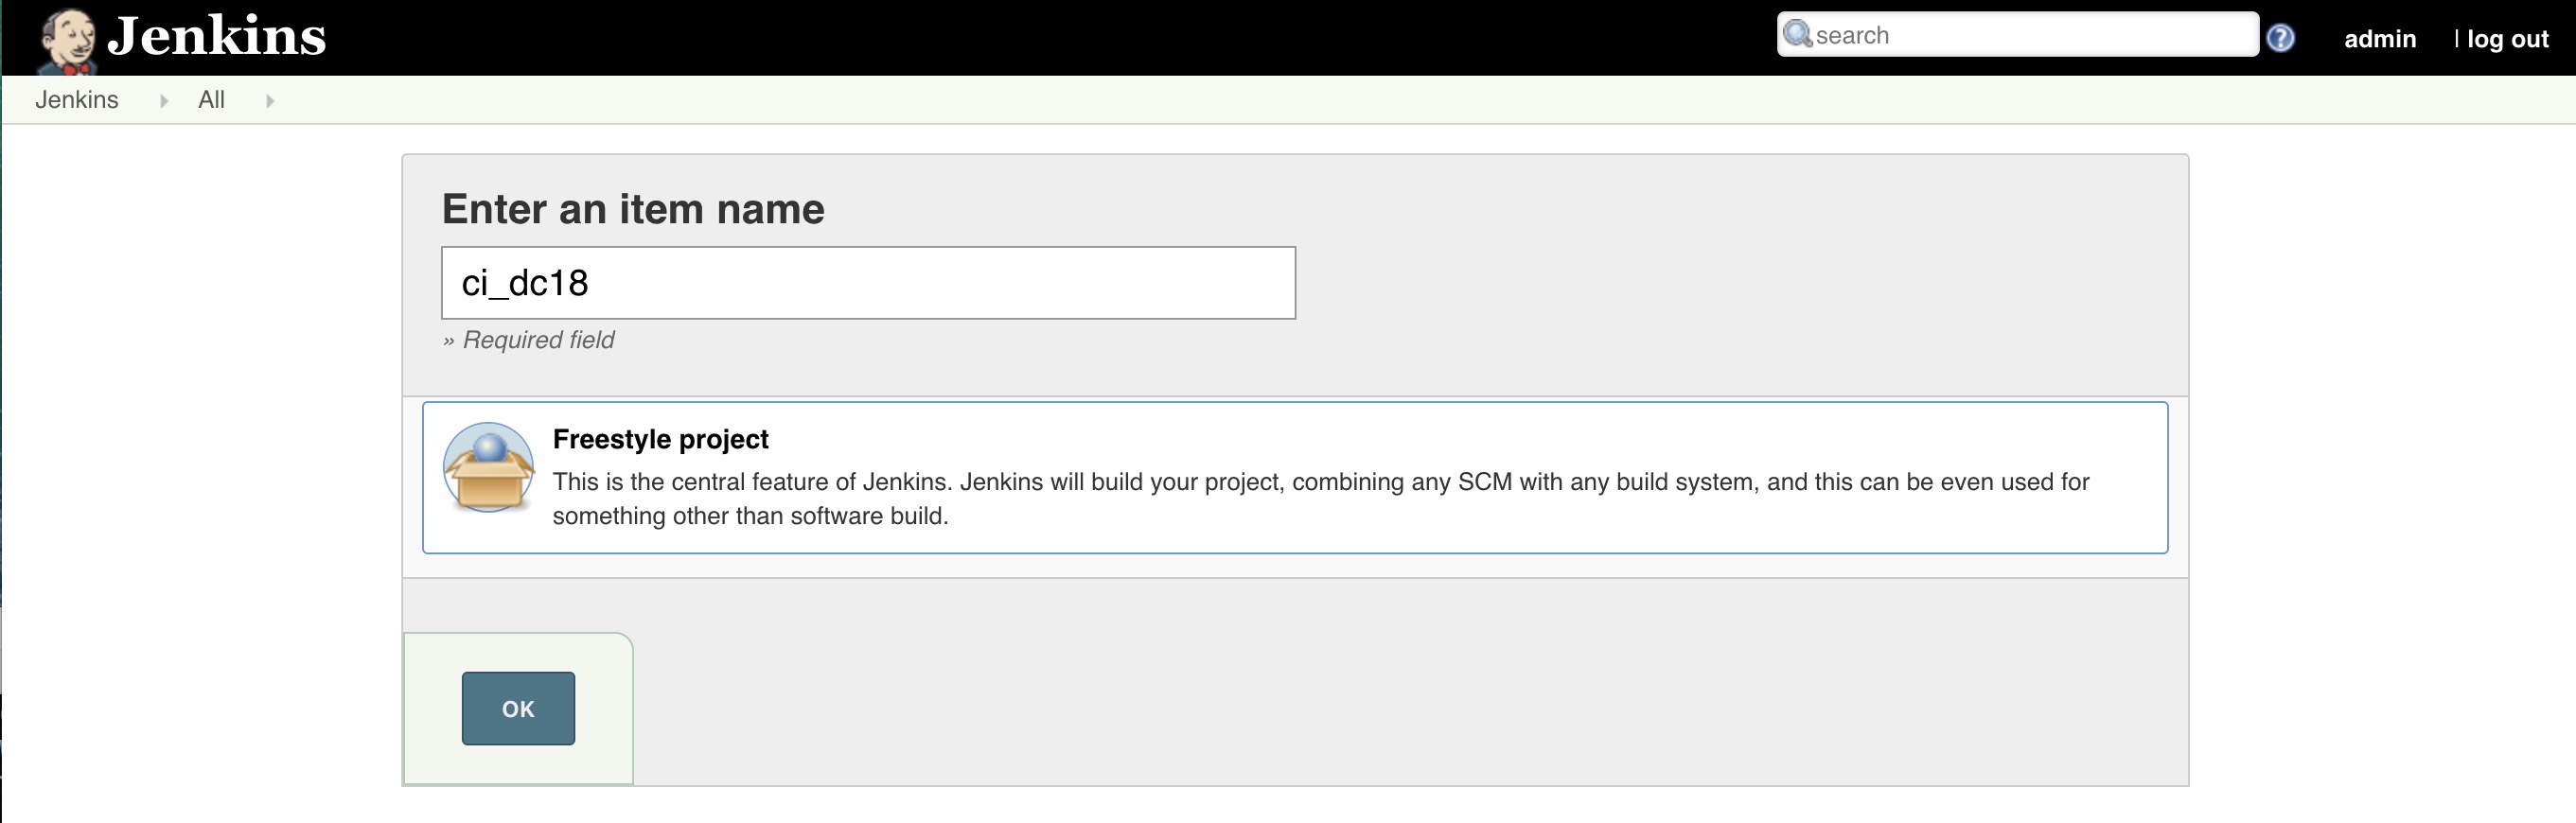
-
Let's scroll down to the
Buildsection. We will come back to theBuild Triggerssection in a bit. Now clickAdd build step-->Execute shell.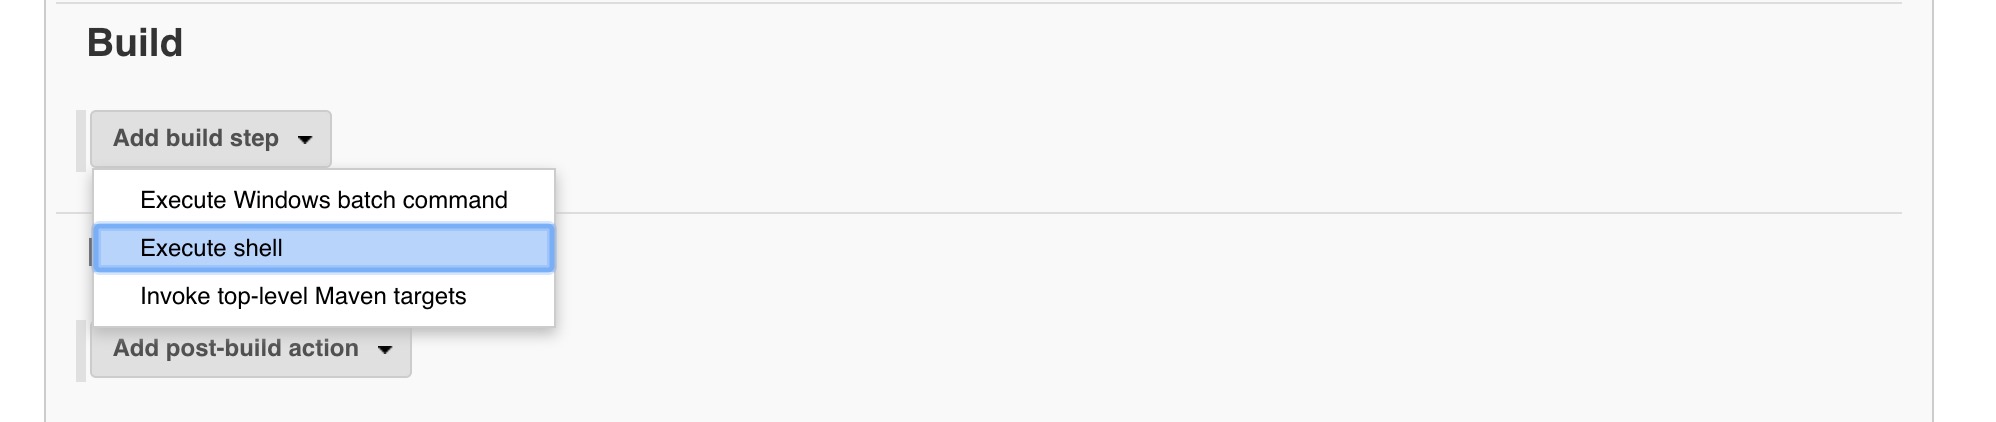
-
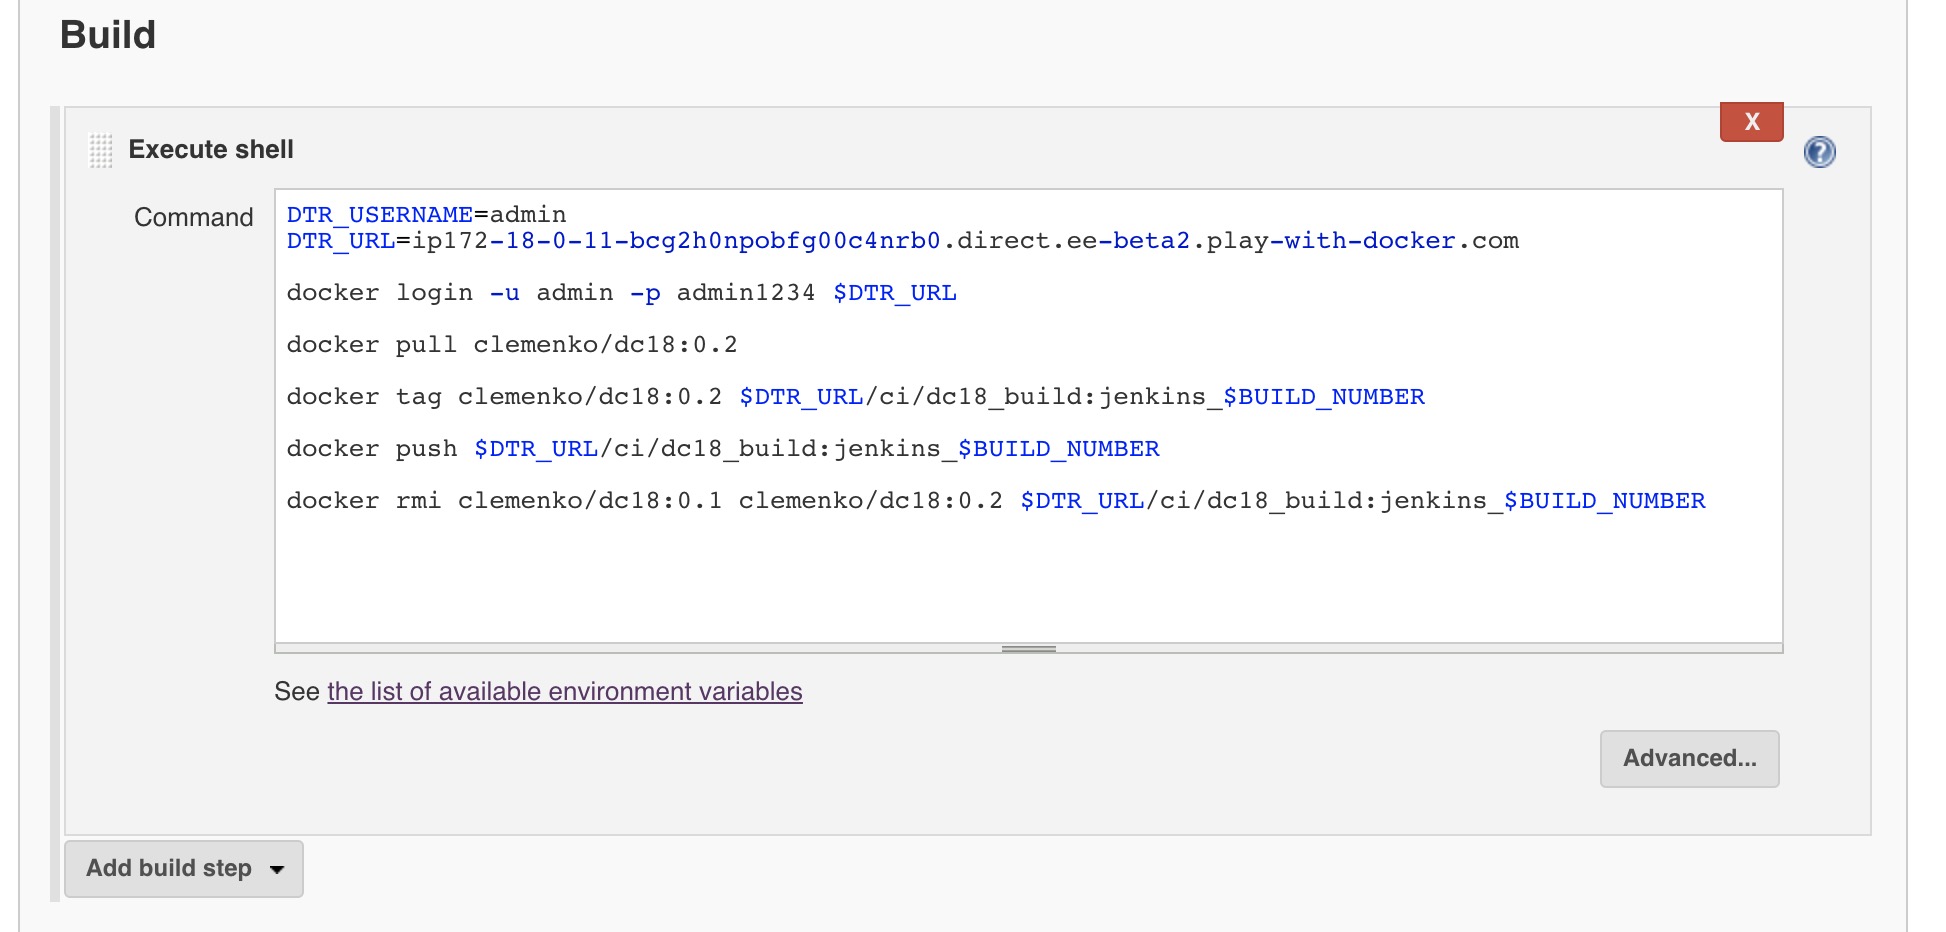
You will now see a text box. Past the following build script into the text box.
Please replace the <DTR_URL> with your URL!
echo $DTR_URL<--worker3DTR_USERNAME=admin DTR_URL=<DTR_URL> docker login -u admin -p admin1234 $DTR_URL docker pull clemenko/dc18:0.2 docker tag clemenko/dc18:0.2 $DTR_URL/ci/dc18_build:jenkins_$BUILD_NUMBER docker push $DTR_URL/ci/dc18_build:jenkins_$BUILD_NUMBER docker rmi clemenko/dc18:0.1 clemenko/dc18:0.2 $DTR_URL/ci/dc18_build:jenkins_$BUILD_NUMBERIt will look very similar to:
Now scroll down and click
Save. -
Now let's run the build. Click
Build now.
-
You can watch the output of the
Buildby clicking on the task number in theBuild Historyand then selectingBuild Output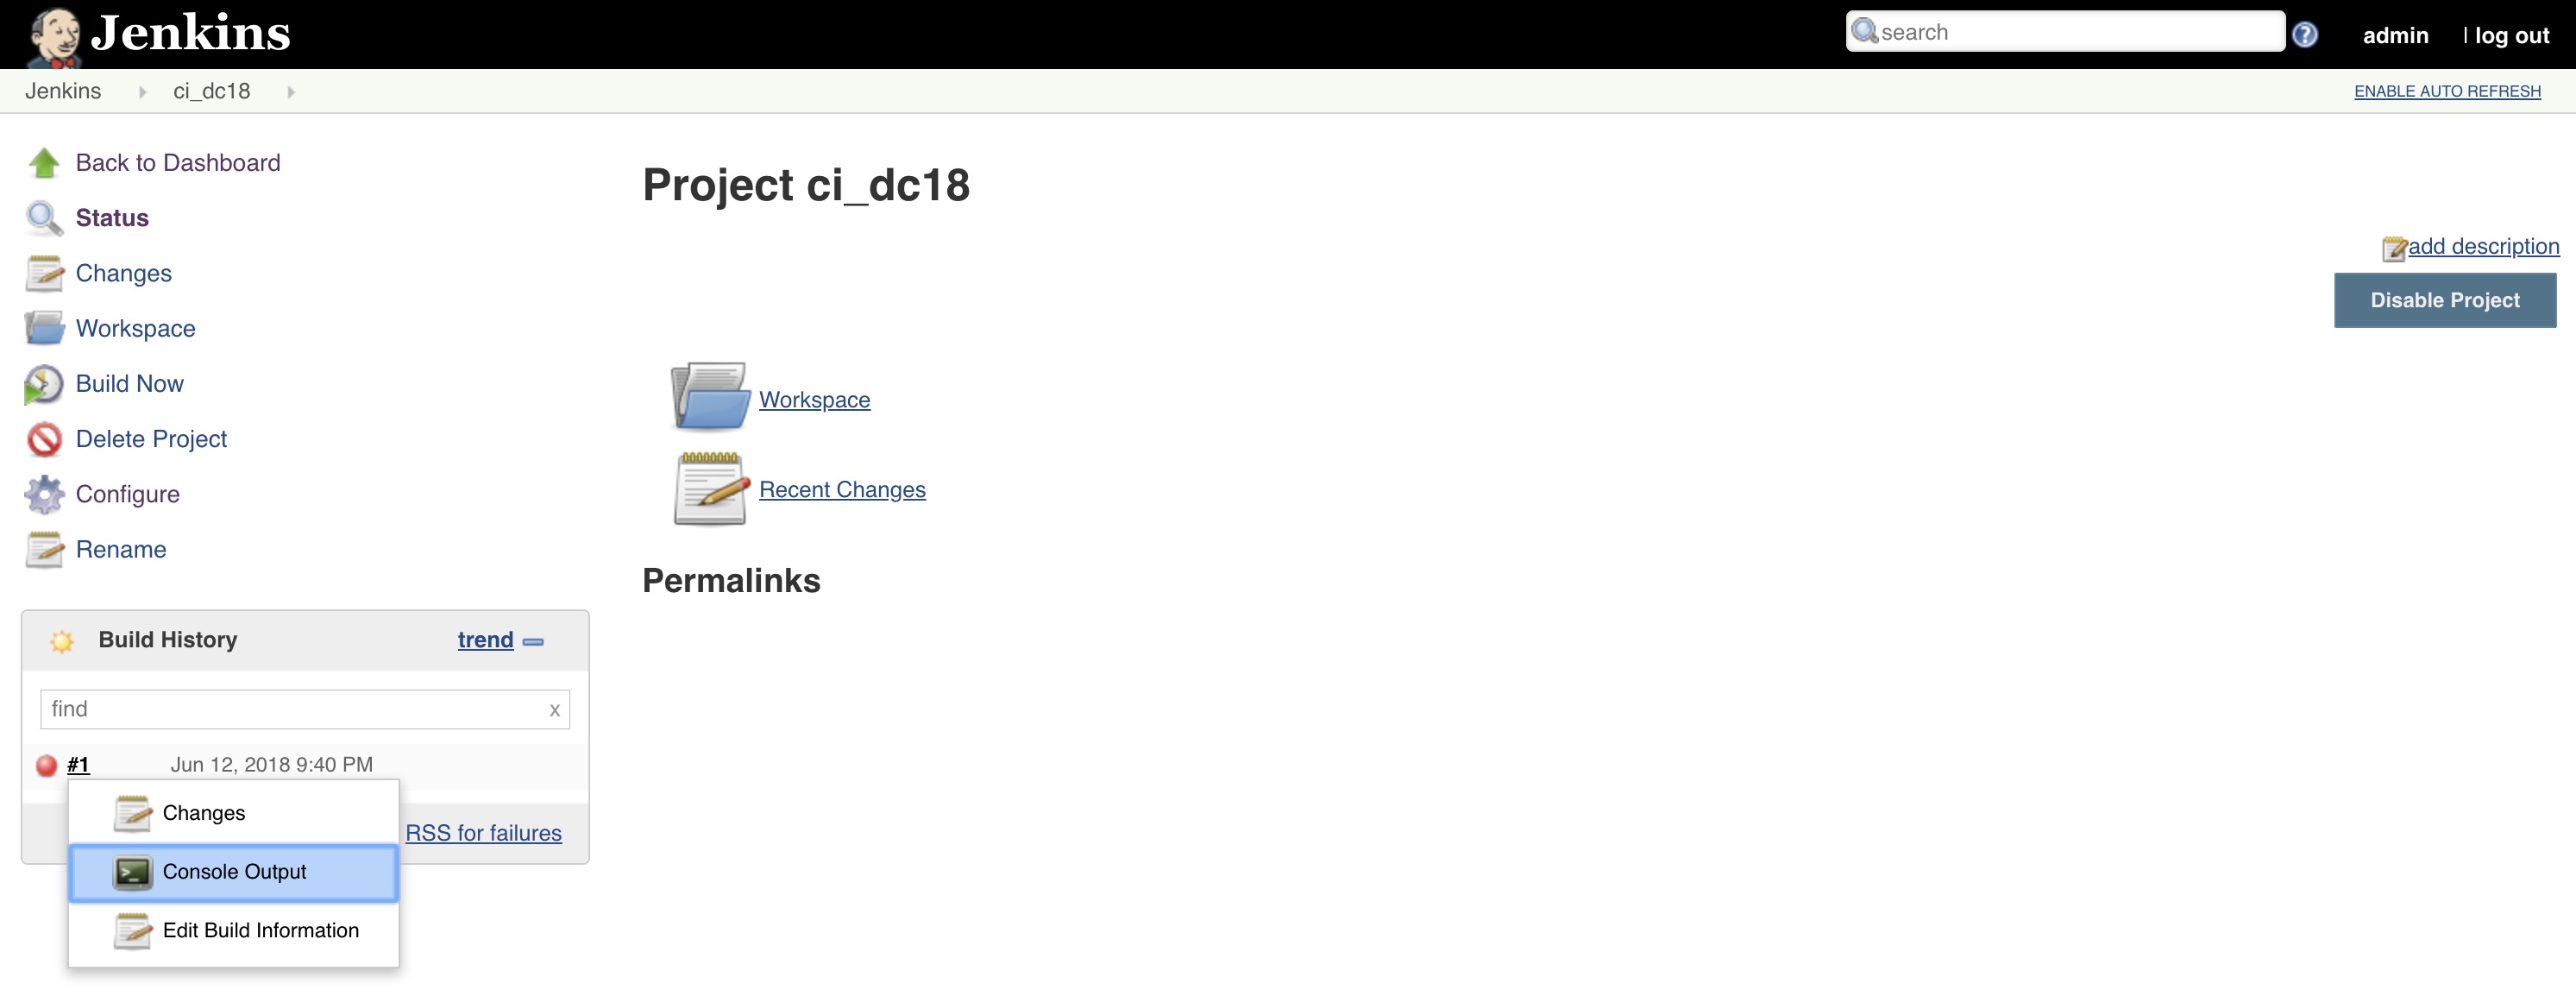
-
The console output will show you all the details from the script execution.

-
Review the
ci/dc18repository in DTR. You should now see a bunch of tags that have been promoted.


Now that we have Jenkins setup we can extend with webhooks. In Jenkins speak a webhook is simply a build trigger. Let's configure one.
-
Navigate to Jenkins and click on the project/item called
ci_dc18and click onConfigureon the left hand side.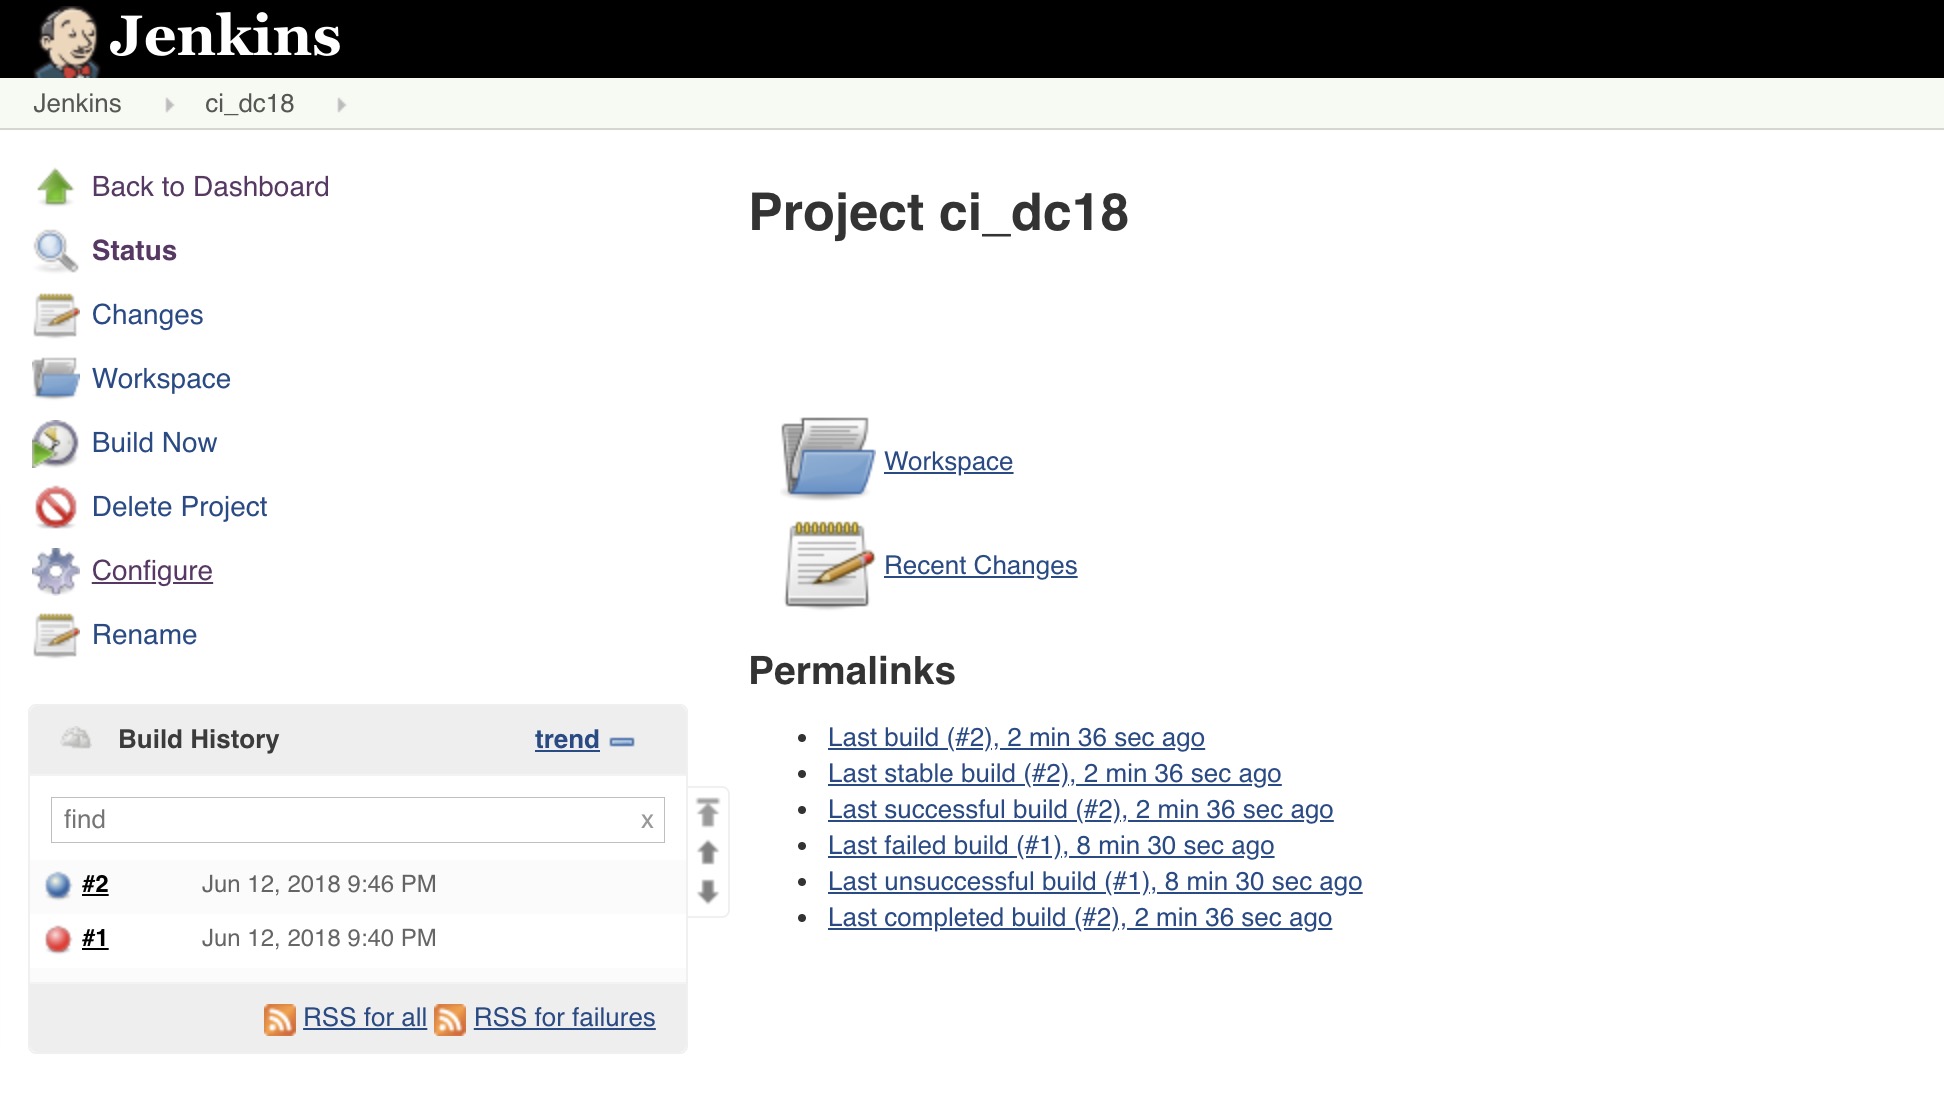
-
Then scroll down to
Build Triggers. Check the radio button forTrigger builds remotelyand enter an Authentication Token ofdc18_rocks. Scroll down and clickSave.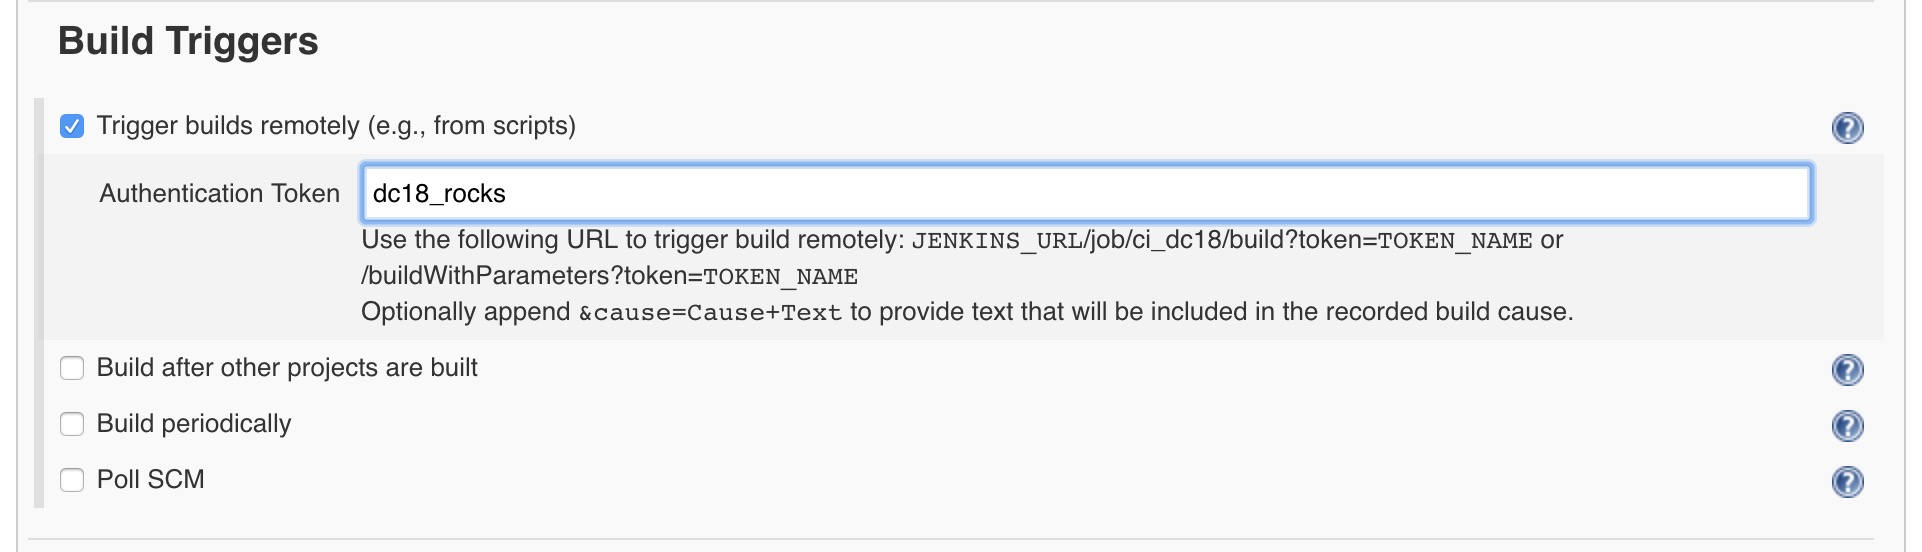
-
Now in your browser goto YOUR
http://$DOCS_URL:8080/job/ci_dc18/build?token=dc18_rocksIt should look like:
http://ip172-18-0-6-bcg2h0npobfg00c4nrb0.direct.ee-beta2.play-with-docker.com:8080/job/ci_dc18/build?token=dc18_rocks


In this workshop we were able to start deploying the basics of an Automated Secure Supply Chain. Hopefully with this foundation you can build your own organizations Secure Supply Chain!