This simple program serves as an API for controlling Corsair iCue device leds through the iCueConnect-Android App.
Video Example In Use
THIS README APPLIES FOR THE iCueConnect-API....
FOR DOCUMENTATION REGARDING iCueConnect-Android APP, CLICK THE PRIOR LINK
Note: This is an early development release. Some things may not work perfectly, and you may experience some bugs/glitches. Please feel free to inform me of any issues you are having via the issues tab.
- You will need iCue installed and running on your windows machine.
- You will need to download the iCueConnect-Android App.
- You will have to have configured all your Corsair devices through iCUE.
- In order for iCueConnect-Android App to communicate with iCueConnect-API and set the leds accordingly, both devices must be connected to the internet.
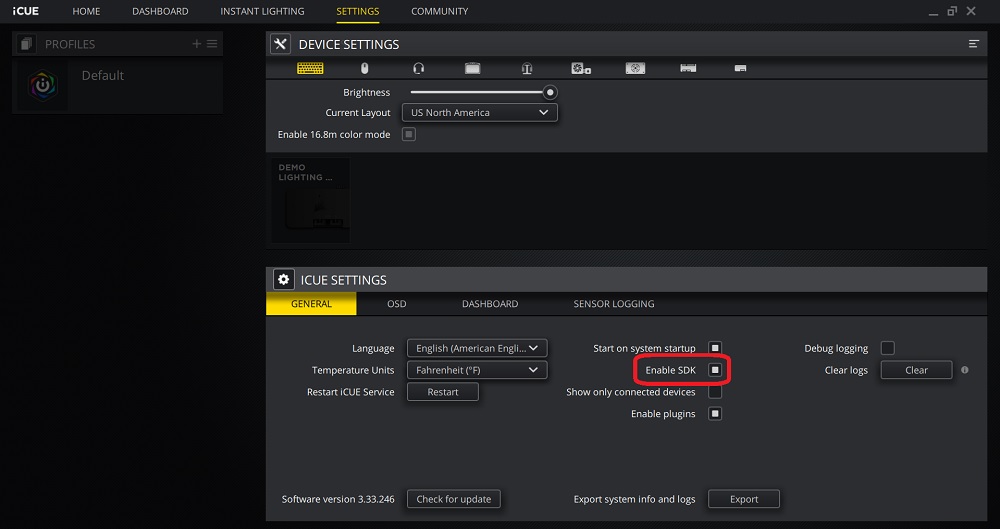
- Lastly you will have to check the Enable SDK option in iCUE's Settings.
- Download the iCueConnect-API here.
- Create a folder named iCueConnect-API and place the iCueConnect.exe inside of it.
- Move this newly created folder into your C:\Users\YourUserNameHere\AppData\Roaming.
- Right click on the iCueConnect.exe, create a new shortcut.
- Place the shortcut on your Desktop or where ever is convenient for you.
iCueConnect uses Pusher for realtime communication between iCueConnect-Android App and iCueConnect-API using sockets. You do not have to know exactly what Pusher is and how it works. You just need to make an account in order for this iCueConnect to work. If you have not done so already preform the following to create a Pusher account.
- Create a free Pusher account here.
- When asked to get started between Channels or Breams, choose CHANNELS.
- When given the following input fields, enter the associated values and then press the "Create app" button.
- Name your app: iCueConnect
- Select a cluster: Choose according to your region.
- Create apps for multiple environments?: Unchecked.
- Choose your tech stack (optional): You can ignore these.
- After clicking "Create app", click the link on the left side labeled "App Keys". Here you will see four values labeled
- app_id
- key
- secret
- cluster
- Save these values. We will need them later.
- First make sure that iCUE is running in the background.
Note: You can check if it is in the windows system tray.
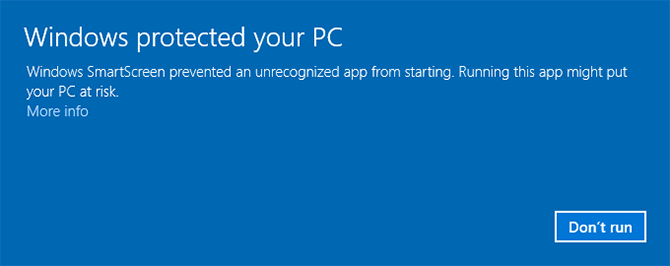
- The first time you run iCueConnect.exe, windows may notify you with the image below.
- Click More info, then click Run anyway.
Note: Your antivirus may not recognize this application and delete it thinking it is a threat. In this case you will need to whitelist the application.
- Since this is the first time the application is being run, it will prompt you for your Pusher information. Enter the information WITHOUT THE QUOTATION MARKS.
Note: If you enter any of the values incorrectly, simply right click on the iCueConnect app icon in the system tray and click Pusher Credentials.
- Click "OK" and iCueConnect.exe will run in the background.
Note: The application can be accessed from the windows system tray.
- At this point, your PC is set up and ready to go. If you haven't already done so, download and setup iCueConnect-Android App.
As mentioned prior, this application is not complex. Its functionalities primarily exist in the background.
There are only 4 functionalities accessible from windows (excluding starting the application).
These functionalities can be accessed by right clicking on the system tray icon as such.

-
Revert Control
-
Test
- This allows you to test that both the API and Android App are working as intended.
- By clicking this, all your leds will pulse white, turn red one after another, and pulse white again before reverting back to normal. At the same time you should receive a notification on your iCueConnect app.
-
Pusher Credentials
- This allows you to view/edit your Pusher Credentials.
-
Quit
- This closes the application.
- Leds not updating according to your phones selection? Follow these trouble shooting steps.
- Select the Test button from the iCueConnect API.
- Make sure that iCUE is running in the background and that the Enable SDK option is set in the settings.
- Sometimes iCUE will need to be restarted. Try that.
- Make sure your Pusher credentials are correct on both devices.
Note: If you enter any of the values incorrectly, simply right click on the iCueConnect app icon in the system tray and click Pusher Credentials.
- Pusher credentials are correct, but leds are still not updating? Try running iCueConnect.exe as an administrator.
- Leds are extremely delayed?
- Leds on occasion can become delayed, however if there is a continues long delay then try setting iCueConnect's priority to realtime or high. Don't know how to do this? Check this tutorial out then!
Note: iCueConnect will appear in the Details tab twice in the Task Manager. Set both accordingly.
- Leds on occasion can become delayed, however if there is a continues long delay then try setting iCueConnect's priority to realtime or high. Don't know how to do this? Check this tutorial out then!
- Are notification LEDs not working properly?
- Make sure you allowed the option Notification Leds in the android app's settings page.
- If the setting is enabled, then you will need to make sure that battery optimization is disabled for the android app.
I do not work for nor did I partner up with Corsair to produce this application. I am simply an enthusiast who just wanted to bring an idea to life.
iCueConnect is a Python based application that utilizes the following:
- Python 3.8.5
- cuesdk: 0.6.6
- PyQt5: 5.15.2
- websocket-client: 0.48.0
- Pysher: 1.0.3
- Pusher 3.0
- six: 1.15.0
- jsonpickle 2.0
- PyInstaller: 5.0.dev0
- This is what I used to develop the .exe file.
Note: There is a bug with the Pysher library that is caused due to changes in the websocket-client library. To get around this I strictly had to use the listed version for websocket-client, Pysher and six.

