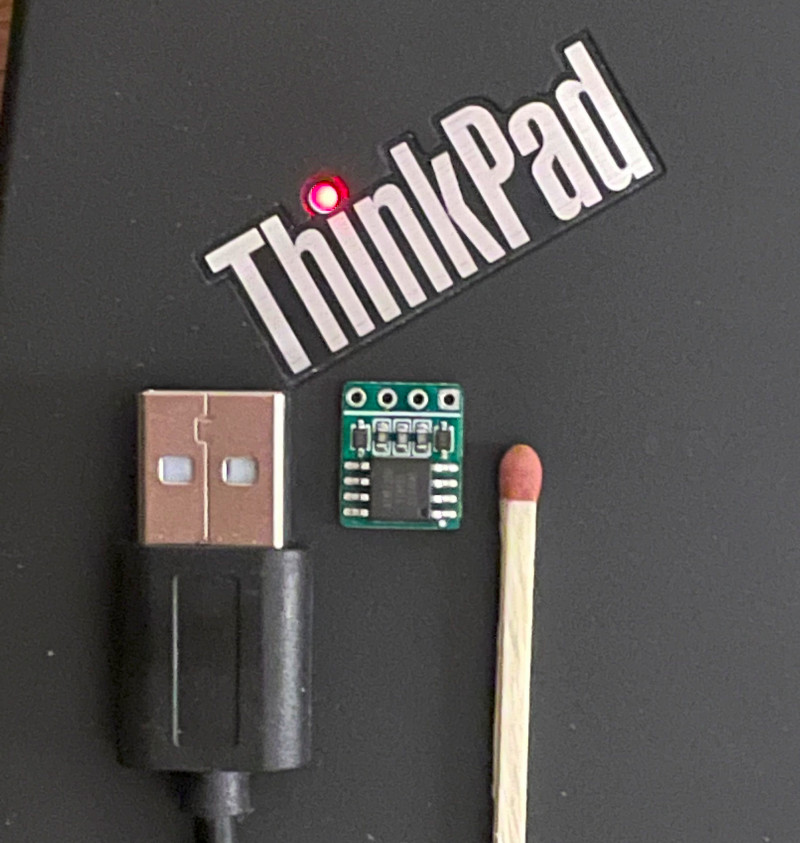
Its a Diy HID Implant that you can implant in whatever! With a size of 10x11mm (The PCB Manufacturer cant do anything smaller than 10x10, but it is possible to reduce to 10x7mm but that is an excercise for the reader)
- Installed Arduino IDE
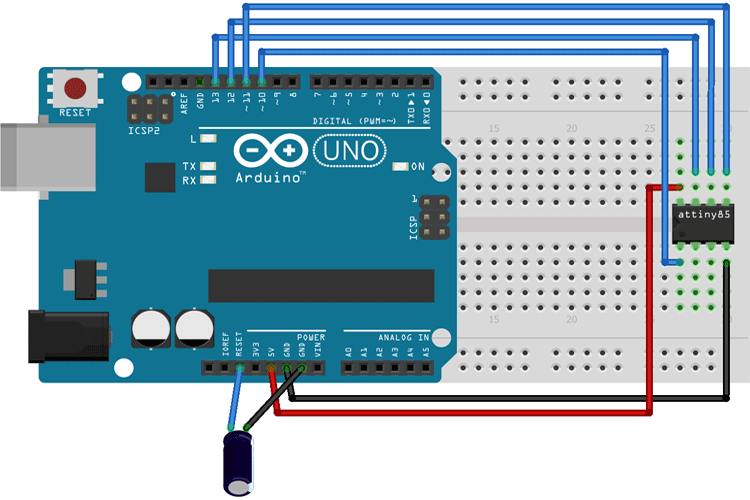
- ArduinoUNO or ISP Programmer
- Jumper cables x6
- 10uF Capacitor
- (optional) SOIC-8 Clip
- USB Breakout cable, either Buy or DIY (I went with the DIY route)
- Installed avrdude
Based around ATTiny85 and DigiKeyboard library, Designed in EasyEDA.
Order a assembled PCB from JLCPCB.com
- TODO Gerber file:
hardware/Gerber.zip - Bill Of Materials:
hardware/BOM.csv - Pick and Place:
hardware/PP.csv
Pick preferred color, and PCB Thickness (Recommended 1.0mm)
Insert your Arduino UNO into the computer, and upload the sketch ISP Programmer found under examples.
ArduinoISP: File > Examples > 11.ArduinoISP > ArduinoISP
Compile and Upload to the UNO
Docs: ArduinoISP
This example is using an ArduinoUNO as a ISP programmer, YMMV with other hardware.
# Setting the correct fuses for bootloader burnin
avrdude -c arduino -p attiny85 -P /dev/ttyACM1 -b 19200 -Uflash:w:"software/bootloader.hex":i -U lfuse:w:0xe1:m -U hfuse:w:0xdd:m -U efuse:w:0xfe:mAdd the following url to the Arduino IDEs additional boards url
https://raw.githubusercontent.com/digistump/arduino-boards-index/master/package_digistump_index.json
Then go to Tools > Board > Boards manager
Search for Digispark and install the package: Digistump AVR Boards
The digistump library is shipped with a faulty micronucleus binary for v2.3 bootloader, a working binary is included in this repo software/micronucleus
Locate the arduino packages folder and browse to
~/.arduino15/packages/digistump/tools/micronucleus/2.0a4/micronucleus
Replace the micronucleus with the included binary
Open the file software/inject.example.ino into the Arduino IDE, and select the board configuration Tools > Board > Digistump AVR Boards > Digispark Default (16.5MHz).
Upload the code with the regular Arduino IDE workflow
Setup the pinout according to the chip silkscreen
Now you are finished and are ready to implant it into whatever USB Peripheral you want.


