This is a repo that I use to:
- store bits and pieces of code I find helpful,
- demonstrate the amazing value of Markdown for Github repos during class demonstrations, and
- provide instructions for adding images to a rep.
There's a very helpful YouTube video for this if we don't get to it in class.
Choose the image you want to use and give it a name that does not use spaces! So, "Scary_Shadrack_1803_1878.png" is fine but "Scary Shadrack 1803 1878.png" is not.
In your repo, use "Create New File" to automatically create a new folder to place your image in.

Github won't create an empty folder, so create a file and start by entering a name that you want for your folder (e.g. "images") and end that name with the / symbol, which creates the folder then prompts you provide a name for the file that will keep that folder open. I like to use "text" and then write a line of text in that file explaining that it's just a placeholder to create the folder.

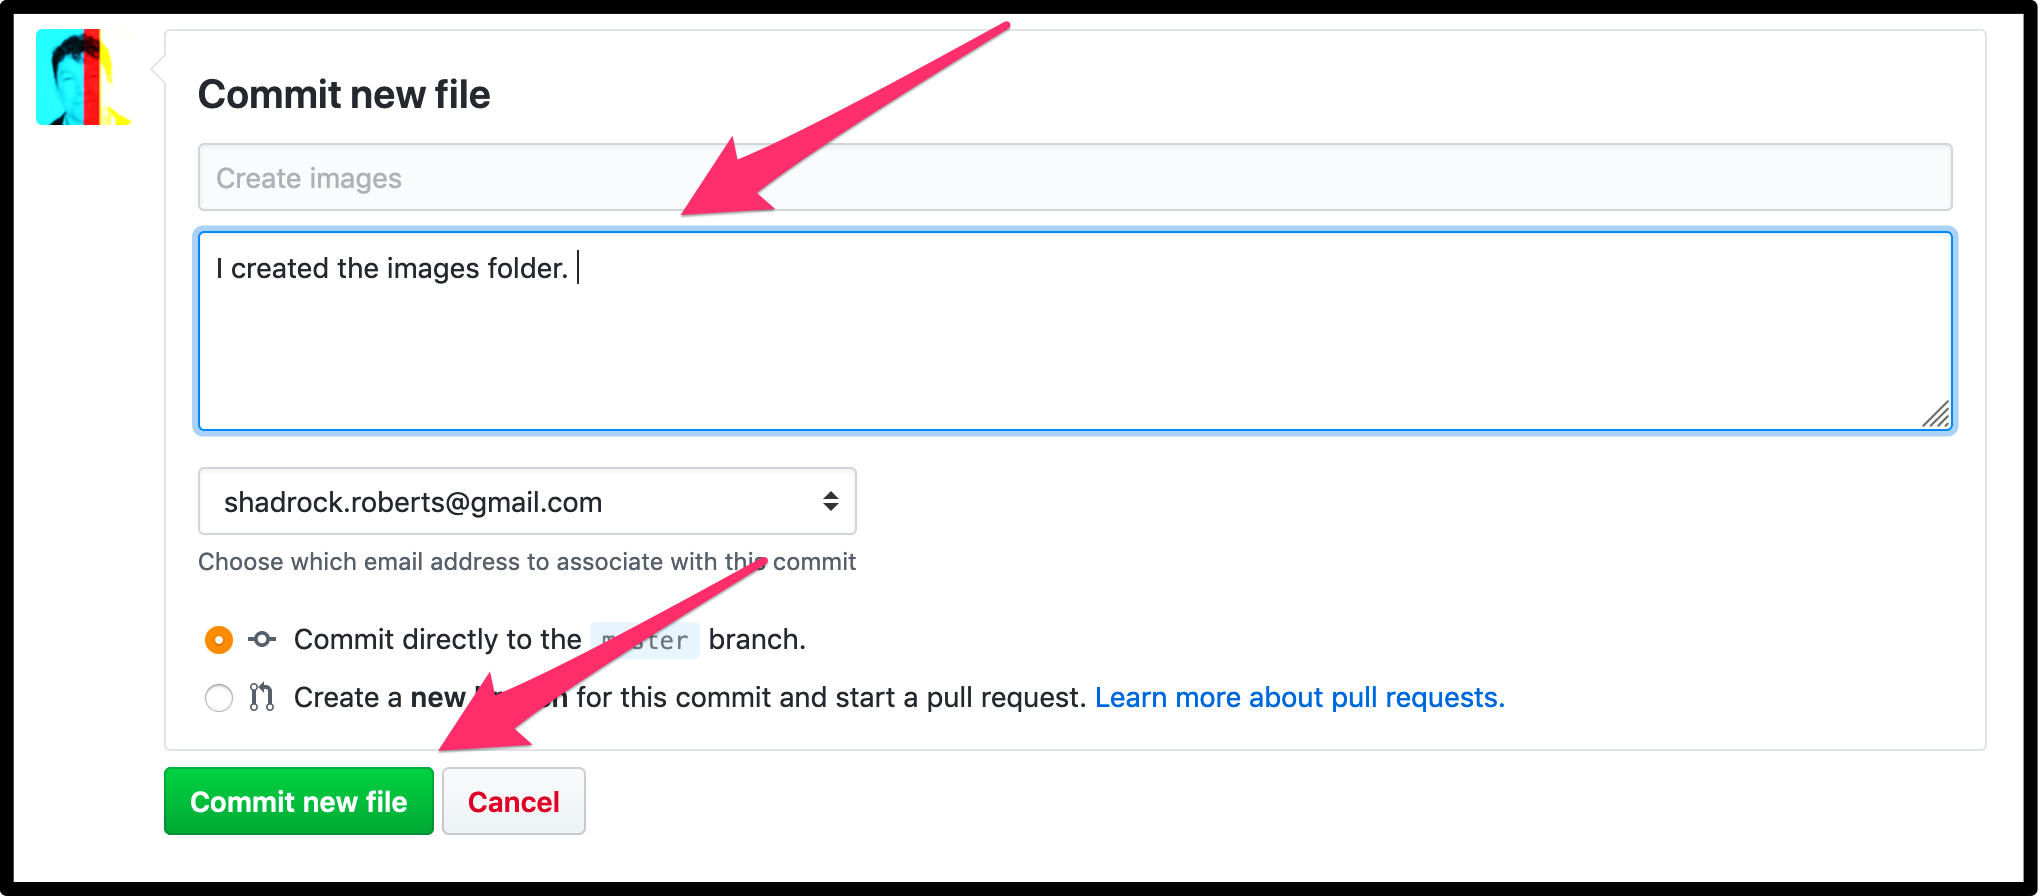
Save by clicking the green "commit" button below. You can add details about the changes you're making if you like in the form fields there. These are just for documentation and won't appear on any of your pages.

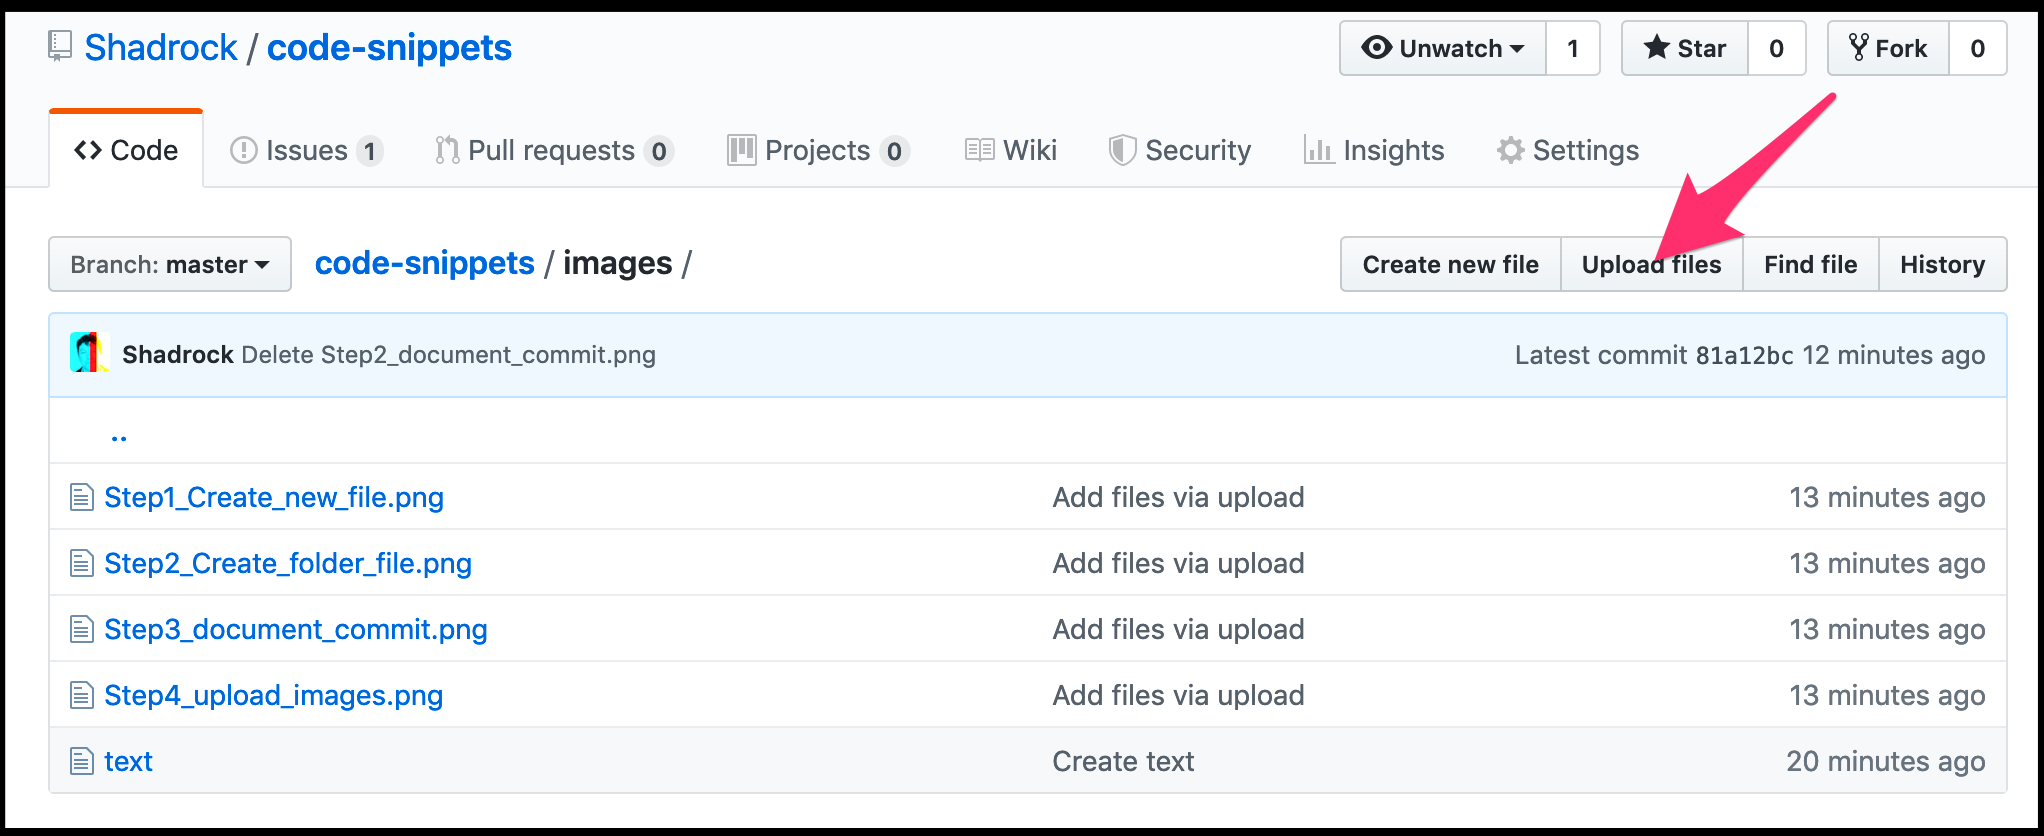
After you've created a folder by creating a file, open that folder by clicking on it from your repo. Then click the "Upload Files" button to drag and drop (or upload) your image file.

After you've loaded your images, go back to your read me, click the editing button and link images wherever you want them in the text.
To create a link in Markdown the syntax is . Any text that you add in the 'Add text' spot will appear if the image can't load for some reason (you can leave it blank if you want). The 'Add link' spot is where you put your link. And the link is simply the folder name followed by the / followed by the complete image name. The last image on this page, for example, looks like this: .