Firebase is easy to handle and easy to understand and it is perfect to make Real Time Chat.It provide us cloud base database easy to access from anywhere.
- Installing CocoaPods
- Firebase Setup
- Config Message View Controller
- Installing JsqMsgViewController
First we gonna create new project in xcode.
Start Xcode - Choose File --> New --> Project .. A Dialog will poppup and we going to select project Temaplate for our app. Choose Single View Controller which has only one view controller after selecting single view press Next.
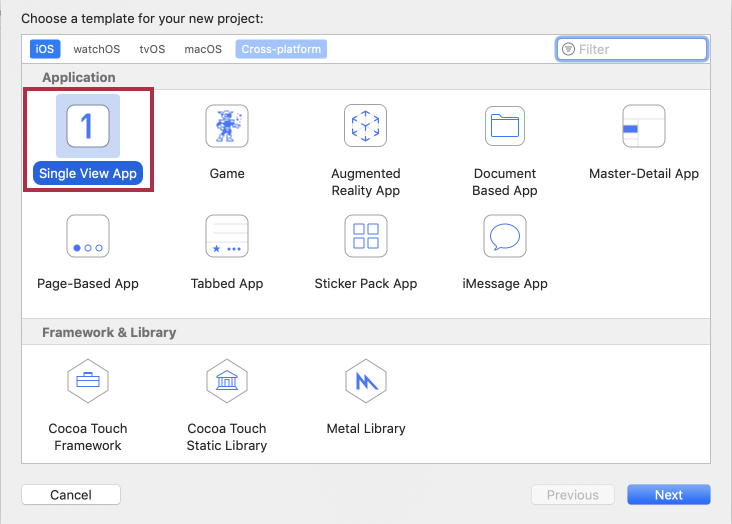
After this your screen should be like this
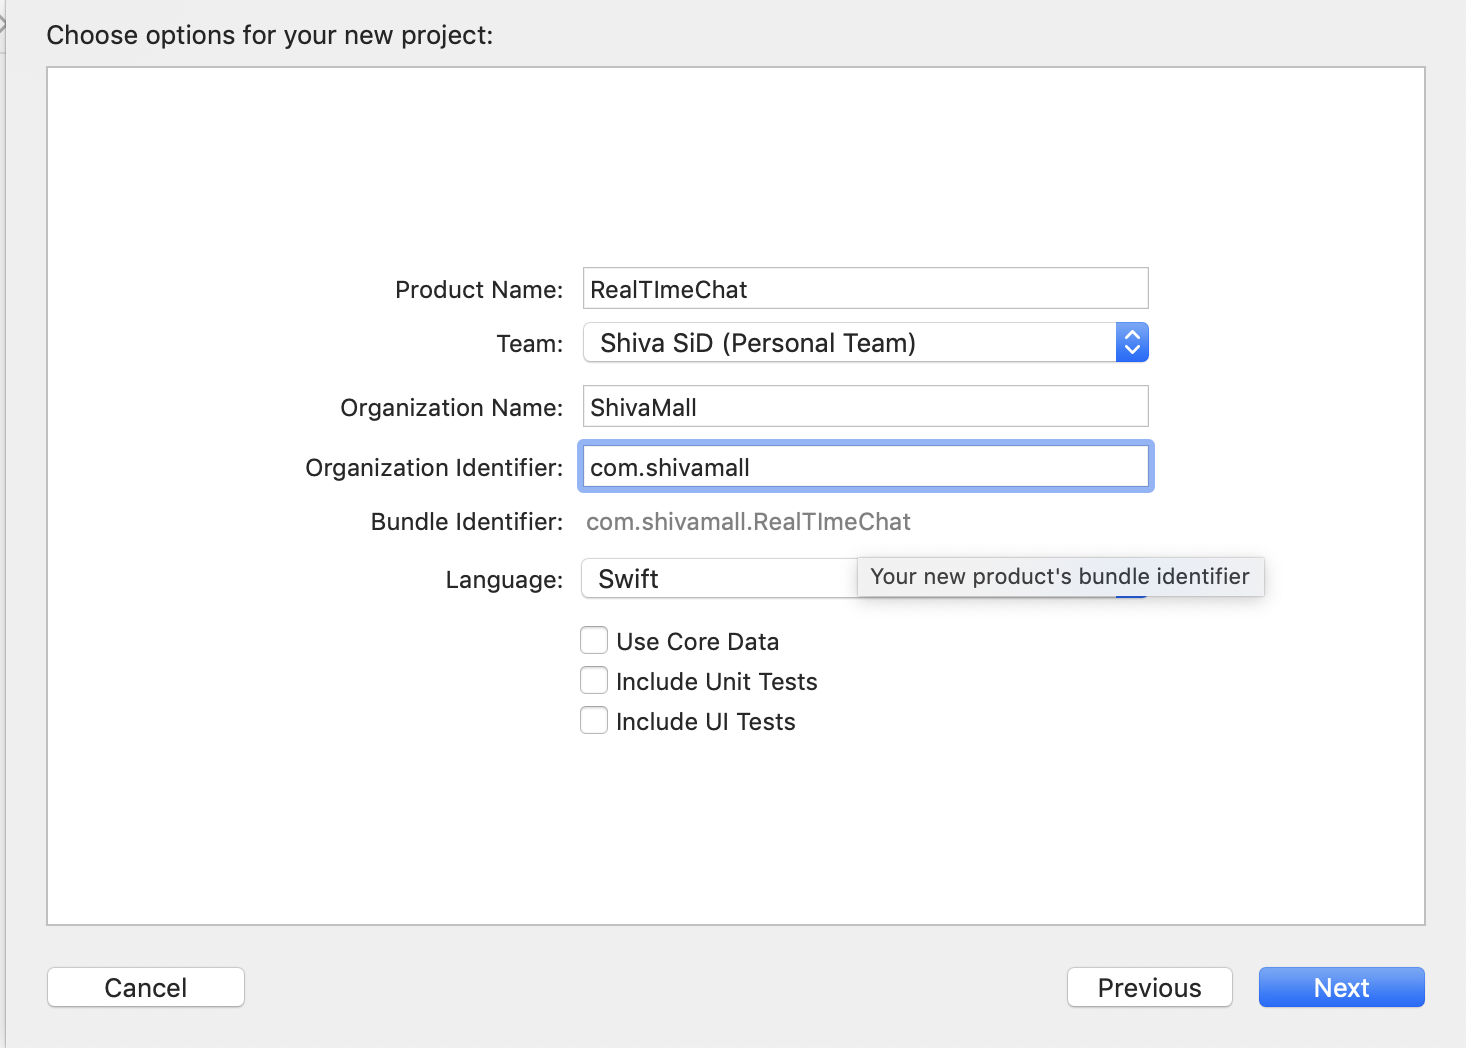
Then click Next.In the next dialog, choose a location in your drive to save your project.
Main Xcode View will showed up
- On the extreme right, there are some Inspectors. They give you fine control of aspects of your project, like UI elements in Interface Builder, Quick Help, and file properties.
- On the left, there are Navigators. They help with organizing your project and tools.
- In the middle there's a main editor, that currently shows Project Settings. When you’re coding, this area shows a text editor.
- At the top left you see Play and Stop buttons, and a Target dropdown. With those buttons you can run and build your app, and you can choose on which device you want to run your app, like a actual iPhone, or an Simulator.
- In the middle, at the top, you see a status bar. Important messages appear there.
- Open the ViewController.swift file in the Project Navigator.
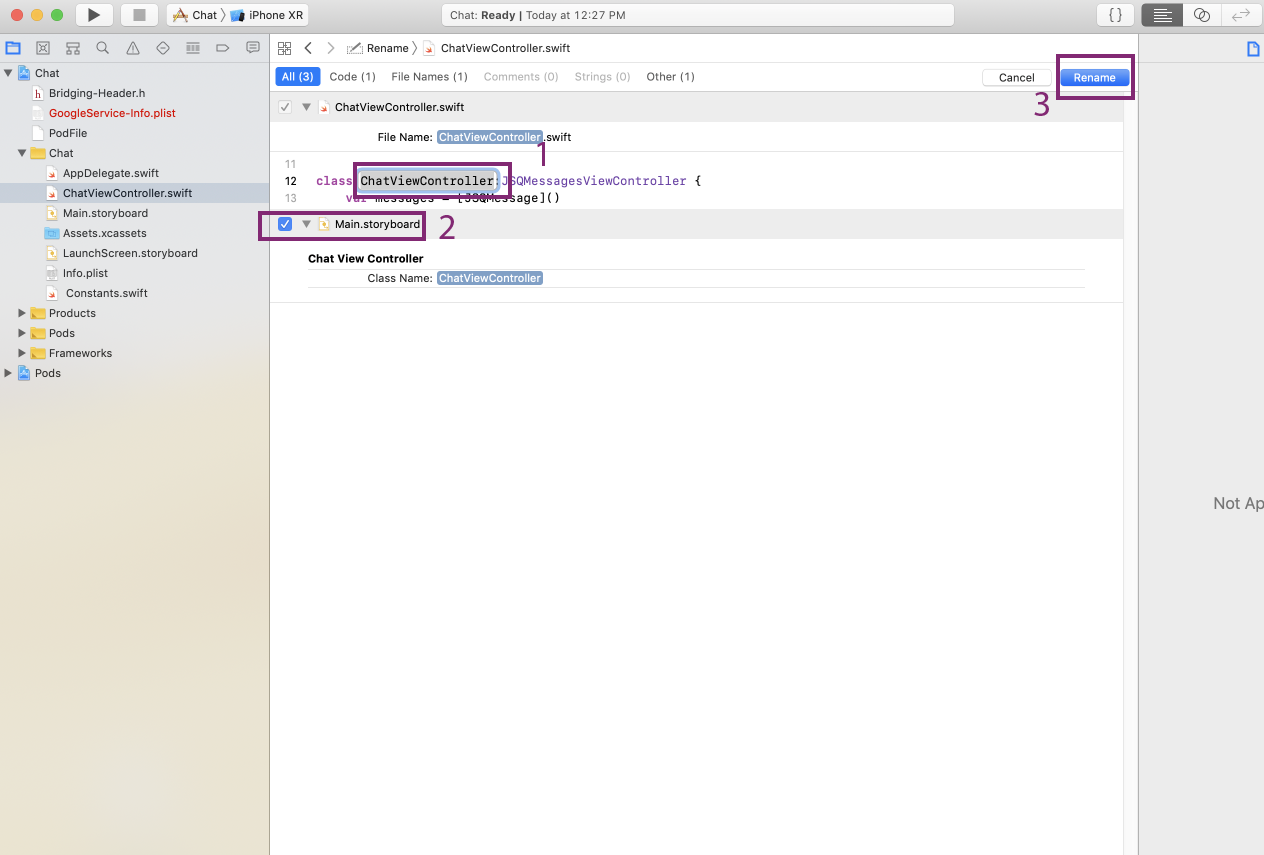
- Then find class: class ViewController: UIViewController {.
- Then, click on ViewController while holding the Command-key. popup will appear and select rename.
- Then, in the screen that appears, rename ViewController to ChatViewController. Make sure that the checkbox for Main.storyboard is ticked.
- At Last click rename on top right.
- First, open Main.storyboard from Project Navigator. Interface Builder opens…
- Then, select Chat View Controller in the list on the left. This will activate the main view controller you see in the editor, with a blue border.
- Then, choose from the menu Editor -> Embed In -> Navigation Controller. This will merge the view controller with navigation controller. Make sure to put navigation controller on left of chat view controller.
There's two arrow on is entry point arrow on left of nav controller and one arrow in between two views who is connecting both views.
We gonna use CocoaPods for installing libraries . Its a package manager . For installing Cocoapods we gonna use CLI command line interface.
$ sudo gem install cocoapods
No need to type $ sign
- Right-click on your Chat project in the Project Navigator and choose New File....
- Then, in the dialog and choose the Empty template from the Other category.
- Then, in the save dialog that appears, name the file Podfile and make sure to save the file in the same directory as Chat.xcodeproj.
platform :ios, '9.0'

target 'Chat' do
  use_frameworks!

  pod 'Firebase/Core'
  pod 'Firebase/Storage'
  pod 'Firebase/Auth'
  pod 'Firebase/Database'
  pod 'JSQMessagesViewController'

end
Save the file Code is telling cocoapods that which pods is need to install for which platform and target.
Then close the Xcode project and quit the Xcode software.
For tha open Terminal and type in
$ cd
give spcae after $ sign Then Drag RealTimeChat from finder onto the terminal window and then press enter it will give us path of that folder somewhat like this:
$ cd /Desktop/RealTimeChat
Press Enter and type in
$ pod install
This will install pods in our project
Now open Chat.xcworkspace fron finder into terminal.Instead of working with the project, you’ll now work with the workspace. Open Build Phases Of your chatapp in project settings theres a new import of pod .
Now we going to add Bridging header and installing JSQMessagesViewController library
- First, right click on your project in the Project Navigator and choose New File...
- Then, select Header File from Source category and click Next.
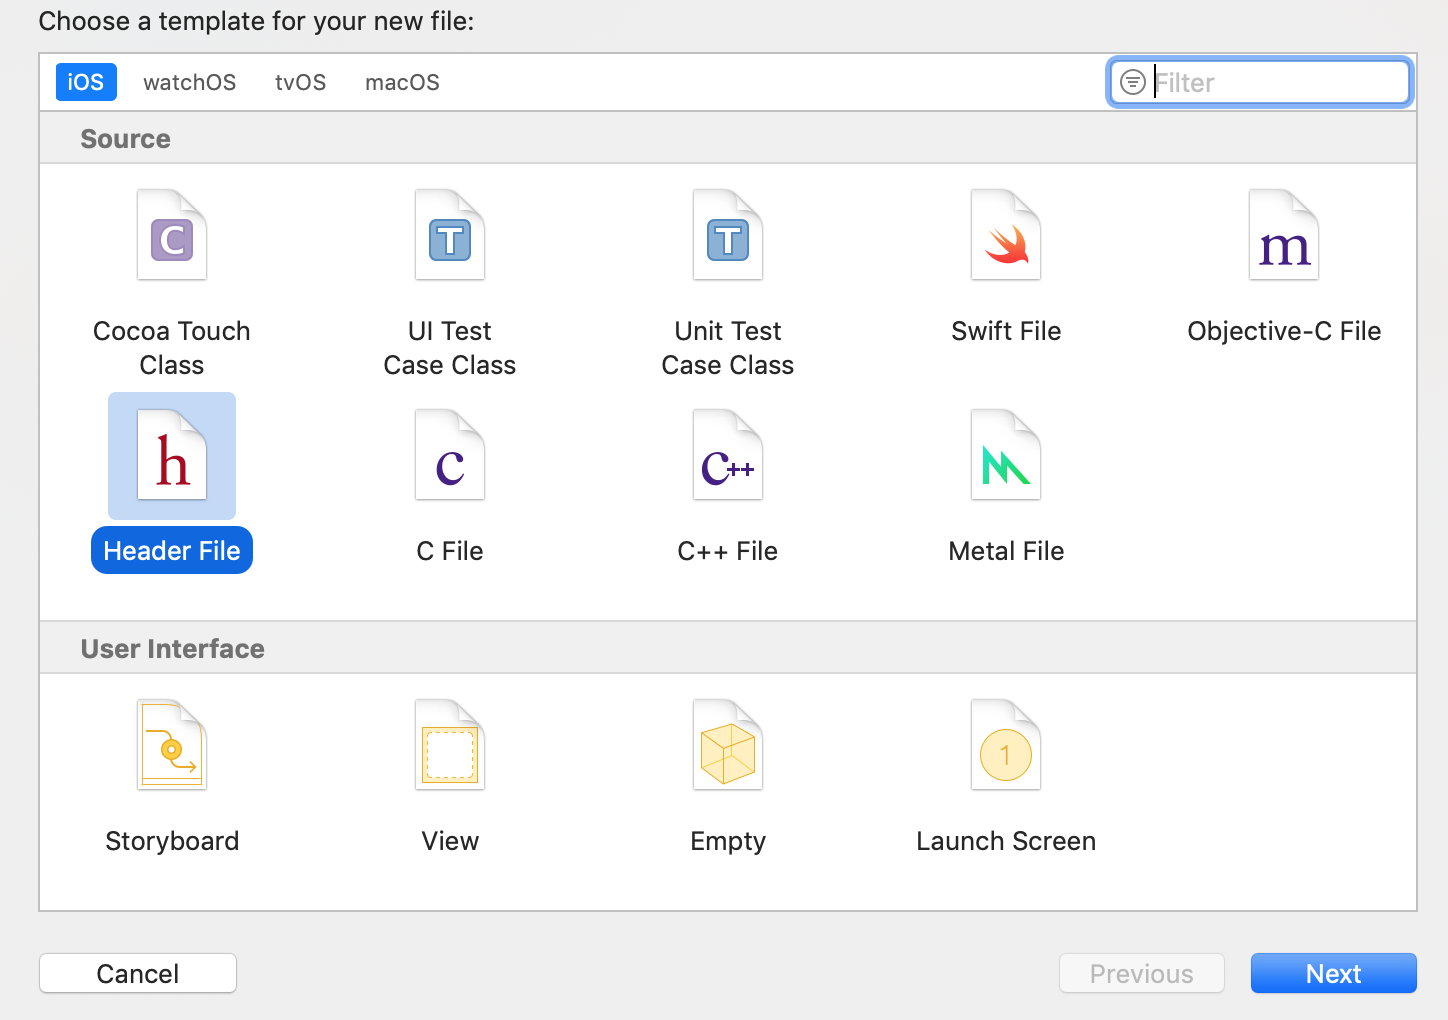
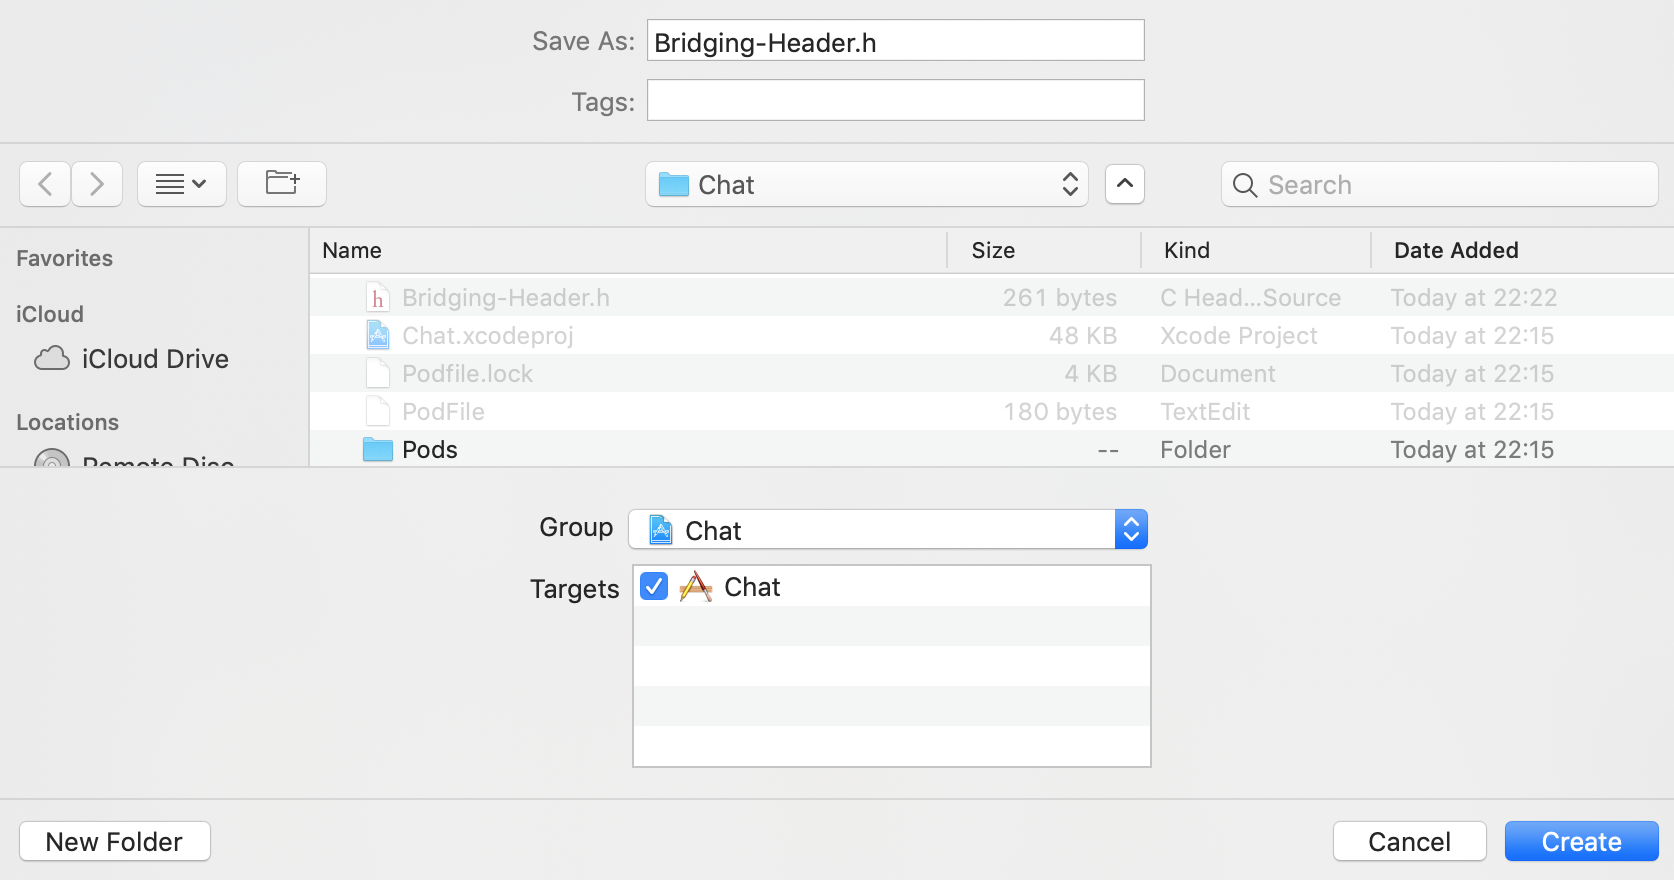
- Finally, in the save dialog, name the file Bridging-Header.h. Make sure to tick the checkbox at the bottom of the dialog, the one for Targets and Chat. Save the file alongside your Podfile and workspace files by clicking Create.
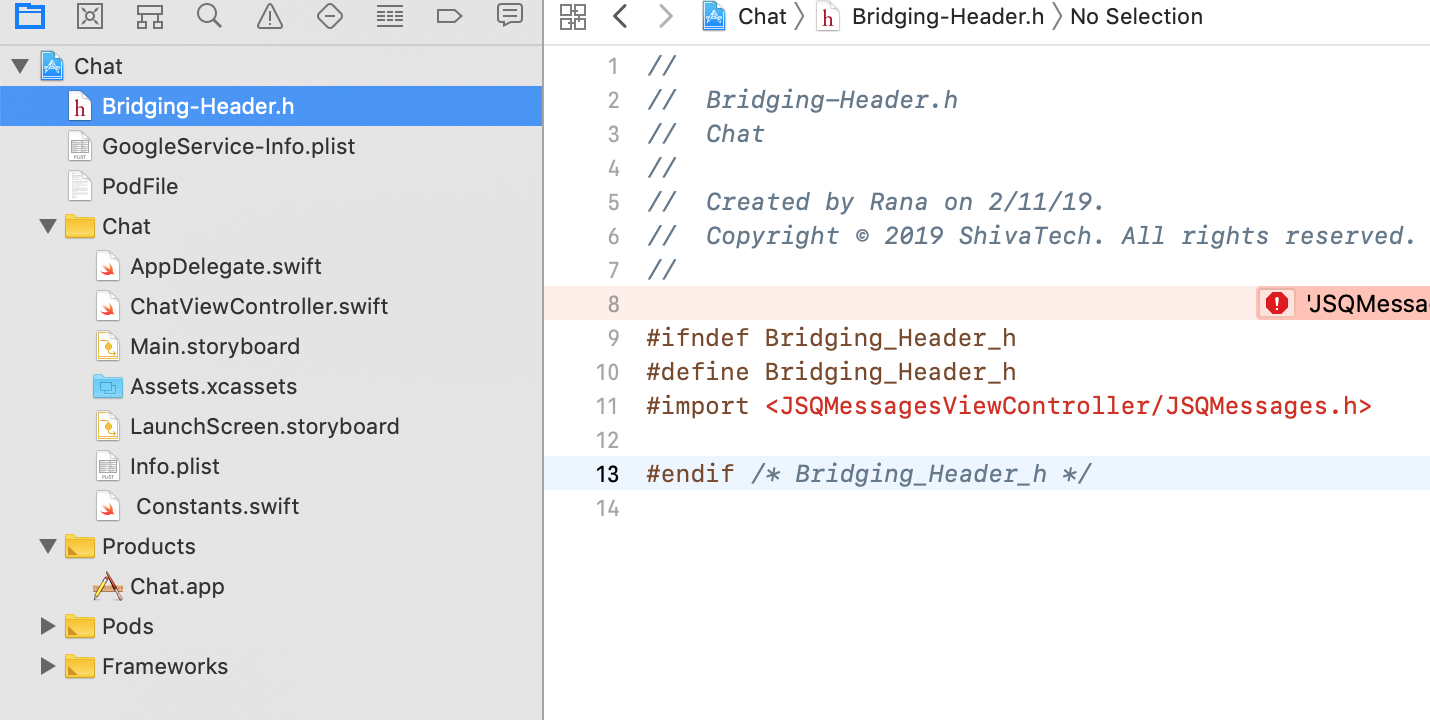
When the file opens, type the following in it:
#import <JSQMessagesViewController/JSQMessages.h>
Your Bridge-Header looke like this
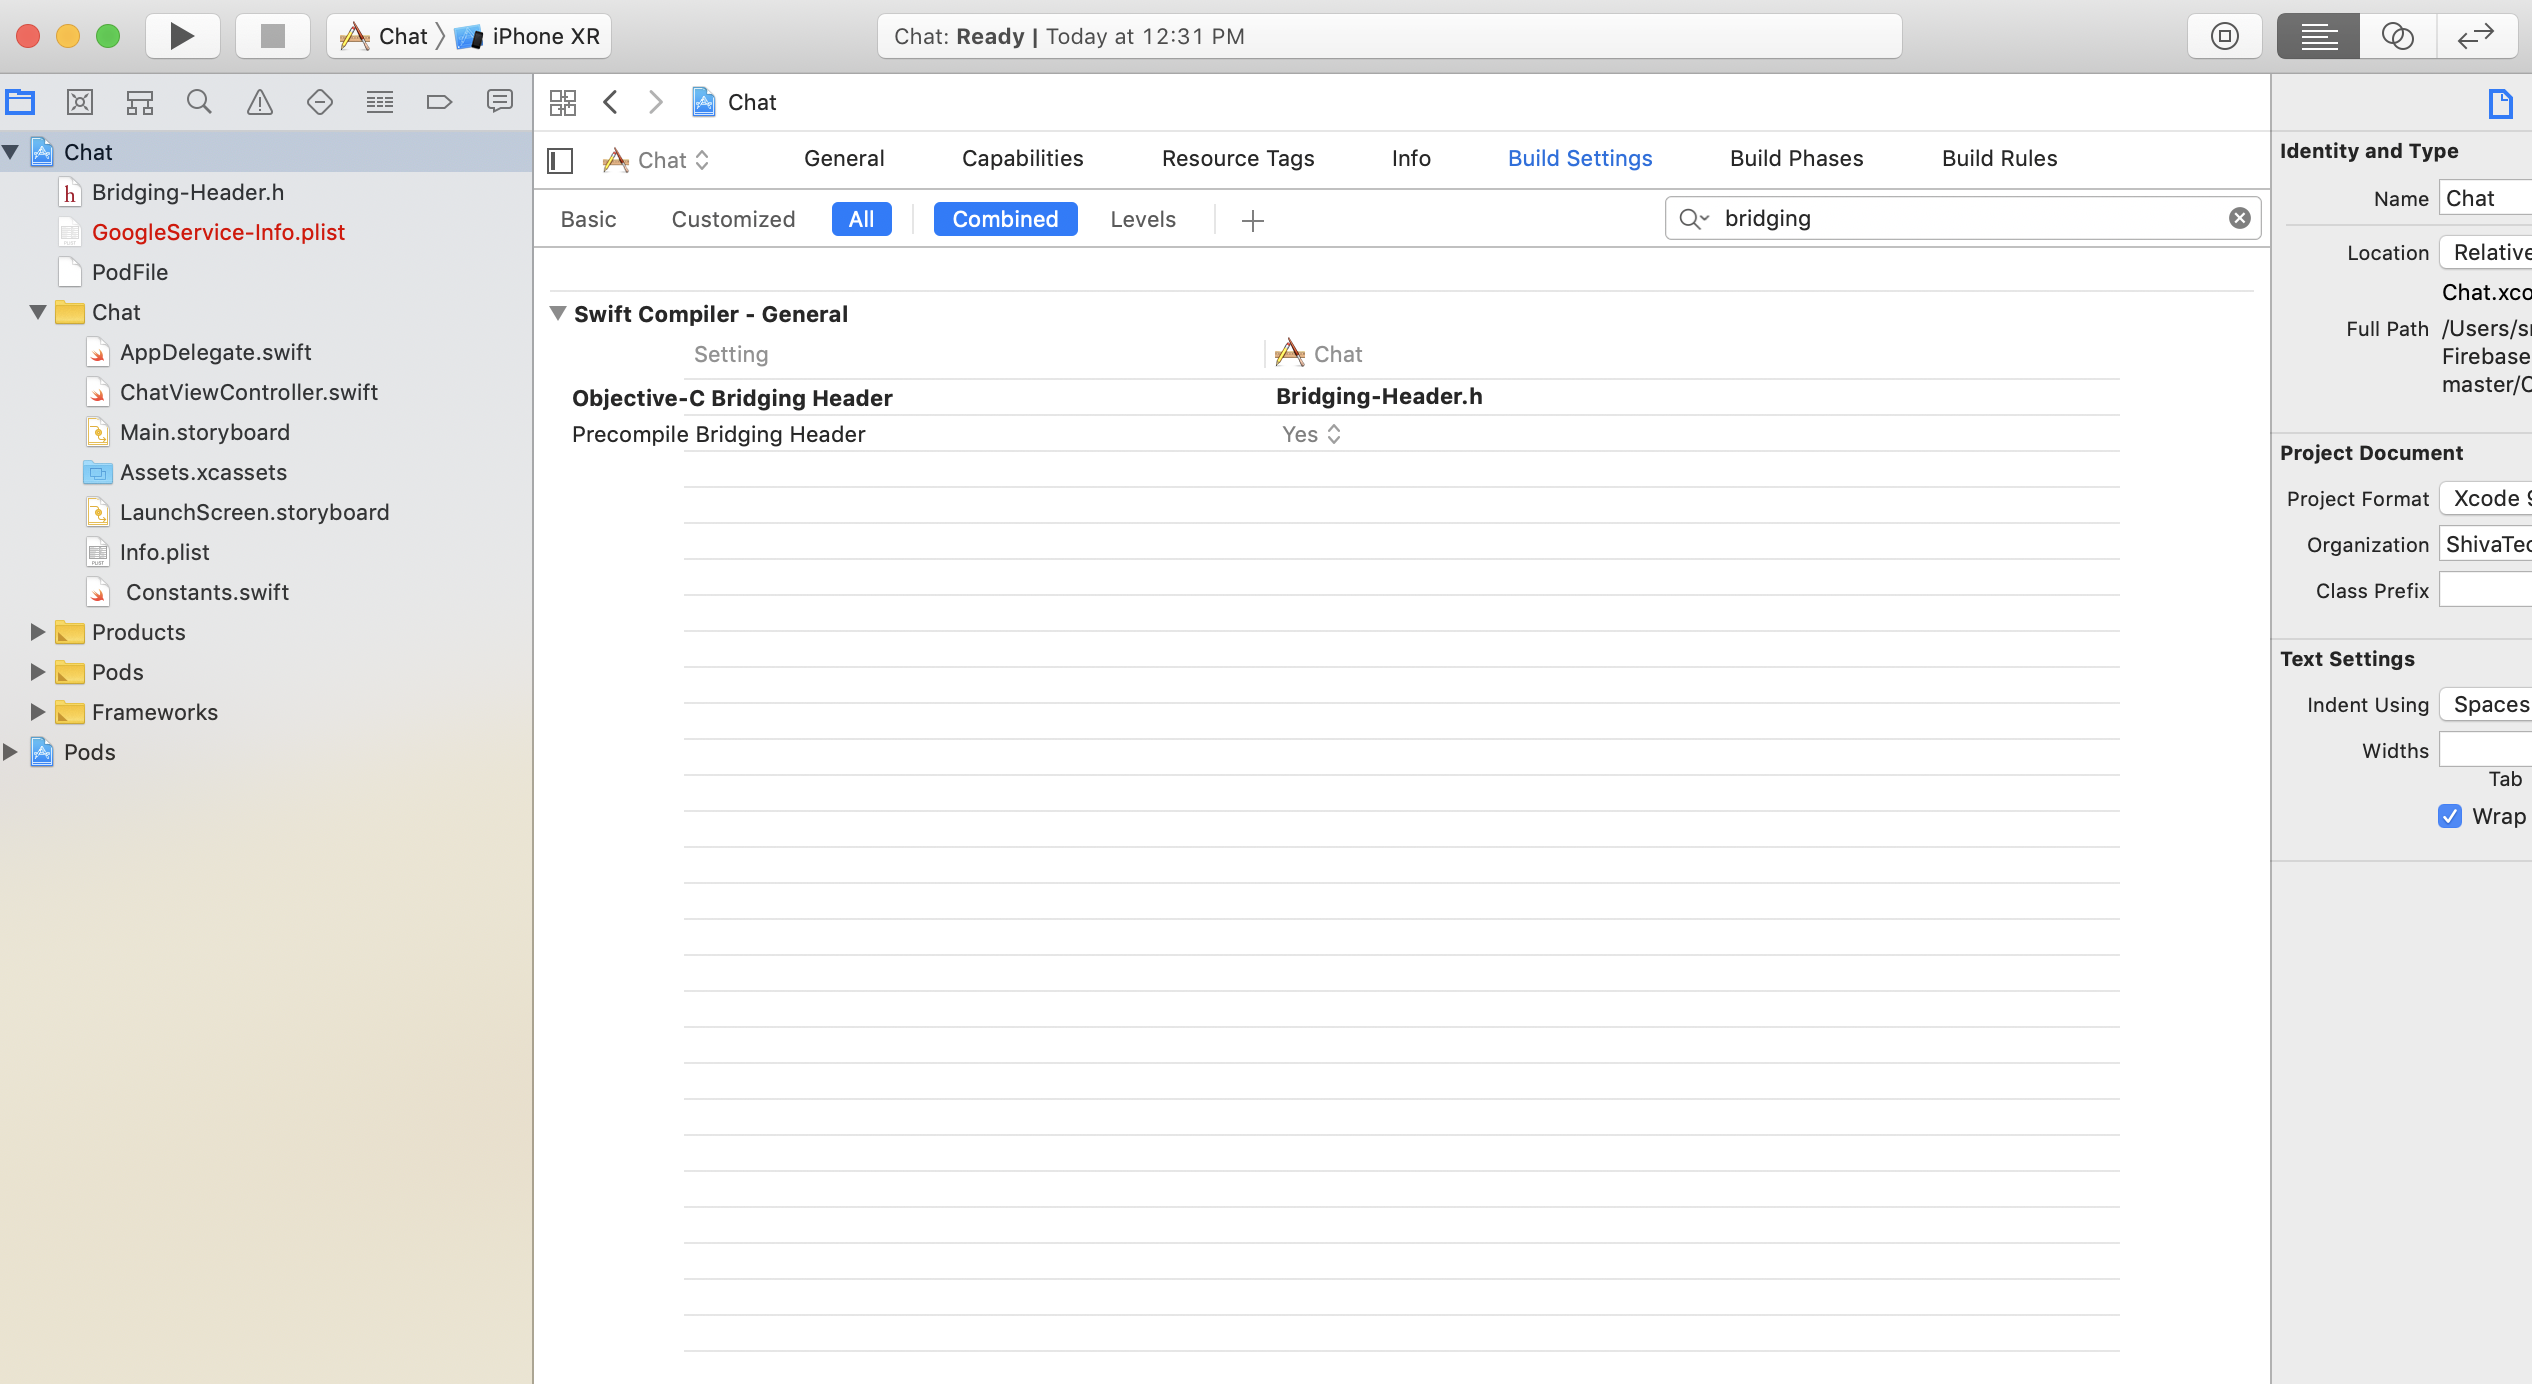
- Go to your Project Settings by clicking on your project in the Project Navigator, and go to the Build Settings tab for the RealTimeChat Target.
- Then, in the search box top-right, start typing bridging header. locate the row that says * Objective-C Bridging Header.
- Double-click on the empty column next to Objective-C Bridging Header – input box appears. Type in: Bridging-Header.h and click outside the input box to confirm your change.\
Your Bridge Hedaer build settings looks like this
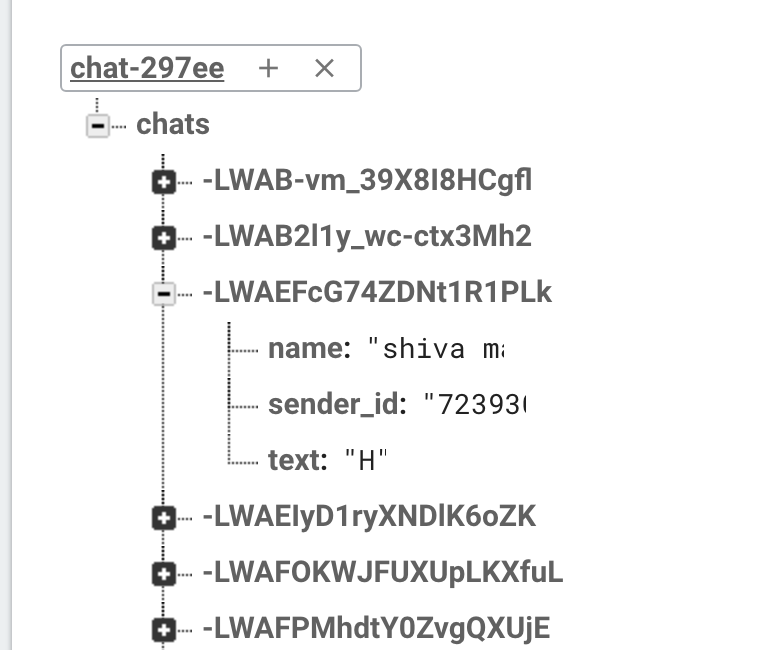
Every Chat Message has a unique $key which differentiate every chat from other. This $key is a special property of firebase database
Every chat message has three properties: a name, a sender_id and the chat text. A path like chatapp/chats/-KmLvuZfWAmvictV04_u/sender_id is reference to individual chat.
- First Open firebase.google.com and signup for free account if you already have account so you can just signin.
- Go to your firebase dashboard
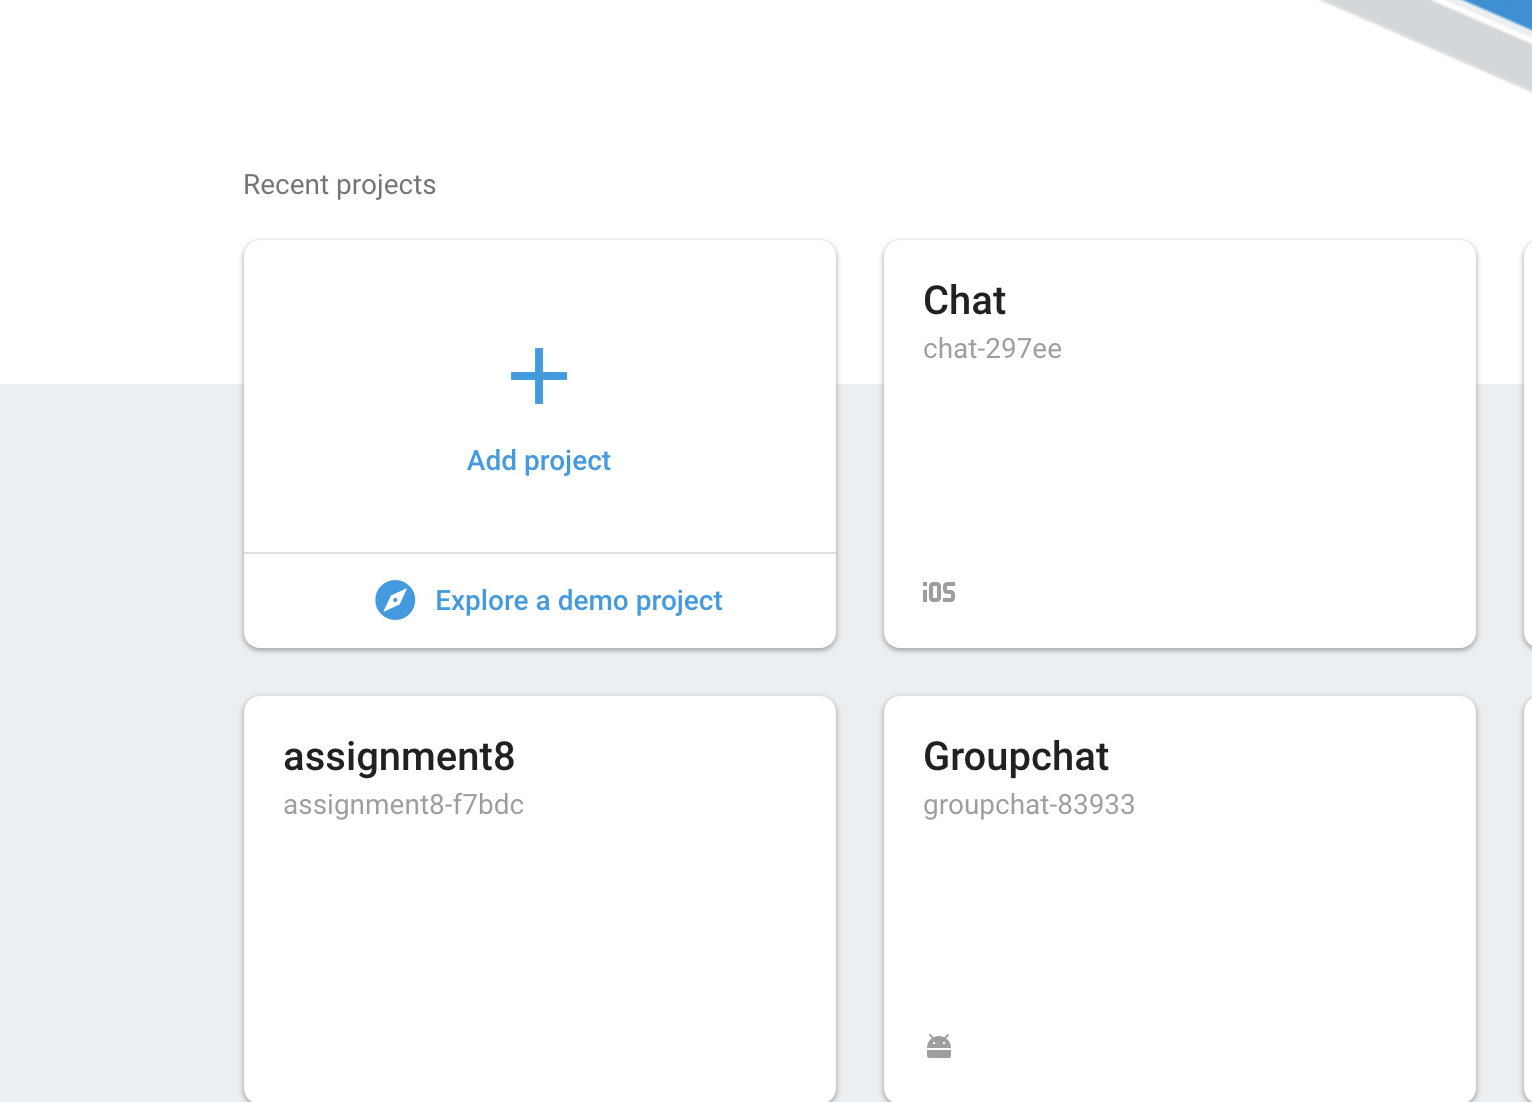
###Choose:
- Project Name: Chat
- Country/Region: Choose your country or region
Click Create Project and Add Firebase to your Ios App
On Next Dialog Choose the following settings:
- iOS Bundle ID: Input your app’s Bundle ID. You Choosed when creating the Xcode project. It’s like:
com.shivamall.RealTimeChat. - App Nickname: Anything, like “Real Time Chat App”
Click Register App. In the next screen that appears, Download GoogleService-Info.plist button. .plist file will be downloaded , so save it in a download location.
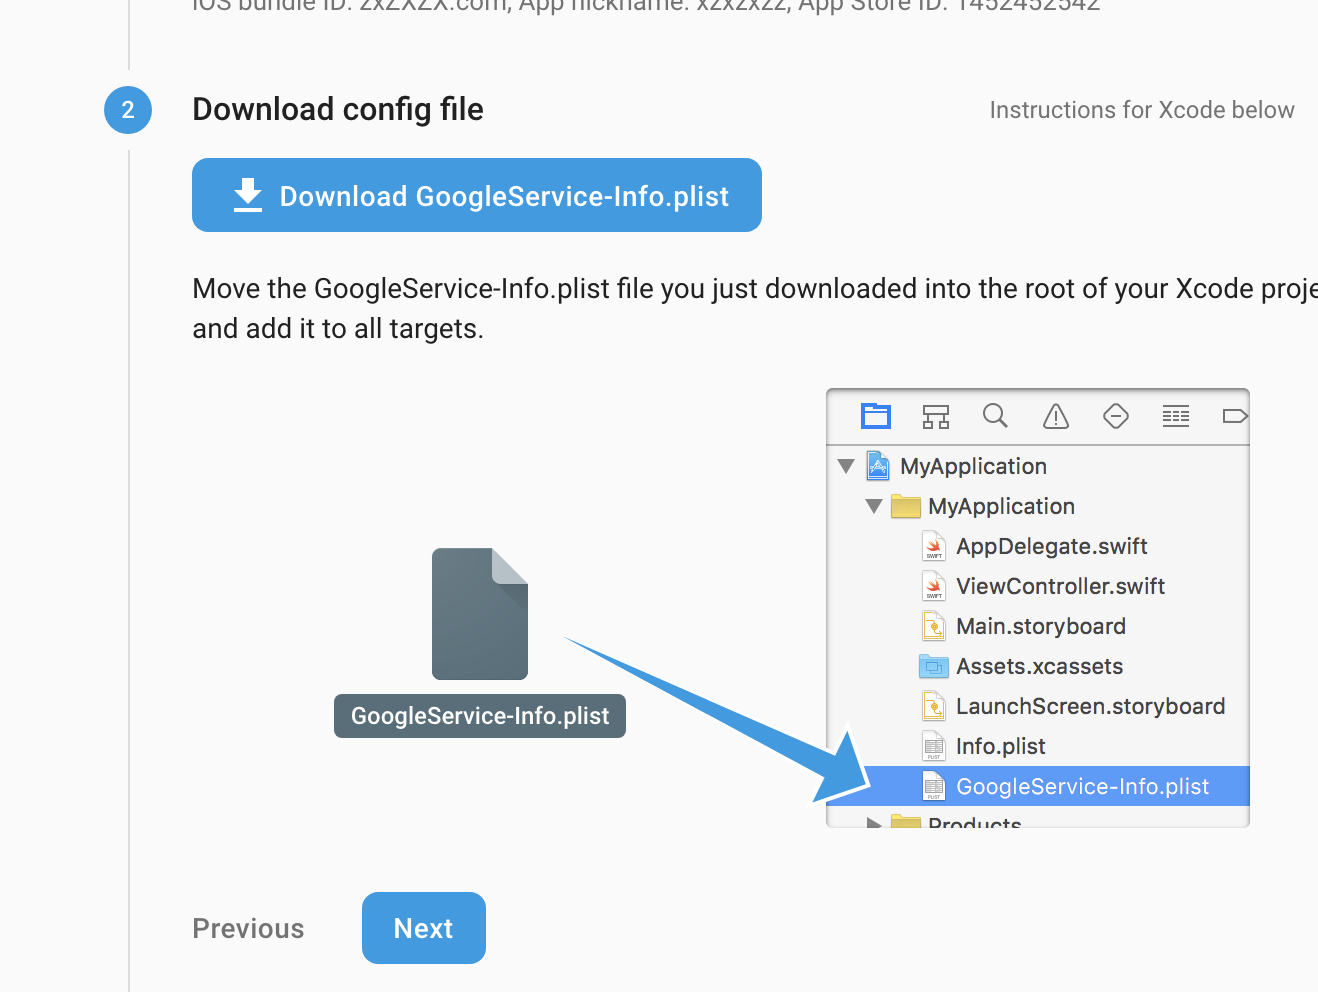
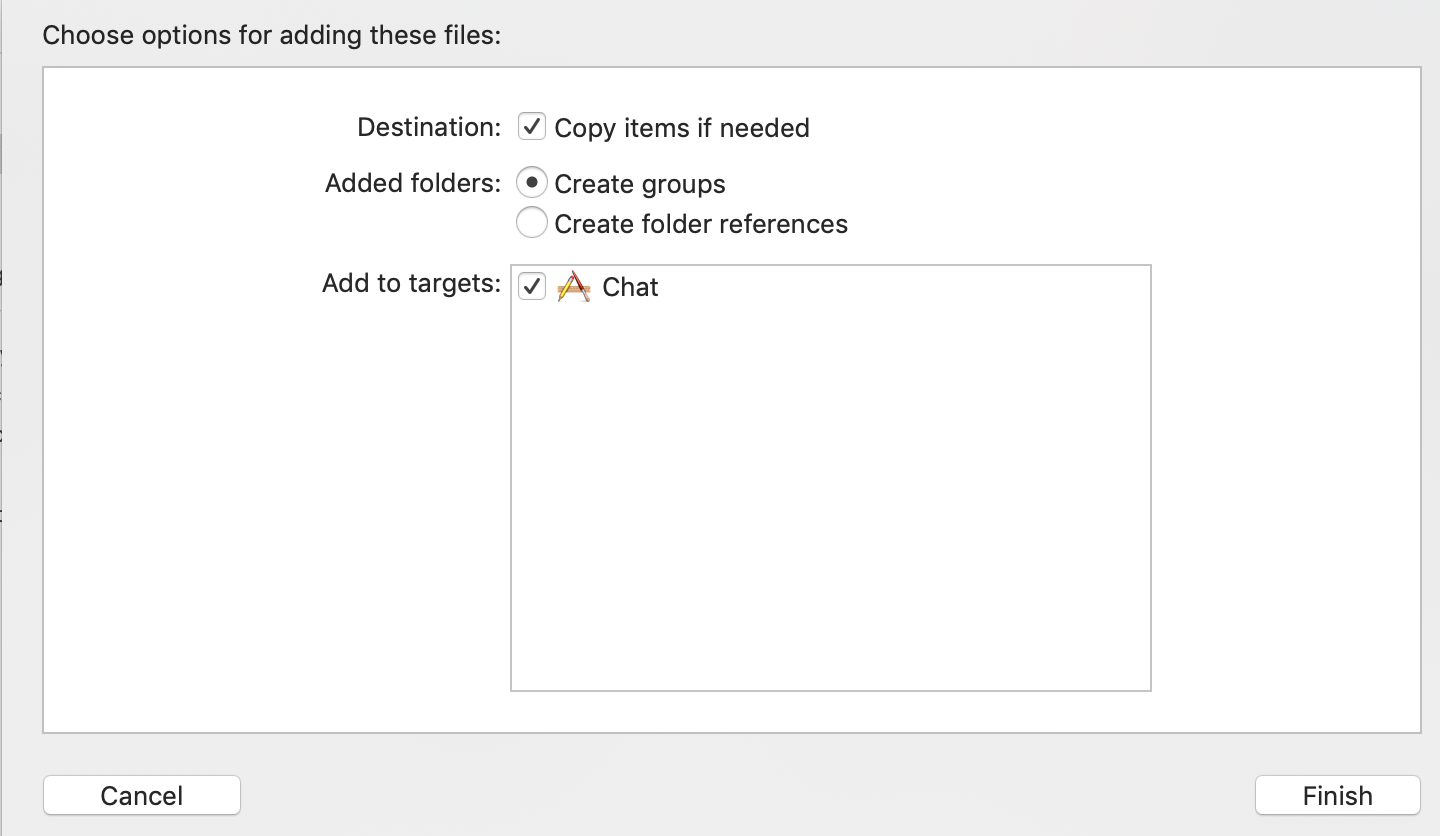
Add the .plist file to your Xcode Project . Drag and drop the file from finder into xcode. When dialog box appears tick the checkbox for Copy items and tick the checkbox next to Target.
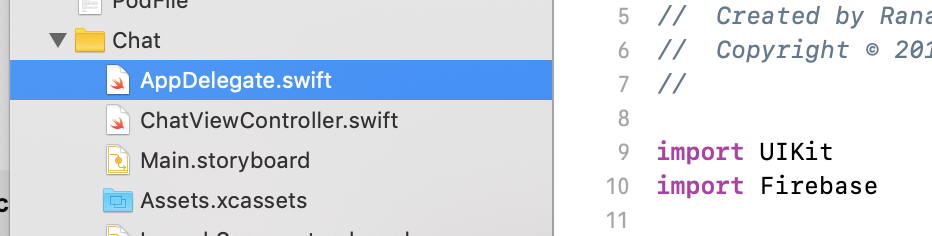
- Open AppDelegate.swift in our project
- Right below import UIKit, type: import Firebase.
- Locate the function application(_:didFinishLaunchingWithOptions:) and add this line to the method: FirebaseApp.configure().

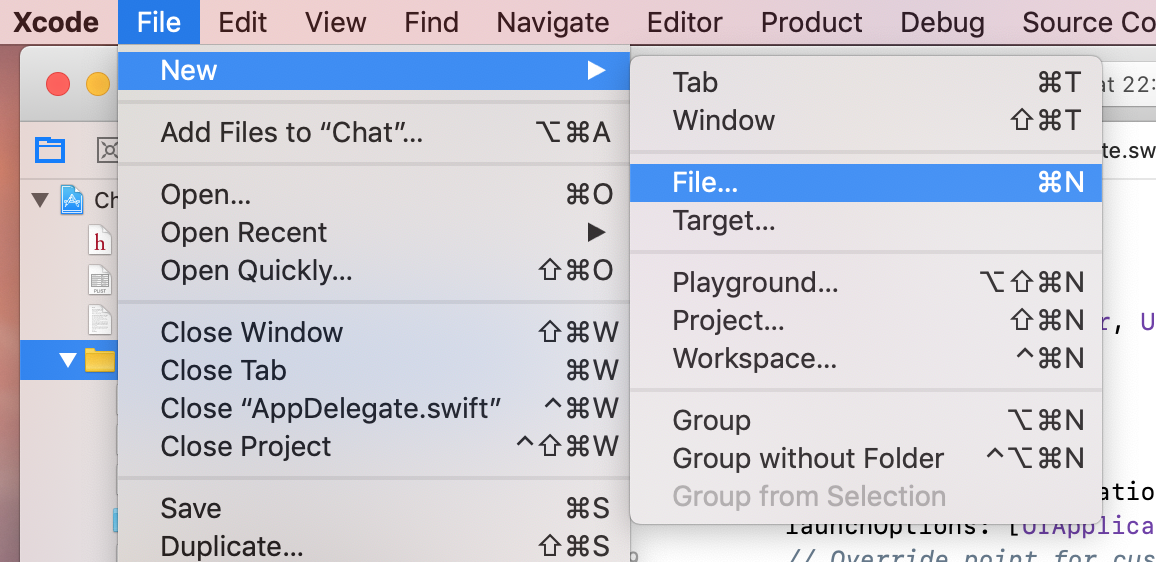
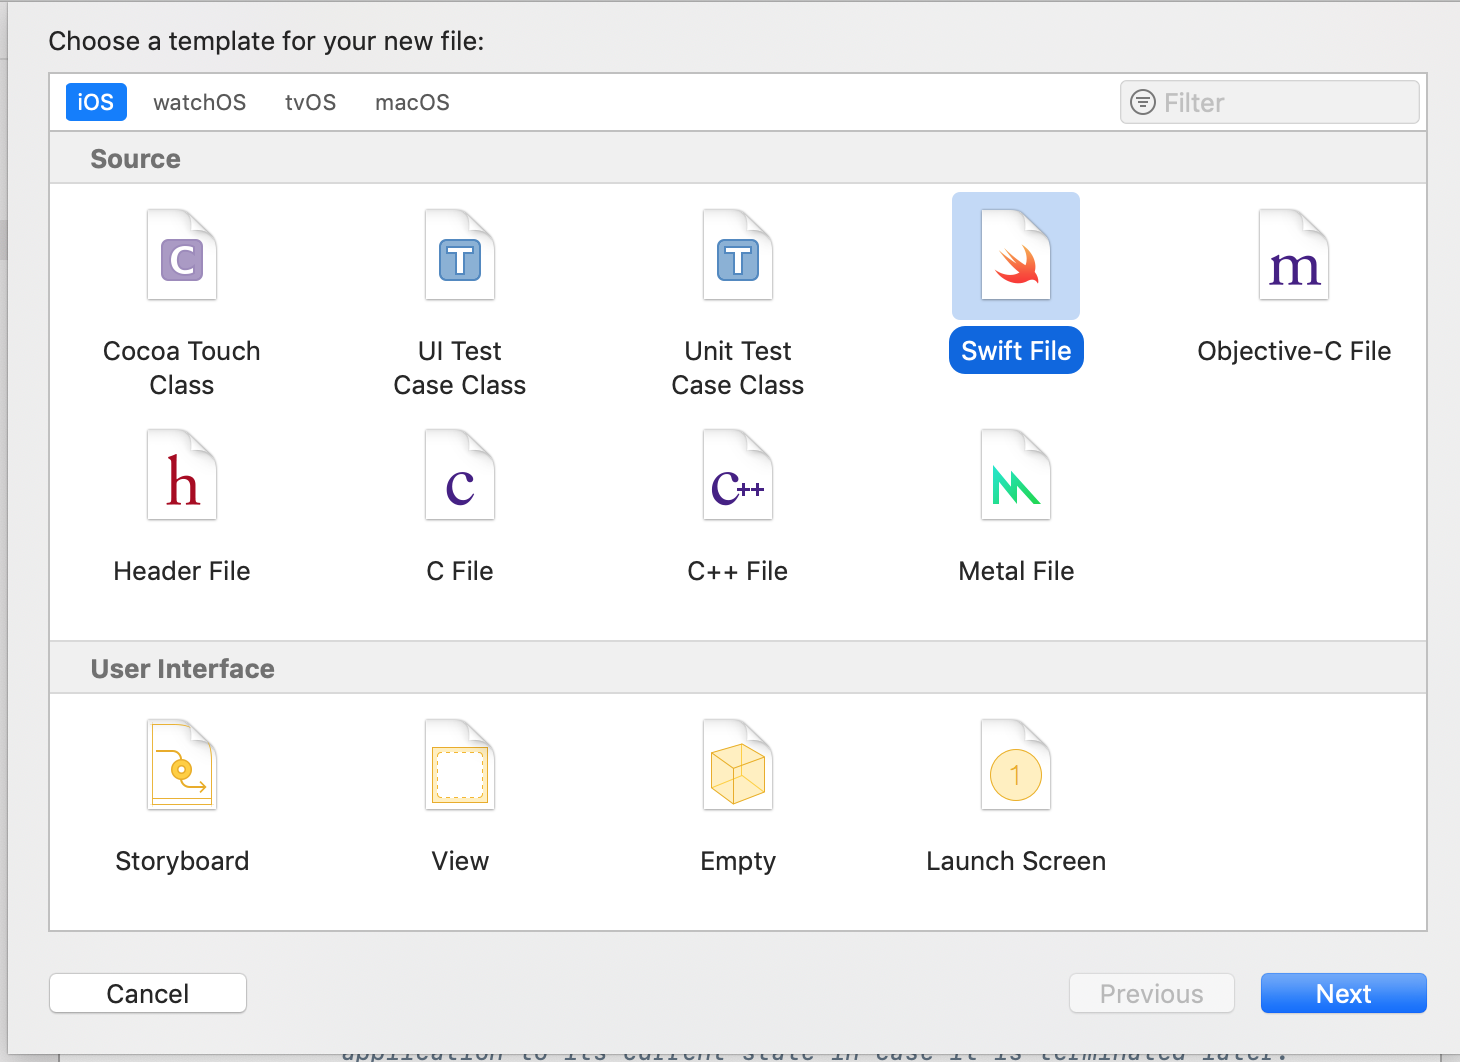
- Right-click on the project and choose New File....
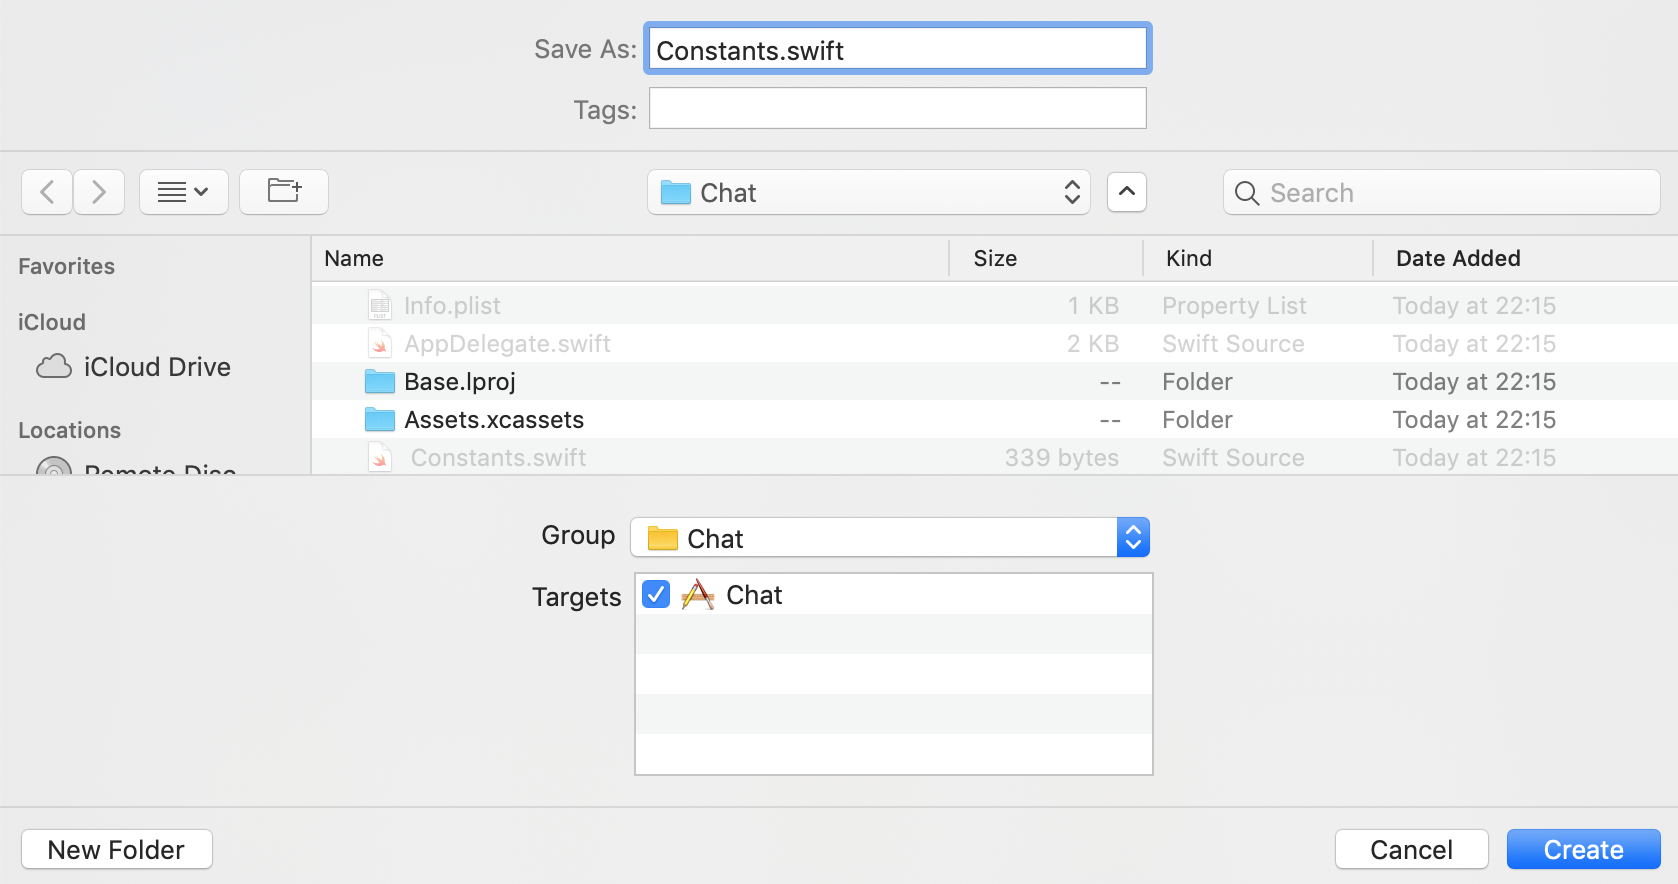
- Pick the Swift File template, name the file Constants.swift, add it to the Chat Target, and save the file in your project folder.
- click Create.
Add below code in Constants.swift:
import Firebase

struct Constants
{
  struct refs
  {
      static let databaseRoot = Database.database().reference()
      static let databaseChats = databaseRoot.child("chats")
  }
}
Above code is a structure to store variables reference to chat data.
Constants.refs.databaseChats
There's Constants called databaseRoot and databaseChats. Root is to get reference to database and then databaseChats “extends” that with a child node called chats.
- We need to set permissions. Firebase has permission tool which grant access to read or write data making data more secure from
unauthorized use. This is app is to be used for group chat so permission gonna be simple.
{
  "rules": {
    ".read": true,
    ".write": true
  }
}
Follow the steps for configuring permissions in Firebase:
- Head to your Firebase Dashboard and open your app. This will show you your app’s page.
- Choose Database option from menu on the left.
- From top-left, choose the tab Rules.
- Replace the text in the editor with the new rules and click Publish.
Now Check your is compiling properly or not.
Now we going config Ui plugin and connect it firebase.
- Open ChatViewController.swift and locate the class.
- Add import JSQMessagesViewController below import UIKit.
- Replace UIViewController with JSQMessagesViewController.
Add following lines in viewDidLoad():
senderId = "1234"
senderDisplayName = "..."
Add this Code right below super.viewDidLoad() and change the display name to your own name.
We need a variable to store messages and to store it in a array and showed in the form of bubbles in JSQMVC
var messages = [JSQMessage]()
Add above code below ChatViewController class
Providing messages data to JSQMVC to show it on mobile ui
override func collectionView(_ collectionView: JSQMessagesCollectionView!, messageDataForItemAt indexPath: IndexPath!) -> JSQMessageData!
{
   return messages[indexPath.item]
}

override func collectionView(_ collectionView: UICollectionView, numberOfItemsInSection section: Int) -> Int
{
   return messages.count
}
Add above code After closes bracket of view did load and inside chatviewcontroller class
lazy var outgoingBubble: JSQMessagesBubbleImage = {
   return JSQMessagesBubbleImageFactory()!.outgoingMessagesBubbleImage(with: UIColor.jsq_messageBubbleBlue())
}()

lazy var incomingBubble: JSQMessagesBubbleImage = {
   return JSQMessagesBubbleImageFactory()!.incomingMessagesBubbleImage(with: UIColor.jsq_messageBubbleLightGray())
}()
lazy means they will be initialized once
override func collectionView(_ collectionView: JSQMessagesCollectionView!, messageBubbleImageDataForItemAt indexPath: IndexPath!) -> JSQMessageBubbleImageDataSource!
{
   return messages[indexPath.item].senderId == senderId ? outgoingBubble : incomingBubble
}

override func collectionView(_ collectionView: JSQMessagesCollectionView!, avatarImageDataForItemAt indexPath: IndexPath!) -> JSQMessageAvatarImageDataSource!
{
   return nil
}
Add this code inside chat view controller class
inputToolbar.contentView.leftBarButtonItem = nil
collectionView.collectionViewLayout.incomingAvatarViewSize = CGSize.zero
collectionView.collectionViewLayout.outgoingAvatarViewSize = CGSize.zero
override func collectionView(_ collectionView: JSQMessagesCollectionView!, attributedTextForMessageBubbleTopLabelAt indexPath: IndexPath!) -> NSAttributedString!
{
    return messages[indexPath.item].senderId == senderId ? nil : NSAttributedString(string: messages[indexPath.item].senderDisplayName)
}

override func collectionView(_ collectionView: JSQMessagesCollectionView!, layout collectionViewLayout: JSQMessagesCollectionViewFlowLayout!, heightForMessageBubbleTopLabelAt indexPath: IndexPath!) -> CGFloat
{
    return messages[indexPath.item].senderId == senderId ? 0 : 15
}
- collectionView(_:attributedTextForMessageBubbleTopLabelAt:) is used when the label text is needed
- collectionView(_:collectionViewLayout:heightForMessageBubbleTopLabelAt:) is used when the height of the top label is needed
override func didPressSend(_ button: UIButton!, withMessageText text: String!, senderId: String!, senderDisplayName: String!, date: Date!)
{
    let ref = Constants.refs.databaseChats.childByAutoId()

    let message = ["sender_id": senderId, "name": senderDisplayName, "text": text]

    ref.setValue(message)

    finishSendingMessage()
}
This code will send chat data to firebase database.
let query = Constants.refs.databaseChats.queryLimited(toLast: 10)

_ = query.observe(.childAdded, with: { [weak self] snapshot in

    if  let data        = snapshot.value as? [String: String],
        let id          = data["sender_id"],
        let name        = data["name"],
        let text        = data["text"],
        !text.isEmpty
    {
        if let message = JSQMessage(senderId: id, displayName: name, text: text)
        {
            self?.messages.append(message)

            self?.finishReceivingMessage()
        }
    }
})
Now we write code for getting data from firebase realtime. This will automatically fetch data from firebase if data changes into firebase.
@objc func showDisplayNameDialog()
{
    let defaults = UserDefaults.standard

    let alert = UIAlertController(title: "Your Display Name", message: "Before you can chat, please choose a display name. Others will see this name when you send chat messages. You can change your display name again by tapping the navigation bar.", preferredStyle: .alert)

    alert.addTextField { textField in

        if let name = defaults.string(forKey: "jsq_name")
        {
            textField.text = name
        }
        else
        {
            let names = ["Ford", "Arthur", "Zaphod", "Trillian", "Slartibartfast", "Humma Kavula", "Deep Thought"]
            textField.text = names[Int(arc4random_uniform(UInt32(names.count)))]
        }
    }

    alert.addAction(UIAlertAction(title: "OK", style: .default, handler: { [weak self, weak alert] _ in

        if let textField = alert?.textFields?[0], !textField.text!.isEmpty {

            self?.senderDisplayName = textField.text

            self?.title = "Chat: \(self!.senderDisplayName!)"

            defaults.set(textField.text, forKey: "jsq_name")
            defaults.synchronize()
        }
    }))

    present(alert, animated: true, completion: nil)
}
Add above code below view did load and inside chat view controller
#REFERENCES