Find solutions to your Python errors without leaving your IDE or terminal!
Ever have Python throw an error traceback longer than a CVS receipt 🧾? Is it dizzying to read through a bunch of cryptic lines trying to figure out exactly what caused the error? Do you look at the traceback and go, "WHAT THE ....."?😕
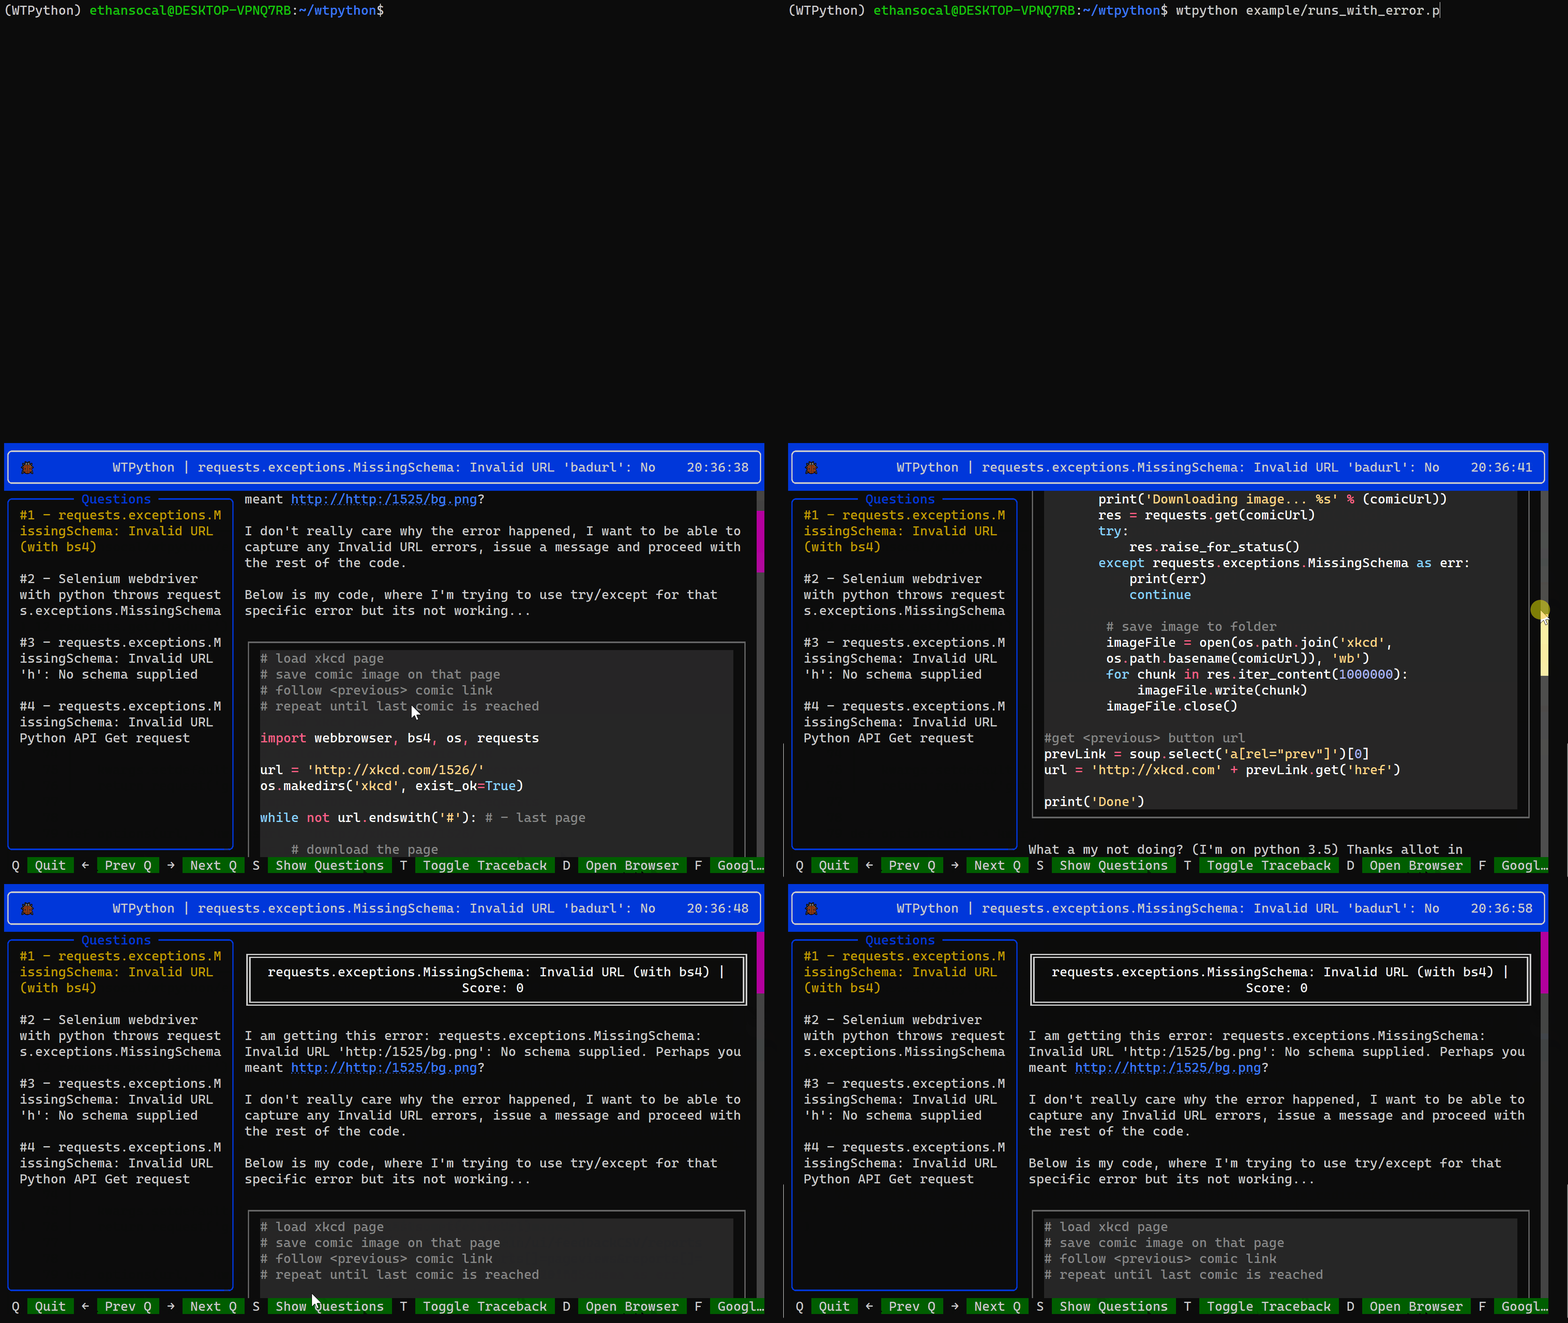
What the Python (wtpython) is a simple terminal user interface that allows you to explore relevant answers on Stackoverflow without leaving your terminal or IDE. When you get an error, all you have to do is swap python for wtpython. When your code hits an error, you'll see a textual interface for exploring relevant answers allowing you to stay focused and ship faster! 🚀
wtpython is styled using Rich and the interface is developed using Textual.
Like what you see? Feel free to share #wtpython on social media!
This project is hosted on pypi, allowing you to install it with pip.
pip install wtpython
When you're coding and running your script or application, then all of a sudden, you see an error and think to yourself "what the...?"
$ python example/division_by_zero_error.py
Traceback (most recent call last):
  File "/home/cohan/github/what-the-python/wtpython/example/division_by_zero_error.py", line 1, in <module>
    1 / 0
ZeroDivisionError: division by zero
All you have to do is jump to the beginning of the line and change python to wtpython and the magic will happen.
$ wtpython example/division_by_zero_error.py
# Magic! 🎩
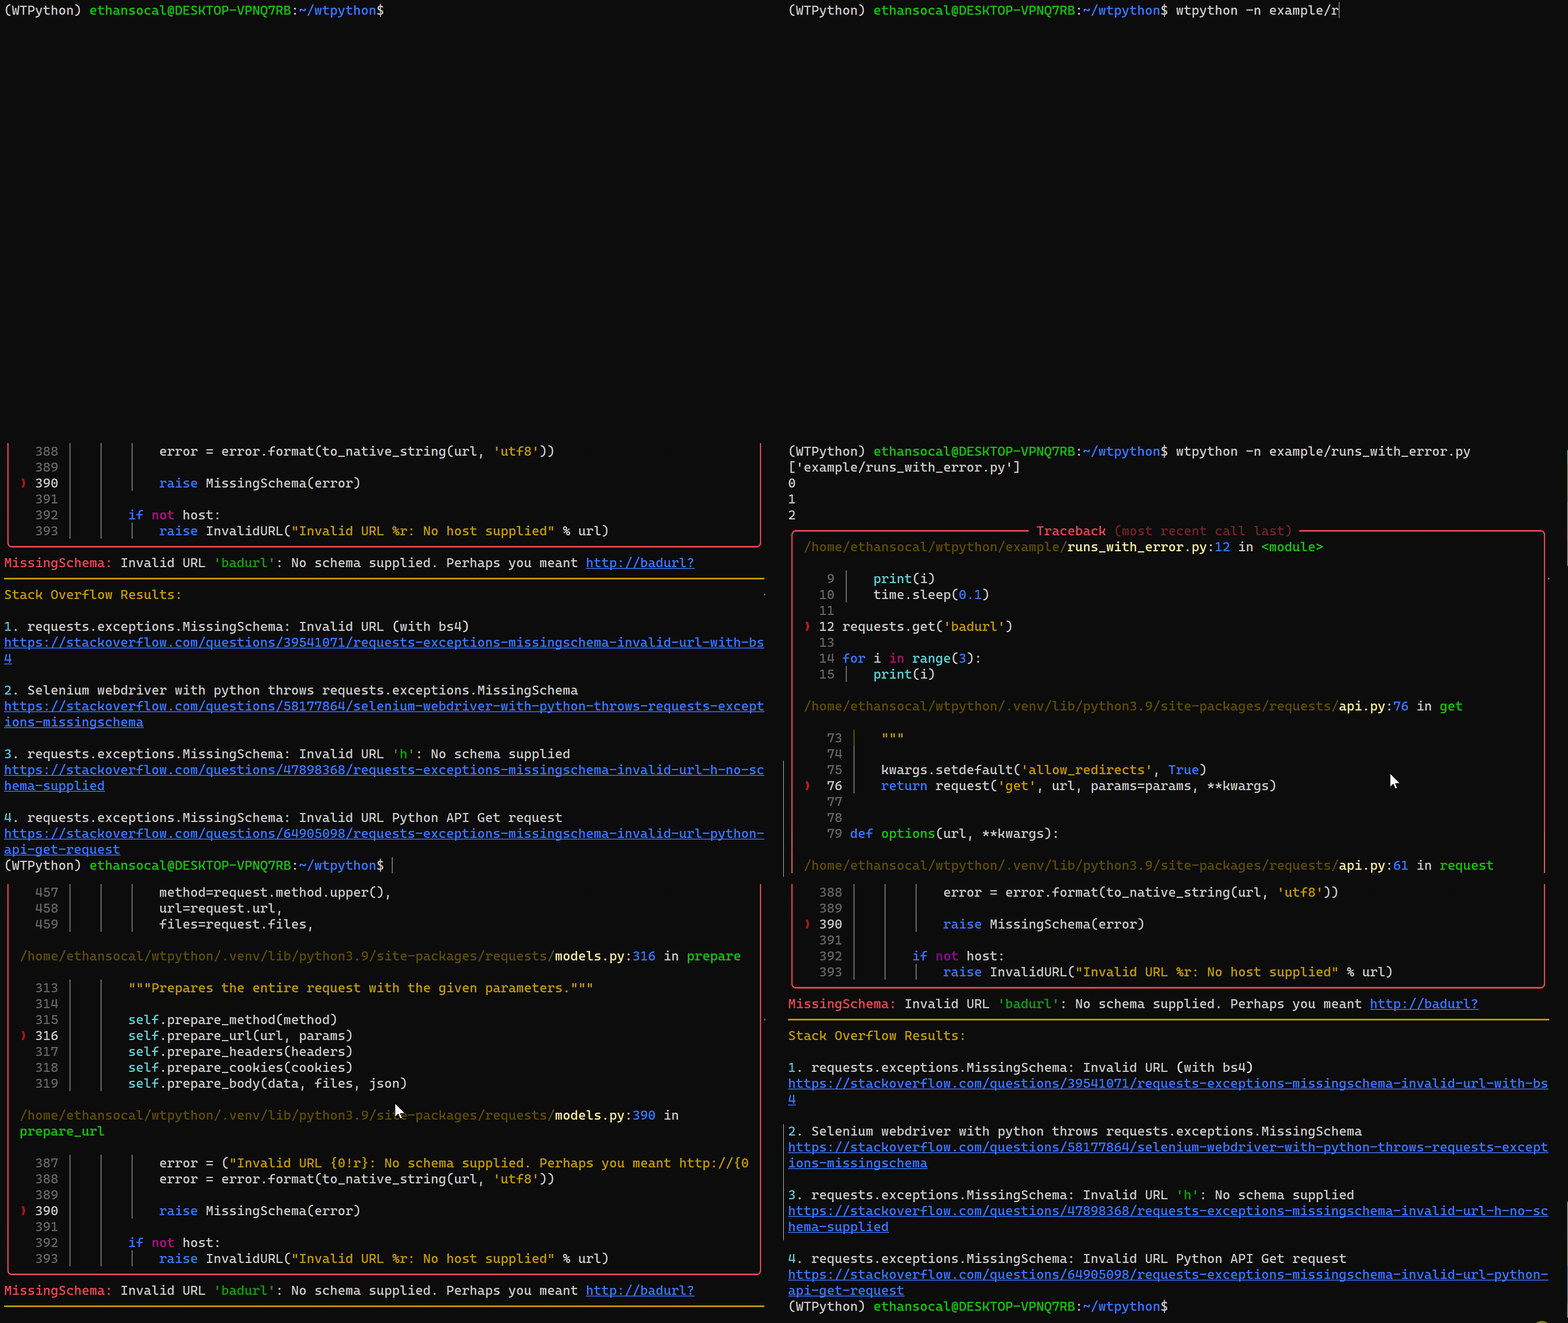
If you want results but don't want to go into the interface, just pass the -n flag to see the Rich formatted traceback and links to the most relevant questions on Stackoverflow.
If you want, you can always run wtpython in place of python. wtpython is designed to allow your code to function normally and only acts when your code hits an error. wtpython will even allow you to pass arguments to your own script! If our code hits an error, please let us know.
All command line options should be passed before your script and arguments passed to your script.
| Flag | Action |
|---|---|
-n or --no-display |
Do not enter the interactive session, just print the error and give me the links! |
-c or --copy-error |
Add the error message to your clipboard so you can look for answers yourself (it's okay, we understand). |
--clear-cache |
wtpython will cache results of each error message for up to a day. This helps prevent you from getting throttled by the Stackoverflow API. |
| Key | Action |
|---|---|
| s | Toggle the sidebar (questions list) |
| t | View the traceback |
| ←, k | View previous question |
| →, j | View next question |
| d | Open question in your browser |
| f | Search for answers on Google |
| q, ctrl+c | Quit the interface. |
| i | Report an issue with wtpython |
This project is still in the early phases, but we have big plans going forward. We hope to tackle:
- Windows support (without WSL)
- Jupyter integration
- More interactive interface
- User configuration settings
- Much much more!
If you have any feedback, please create an issue or start a discussion
Contributions are welcome!
For typos and minor corrections, please feel free to submit a PR. For technical changes, please speak with the core team first. We'd hate to turn down your awesome work.
Note: Due to a limitation in textual, Windows is not supported, but fear not, this works in WSL.
-
Fork the repository to get started.
-
Clone the repo and enter the
wtpythonfolder.
git clone https://github.com/<your-name>/wtpython.git
cd wtpython
- Create and activate a virtual environment.
python -m venv .venv --prompt template
source .venv/bin/activate
- Upgrade pip and install Flit.
python -m pip install --upgrade pip flit
- Install the package in editable mode.
flit install -s
If you add dependencies to the project, you'll have to run this command again to install the new dependencies. Make sure to pin the version in pyproject.toml. This software is under a MIT license, so all dependencies must respect this. There is an automated test that will block contributions that violate MIT.
- Install pre-commit.
pre-commit install
The .pre-commit-config.yaml file is configured to perform the following tasks on each commit:
- Validate yaml files
- Validate toml files
- Ensure a single new line on each file
- Ensure trailing white spaces are removed
- Ensure
noqaannotations have specific codes - Ensure your python imports are sorted consistently
- Check for errors with flake8
- Create a new branch in your repo.
git checkout -b <mybranch>
- Make some awesome changes!
We're excited to see what you can do. 🤩
- Commit your changes.
git add .
git commit -m "<description of changes>"
- Push your changes up to your repository.
git push --set-upstream origin <mybranch>
-
Open a Pull Request. Please provide a good description to help us understand what you've done. We are open to your suggestions and hope you'll be open to feedback if necessary.
-
Celebrate! You've just made an open-source contribution, 🎉 and you deserve a gold star! ⭐


