Plugin to add flashcards from a text or markdown file to Anki. Run in Obsidian as a plugin, or from the command-line as a python script. Built with Obsidian markdown syntax in mind. Supports user-defined custom syntax for flashcards.
See the Trello for planned features.
Check out the Wiki! It has a ton of information, including setup instructions for new users. I will include a copy of the instructions here:
- Start up Anki, and navigate to your desired profile.
- Ensure that you've installed AnkiConnect.
- Have Obsidian downloaded
- Search the 'Community plugins' list for this plugin
- Install the plugin.
- In Anki, navigate to Tools->Addons->AnkiConnect->Config, and change it to look like this:
{
    "apiKey": null,
    "apiLogPath": null,
    "webBindAddress": "127.0.0.1",
    "webBindPort": 8765,
    "webCorsOrigin": "http://localhost",
    "webCorsOriginList": [
        "http://localhost",
        "app://obsidian.md"
    ]
}
- Restart Anki to apply the above changes
- With Anki running in the background, load the plugin. This will generate the plugin settings.
You shouldn't need Anki running to load Obsidian in the future, though of course you will need it for using the plugin!
To run the plugin, look for an Anki icon on your ribbon (the place where buttons such as 'open Graph view' and 'open Quick Switcher' are). For more information on use, please check out the Wiki!
- Install the latest version of Python.
- If you are a new user, download
obstoanki_setup.pyfrom the releases page, and place it in the folder you want the script installed (for example your notes folder). - Run
obstoanki_setup.py, for example by double-clicking it in a file explorer. This will download the latest version of the script and required dependencies automatically. Existing users should be able to run their existingobstoanki_setup.pyto get the latest version of the script. - Check the Permissions tab below to ensure the script is able to run.
- Run
obsidian_to_anki.py, for example by double-clicking it in a file explorer. This will generate a config file,obsidian_to_anki_config.ini.
The script needs to be able to:
- Make a config file in the directory the script is installed.
- Read the file in the directory the script is used.
- Make a backup file in the directory the script is used.
- Rename files in the directory the script is used.
- Remove a backup file in the directory the script is used.
- Change the current working directory temporarily (so that local image paths are resolved correctly).
Current features (check out the wiki for more details):
- Custom note types - You're not limited to the 6 built-in note types of Anki.
- Updating notes from file - Your text files are the canonical source of the notes.
- Tags, including tags for an entire file.
- Adding to user-specified deck on a per-file basis.
- Markdown formatting.
- Math formatting.
- Embedded images. GIFs should work too.
- Audio.
- Auto-deleting notes from the file.
- Reading from all files in a directory automatically - recursively too!
- Inline Notes - Shorter syntax for typing out notes on a single line.
- Easy cloze formatting - A more compact syntax to do Cloze text
- Frozen Fields
- Obsidian integration - A link to the file that made the flashcard, full link and image embed support.
- Custom syntax - Using regular expressions, add custom syntax to generate notes that make sense for you. Some examples:
# Style
This style is suitable for having the header as the front, and the answer as the back

- Question answer style.
Q: How do you use this style?
A: Just like this.

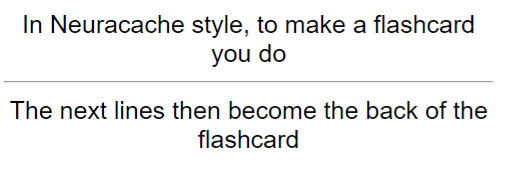
- Neuracache #flashcard style.
In Neuracache style, to make a flashcard you do #flashcard
The next lines then become the back of the flashcard

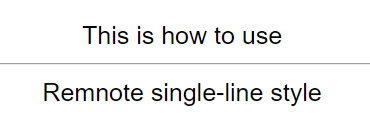
- Ruled style
How do you use ruled style?
---
You need at least three '-' between the front and back of the card.

- Markdown table style
| Why might this style be useful? |
| ------ |
| It looks nice when rendered as HTML in a markdown editor. |

- Cloze paragraph style
The idea of {cloze paragraph style} is to be able to recognise any paragraphs that contain {cloze deletions}.
Note that all custom syntax is off by default, and must be programmed into the script via the config file - see the Wiki for more details.
