FPV remote control radio car using LinkIt Smart 7688
For a quick understanding what does this project do, please check:
- Youtube video
- Google presentation
Quick references:
- as root, do
npm install ws - put fpvcarsrv.js to
/root - put index.html & arrow.png to
/www/car/ - put init.cgi to
/www/cgi-bin, and dochmod 755 /www/cgi-bin/init.cgi
- init.cgi will start both mjpg-streamer and websocket server, make sure there is
/root/fpvcarsrv.js, if you want to rename/change the path, remember to modify init.cgi as well - mjpg-streamer will be listening port
8080(which is hard-coded in init.cgi)
- the default video settings will be “
320x240, 15fps” - they can be specified at runtime by “
init.cgi?r=640x480&f=30”
- websocket server will be listening port 8001, hard-coded in fpvcarsrv.js
- Wait for 7688 ready after powering on
- check the Wi-Fi LED, it should be always on during bootup
- If 7688 is in AP mode, the LED will turn off after ready. And after a device (laptop or mobile) connect to it, the LED will start to blink
- If 7688 is in Station mode, the LED will be blinking if it connect to an AP.
- Launch browser on your device and goes to "http://hostname/cgi-bin/init.cgi"
- If you want to specifiy camera resolution and fps, goes to "http://hostname/cgi-bin/init.cgi?r=640x480&f=30"
- After a while, it should display following
starting mjpeg streamer (320x240, 15)... done
starting node server ... done
- Click the
/carhyperlink or goes to "http://hostname/car"
/www/cgi-bin
chmod 755 init.cgi
init.cgi is written with Python, it is responsible for (re)start mjpg-streamer and websocket server if anything goes wrong.
/root
it require websocket package, please do “npm install ws”
(remember to setup 7688 to station mode and connect to a AP with network access to do so)
- fpvcarsrv.js is written with Node JS, it is responsible for starting a server allowing client to control the ESC/Servo.
- It starts websocket server at port 8001
- Only the first connection can control the vehicle, the other connection will be viewer.
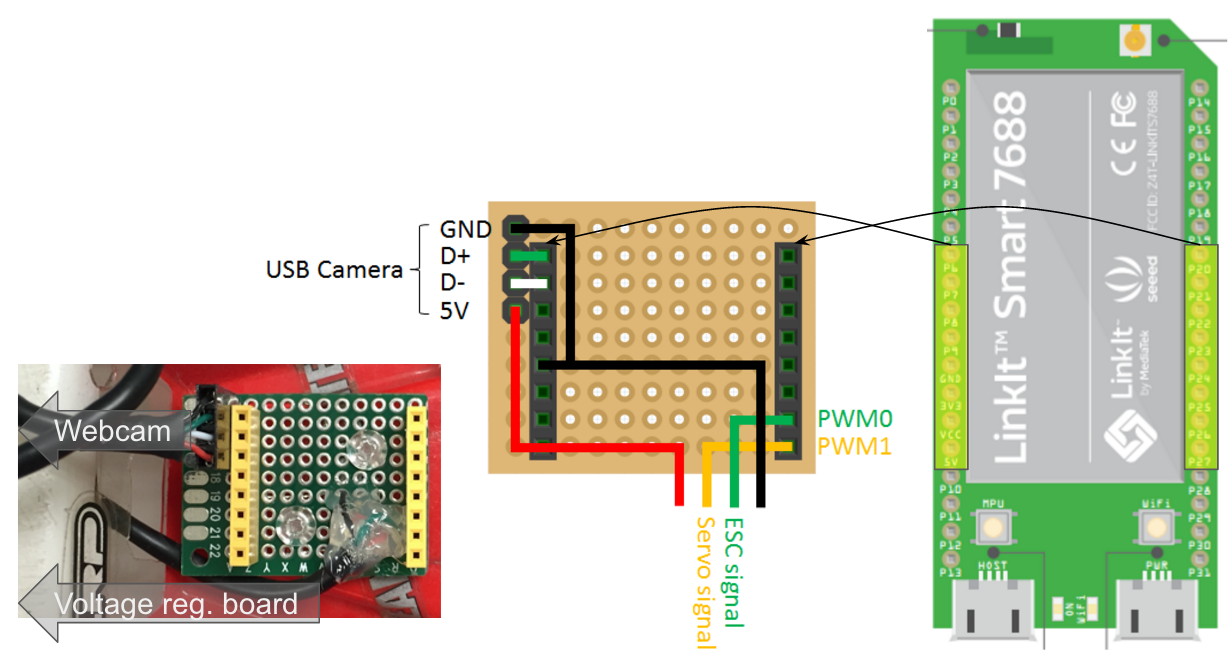
- ESC (Throttle) is connected to PWM0 (pin18) of 7688
- Servo (Steering) is connected to PWM1 (pin19) of 7688
- mraa package (already installed) is used to control the 2 PWM output
/www/car
- Connect to http://hostname/car to reach index.html
- If 7688 is at AP mode, make sure your device connect to it.
- If 7688 is at station mode, make sure 7688 and your device is at the same network domain
- Not all browser support mjpg playback, following case tested:
- Safari on Macbook (OS 10.11): ok
- Chrome on Macbook (OS 10.11): ok
- Safari on iPhone6 (iOS 9.2): ok (not ok at iOS 9.1)
- Chrome on iPhone6: not ok
- This page will create a
element with src = http://hostname:8080/
- This page will also create websocket connection to http://hostname:8001/
- It will wait for server ack, and know its role as controller or viewer.
- In controller’s case, it will monitor touch moving or mouse dragging. and send correponding command to websocket server created in fpvcarsrv.js
- In viewer’s case, it will do nothing
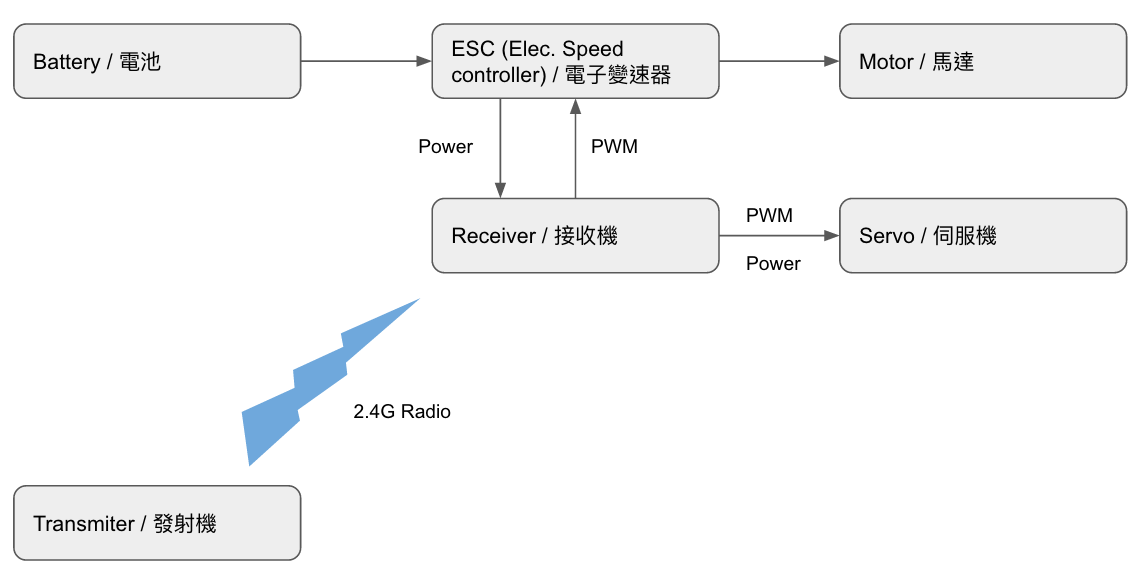 Transmitter sends signal to Receiver and control steering(Servo) and throttle(ESC)
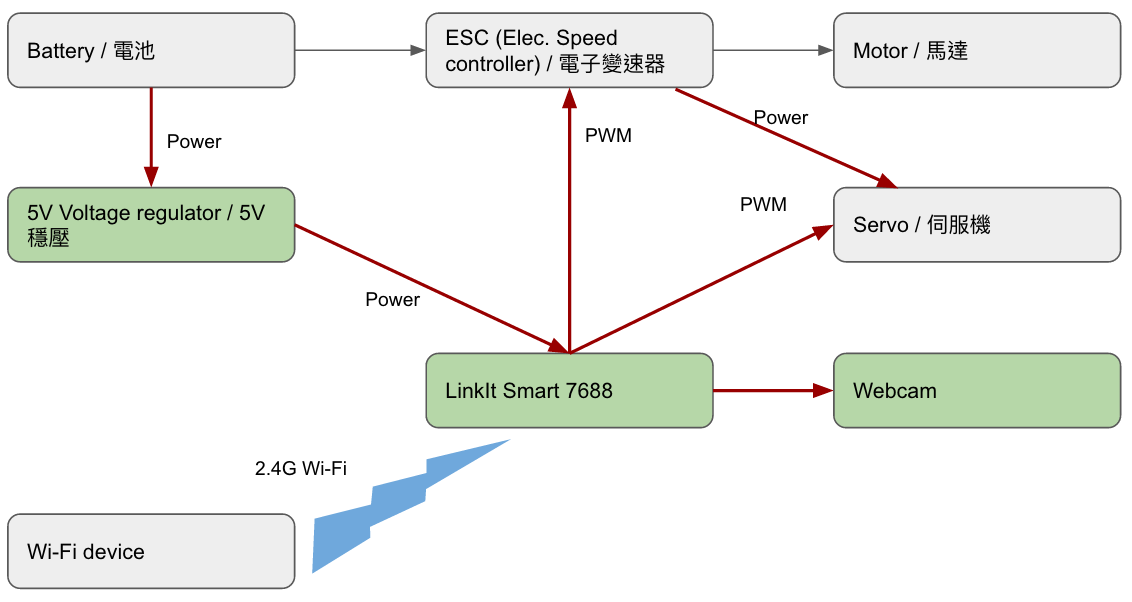 7688 replace Receiver, receive control command from Wi-Fi device and control steering(Servo) and throttle(ESC), it also connect to a USB camera to provide FPV service.
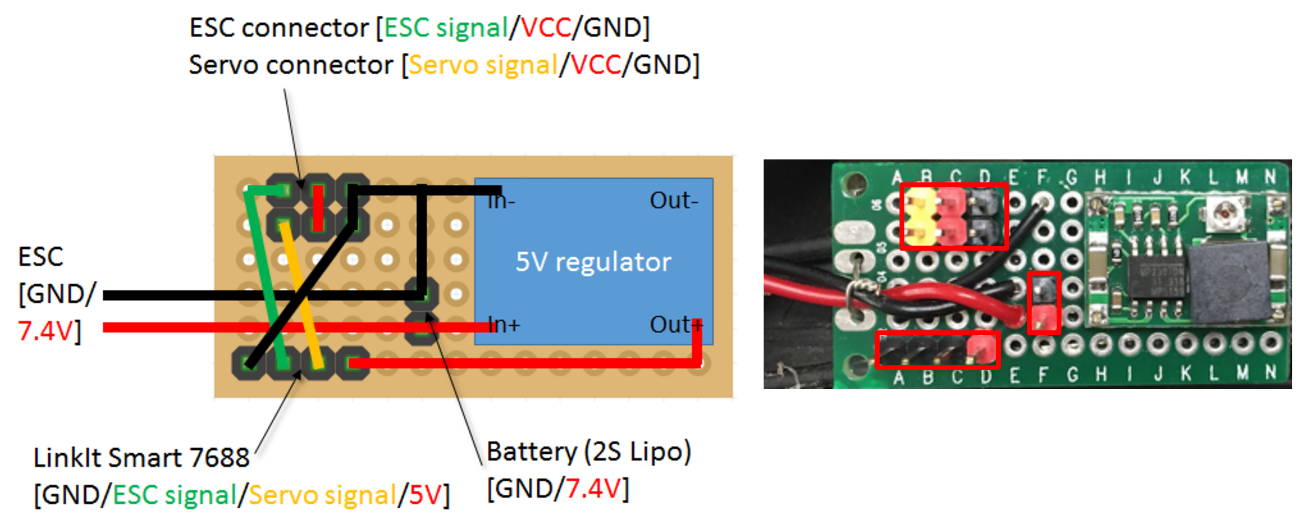
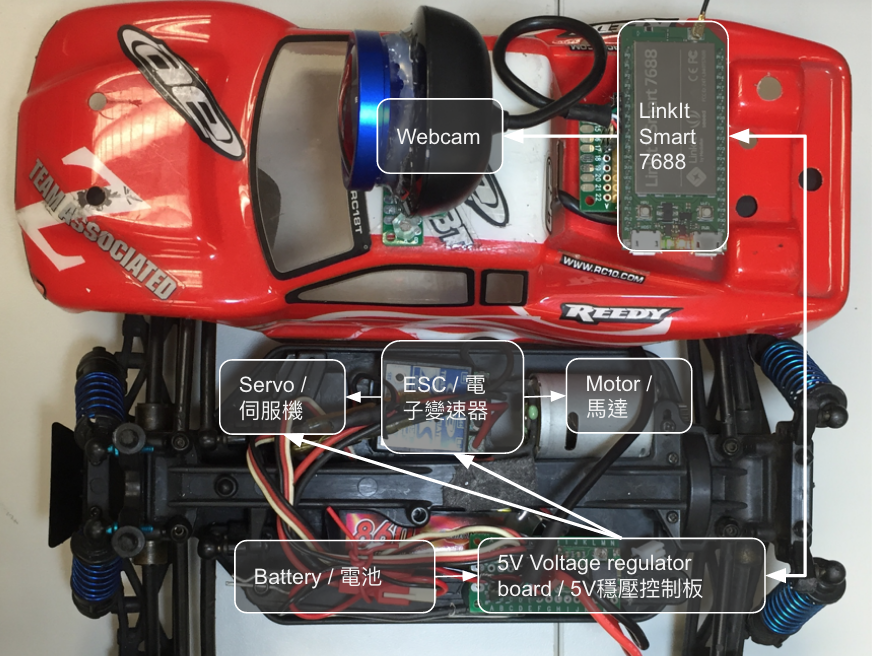 7688 and Webcam are on the car shell, it connect to the car body via a 4-line wire (5V/Servo signal/ESC signal/GND).
The 5V voltage regulator board on car body help to provide 7.4v->5v regulation.

