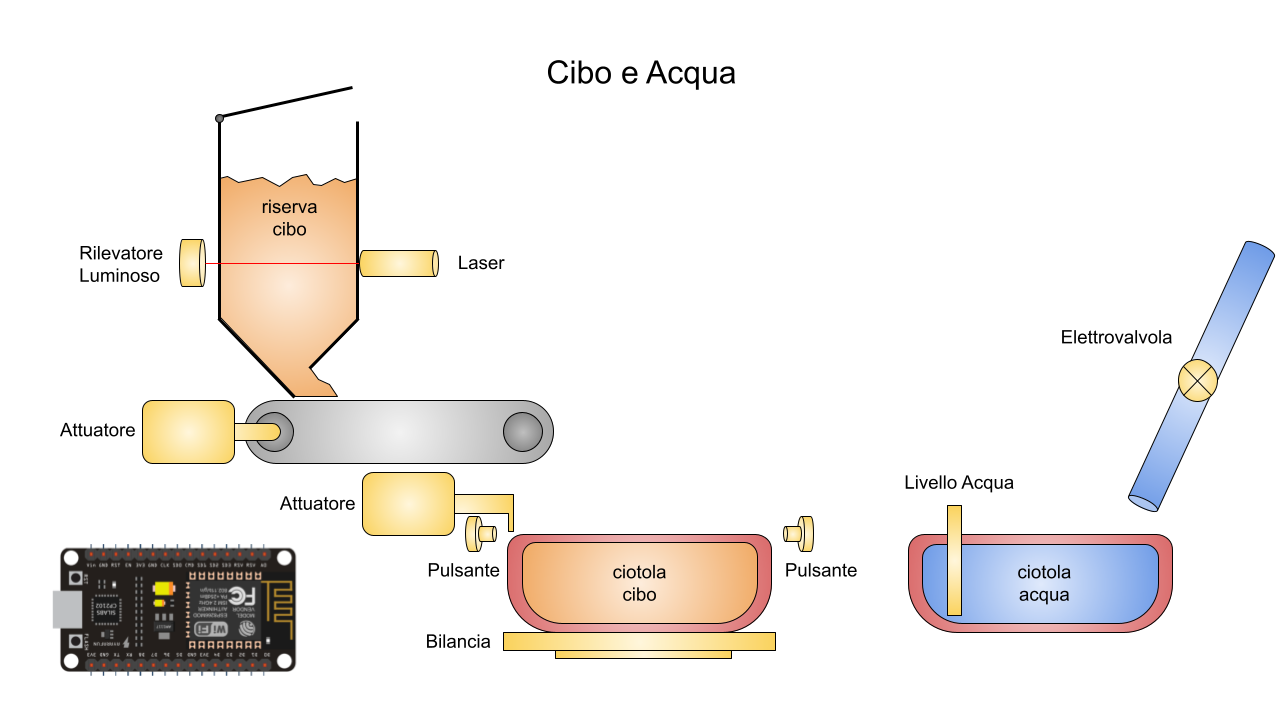
Automation of an animal shelter for SmartCity project. Using Domain-Driven-Design and Build Automation + Continuous-Integration/Continuous-Delivery.
This repo contains the code for the microcontrollers that automates the food and water delivery, tracks the consumptions and, optionally, the vital signs of the animal.

- clone the repo or download the latest release
git clone git@github.com:SmartDogHouse/SmartDogHouse-Software.git
- if you want to send data to AWS, put your AWS key and cert in the folder "flash" under src/main/python, they are used to identify your ESP to AWS.
- substitute you WiFi SSID, Password and amazon host in file main.py (either changing the strings either creating a module "secret.py with the strings that won't be tracked)
you can find the documentation of the code at: https://smartdoghouse.github.io/SmartDogHouse-Software/documentation/src/
If you want to run the tests of the code, inside project folder root execute
python -m src.test.python.test_water_sensor #single testpython -m unittest discover -s ./src/test/ #all testshttps://smartdoghouse.github.io/SmartDogHouse-Software/
pip install coverageRun tests with coverage:
coverage run -m src.test.python.test_water_sensor #single testcoverage run -m unittest discover -s ./src/test/ #all testscreate report and report website:
coverage report	        #report in shell
coverage html #report website, open index.html in htmlcov folder- Connect ESP32 (or a similar device)
- check if you can see it with command
ls /dev/ttyU*
if using VirtualBox:
- VirtualBox -> Settings -> Usb -> Add "Usb name of the ESP"
- in Ubuntu (or the OS emulated), on the top: Devices -> Usb -> Select it
sudo pip3 install esptoolIf you want to skip the next 3 steps for installing the firmware, you can see the bash scripts
esptool is used to flash the ESP's memory (press "BOOT" on ESP if stuck on "connecting..--....--..")
esptool.py --chip esp32 --port /dev/ttyUSB0 erase_flashwget https://micropython.org/resources/firmware/esp32-20210618-v1.16.binesptool.py --chip esp32 --port /dev/ttyUSB0 write_flash -z 0x1000 esp32-20210618-v1.16.binpip3 install adafruit-ampy-
(auto) if you want to use the code of the repo, use the bash scripts to upload the files
-
ampy -d 1 --port /dev/ttyUSB0 put src/main/python/boot.py
ampy -d 1 --port /dev/ttyUSB0 put src/main/python/main.py
ampy -d 1 --port /dev/ttyUSB0 put src/main/python/water_sensor.py
Careful! in the code folder there are some stubs that shouldn't be uploaded to your esp, use the bash scripts in the folder if you want to upload the files of this project. Stubs are used to make the tests work with normal python installation
picocom /dev/ttyUSB0 -b 115200from water_sensor import WaterSensor # import a sensor
ws=WaterSensor(33) # assign it to a pin
ws.measure() # measure
ws.get_last_measure()
git clone https://github.com/micropython/webrepl./webrepl_cli.py -p cam ../main.py 192.168.1.208:/main.pybash upload_firmware.shbash src/main/python/upload_folder_files.sh it is safe, it doesn't upload stub files like "machine.py", the stubs emulate the libraries of MicroPython and make the test-files work with normal python.
bash src/main/python/flash/upload_key_cert.sh This project is under a License - see the LICENSE file for details
