Blazingly fast path based modular layout engine built on top of Bevy ECS. It calculates layout from user-defined rectangle positions and percentages. Works for all aspect ratios.
Note: Currently WIP development. Most of the features are already implemented, but we are giving ourselves some time to catch bugs and polish our systems. The deadline for the 0.1 release is the 0.12.0 release of Bevy.
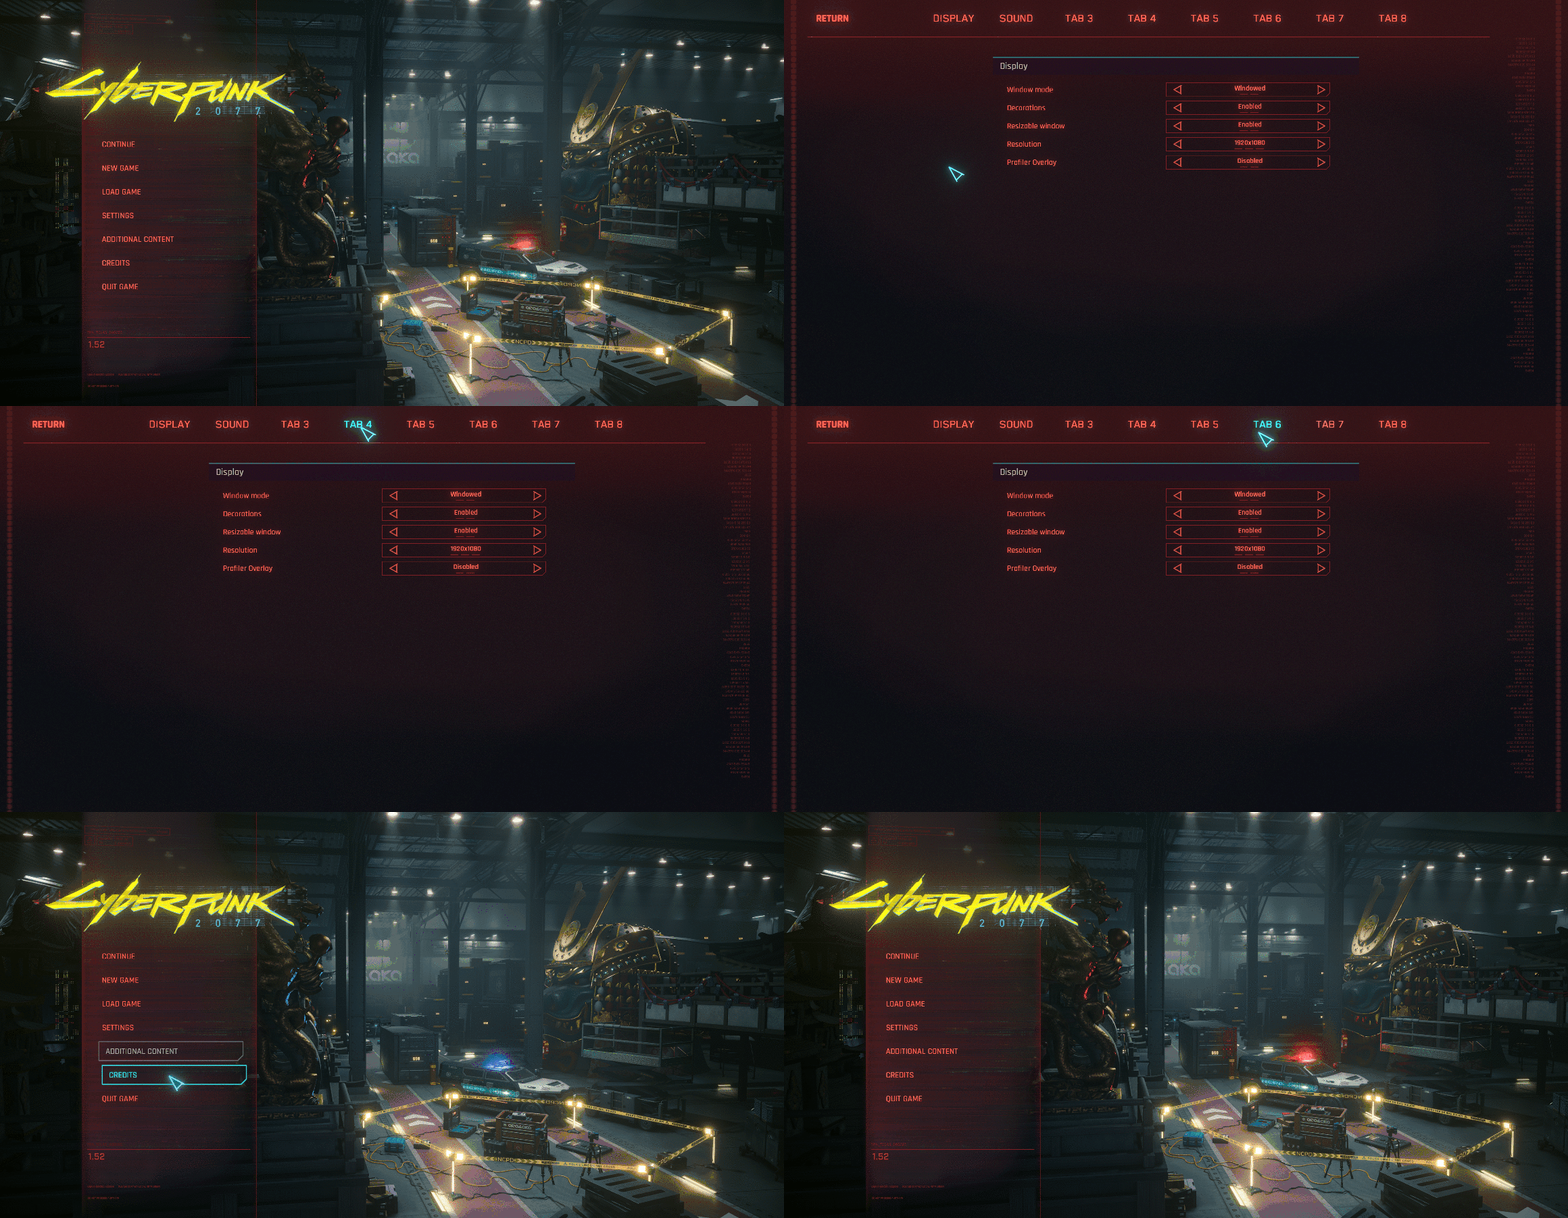
^ A recreation of Cyberpunk 2077 UI in Bevy. (Source code here).
For latest state-of-the-art example usage of Bevy-Lunex, take a look at the source code of this repository.
Bevy-Lunex is a layout engine based on defining and managing rectangles. It strives to be clean, simple and intuitive to the user. The most prominent use case is to use it as a "building brick" for your own user interface.
The core of this library is pure math layout engine, meaning no styling or rendering is currently included. That's where you come in. You can use the library to hook your own components and custom rendering to make it look exactly the way you want.
By attaching entities to coordinates returned by Bevy Lunex, you can abstract complex positioning logic away from you. Take a look at these examples:
Bevy Lunex Cyberpunk- Made by attaching images to Bevy Lunex rectangles and animating them.Stardawn- Used bevy_vector_shapes to render resizable dynamic elements.
Expand
Due to the nature of Rust, we had to come up with a unique way how to manage data. We decided to implement hierarchy tree structure, which is used in UNIX file system.
All data is stored in a master struct, called "UiTree", which manages all layout data. The "UiTree" is composed of "UiBranches", where each branch represents a rectangle and they can be nested inside each other. "Widgets" are custom smart pointers containing a "path" to the corresponding nested "UiBranch". "Widgets" are components and are spawned as entity.
When needed, the "Widget" can fetch "UiBranch" inside the "UiTree" and return a mutable borrow. From the borrow you can modify the layout data, thus changing the behaviour and the result of the rectangle calculations taking place. This is the way to get around the Rust's borrow checker.
> UI
  |-> Main_menu
  |    |-> Background
  |    |-> Board
  |    |    |-> Logo
  |    |    |-> Buttons
  |    |    |    |-> Continue
  |    |    |    |-> New_Game
  |    |    |    |-> Load_Game
  |    |    |    |-> Settings
  |    |    |    |-> Credits
  |    |    |    |-> Additional_Content
  |    |    |    |-> Quit_Game
^ This is a "UiTree" structure printed out in a terminal. Each item displayed here is "UiBranch". Look for example at the "Board" branch, in which are nested "Logo" and "Buttons" branches.
First, create a "UiTree" struct that will hold all the layout data managed recursively.
let mut tree = UiTree::new("UI");To create a new "Widget" in the root directory you pass in the "UiTree", specify widget properties and the function returns the smart pointer.
let widget = Widget::create(&mut tree, "widget", RelativeLayout {
    relative_1: Vec2::new(0.0, 0.0),
    relative_2: Vec2::new(100.0, 100.0),
    ..default()
})?;Once you have the "Widget" created, you can pass it to an entity as a component together with other components like "Image". Here we use "ImageElementBundle", which is the same as "SpriteBundle", but has extra fields for "Widget" and "Element". Element component is used when you need to attach a visual entity to a widget, like text or image.
commands.spawn((
    ImageElementBundle::new(
        widget,
        &ImageParams::default(),
        asset_server.load("button.png"),
        Vec2::new(1280.0, 250.0)),
    ButtonHighlightEffect::new(Color::GOLD),
));
In this example, we also passed another component called "ButtonHighlightEffect", which we will define in the next section.
To add logic to your "Widgets", you use Bevy systems. In this example, we will create a system that will tint the sprite to a certain colour if a cursor hovers over the "Widget" First we define the component with color data. Then we define the system that will query "UiTree", "Cursor" and our components. Add the logic and we are done.
#[derive(Component)]
pub struct ButtonHighlightEffect (pub Color);

fn button_highlight_effect_update(
    systems: Query<&UiTree>,
    cursors: Query<&Cursor>,
    mut query: Query<(&Widget, &mut Sprite, &ButtonHighlightEffect)>
) {
    for system in systems.iter() {
        for (widget, mut sprite, color) in &mut query {
            for cursor in cursors.iter() {
                if widget.contains_position(&system, "", &cursor.position_world().as_lunex(system.offset)).unwrap(){
                    sprite.color = color.0;
                } else {
                    sprite.color = Color::WHITE;
                }
            }
        }
    }
}Don't forget to add the system to the app.
.add_systems(Update, button_highlight_effect_update)You need to spawn the "UiTree" we created in the first step as an entity so we can query for it.
commands.spawn(tree);There are 3 main layout options to pick from. With their combination, you can define any setup. They are:
- RELATIVE || Defined from 2 points, as % of the parent container.
- SOLID || Defined as a ratio of width and height. Will scale to fit or fill parent.
- WINDOW || Defined as a point + width and height. Same as RELATIVE.
By nesting branches of these 3 types, you can precisely define the position and layout behaviour.
| Bevy | Bevy Lunex |
|---|---|
| 0.11.2 | <= 0.0.6 |
Any contribution submitted by you will be dual licensed as mentioned below, without any additional terms or conditions.
Released under both APACHE and MIT licenses, for the sake of compatibility with other projects. Pick one that suits you the most!


