
Very delicious Cheesecake. Designed by Sorakage
"CheeseCake" is a Lighter, portable and better looking full body tracking device.
Based on SlimeVR
With 8-port charging dock, eliminating wiring troubles.
When you place an order in JLCPCB, remember change the PCB thickness to 1mm!
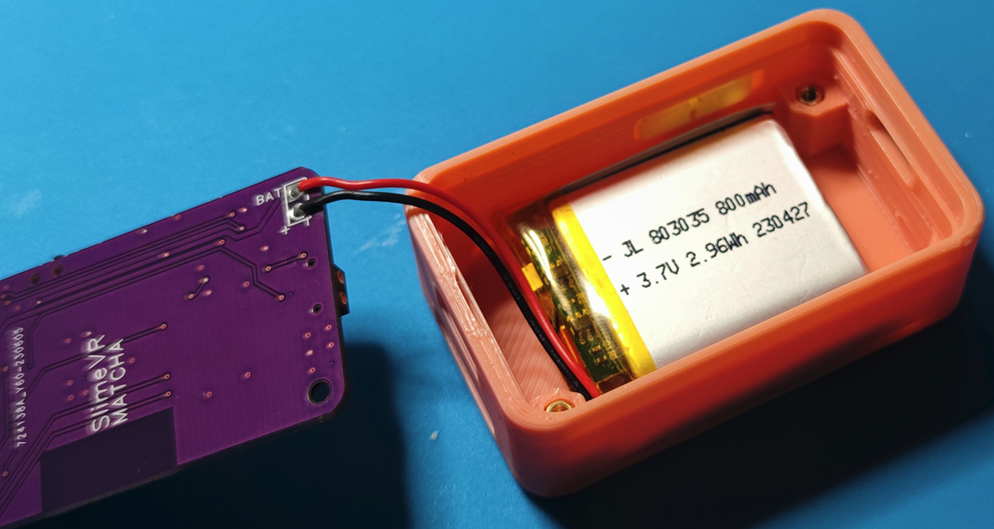
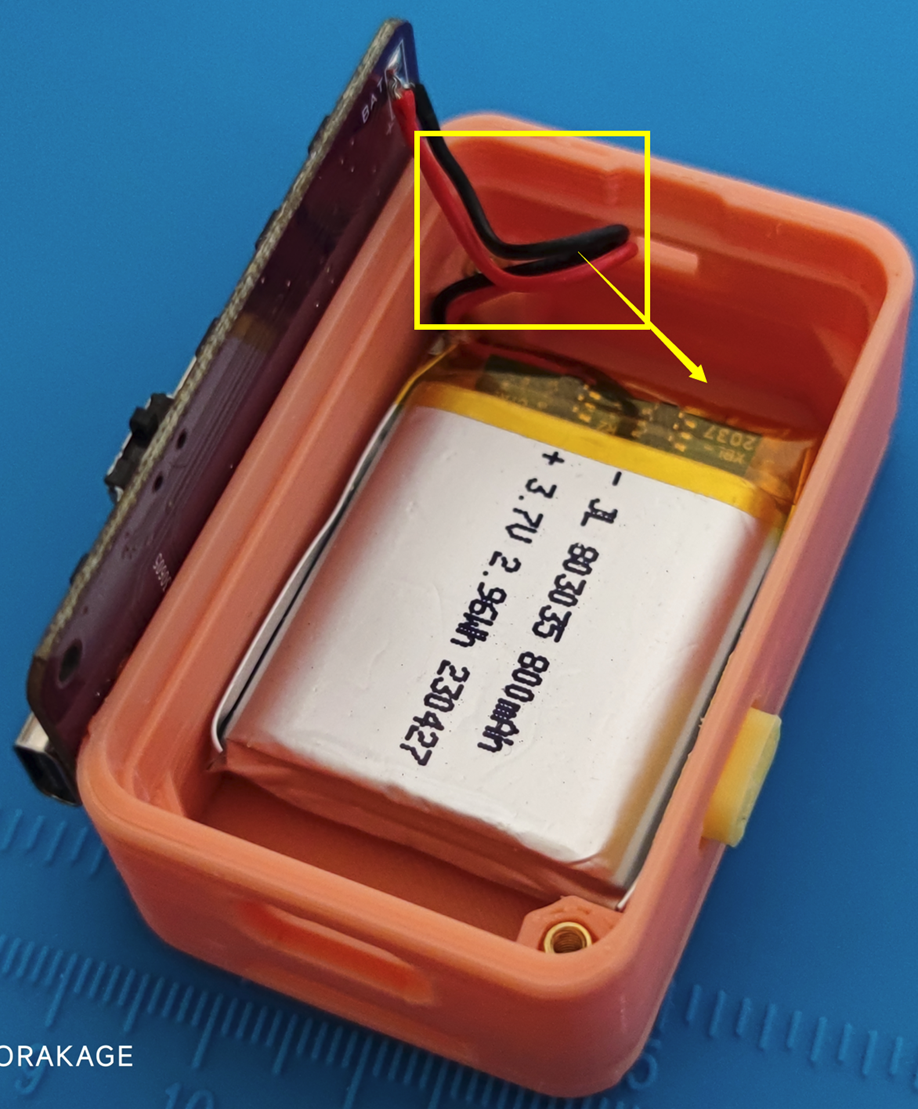
Before flashing the firmware, the board must be connected to the battery.
This design removes the protection diode (to prevent Li-po battery overcharged while uploading firmware), and USB-5V is supplied to the battery via the on-board charging chip TP4057.
The on-board charger will not output voltage without connected to the battery.
Any kind of modification are welcome!
It can be even better if you can credit me on the modified PCB with [This LOGO]
For the CheeseCake you will need the following components:
- PCB produced by JLC PCBA
- 3D Print Parts
- 38 or 40mm straps
- Li-po Battery (803035 800/900mAh or 903035 1000/1200mAh is what the docs suggest)
- Ensure the battery is no larger than 9mm in depth, 30mm in width, and 35mm in height to fit the case.
- Verify the battery dimensions with the seller before purchase. Some sellers list 803035 batteries with dimensions exceed, which will not fit in the 3D printed case.
- Pogo Pins (Optional for specific supported PCBs) [More Info]
- Soldering Iron/Station
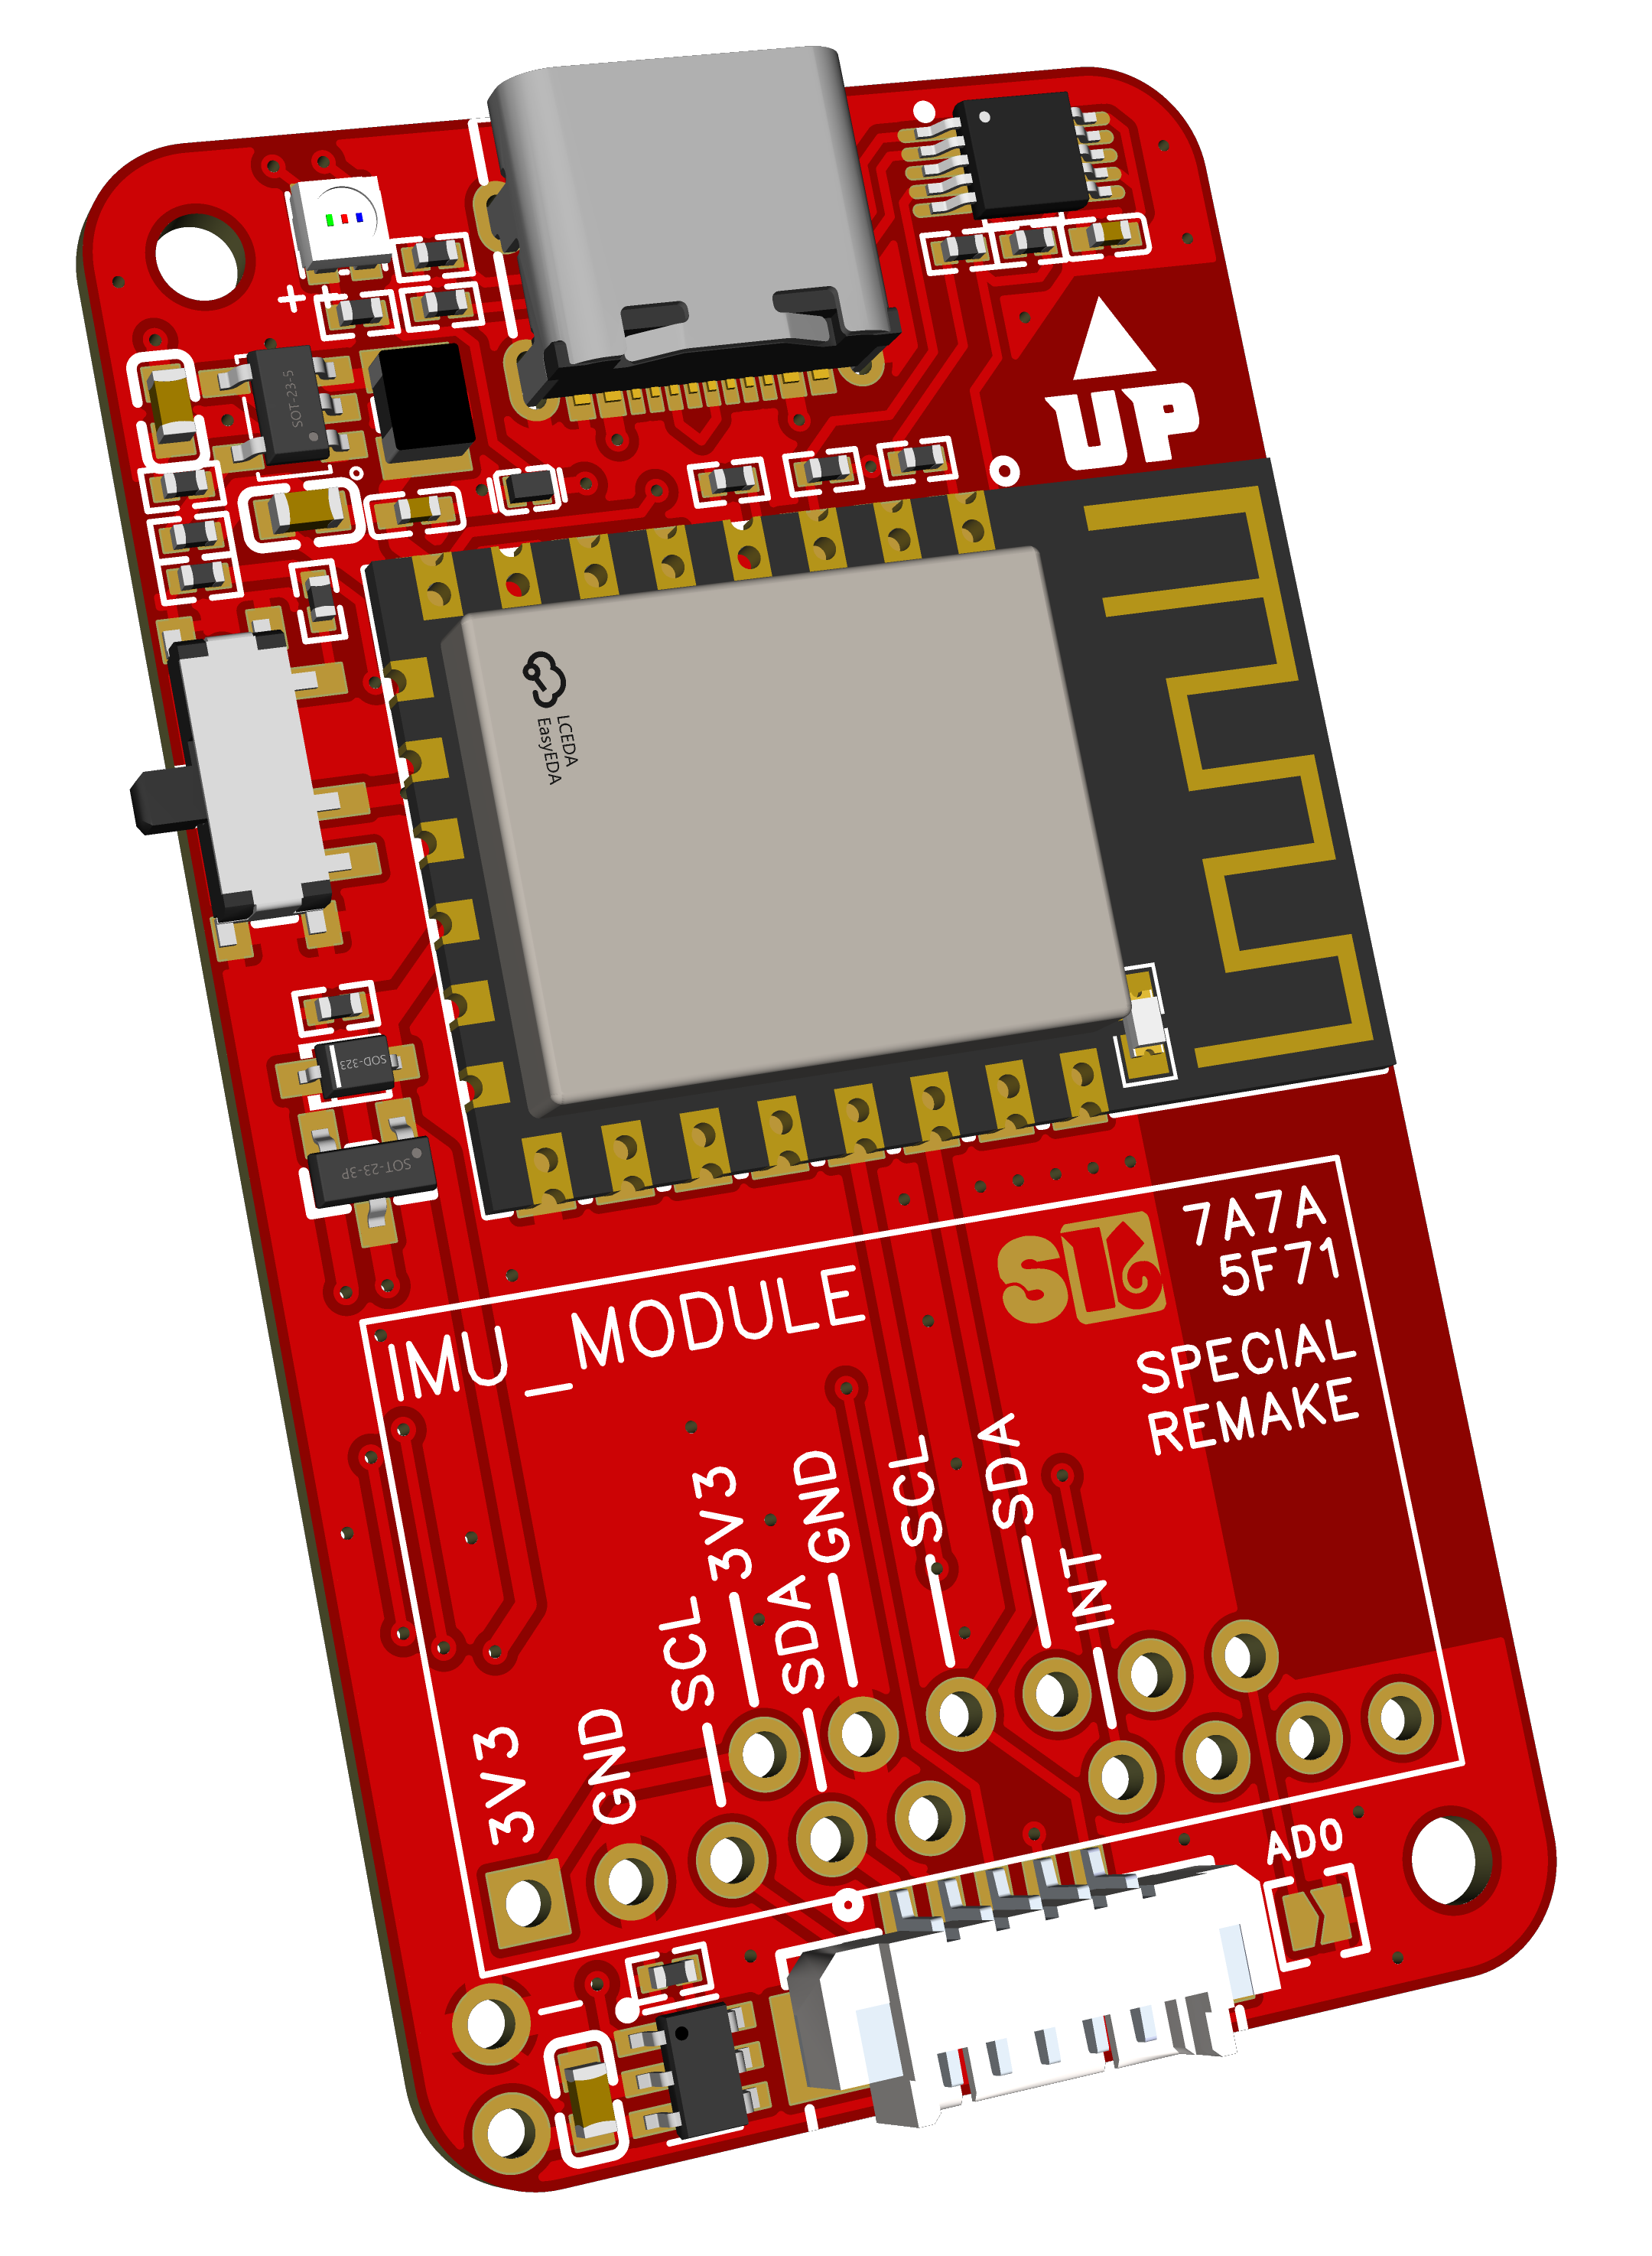
There are 3 Versions of PCB included in this Project:

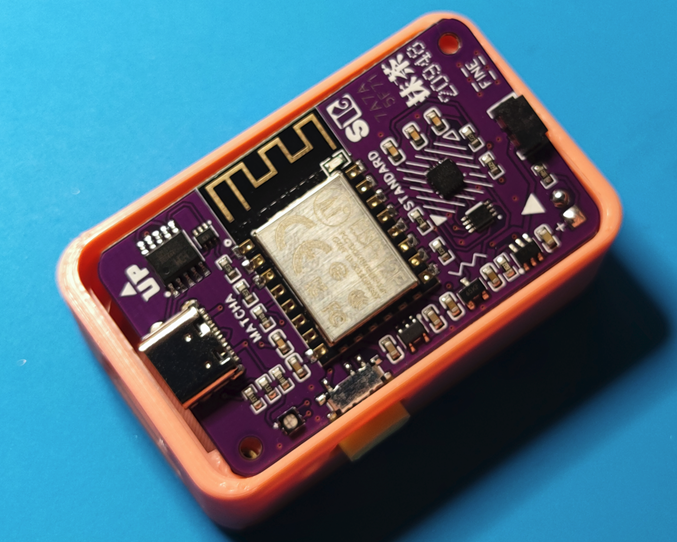
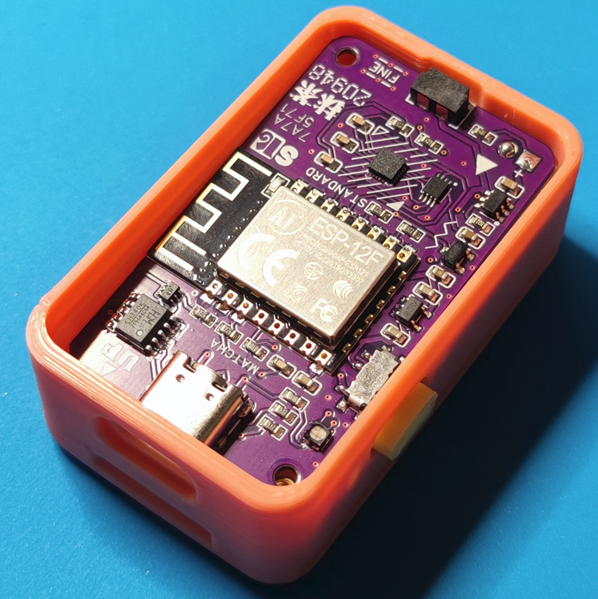
Because BMI160 is EOL now, Update a BMI270 version, it has a JST 2.0mm battery connector(Battery+ is left) and reverse to match Type-C Charging Dock.
But it doesn't include AUX connector, if you want make a BMI270 with AUX, check "Cheese with AUX".


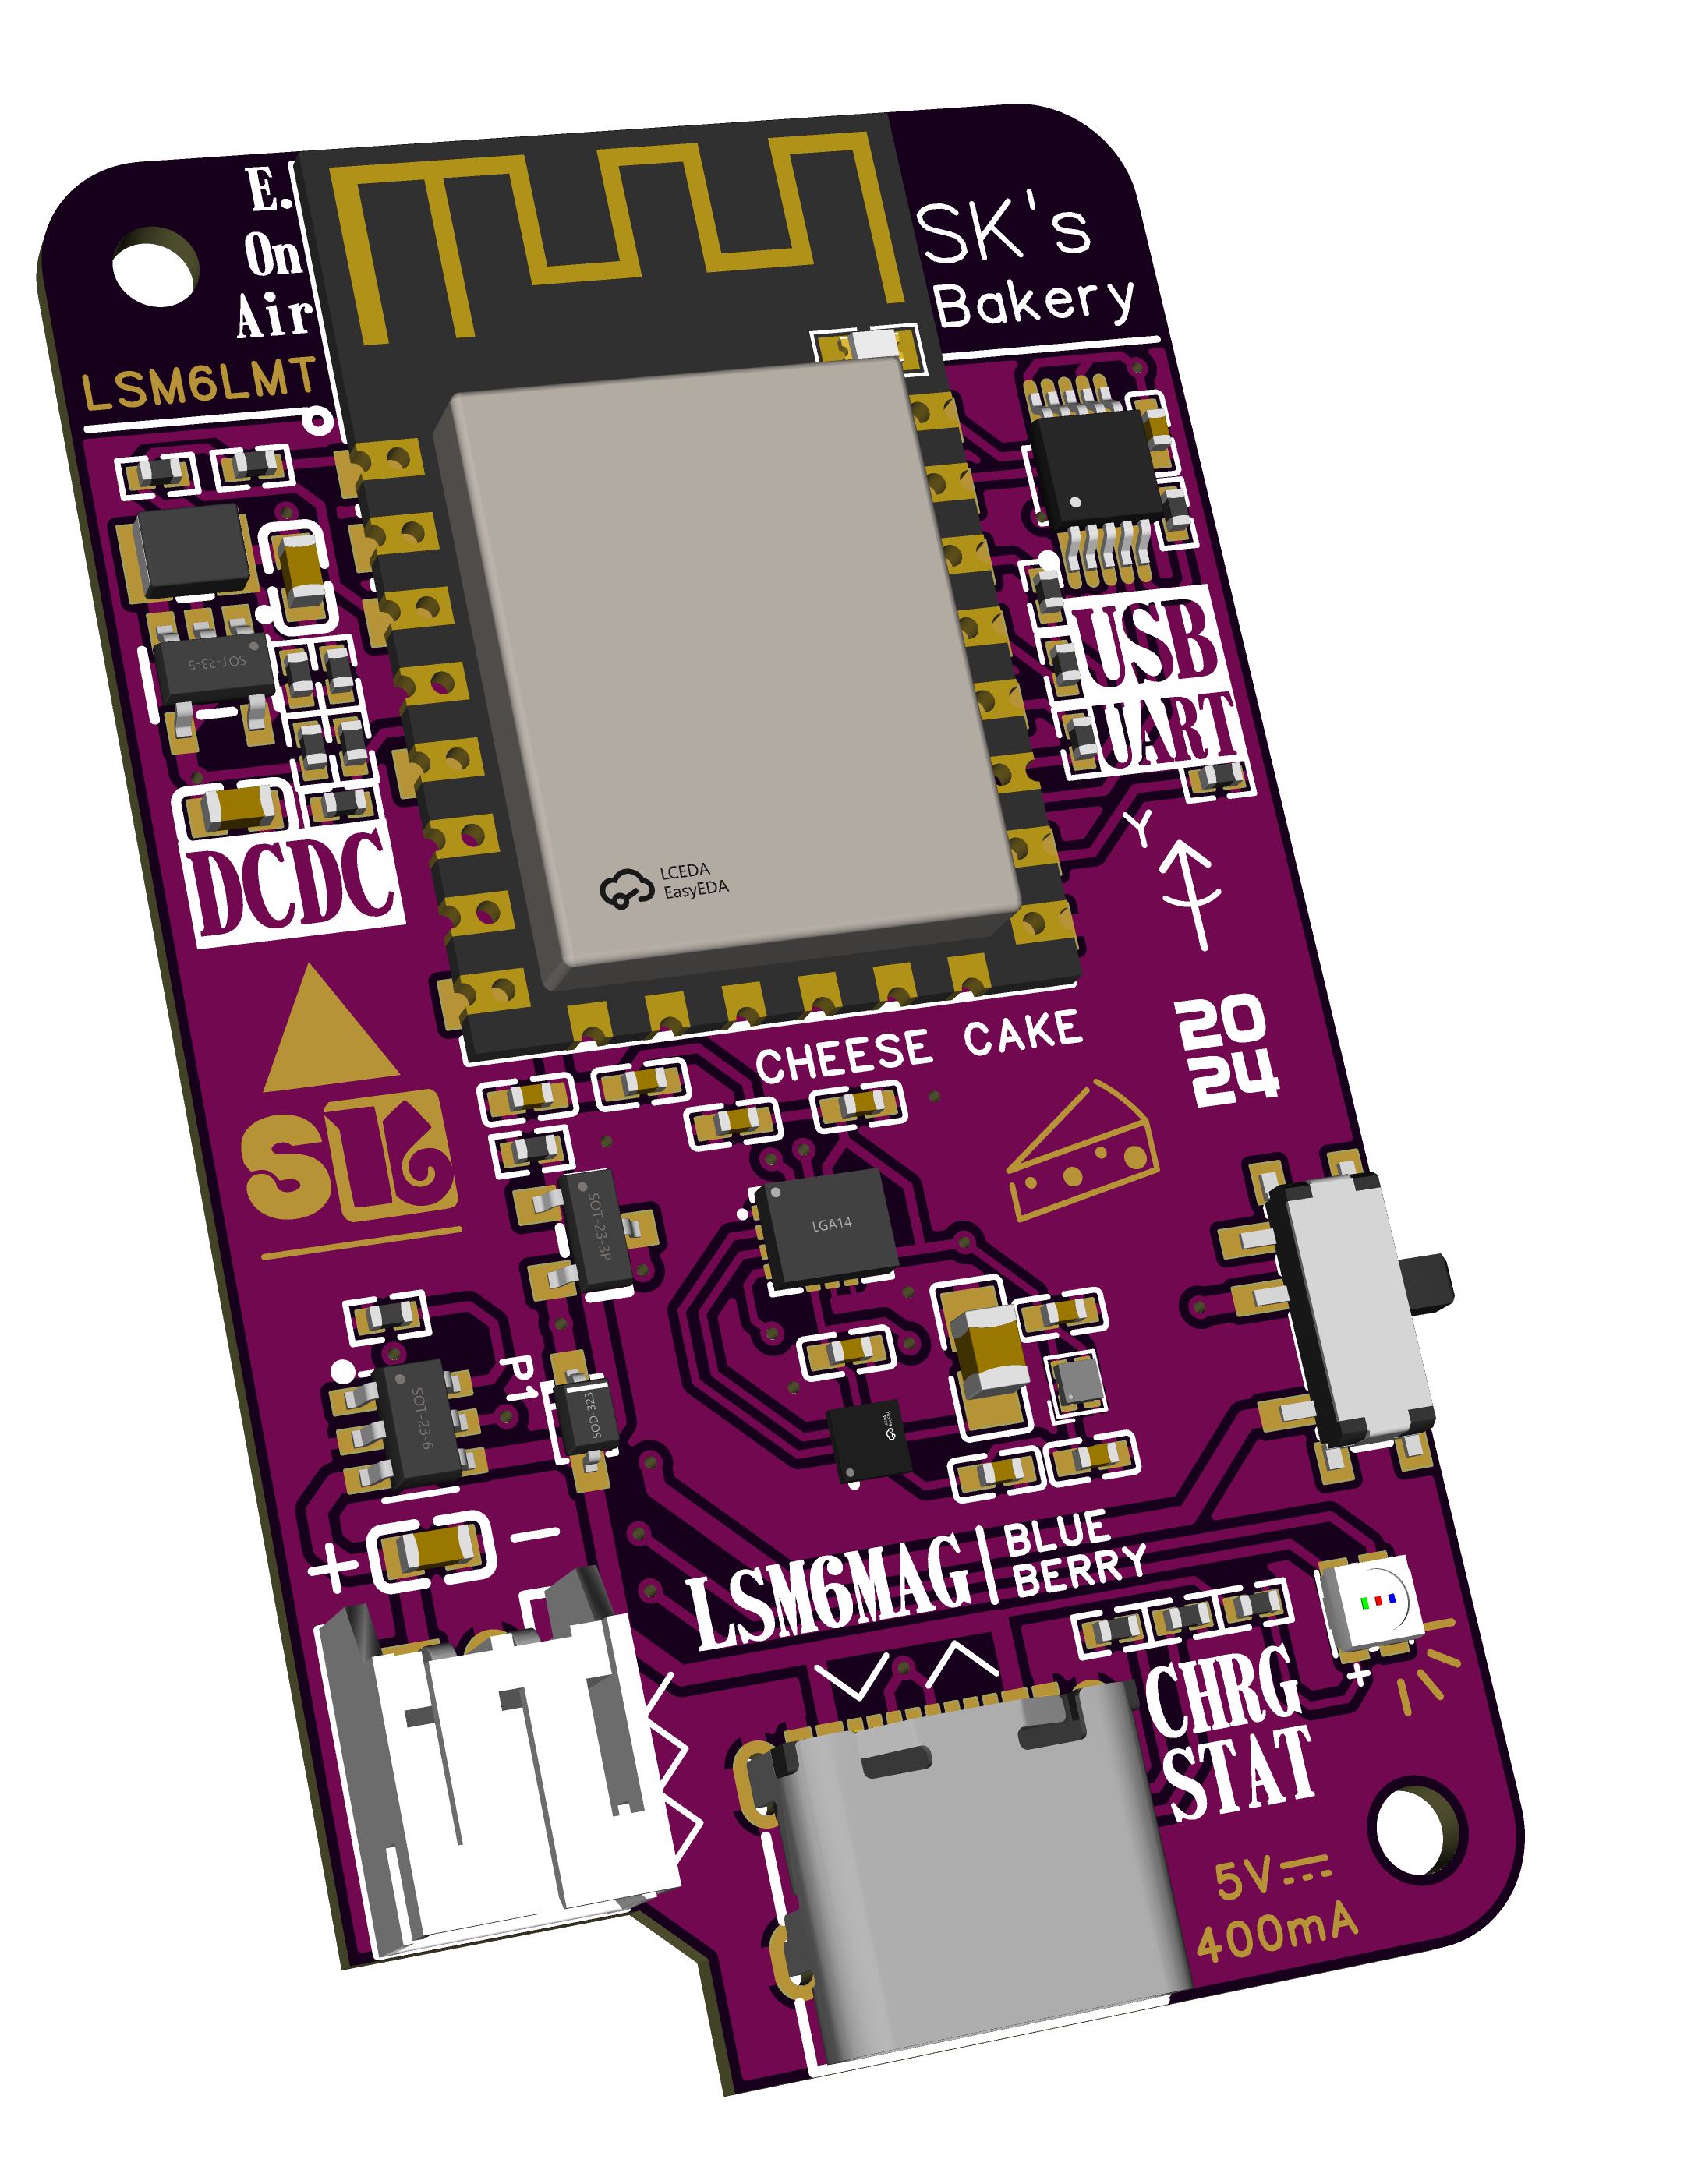
This might be the best CheeseCake ever. To extend the battery life, it have some magic in it:
DC-DC Buck Power Supply, which can save up to 18% of power consumption (in 4.2V,LDO need 90mA, but DC-DC only need 74mA).
And in order to improve signal quality over long distances, leave some Keep-out area at ESP-12F's antenna.
While using this version, the code in define.h must be change to:
    #elif BOARD == BOARD_NODEMCU || BOARD == BOARD_WEMOSD1MINI
      #define PIN_IMU_SDA D2
      #define PIN_IMU_SCL D1
      #define PIN_IMU_INT D5
      #define PIN_IMU_INT_2 D6
      #define PIN_BATTERY_LEVEL A0
      #ifndef BATTERY_SHIELD_RESISTANCE
        #define BATTERY_SHIELD_RESISTANCE 0
      #endif
      #ifndef BATTERY_SHIELD_R1
        #define BATTERY_SHIELD_R1 10
      #endif
      #ifndef BATTERY_SHIELD_R2
        #define BATTERY_SHIELD_R2 47
      #endif
It exists, therefore I designed.

All Japanese love Rare CheeseCake a lot, I love it too.
And I hope you can also like it.


Including 3 different MOD: BMI series, LSM6DSV series and ICM-42688(with External Clock)
In SK-BMI MOD, the default IMU on BMI MOD is BMI270, but you can change it to BMI160/BMI323 or other IMUs at PCBA page.
It can be solodered on 「Choco」SpecialRemake directly or connect to the AUX port through JST 1.25mm 5pin like pic below:
Note: the two connectors are MIRROR
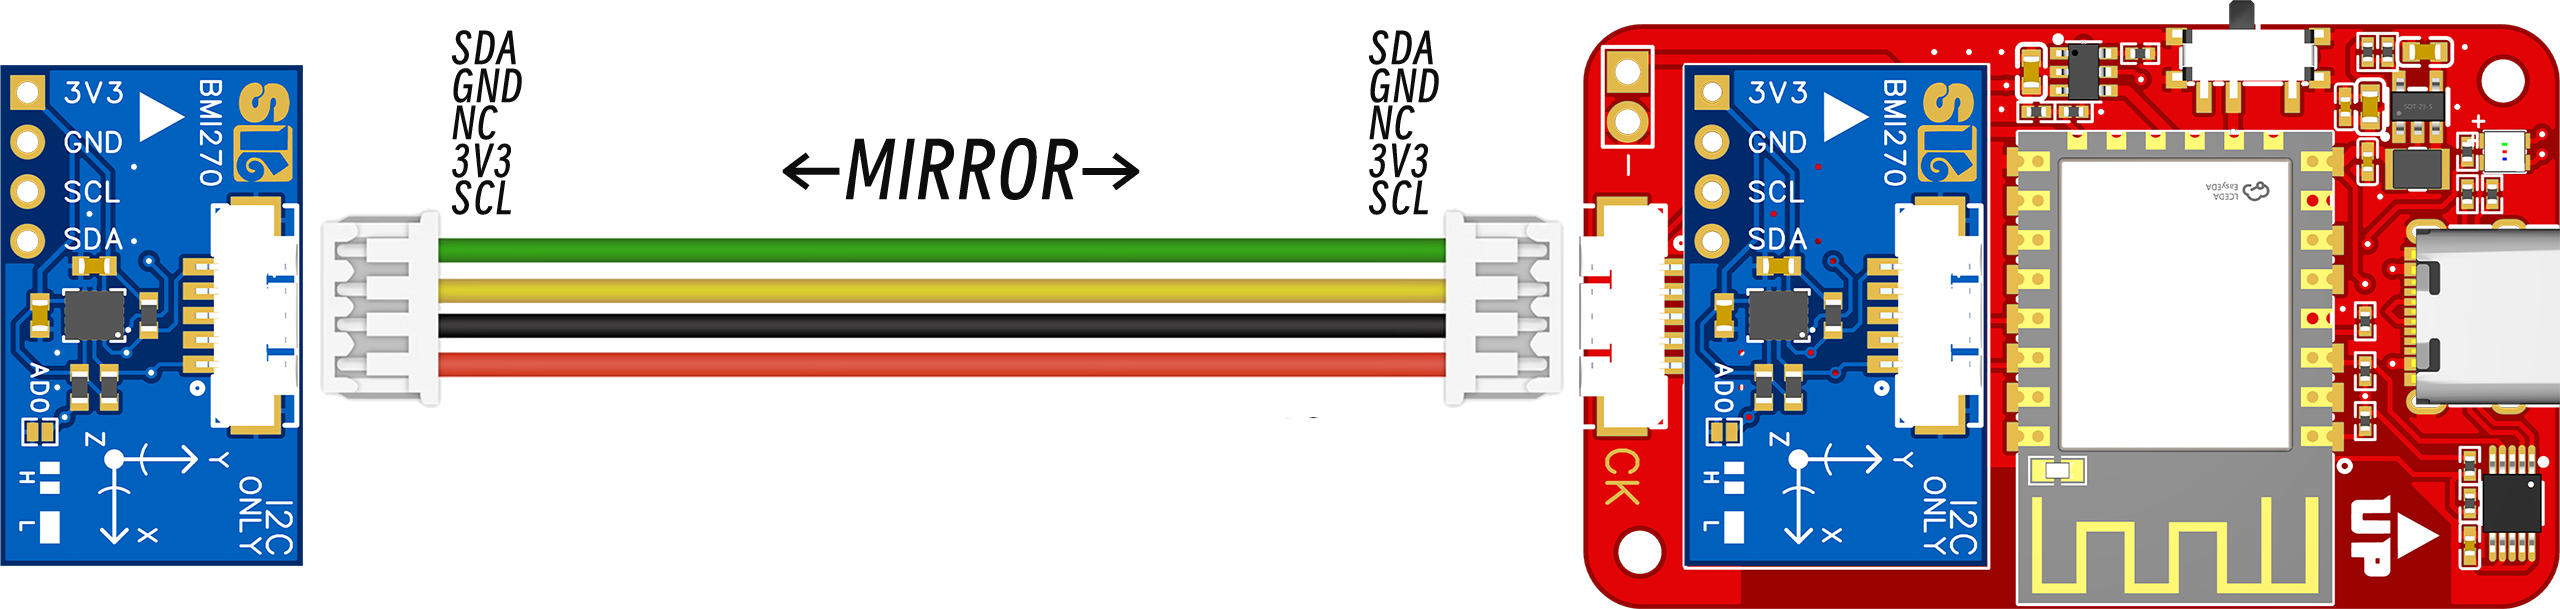
- Notice:If you want to use it both solder it on Choco-SpecialRemake and use as AUX, I recommend order JST connector separately and soldering them on by yourself.
- With AUX connector it too thick to fix acrylic top lid, or you need to carve a groove in the corresponding position of the 3D print top lid.
And the DEG of this module is fixed to DEG_0 when installed on 「Choco」SpecialRemake or Y axis towards up.
Also, if you want to upgrade your SlimeVR but not using 「Choco」SpecialRemake, it has a smaller version of SK-BMI270:


Though it has a smaller size, if it was soldered on 「Choco」SpecialRemake, it looks a little bit unbalance.
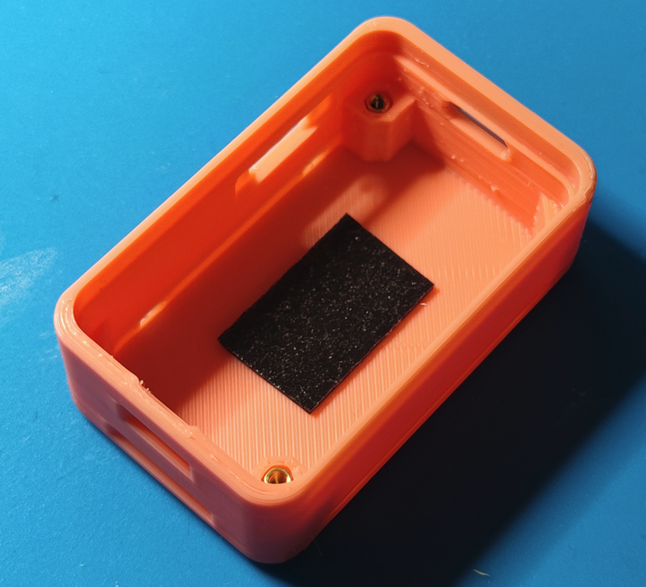
This repository contains various 3D printed components required to assemble the SlimeVR-CheeseCake. Below are the necessary files and instructions.
- Main Case: CheeseCake Case with AUX - Recommended design compatible with any 3D filament.
- Alternative Designs:
- If you want a larger battery, you can use the 803040-case modified by Blu3u.
- 3D Printed Option: 3D Printed Top Lid
- Note: Use elephant foot compensation to reduce fitting issues.
- Acrylic Option: For a 4mm transparent acrylic lid, use the dimensions provided in this file.
- Switch Component: Switch for Case - This part is crucial for the assembly.
- Note: If it's hard to assemble, you can try narrowing the switch by scaling down the Z-axis.
- Clamp Holder - Fits 4cm and 3cm straps.
- Clamp Holder 5cm Strap - Fits 5cm straps.
- GoPro Chest Harness Compatible Clamp Holder - For GoPro chest harness compatibility.
- Slide Holder - Fits 4cm and 3cm straps.
- Slide Holder 5cm Strap - Fits 5cm straps.
- 8-Tracker Type-C ChargeDock

- 8-Tracker ChargeDock:
- 6-Tracker ChargeDock:

- Apply about 2cm foam tape on the inner side of the case. Install two M2*7mm hexagonal spacers (either with a HAMMER, or push the spacer into the hole with a soldering iron to melt it in place)
- Install M2*7mm hexagonal spacers into chargedock top piece. (either with a HAMMER, or push the spacer into the hole with a soldering iron to melt it in place).
- Insert PCB into chargedock bottom.
- Press the chargedock bottom into position, screw on M2*5mm screws.
If this project can help you I would be very happy!
And also, if you want to give me some support, you can support me on BOOTH!