Before we dive in and start working on specific parts of a React project, let's take a look at a simple React app so we can understand it at a high level.
In this lesson, we will start with a basic React app, examine the default directory structure, and gain a better understanding of how these apps are built.
- See an example of a basic React app
- Gain an overview of how the files interact
- Practice writing your first React component
In order to work on React apps, we create a temporary server in the terminal that displays the app in your browser. This server will not work if you are using the in-browser Learn IDE. If you are currently using the in-browser IDE, you will need to begin using your computer's local environment. If you are using a Mac, you can follow these instructions for setting everything up locally.
This lesson has all the necessary parts of a fully working React app. To check the app out, fork and clone this lesson onto your computer, navigate into the lesson's directory, and run:
npm installThis will get and install all the required dependencies for React.
Next, we need to start up a server for the app to run on:
npm startThis will host the app and open a browser window to display it. If the browser doesn't open, but the server started correctly, you can use the links that appear in the terminal to access the app. They should look something like the following:
Local:            http://localhost:3000
On Your Network:  http://192.168.1.5:3000
You can use the Local link to open the app in your own browser. The second is
for any other computers on your network that you want to access your app from
(this is particularly useful if you want to test out your app in a mobile
browser on your phone).
If everything has worked correctly, you should see a page with the exact time it was loaded, along with a small amount of text and a GIF.
If we make any changes to our app while the server is running, it will 'hot reload,' and update the app in the browser. If there are app-breaking errors in your code, the browser will display those errors instead.
We'll start by exploring the JavaScript code for this sample app in the src
directory.
The "entry point" into our application - the first JavaScript code that will run
when our app starts up - is in the src/index.js file. Open that file up in
your text editor. Inside, you'll see something like this:
import React from "react";
import ReactDOM from "react-dom";
import App from "./components/App";

ReactDOM.render(<App />, document.getElementById("root"));
We'll talk about the import statements in a bit, but for now, let's have a
look at ReactDOM.render().
This function comes from the react-dom npm package. It takes in two arguments:
- A React component to render (typically, we'll render our top-level
Appcomponent here). - A DOM element where we want that component to be rendered (a
divwith the ID ofroot).
ReactDOM.render() will always be used in your applications. This one small
function is how the rest of our application — all the components we'll
write — will eventually make its way onto the DOM!
Even though React is a modern, complex framework, it still relies on a regular
index.html file to load the JavaScript! The file can be found in the public
folder. Take a look at it and try identify how public/index.html is connected
to src/index.js.
In general, when you're given a React project to work with, it's a good idea to
start by reading the index.js and work your way down from there into the rest
of the components.
Next, open up src/components/App.js in a text editor. This file contains our App
component. Within the App component is a section of code that looks very
much like HTML:
<div className="App">
  <h1>{format(new Date(), "MMMM do yyyy, h:mm:ss a")}</h1>
  <p className="App-intro">
    In React apps, we write JSX - it looks like HTML, and uses a lot of HTML
    syntax. JSX lets us include JavaScript functions right along with the HTML,
    and also allows us to add in components, which are separate, self-contained
    chunks of JSX.
  </p>
  <ExampleComponent />
</div>
There's also some JavaScript code mixed in with this HTML-like syntax:
format(new Date(), "MMMM do yyyy, h:mm:ss a").
As it turns out, this is actually all JavaScript. This syntax is called JSX. It lets us write code that looks nearly identical to HTML, but allows us to mix in vanilla JavaScript and other neat things.
Reading through the JSX code, we've got one div that contains three child
elements, <h1>, <p> and <ExampleComponent />. In your browser, these
are the elements being displayed! The <h1> provides a timestamp of the
exact time the app was loaded. The <p> section includes the brief text on JSX.
The ExampleComponent contains the sunglasses GIF. In the src folder, take a
look at ExampleComponent.js. You'll see a file very similar to App.js,
containing <img> and <p> elements.
By including <ExampleComponent /> in App.js's JSX, we are able to use the
contents of the components. If you copy and paste <ExampleComponent /> so it
is listed two times in a row, two GIFs will appear on the page. Try this now.
What about the rest of App.js, though? Moving out from the middle, we see this
JSX code is the return value of a function called App:
function App() {

  return (
    // JSX goes here!
  )
}
The key thing to understand is that all of the visible content of our app is
returned from this App function.
We've already seen that it is possible to have multiple files that contain
visible content, i.e., by using both App and ExampleComponent.
ExampleComponent, however, is used within App. App is at the top-most
level, the parent component of our React app content.
There are two other sections in the App.js file we haven't touched on:
import React from "react";
import { format } from "date-fns";
import ExampleComponent from "./ExampleComponent";
import TestComponent from "./TestComponent";

// function App() { etc }

export default App;
react and date-fns are both npm packages, so what is happening here? App.js
is pulling in specific content from these two packages! react and date-fns
are being imported from the node_modules folder, which was created when we
ran npm install.
You can see in the App function that format from the date-fns library is
being used in the return statement when we call format(...). react is also
being used, even though you can't see it written in the code! Anywhere you write
JSX inside a component is actually transpiled to JavaScript code that looks
like this: React.createElement(tagName, props, children) (more on that later).
Version 17 of React, released October 2020, introduced a new JSX transformation. So instead of
React.createElement(), the JSX is transpiled into_jsx(). You can read more about the change here.With React 17, you can actually omit the line
import React from "react"in your component files, and they'll still work just fine. You can find out which version of React a project is using by looking atdependenciessection of thepackage.jsonfile.
The imports for ExampleComponent and TestComponent are slightly different.
In this case, App.js is importing files in the same directory, like
./ExampleComponent, which allows it to use <ExampleComponent /> in the
return statement.
OK, then what is happening with export? By including the export line, we are
allowing other files to import things from the App.js file. There are
different types of exports, like named exports and default exports, but we will
dive deeper into this topic in a later lesson.
For now, we will just focus on default exports. The line, export default App
denotes that our App function is the main thing we want to export from our
App.js file. You can have only one default export per file. If you take a look
at one of the other JS files, index.js, you can see that at the top of the
file, we are importing App from App.js (the .js is not included, but
still implied). This is the syntax to import something that is the default
export of another file:
import App from "./App";This structure of importing and exporting allows for files to 'chain' together.
ExampleComponent.js has an export statement as well (take the time to locate
it), and is imported into App.js. Additionally, App.js is imported into
index.js.
The index.js file doesn't have an export. It is the 'top' of this chain.
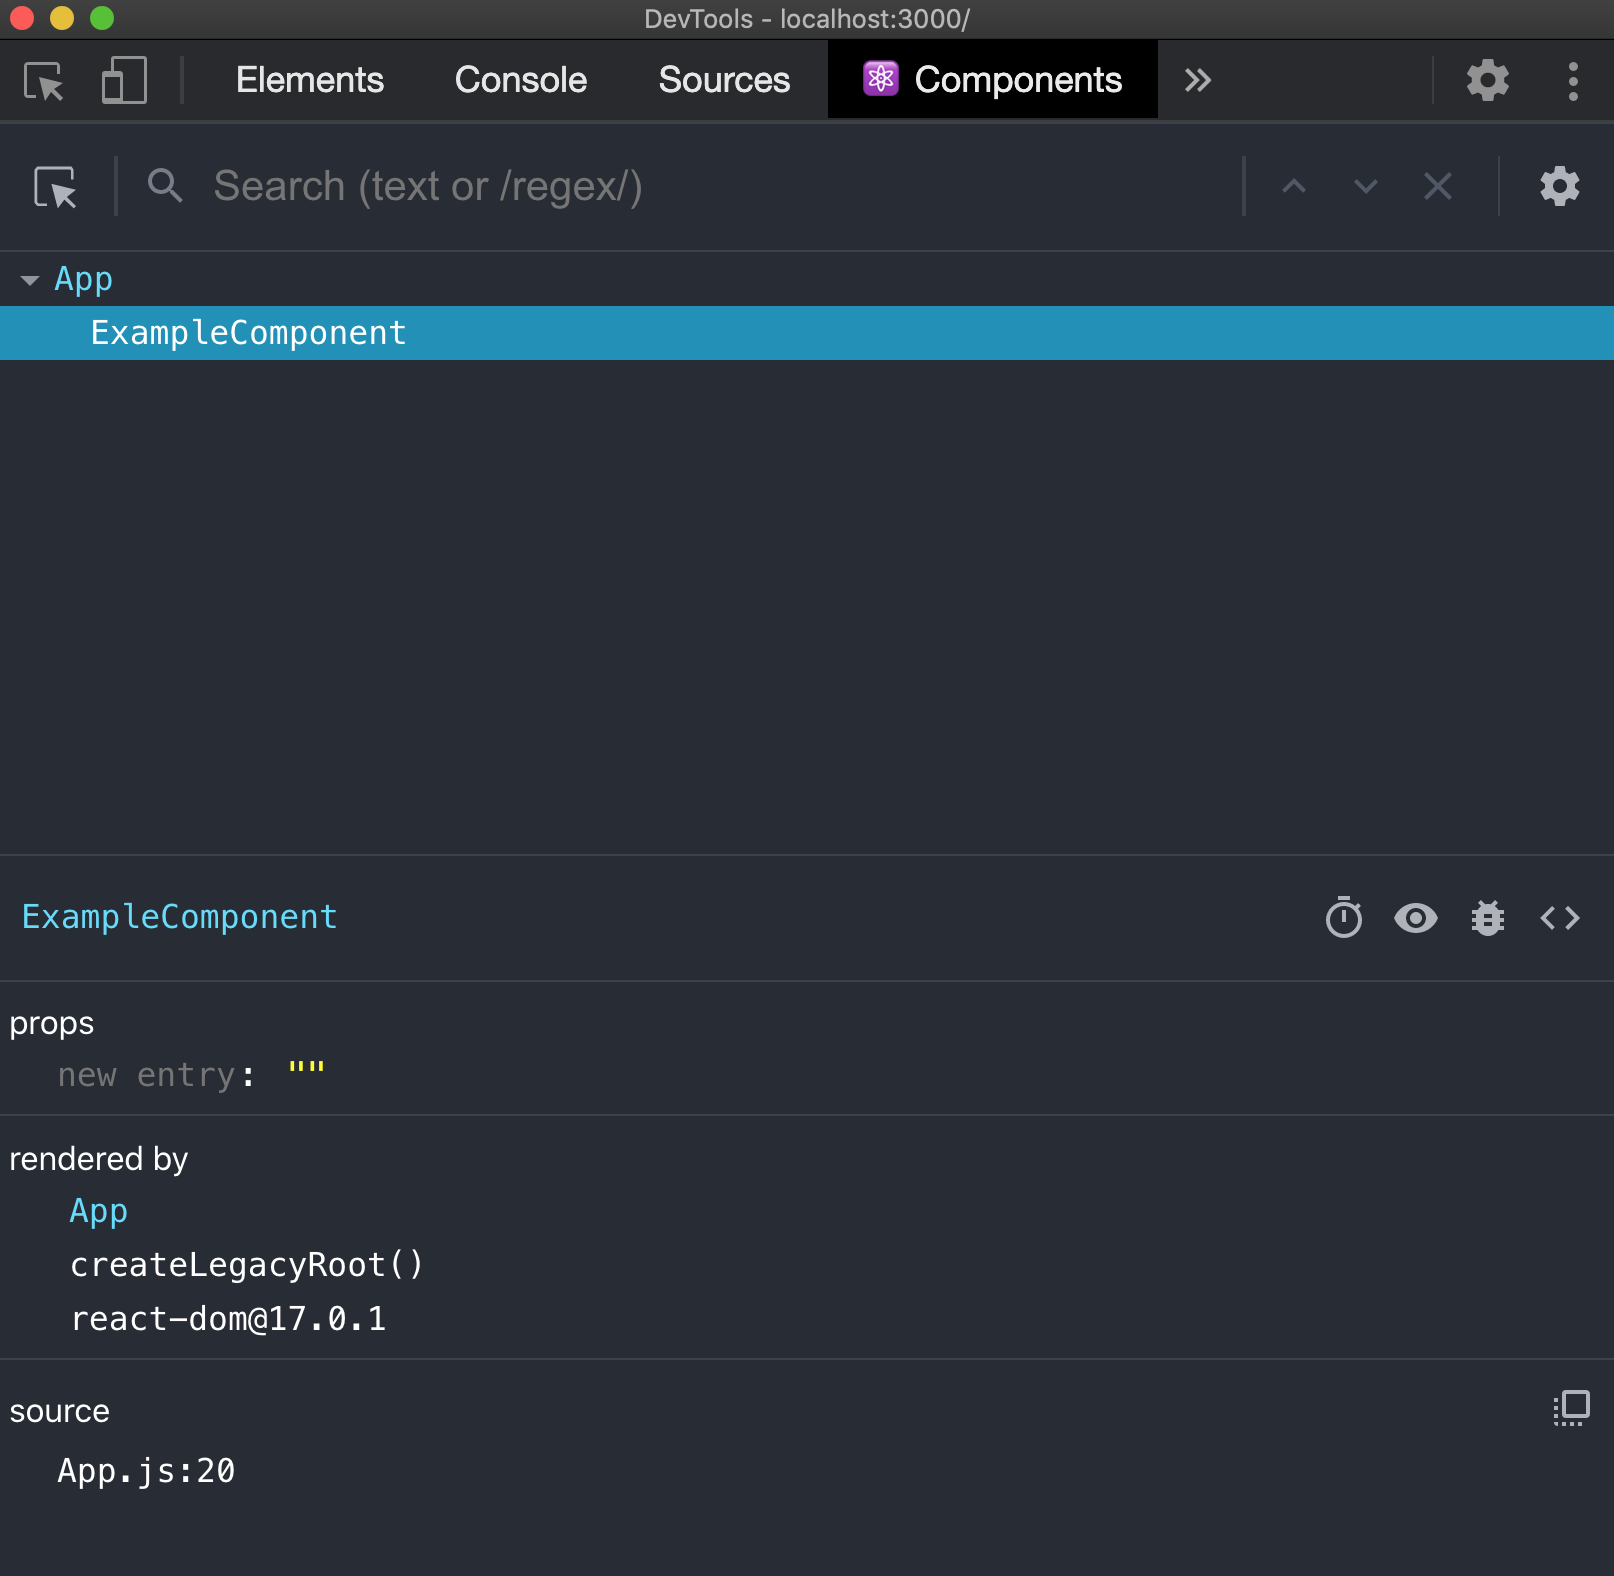
React has a great set of developer tools that make it easier to view our components in the browser and debug what's happening under the hood. Install the React Developer Tools Chrome Extension or Firefox Extension. Here is the readme for the extension.
After installing, go to http://localhost:3000 to view our React application.
Then open your browser's developer tools, and find the Components tab. Here,
you'll see the component hierarchy with information about all the components
we're using so far in the app!
There are three tests to pass in this lesson. They are all related to the
content within src/components/App.js.
- Replace the contents of the
h1element so that, instead of a time, it just says 'Now' - Make sure to include
<ExampleComponent />(if you have removed it) - Add in a new component,
<TestComponent />, just below<ExampleComponent />, in theApp.jsfile
When working on React labs, it's helpful to have two terminal tabs open:
- In the first tab, run
npm startto run your React app in the browser - In the second tab, run
learn testornpm testto see the test output
There is a lot still we haven't touched on, and we will go into greater depth on
how things work throughout the following lessons. Almost all of our work,
however, will be done within App.js and child components of it. This is where
all of our creative energy will be spent.
This file structure is used by Facebook, the creators of React, and is what
create-react-app automatically generates. Using this structure, a lot of
set-up is abstracted away. We do not need to deal with writing the HTML document
or connecting it with JavaScript, as it is always the boiler plate code with
index.html, index.js, and App.js.