A cookiecutter template that creates a Hovercraft! presentation.

Table of Contents
Disclaimer: YMMV, these are my reasons…
- HTML slides work everywhere (uses impress.js)
- But write in text markup (reStructuredText)
- Re-use your CSS3 know-how
- Text is way more malleable than typical presentation software slides
- Refactor your slides as you do with code
- Text is SCM-friendly, get a proper change history
- Easy to update embedded code snippets (even automatically)
- Re-purpose your slides easily (blog posts, docs, …)
- Embedded presenter console (2nd window with notes + timer + slide previews)
- Live-reload preview during authoring
- Convert to PDF to get a single-file document
For authoring, you need Python3 + bash (Linux, Mac OSX, Babun, or Windows 10).
- Selection of a few standard licences (CC0, CC-BY-SA-4, …)
- Default CSS for common styling needs
- Floating images
- Image-only slides
- 2-column slide layout
- Styled bullet points
- An optional global notice (at the bottom of the screen)
The demo slides rendered from reStructuredText look like this:
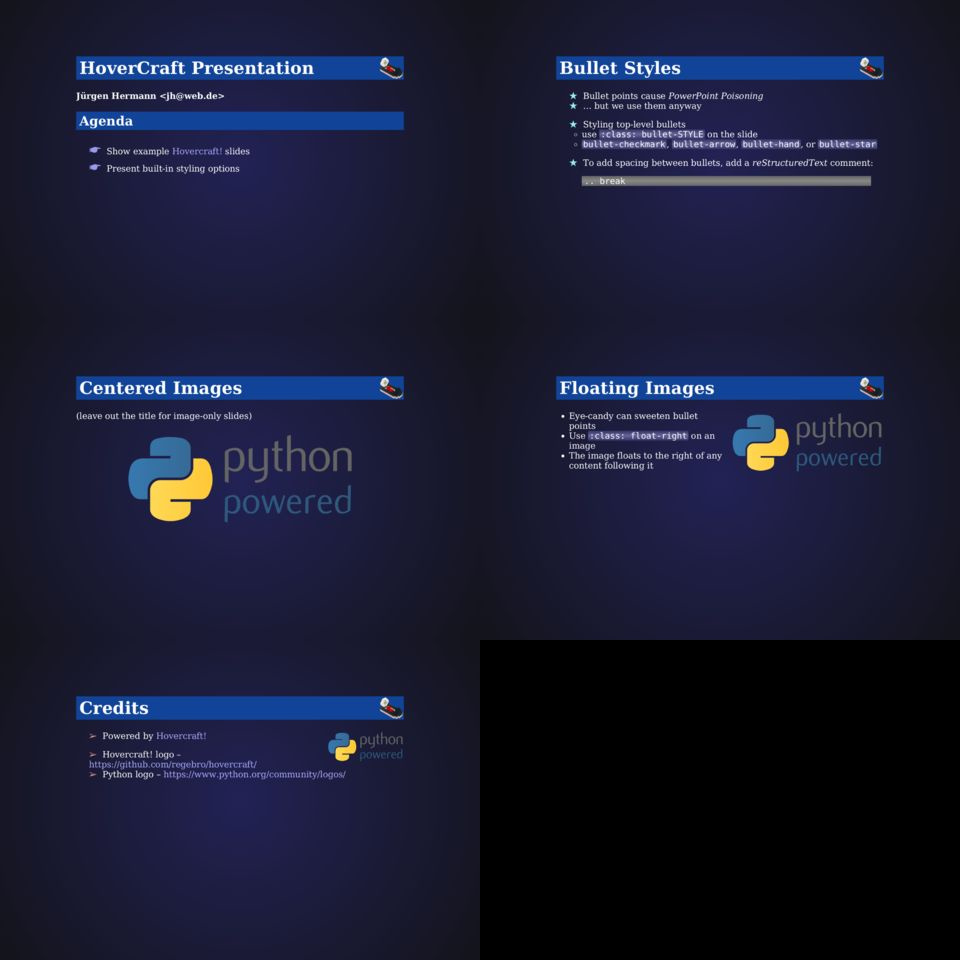
Demo slide thumbnails
To directly view the demo slides that come with this template, execute these commands:
git clone "https://github.com/Springerle/hovercraft-slides.git"
cd hovercraft-slides
. .env --yes && invoke test
After a while, a browser tab should open with the rendered presentation.
To use this template, refer to the Cookiecutter documentation – it was tested with Cookiecutter 1.4.0. Here's a way to install it to its own virtualenv:
mkdir -p ~/bin ~/.local/venvs
test -d ~/.local/venvs/cookiecutter \
    || virtualenv ~/.local/venvs/cookiecutter
~/.local/venvs/cookiecutter/bin/pip install -U pip setuptools wheel
~/.local/venvs/cookiecutter/bin/pip install -U cookiecutter
ln -s ~/.local/venvs/cookiecutter/bin/cookiecutter ~/bin
which cookiecutter || exec $SHELL -l
cookiecutter --version
You also need Python3 installed
on the machine you're authoring your slide set on, with a working
pyvenv command. After you created your new slide project, these
commands install all tools and open a browser tab with the rendered
index.rst slide set:
. .env --yes
invoke view
Note that invoke view starts a watchdog process that will react to
any changes in *.rst files by rendering and reloading the open
browser tab (live reload).
See the template's README for more details on available tasks.
The logo that appears on the right of slide titles is in the
img/title-logo.png file. Keep it roughly the same height at 72px
– if your logo is not square, you should increase the padding-right
value of 80px for h1 accordingly (in the first section of
css/default.css).
If you want to add you own CSS styles, place them in the css/custom.css file,
after the import of the defaults:
@import url('default.css');
The :css: field in index.rst points to that custom CSS file.
Doing it that way ensures you can easily update the defaults later on,
by just overwriting default.css with a new version from the template.
And in case you're adding some CSS rules useful to a wider audience, PRs are always welcome.