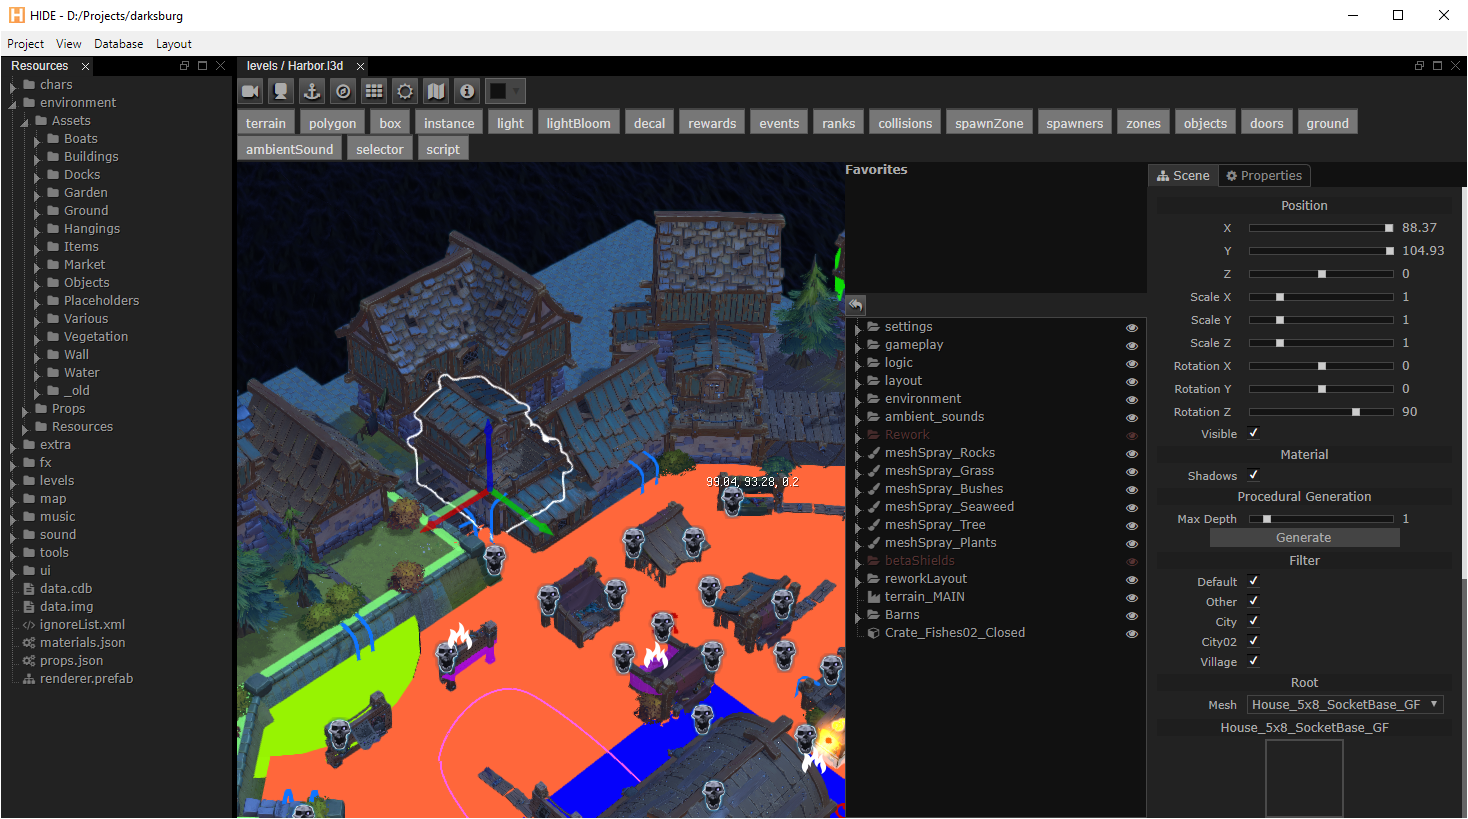
Hide (Heaps IDE) is an extensible editor that can be used as a middleware for various tasks, such as:
- preview 3D models and textures
- edit materials properties
- create timeline based visual effects and movements
- create whole 3D levels, place lights, paint terrain, bake shadow maps and volumetric light maps
- create and edit 2D and 3D particles systems
- edit and modify your Castle Database
- extend by adding game specific prefabs
- extend with your own game specific editors
If you don't want to build Hide from source, you can download a nightly build from here.
- Install Haxe using approriate installer from https://haxe.org/download/
- Install these libraries:
haxelib git heaps https://github.com/HeapsIO/heaps
haxelib git castle https://github.com/ncannasse/castle
haxelib git hxbit https://github.com/ncannasse/hxbit
haxelib git hscript https://github.com/HaxeFoundation/hscript
haxelib git hxnodejs https://github.com/HaxeFoundation/hxnodejs
haxelib git domkit https://github.com/HeapsIO/domkit
haxelib git hx3compat https://github.com/HaxeFoundation/hx3compat
- Clone this repo
- Run
haxe hide.hxml - This will create hide.js in the bin folder
- If there are errors when compiling, make sure you are using the latest libraries from git
- Download and copy NWJS into the
/bin/nwjsdirectory - On OSX, copy all files from
bininto thebin/nwjs.app/Contents/Resources/app.nwfolder
- Windows: Run
hide.cmd - Linux: Run
nwjs/nw .(don't miss the trailing space and dot) - OSX: Open the NWJS application
In your project's resource folder, you can create a props.json configuration file to override Hide's default settings. Refer to bin/defaultProps.json for the list of available settings.
In your project, create an hxml configuration for building the plugin. Example:
# hide-plugin.hxml
-cp src
-lib hide
-lib hxnodejs
-lib castle
--macro hide.Plugin.init()
-js hide-plugin.js
-debug
HideImports
HideImports.hx here is just a file that lists all the classes you want to embed in your plugin. Example:
// HideImports.hx
import prefabs.MyPrefab1;
import prefabs.MyPrefab2;
Running haxe hide-plugin.hxml should now generate a hide-plugin.js plugin file.
In your project configuration file (res/props.json) you can now include this file like so:
{
    "plugins": ["../hide-plugin.js"]
}
Aside from javascript plugins, you can add your own stylsheets:
{
    "plugins": ["../hide-plugin-style.css"]
}Example of a project-specific custom prefab:
import hrt.prefab.Context;
import hrt.prefab.Library;

class MyPrefab extends hrt.prefab.Object3D {

    public function new(?parent) {
        super(parent);
        type = "myprefab";
    }

    override function make(ctx:Context):Context {
        var ret = super.make(ctx);
        // Custom code...
        return ret;
    }

    #if editor

    override function getHideProps() : hide.prefab.HideProps {
        return { icon : "cog", name : "MyPrefab" };
    }

    #end

    static var _ = Library.register("myprefab", MyPrefab);
}You can add your own viewers/editors for files, by extending hide.view.FileView class:
import hide.view.FileView;

class CustomView extends FileView {

    // onDisplay should create html layout of your view. It is also called each when file is changed externally.
    override public function onDisplay()
    {
        // Example of initial layout setup.
        element.html('
          <div class="flex vertical">
            <div class="toolbar"></div>
            <div class="content"></div>
          </div>
        ');
        var tools = new hide.comp.Toolbar(null, element.find(".toolbar"));
        var content = element.find(".content"));
        // Importantly, use `getPath()` to obtain file path that you can use for filesystem access.
        var path = getPath();
        // ... your code to fill content
  }

  // Register the view with specific extensions.
  // Extensions starting with `json.` refer to `.json` files with `type` at root
  // object being second part of extension ("type": "customView" in this sample).
  // Otherwise it is treated as regular file extension.
  // Providing icon and createNew is optional. If createNew set, HIDE file tree will have a context menu item to create new file that FileView represents.
  static var _ = hide.view.FileTree.registerExtension(CustomView, ["json.customView", "customview"], { icon: "snowflake-o", createNew: "Dialog Context" });

}
