User Guide
Hytilities is a Hypixel focused Forge 1.8.9 mod, adding tons of Quality of Life features that you would want while on Hypixel, such as an Advertisement-Blocker, AutoQueue, Game Status Restyle, AutoComplete for /play and plenty others to discover on your own!
Hytilities is installed just like any other Forge mod.
If you do not know how to install a Forge mod, then we recommend following this step-by-step guide.
Chat
- Autocomplete /play Commands - Allows tab completion of /play commands
- Guild Welcome Message - Send a friendly welcome message when a player joins your guild.
- Chat Swapper - Automatically change back to a selected channel when leaving a party.
- Chat Swapper Channel - The channel to return to when leaving a party. Requires Chat Swapper.
- Remove All Chat Message - Hide the "You are now in the ALL channel" message when auto-switching.
- Game Status Restyle - Replace common game status messages with a new style.
- Player Count Before Player Name - Put the player count before the player name in game join/leave messages.
- Player Count On Player Leave - Include the player count when players leave.
- Player Count Padding - Place zeros at the beginning of the player count to align with the max player count.
- Short Channel Names - Abbreviate channel names.
- Shout Cooldown - Show the amount of time remaining until /shout can be reused.
- Player Adblocker - Remove spam messages from players, usually advertising something.
- Trim Line Separators - Prevent separators from overflowing onto the next chat line.
- Remove Automatically Activated Quest Messages -
- Remove Lobby Statuses - Remove lobby join messages from chat.
- Limbo /play Helper - When a /play command is run in Limbo, this runs /l first and then the command.
- Show Personal Mystery Box Rewards - Remove others mystery box messages from chat.
- Remove Soul Well Announcements - Remove soul well announcements from chat.
- Remove Game Announcements - Remove game announcements from chat.
- Remove Hype Limit Reminder - Remove Hype limit reminders from chat.
- Remove Bedwars Advertisements - Remove player messages asking to join BedWars parties.
- Remove Friend/guild Statuses - Remove join/quit messages from friend/guild members.
- Remove Guild Motd - Remove the guild Message Of The Day.
- Remove Chat Emojis - Remove MVP++ chat emo.jis.
- Remove Server Connected Messages - Remove server connection messages.
- Remove Automatically Activated Quest Messages - Remove automatically activated quest messages
- White Chat - Make nons chat messages appear as the normal chat message color.
- White Private Messages - Make private messages appear as the normal chat message color.
- Cleaner Game Start Counter - Compacts game start announcements.
- Remove Curse Of Spam Messages - Hides the constant spam of kali's curse of spam.
- Remove Gifts Message - Removes the gifts messages.
- Thank watchdog - Compliment Watchdog when someone is banned, or a Watchdog announcement is sent.
Lobby
- Hide Lobby Npcs - Hide NPCS in the lobby.
- Hide Lobby Bossbars - Hide the bossbar in the lobby.
- Mystery Box Star - Shows what star a mystery box is in the Mystery Box Vault, Orange stars are special boxes.
- Limbo Limiter - While in Limbo, limit your framerate to 15 to reduce the load of the game on your computer.
General
- Hide Npcs In Tab - Prevent NPCS from showing up in tab.
- Hide Player Ranks In Tab - Prevent player ranks from showing up in tab.
- Cleaner Tab In Skyblock - Doesn't render player heads or ping for tab entries that aren't players in Skyblock.
- Hide Ping In Tab - Prevent ping from showing up in tab while playing games, since the value is misleading. Ping will remain visible in lobbies.
- Auto Start - Join Hypixel immediately once the client has loaded to the main menu.
- Hide Guild Tags In Tab - Prevent Guild tags from showing up in tab.
- Broadcast Achievements - Announce in Guild chat when you get an achievement.
- Broadcast Levelup - Announce in Guild chat when you level up.
- Auto Queue - Automatically queues for another game once you die.
- Auto Queue Delay - Delays the execution of Auto Queue. (The measurement is in seconds)
Game
- Mute Housing Music - Prevent the Housing songs from being heard.
- Hide Armour - Hide armour in games where armour is always the same.
- Hardcore Hearts - When your bed is broken/wither is killed in Bedwars/The Walls, set the heart style to Hardcore.
- Pit Lag Reducer - Hide entities at spawn while you are in the PVP area.
- Game Countdown Timer - Hide the displayed title text when a game is about to begin.
How to contribute
You can contribute to Hytilities by following the instructions below. Basic knowledge of git is required.
Press the green "Code" button.
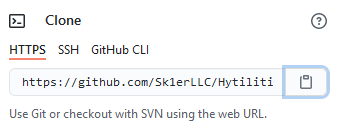
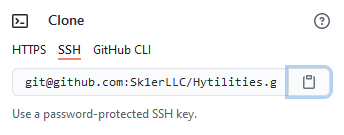
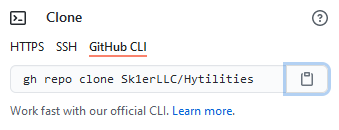
Depending on how your Git is set up/you want to clone, you will click on either HTTPS, SSH, or GitHub CLI, then press the clipboard button beside the link.
Open your preferred IDE, in this example we will be using IntelliJ. You can choose the "Community" tab if you do not already own the Ultimate version.
On IntelliJ's main menu, press the button that says "Check out from Version Control", click "GitHub", and paste the URL to the "Git Repository URL" text field. If you want to change the directory it will be cloned to, change the "Parent Directory" text field. Once you are done changing where you want it to be, click "Clone", then wait for it to finish. Once prompted with "You have checked out an IDEA project file: [file location]. Would you like to open it?", press the "Yes" button.
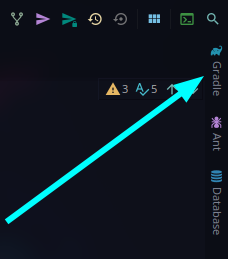
Once it is done cloning, click on the Gradle tab on the very right sidebar.
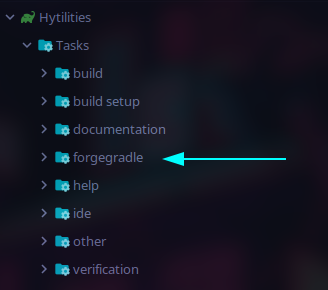
Once that is open, click the dropdown beside the Tasks folder.
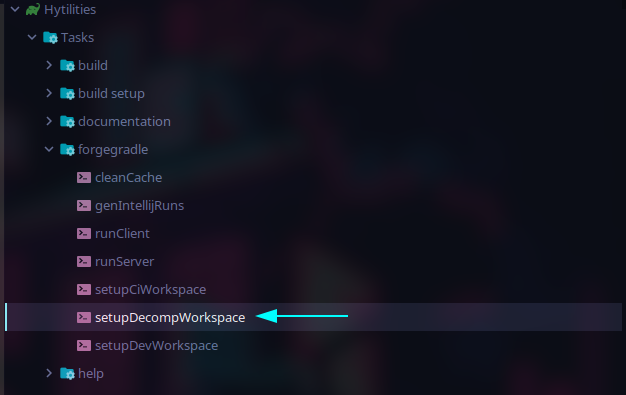
Then click the forgegradle directory dropdown.
Then proceed to double-click the setupDecompWorkspace task. This may take a few minutes.
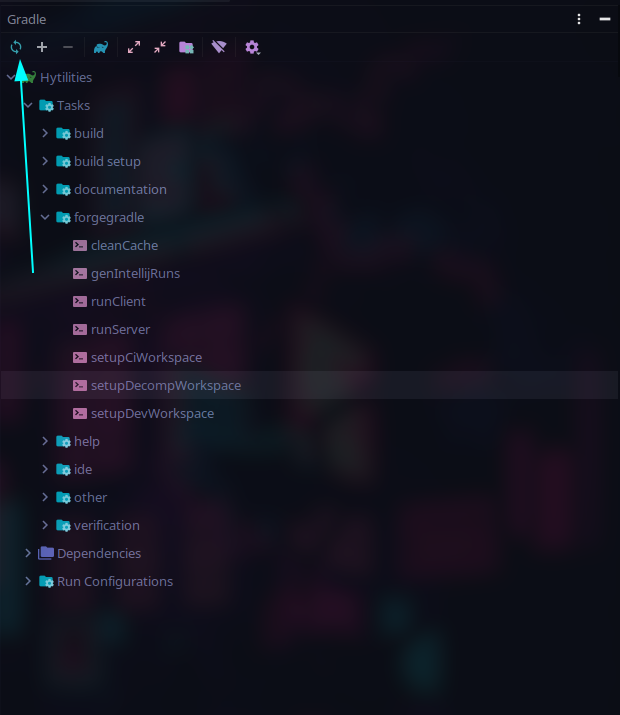
Once that is complete, you will want to click on this button in the top left of the Gradle tab.
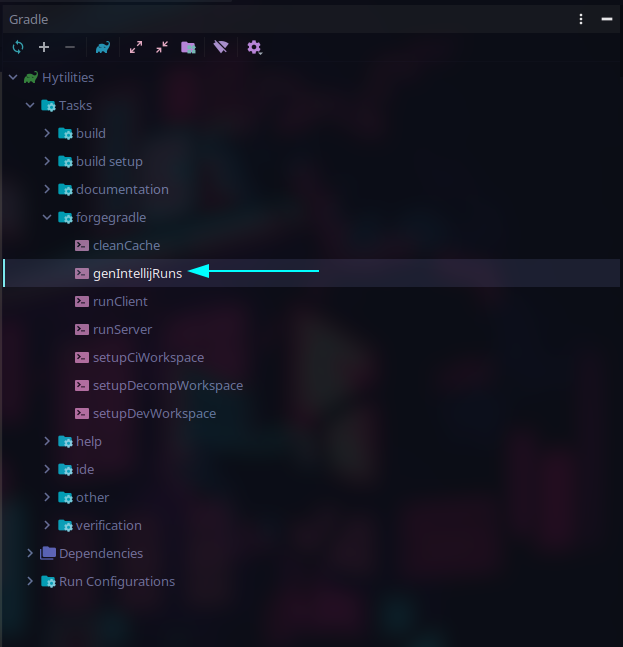
Once the project is done refreshing, you will want to run the genIntellijRuns task.
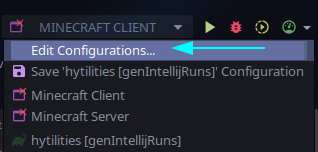
Once that task is complete, you can start Minecraft by clicking on this dropdown in the top right, usually saying Minecraft Client.
Click the Edit Configurations... button.
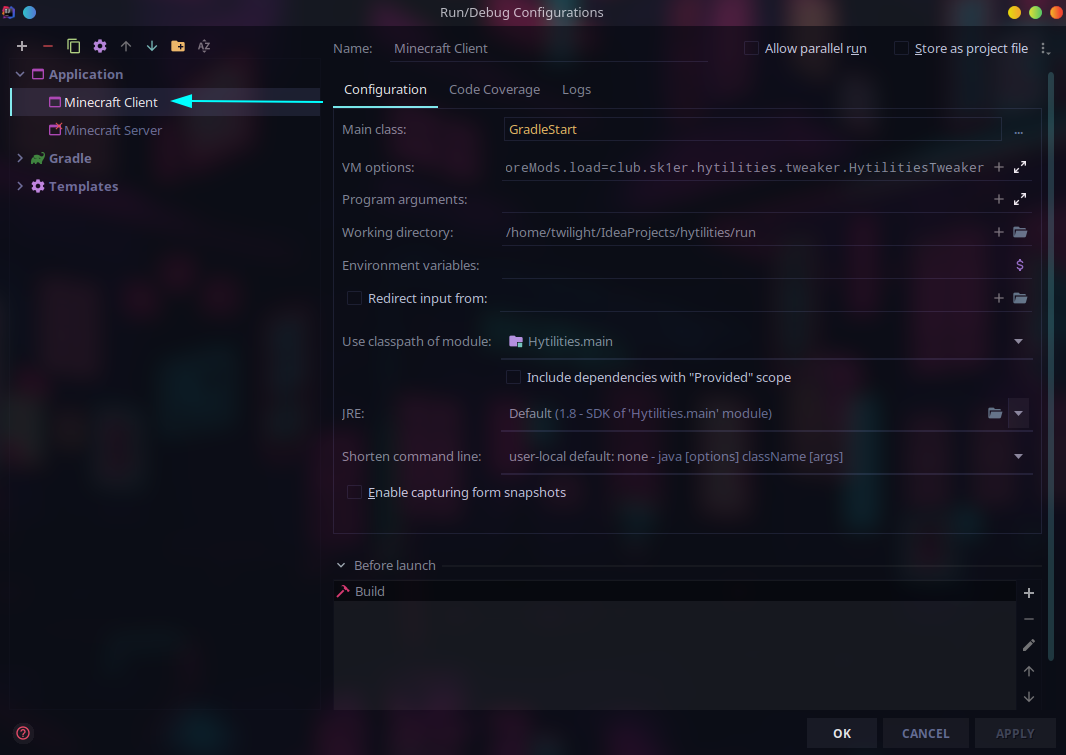
Click on Minecraft Client.
Ensure that the classpath is set to Hytilities.main. If it is not, select the drop down and set it.
If you want to be able to play Multiplayer, you'll need to log in. To do this, append to the Program Arguments field --username <email> --password <password> where <email> is your email (or your account name if you have an unmigrated account) and <password> is your password.
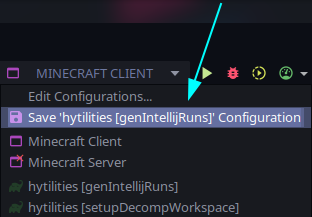
Apply and save your changes.
You should now be able to run Hytilities in the dev workspace.
If you want to compile, then you must simply run Tasks > build > build.
Note that while you can launch the game from the Terminal, you cannot login, so playing on Hypixel in the development environment is impossible.
As with many GitHub projects, Hytilities is rather simple to set up in the Terminal.
Click the green code button.
Depending on how your Git is set up/you want to clone, you will click on either HTTPS, SSH, or GitHub CLI, then press the clipboard button beside the link.
Go to your terminal, and type git clone , paste in the URL you copied, and hit enter.
Enter the Hytilities directory. From here, what you do depends on your OS. This guide will use Linux, however the process is only slightly different on Windows. Instead of doing ./gradlew ..., you do gradlew .... If you are a Windows user, when copy and pasting commands from here, omit the ./.
Type ./gradlew setupDecompWorkspace. This may take several minutes. It should say BUILD SUCCESSFUL once finished.
Now, you can edit the files as you would any other project, such as with a Terminal editor like vim. To compile, run ./gradlew build. They will be in the versions/1.8.9/build/libs folder. To launch the game, run ./gradlew runClient.

