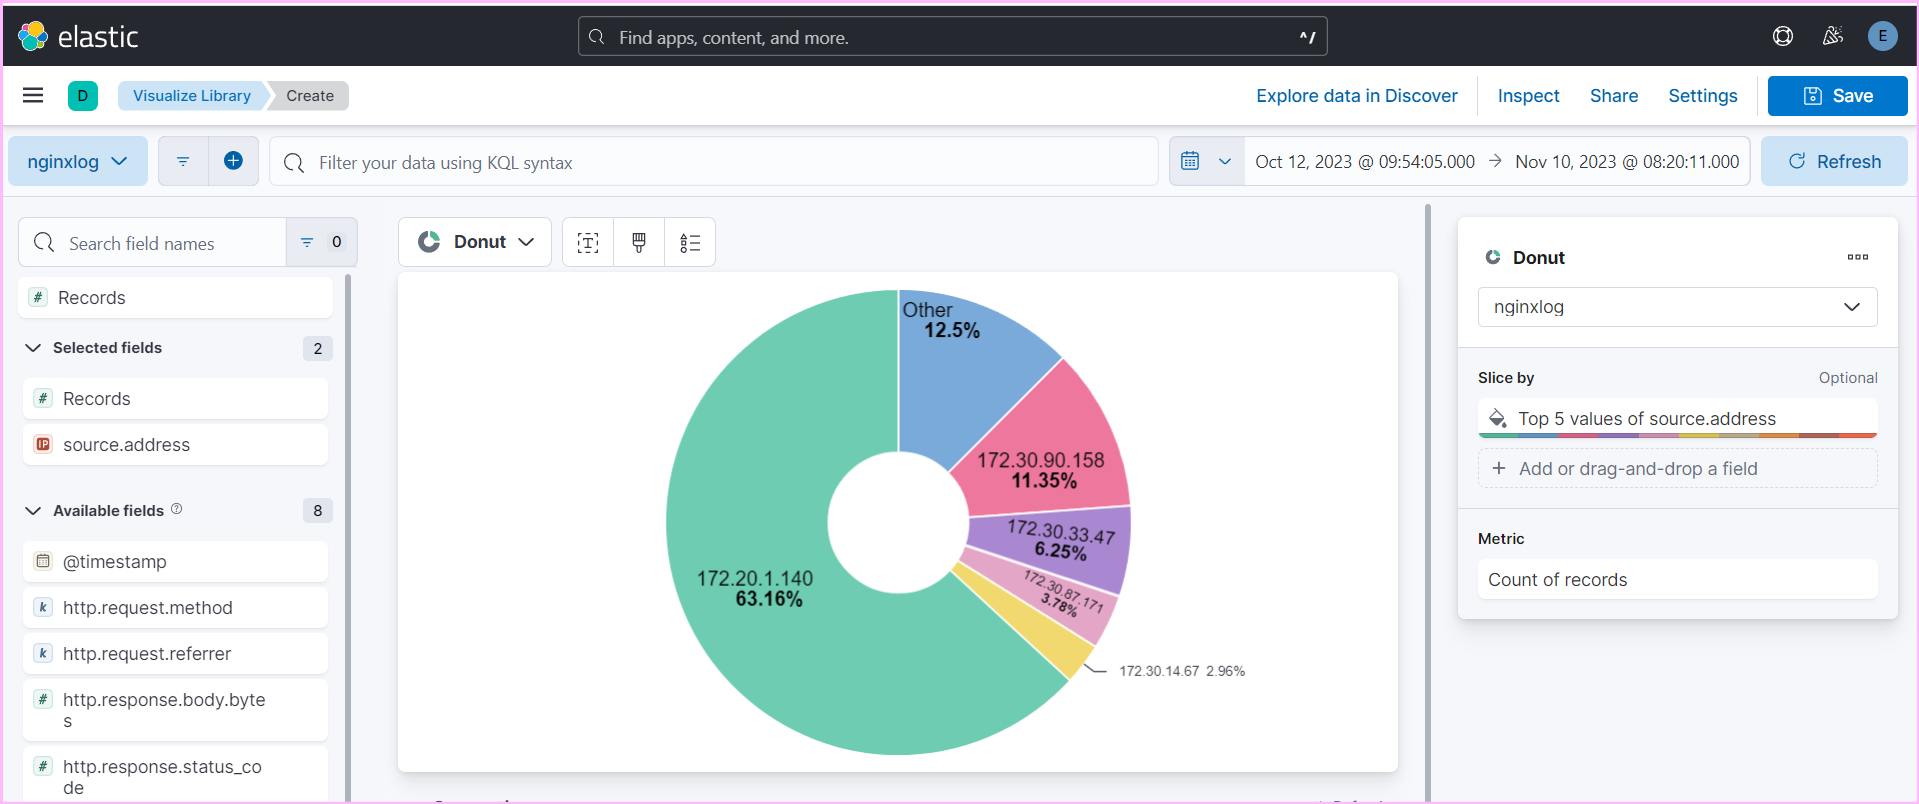
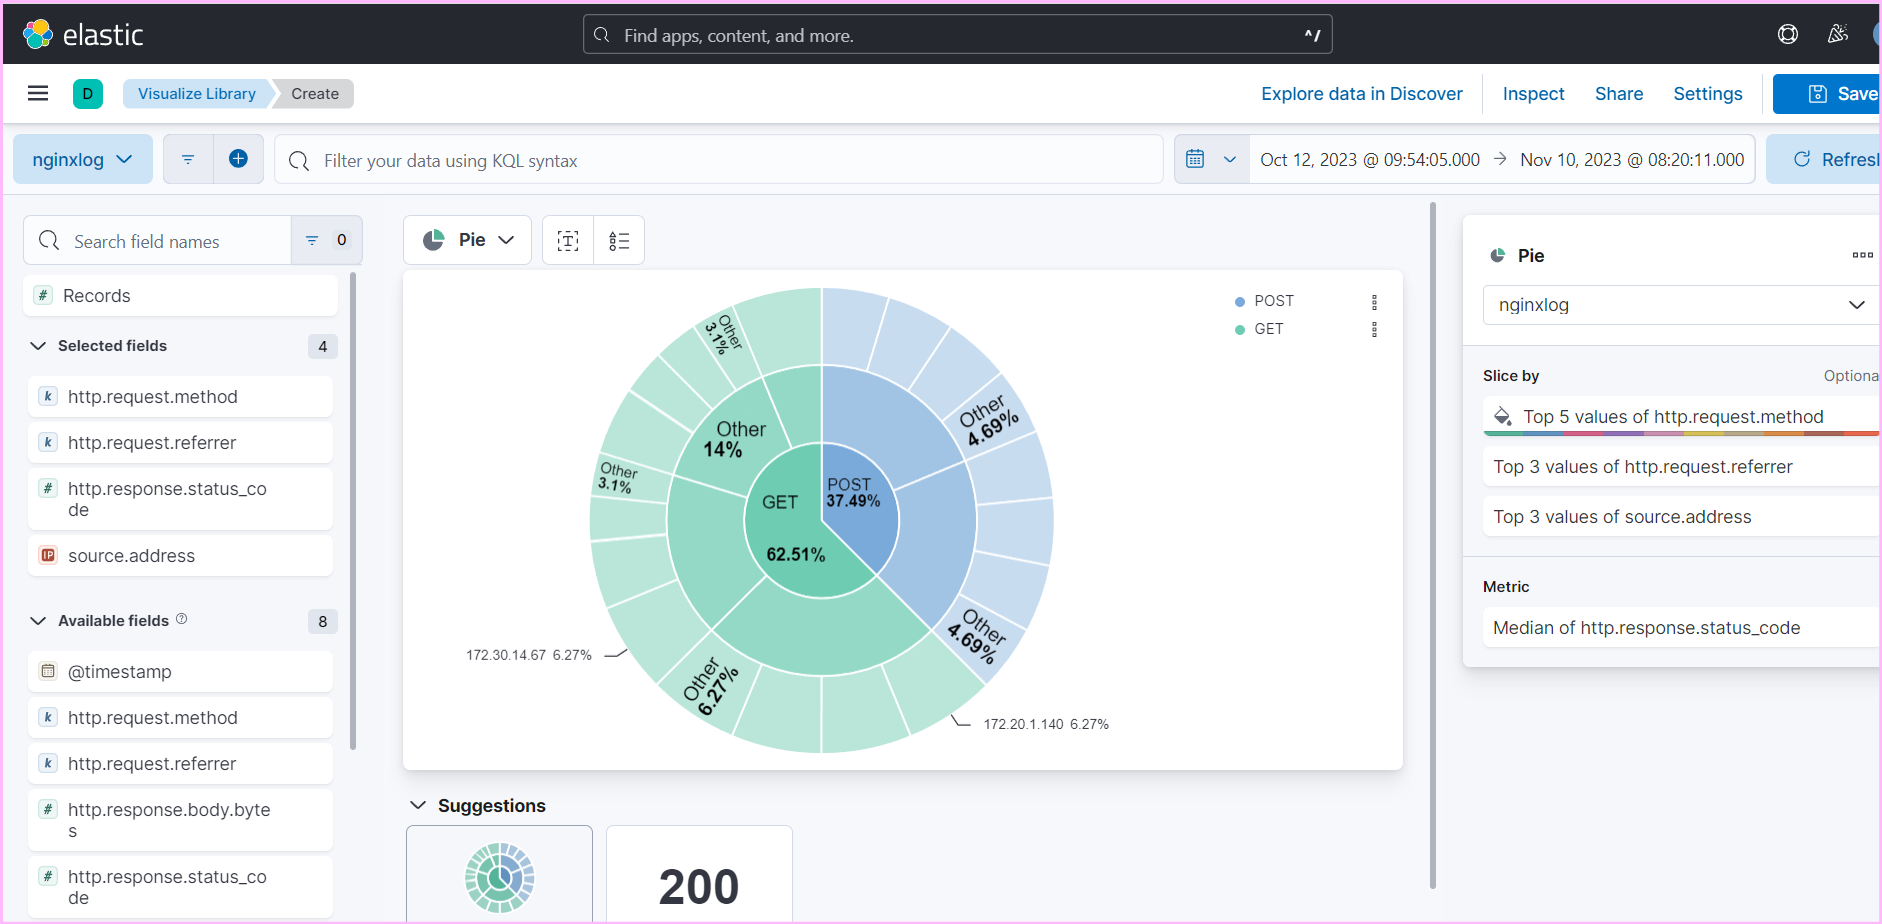
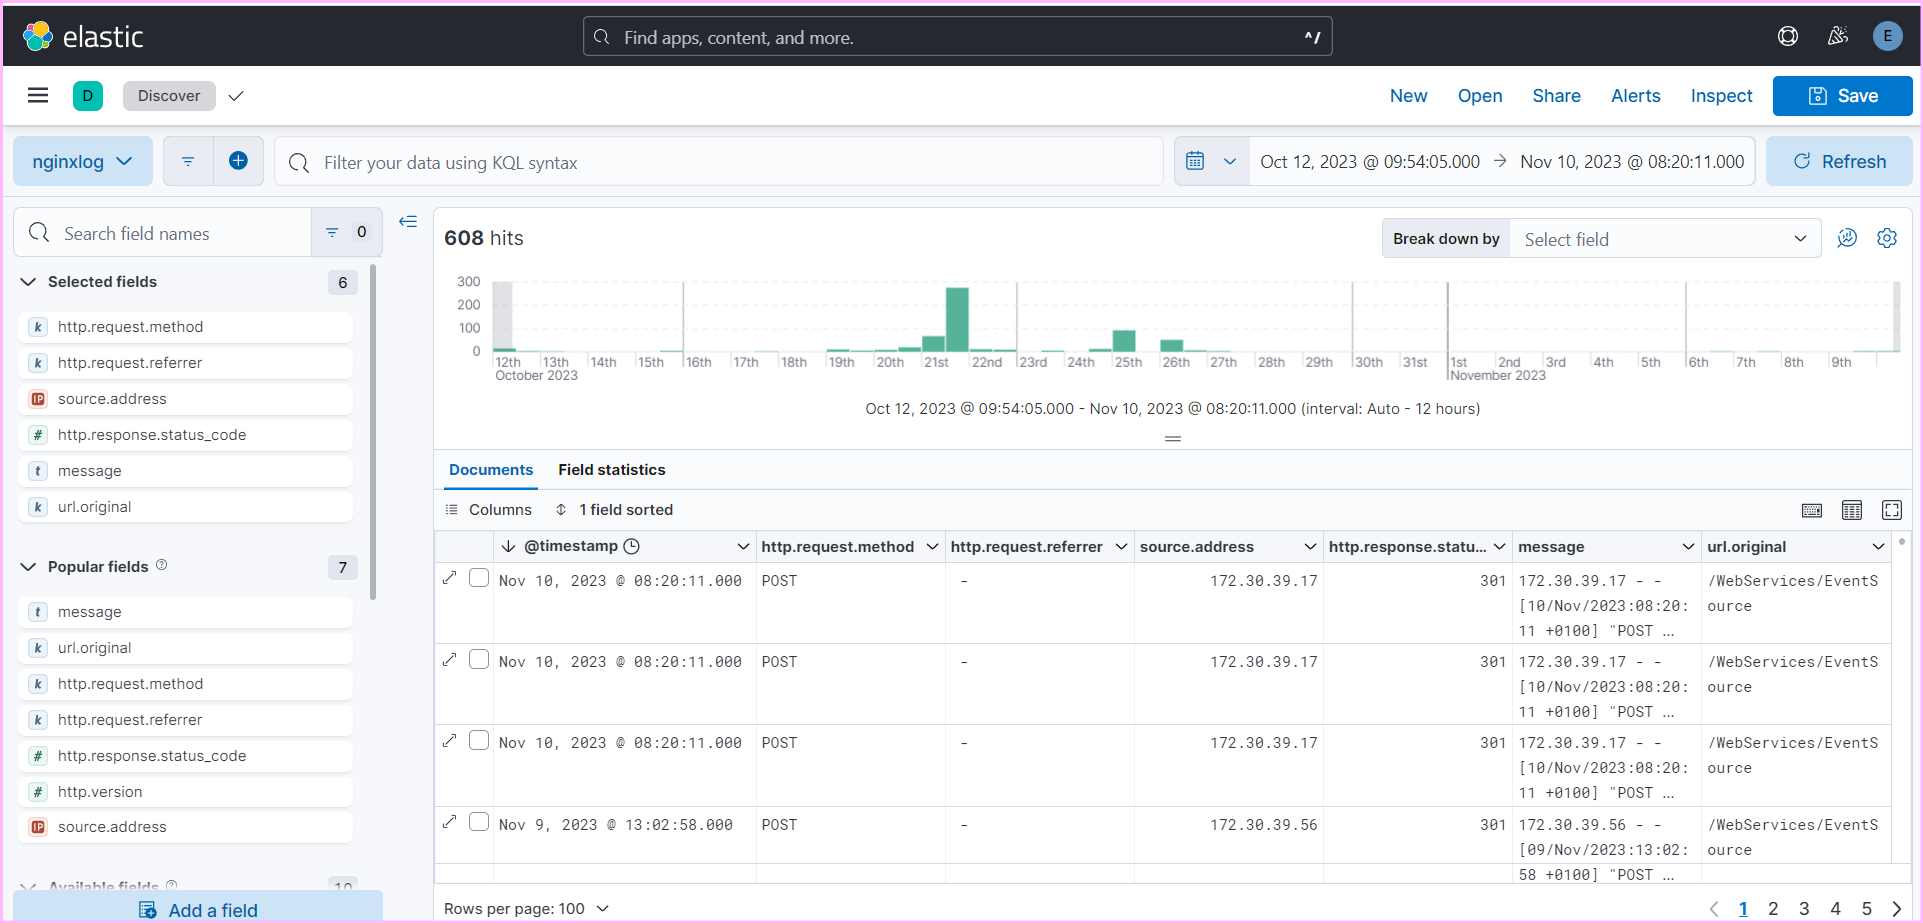
This project implements a honeypot and a secure web environment to detect and analyze potential security threats.
- Prerequisites
- 1. Setting Up the Python Honeypot
- 2. Setting Up the Secure Web Environment
- 3. Dashboard and Visualization Diagrams from Elasticsearch
- 4. Troubleshooting Common Issues
- 5. Conclusion
Before you begin, ensure you have a server with a suitable operating system (e.g., Debian). You will also install Nginx, PHP 8.2, and MariaDB. Instructions on how to install and configure these are included in this document.
A honeypot is a security mechanism designed to detect and monitor unauthorized access or attacks on a network or system. In this project, we will implement a honeypot (python script in honeypot/honeypot.py) to detect and analyze potential security threats. The honeypot will run on a custom port (12345) and record interaction attempts from potential attackers.
-
It imports the
socketmodule, which is used to create a network socket and handle incoming connections. -
It defines the
honeypot_portvariable, specifying the port number on which the honeypot will listen for incoming connections. -
The
start_honeypotfunction sets up the honeypot server using a block for proper resource management. It binds the server socket to all available network interfaces on a specified port and starts listening for incoming connections. -
When a connection is established, it logs the IP address of the connecting client.
-
The code logs the connection and login attempt details to a file named
honeypot.logand responds to the client with a login failure message. -
The
start_honeypotfunction continues to listen for new connections in an infinite loop.
To run the honeypot in the background, navigate to the honeypot directory and execute the following command:
python honeypot.py > honeypot.log 2>&1 &If you want to run the honeypot live, use the following command:
python honeypot.pyIn addition to the honeypot, we will create a secure web environment with the following features:
- User authentication with secure login.
- User registration without email verification, captcha, or 2FA.
- User account management, including enabling/disabling users.
- Uploading avatars.
- A secure admin panel for user management.
- Extensive logging with Kibana integration for monitoring.
- Honeypot challenges for testing against common web vulnerabilities.
-
Install the prerequisites:
sudo apt install curl gnupg2 ca-certificates lsb-release debian-archive-keyring
-
Import an official NGINX signing key so APT could verify the packages' authenticity. Fetch the key:
curl https://nginx.org/keys/nginx_signing.key | gpg --dearmor |sudo tee /usr/share/keyrings/nginx-archive keyring.gpg >/dev/null
-
Verify that the downloaded file contains the proper key:
gpg --dry-run --quiet --no-keyring --import --import-options import-show /usr/share/keyrings/nginx-archive-keyring.gpg
-
Set up the APT repository for stable NGINX packages, run the following command:
echo "deb [signed-by=/usr/share/keyrings/nginx-archive-keyring.gpg] http://nginx.org/packages/debian $(lsb_release -cs) nginx" | sudo tee /etc/apt/sources.list.d/nginx.list
-
To install NGINX, run the following commands:
sudo apt update
sudo apt upgrade
sudo apt install nginx
-
Install the PHP package
sudo apt install php8.2-fpm -y
-
Edit the site configuration in
/etc/nginx/conf.d/default.conf.-
Add
index.phpto the index list -
Add the PHP block
location ~ \.php$ {
 fastcgi_pass unix:/run/php/php8.2-fpm.sock;
 fastcgi_param SCRIPT_FILENAME $document_root$fastcgi_script_name;
 include fastcgi_params;
}
-
-
Add the NGINX user to the
www-datagroup.usermod -aG www-data nginx
-
Restart NGINX:
sudo systemctl restart nginx
-
Create a new file in
/usr/share/nginx/html/phpinfo.phpand add the content.<?php echo phpinfo();?>
-
Install MariaDB on the server
sudo apt install mariadb-server
-
Run the security script
sudo mysql_secure_installation
-
Start MariaDB
sudo mariadb
-
Run the following SQL commands to set up the necessary tables and data:
-- Create the 'honeypot_database' database
CREATE DATABASE IF NOT EXISTS `honeypot_database` DEFAULT CHARACTER SET utf8mb4 COLLATE utf8mb4_general_ci;

-- Use the 'honeypot_database' database
USE `honeypot_database`;

-- Create the 'solved_challenges' table
DROP TABLE IF EXISTS `solved_challenges`;

CREATE TABLE `solved_challenges` (
  `id` int(11) NOT NULL AUTO_INCREMENT,
  `user_id` int(11) DEFAULT NULL,
  `challenge_id` int(11) DEFAULT NULL,
  PRIMARY KEY (`id`)
) ENGINE=Aria AUTO_INCREMENT=4 DEFAULT CHARSET=utf8mb4 COLLATE=utf8mb4_general_ci PAGE_CHECKSUM=1;

-- Create the 'users_list' table
DROP TABLE IF EXISTS `users_list`;

CREATE TABLE `users_list` (
  `user_id` int(11) NOT NULL AUTO_INCREMENT,
  `name` varchar(45) NOT NULL,
  `email` varchar(45) NOT NULL,
  `password` varchar(255) NOT NULL,
  `avatar` varchar(80) DEFAULT NULL,
  PRIMARY KEY (`user_id`),
  UNIQUE KEY `userid_UNIQUE` (`user_id`),
  UNIQUE KEY `email_UNIQUE` (`email`)
) ENGINE=Aria AUTO_INCREMENT=11 DEFAULT CHARSET=utf8mb4 COLLATE=utf8mb4_general_ci PAGE_CHECKSUM=1;

---------------------------------------------------------

-- Create the 'sql_database' database
CREATE DATABASE IF NOT EXISTS `sql_database` DEFAULT CHARACTER SET utf8mb4 COLLATE utf8mb4_general_ci;

-- Use the 'sql_database' database
USE `sql_database`;

-- Create the 'sql_list' table
DROP TABLE IF EXISTS `sql_list`;

CREATE TABLE `sql_list` (
  `user_id` int(11) NOT NULL AUTO_INCREMENT,
  `username` varchar(255) DEFAULT NULL,
  `email` varchar(255) DEFAULT NULL,
  PRIMARY KEY (`user_id`)
) ENGINE=InnoDB AUTO_INCREMENT=3 DEFAULT CHARSET=utf8mb4 COLLATE=utf8mb4_general_ci;

-- Insert data into the 'sql_list' table
INSERT INTO `sql_list` VALUES
(1,'JohnDoe','john.doe@example.com'),
(2,'AliceSmith','alice.smith@example.com');
-
Go to the following page and follow the steps to get an API key.
-
In
util/resizeAndUploadAvatar.json line 1, paste your API key and save:const imgbb_api_key = 'YOUR_API_KEY';
-
Set up NGINX to serve your web application.
-
Create server blocks or virtual hosts for your web application and configure them to use SSL (HTTPS).
-
Ensure that your web application is accessible over HTTPS for secure communication.
-
Implement user authentication for secure login.
-
Set up user registration without email verification, captcha, or 2FA.
-
Create an admin panel for user management, including the ability to enable/disable users.
-
Allow users to upload avatars and handle them securely.
-
Set up Elasticsearch, Kibana, and Filebeat to collect and analyze logs.
-
Configure log shipping from your web server and honeypot to Elasticsearch.
- Create honeypot challenges within your web environment to test for common web vulnerabilities like SQL injection SQL injection, Cross-Site Scripting (XSS), CSRF, and Broken Access Control.
When user inputs are directly inserted into SQL queries without proper sanitization.
Solution:
-
' OR 1=1 -- -
' UNION SELECT null, username, password FROM users_list --
Here, the PHP script takes a search query from the user through a GET parameter and displays the search results on the page. However, the script directly echoes the user's input without proper escaping or validation, making it vulnerable to XSS attacks.
Solution:
Add this:
<script>alert("group4");</script>Solution:
Changing the userid cookie to 1 solves the challenge.
Solution:
An attacker can create a simple HTML page with JavaScript to perform a CSRF attack. This script will automatically submit a form to transfer funds when the user visits the page.
Lacks anti-CSRF protection. This makes it vulnerable to Cross-Site Request Forgery (CSRF) attacks.
Solution:
The attacker can access by modifying the URL in the browser address bar.
?input=<img%20src=x%20onerror=alert("group4")>
-
Open
/etc/nginx/conf.d/default.confwith your favorite editor. -
Implement
server_tokens off, preventing NGINX from including the server version information in the HTTP response headers.server_tokens off;
-
Implement the
autoindex directive. NGINX won't automatically generate a directory listing. Instead, it will typically return a "403 Forbidden" error or whatever error page you have configured for such cases.autoindex off;
-
Implement
limit_except GET POST, which restricts all HTTP methods except for GET and POST.location / { limit_except GET POST { deny all; } # Only allow GET and POST try_files $uri $uri/ =404; }
-
Implement the
add_header directive. This header is a security feature that helps protect your website against clickjacking attacks.add_header X-Frame-Options "deny"; # Add XFO header add_header X-Contenty-Type-Options nosniff; # Add XCTO header add_header Strict-Transport-Security 'max-age=172800; includeSubDomains';
Your NGINX configuration should look like this:
server {
listen 80 http2; # Make use of HTTP2
server_name localhost;
server_tokens off; # Disable NGINX version printing
return 301 https://$host$request_uri;
}
server {
listen 443 ssl;
server_name localhost;
ssl_certificate /etc/ssl/certs/nginx-selfsigned.crt;
ssl_certificate_key /etc/ssl/private/nginx-selfsigned.key;
ssl_protocols TLSv1 TLSv1.1 TLSv1.2 TLSv1.3;
ssl_ciphers HIGH:!aNULL:!MD5;
server_tokens off; # Disable NGINX version printing
access_log /var/log/nginx/html.local.access.log;
error_log /var/log/nginx/html.local.error.log;
add_header X-Frame-Options "deny";
add_header X-Content-Type-Options "nosniff"; # Add XCTO header
add_header Strict-Transport-Security 'max-age=172800; includeSubDomains'; # Add HSTS header
root /usr/share/nginx/html;
index index.html index.htm index.php;
location / {
  limit_except GET POST { deny all; } # Only allow GET and POST
  try_files $uri $uri/ =404;
}
}- Regularly update your server and scripts to address security vulnerabilities.
-
Add a customized log directory for the challenges and register page in the Nginx configuration. You can follow these steps:
-
Edit your Nginx configuration file, typically located at
/etc/nginx/conf.d/default.confand/etc/nginx/nginx.conf. -
Inside the server block, add the location block for the challenges and register page and specify a custom log file and directory. For example:
location /challenges.php {
  access_log /var/log/nginx/html.local.challenges.php.access.log;
  error_log /var/log/nginx/html.local.challenges.php.error.log;
}

location /register.html {
  access_log /var/log/nginx/html.local.register.html.access.log;
  error_log /var/log/nginx/html.local.register.html.error.log;
}
-
Restart Nginx to apply the changes:
sudo systemctl restart nginx
-
Regularly review logs:
tail -f /var/log/nginx/access.log
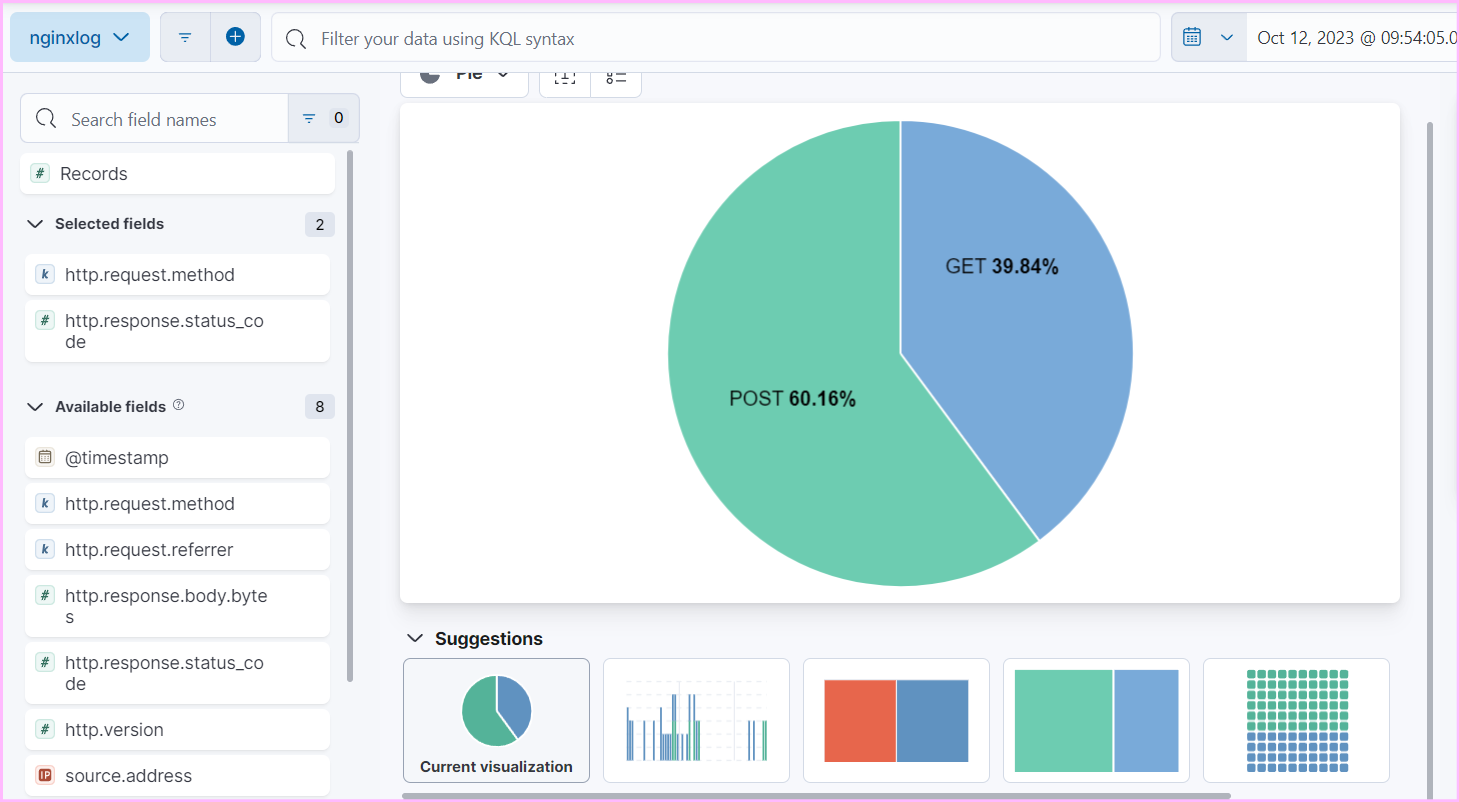
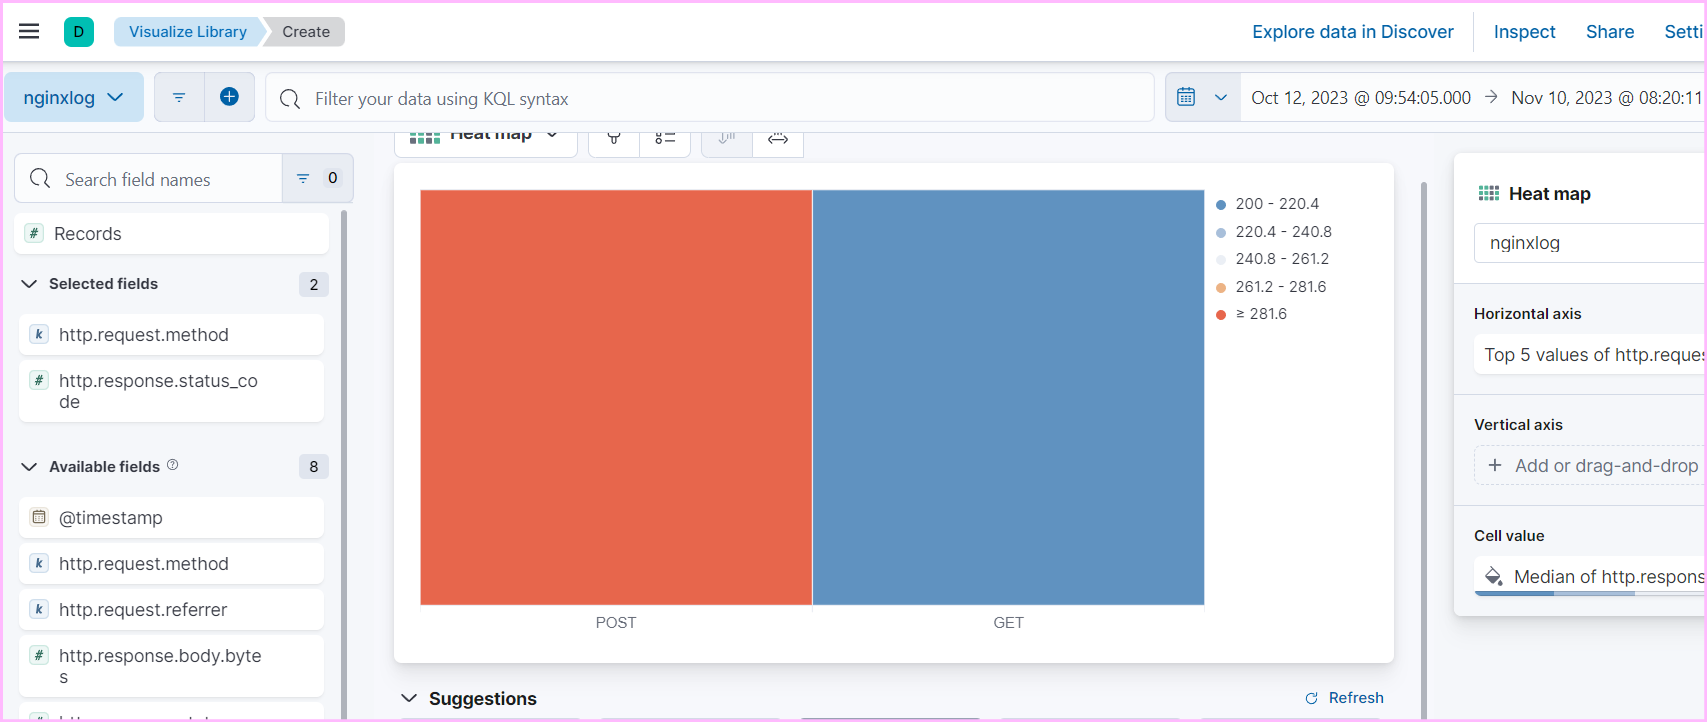
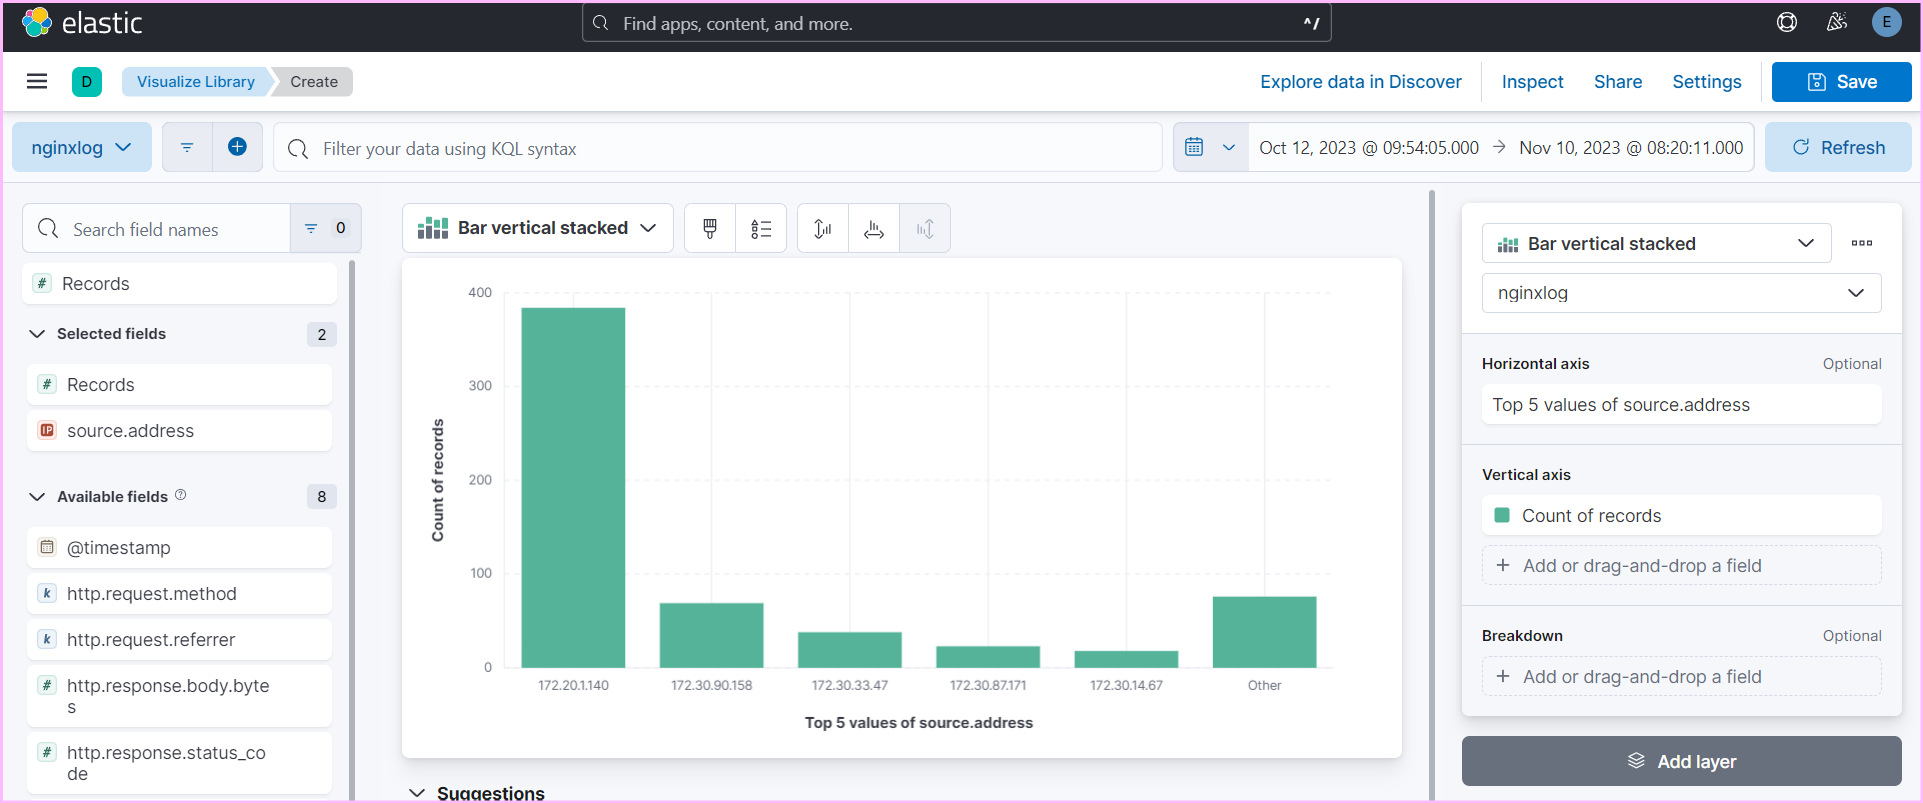
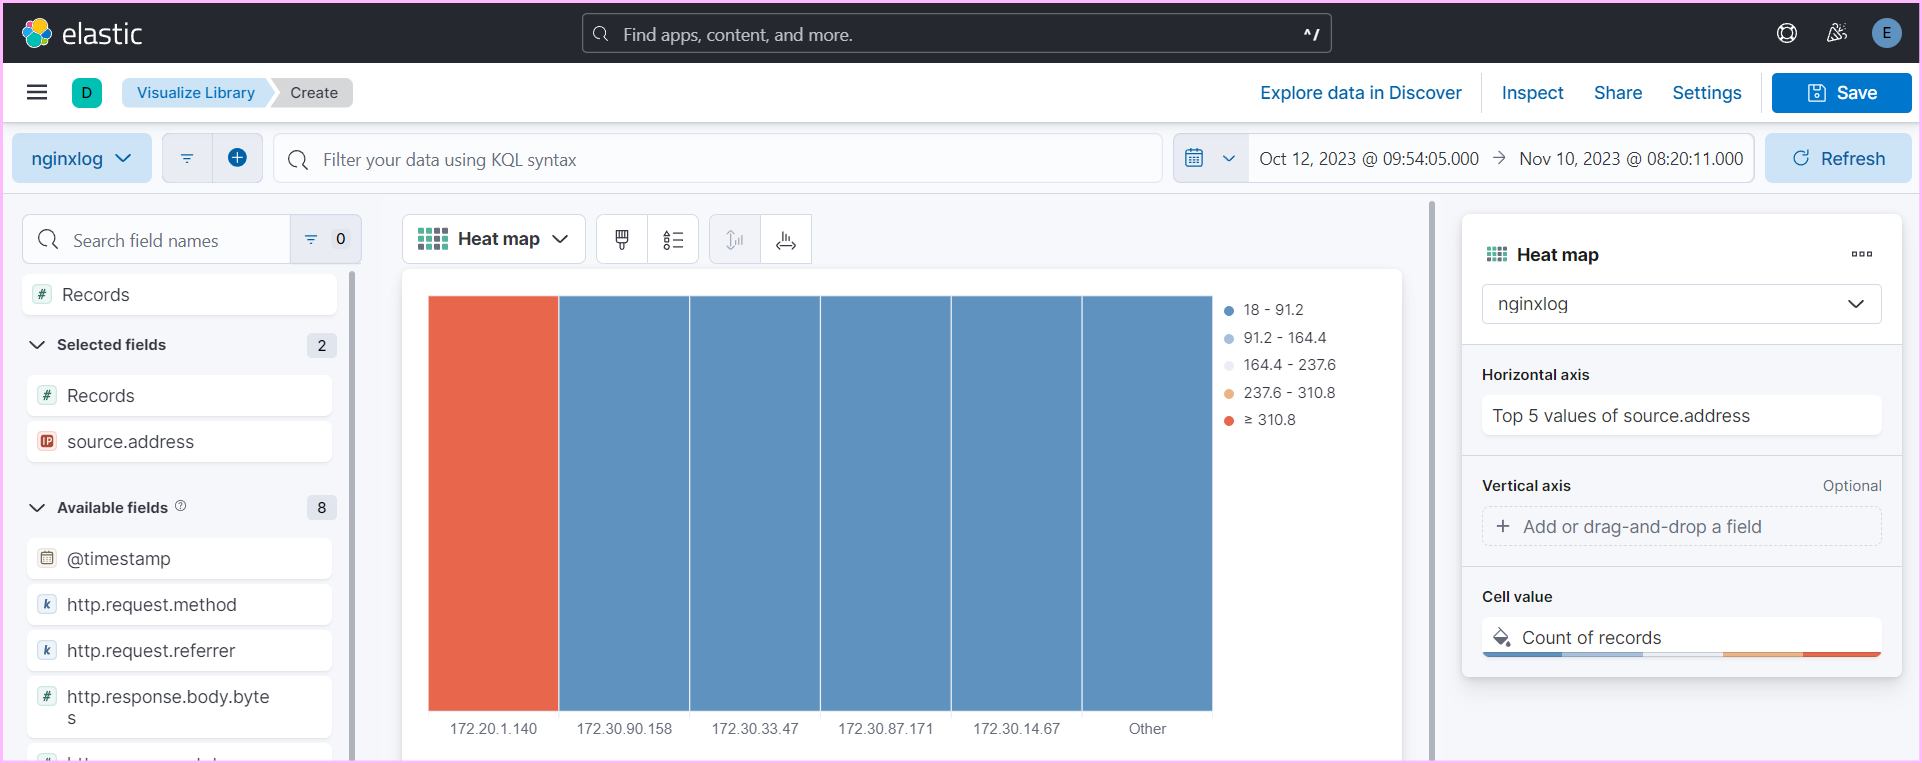
- Use Kibana to create detailed dashboards and visualizations for monitoring and analyzing logs effectively.
- If you encounter issues during the setup or operation of your honeypot and web environment, consider the following troubleshooting steps:
-
Check Nginx Service Status (Verify the status of the Nginx service. Look for error messages or warnings in the output.)
sudo systemctl status nginx
-
If Nginx is not running, start the service and check the status again.
sudo systemctl start nginx
-
Tail the Nginx error log for real-time updates. Look for any error messages or warnings.
sudo tail -f /var/log/nginx/error.log
-
If you make changes to the Nginx configuration, restart the service to apply the changes.
sudo systemctl restart nginx
-
Check your Nginx configuration files for syntax errors. Use the following command to test the configuration:
nginx -t
-
Review System Journal (Logs) Use journalctl to review system logs specific to the Nginx service. Look for error messages or warnings.
journalctl -u nginx
-
Check for System-Wide Issues (Examine the entire system journal for potential issues:)
journalctl
By following this guide, you will be able to successfully set up a honeypot and a secure web environment. Regularly monitor and analyze logs, adapt your security measures.
STAY SECURE!
