This is the code for our final project. The project introduction and specification can be found on the website
This code is based on the sample demo of Pico4ML. Click here
main.c is the main code for the gaming, including transfer camera data, drawing game and the game main loop
folder arducam is the lib for driving camera.
folder lib is the library of device driver, including pio-i2c, lsm6ds3 driver, ST7735 driver, drawing function, and fonts.
if (restart){
    car_x = 32;
    car_y = 120;
    car_w = 16;
    car_h = 30;
    for (int i = 0; i < 5; i++){
        lane_y[i] = (i - 1) * 40;
    }
    mov_speed = 2;
    for (int i = 0; i < 3; i++){
        block_y[i] = -40 - i*(rand()%40+100);
        int r = rand() % 3;
        block_x[i] = x_position[r];
        r = rand() % 4;
        block_w[i] = 15;	//fixed width of car block
        block_h[i] = rand() % 6 + 25;	//random length of car block
        block_x[i] = block_x[i] - block_w[i] / 2;
    }
    time = 0;
    restart = false;
}
We just reset all the parameters in the game, and wait for the user input to restart the game.
We are using our function to draw pixels on the camera image, basically locate the rectangular and then substitute the corresponding element in the array.
void draw_rec_onbuf (int16_t x, int16_t y, int16_t w, int16_t h, uint8_t* displayBuf, uint16_t color){
    //x=>w y=>h
	//start point: 80*y+x
    if (x < 0){
        w = w + x;
        x = 0;
    }
    else if (w + x > 80){
        w = 80 - x;
    }

    if (y < 0){
        h = h + y;
        y = 0;
    }
    else if (h + y > 160){
        h = 160 - y;
    }

    int index = (y * 80 + x) * 2;
    //printf("%d,%d\n",w,x);
    for (int i = 0; i < h; i++){
        for (int j = 0; j < w; j++){
            displayBuf[index+j*2] = (uint8_t)(color >> 8) & 0xFF;
            displayBuf[index+j*2+1] = (uint8_t)(color)&0xFF;
        }
        index = index + 80 * 2;
    }
} in order to test our rendering, we have build a Repl control pannel in earlier versions. This not work well, since he delay and redundant input of keyboard.
readGyro(pio, sm, data);
for (int i = 0; i < 2; i++){
    if ((integflag == false) && (data[i] > 5) || (data[i] < -5)){
        integflag = true;
    }
}
if (integflag){
    for (int i = 0; i < 2; i++){
        gyrosum[i] += data[i];
    }
    integtime -= 1;
}
if (integtime == 0){
    integflag = false;
    car_y = car_y + mov_speed + 0.2*gyrosum[1];
    car_y = car_y_lim(car_y);
    car_x = car_x + 0.2*gyrosum[0];
    car_x = car_x_lim(car_x,car_w);
}readAcceleration(pio, sm, data);
printf("x: %d, y: %d, z: %d.\n",data[0] ,data[1] ,data[2]);
if (data[1] > -1000) {
car_y = car_y + mov_speed + (data[1] + 1000) / 600;
car_y = car_y_lim(car_y);
}
else if (data[1] < -5500){
car_y = car_y - mov_speed + (data[1] + 5500) / 1000;
car_y = car_y_lim(car_y);
}
if (data[0] > 1700) {
car_x = car_x - 2 - (data[0] - 1700) / 725;
car_x = car_x_lim(car_x,car_w);
}
else if (data[0] < -1700){
car_x = car_x + 2 - (data[0] + 1700) / 725;
car_x = car_x_lim(car_x,car_w);
}We are using both acceleration and gyro, which makes the movement more sensitive. Gyro is used for rapid and dynamic change, and acceleration is used for more slow change.
bool collFlag = 0;
for ( int i = 0; i < 3; i++){
    bool collisionX = block_x[i] + block_w[i] >= car_x && car_x + car_w >= block_x[i];
    bool collisionY = block_y_int[i] + block_h[i] >= car_y && car_y + car_h >= block_y_int[i];
    collFlag = collisionX && collisionY;
    if(collFlag){
        break;
    }
}
if (collFlag){
    gameOver();
}
A simple judgment for collision of 2 rectangular.
if (mov_speed <= 7.5){
	mov_speed += (rand() % 2) * 0.012;
}
The speed will grow with the time.
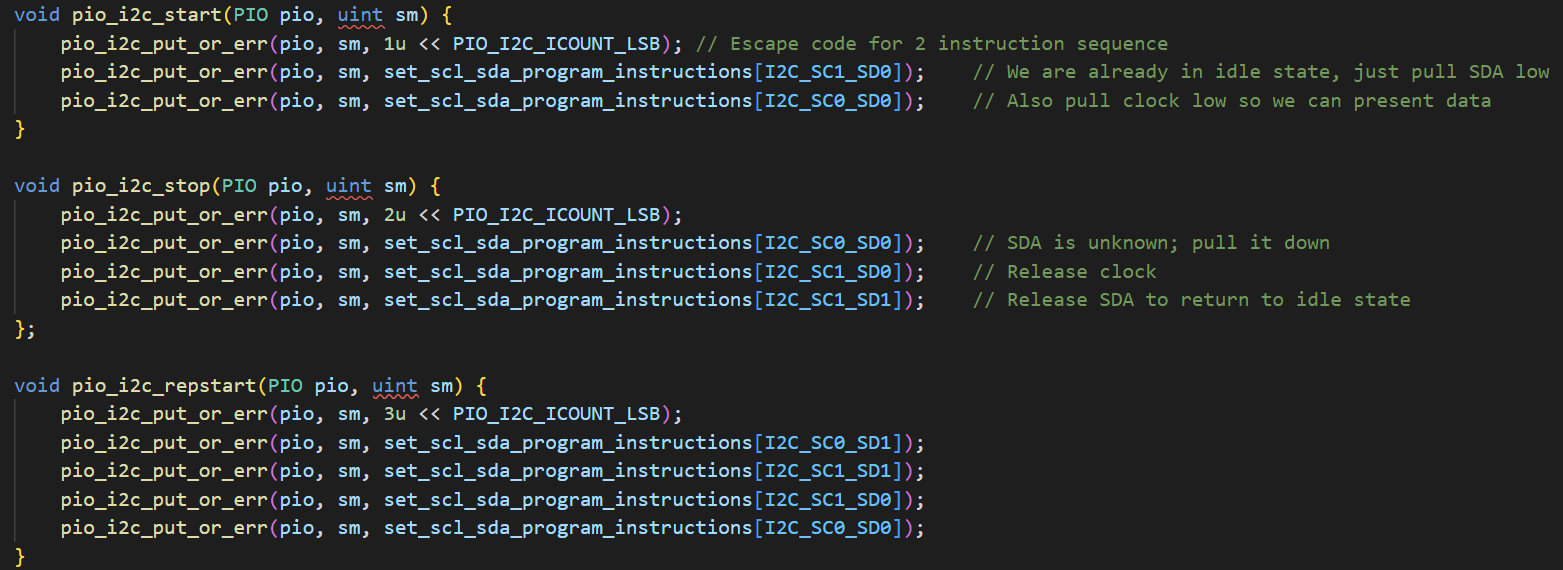
We have already explain how this will work in lab2b. The code is based on the example of pico-sdk.
We find that the original pio-i2c is not working, from i2c example we can know that, the read programme should be like this
void read_proximity(int32_t* proximity) {
uint8_t buf[1];
uint8_t reg = PDATA_REG;
i2c_write_blocking(i2c_default, addr, ®, 1, true); // true to keep master control of bus
i2c_read_blocking(i2c_default, addr, buf, 1, false); // false - finished with bus
*proximity = buf[0];
}Here we see that first the master should write a command to bus without stop bit.
Also, from a reference, we can know that the following should be a repeat start bit.
However, in the pio-read function, it seems not working.
int pio_i2c_read_blocking(PIO pio, uint sm, uint8_t addr, uint8_t *rxbuf, uint len) {
    int err = 0;
    pio_i2c_start(pio, sm);
    pio_i2c_rx_enable(pio, sm, true);
...
We can see here the read function first do a start bit, this may be the reason. After replace it with function "repstar", it works.
It is easy to find the configuration registers and data registers from the datasheet.

