This repo is for the Techtonica website, which is currently hosted on DreamHost.
The audience of the website is made up of (potential) volunteers, sponsors, and program participants.
We need to effectively communicate that Techtonica and its participants are worth supporting and share details of the program for potential applicants and volunteers.
There should be a good understanding of how the program works with vetting, training, mentoring, and placements.
Detailed instructions on how to update the website: https://docs.google.com/document/d/1oL3BaemFfUD7DfoFzhTSwcX4lPxYbWN3Dy9oZFfGP0Y/edit
This app uses Python 3.6; please stick to this version when doing development.
This project uses various pre-commit hooks to ensure code quality and formatting consistency.
-
Install pre-commitglobally. -
Install the project pre-commit hooks:
pre-commit install -f --install-hooks
If you prefer using Docker, see instructions.
It is recommended you use a virtual environment tool to keep dependencies required by different projects separate. Learn more about Python virtual environments.
Install the project dependencies. In the project root run:
pip install -r dev.txtStart the application's server:
FLASK_DEBUG=1 FLASK_APP=main_site.py flask runBrowse to http://localhost:5000.
This is required for being able to render and test the Square payment elements.
pip install pyopenssl
FLASK_DEBUG=1 FLASK_APP=main_site.py FLASK_RUN_CERT=adhoc flask run- Download Docker Desktop
cdinto the folder that holds your techtonica.org repo- Run your app:
docker-compose up
requirements.txt or Dockerfile, you will have to
rebuild the Docker image in order for those changes to take effect.
- To run app:
docker-compose up - To rebuild Docker image:
docker build . -t techtonica/website --pull - To push latest image to Docker Hub:
docker push techtonica/website
Styling changes should be made to the Sass (.scss) files and then compiled to CSS using one of the following commands:
👷♀️ Install Sass using one of the following
Mac: brew install sass/sass/sass
Windows: choco install sass
sass static/sass/style.scss static/css/style.css
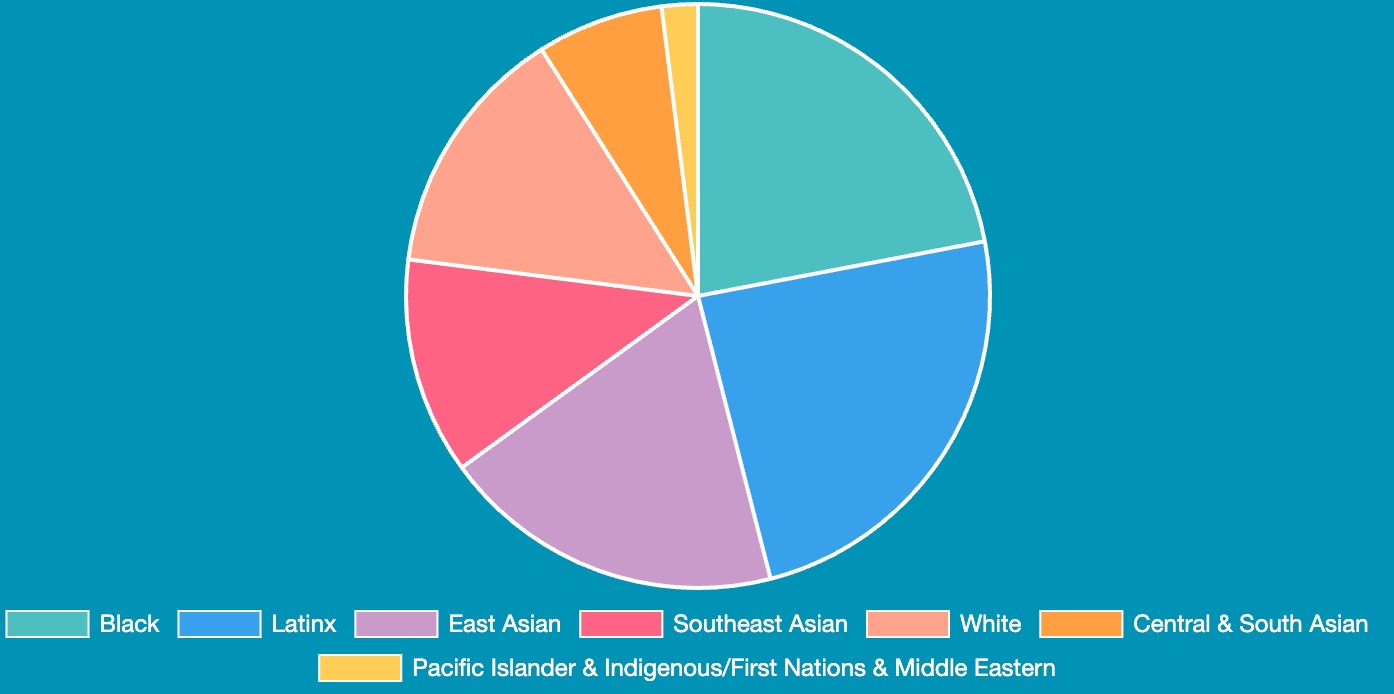
sass --watch static/sass/style.scss static/css/style.cssAt the moment, we do not have styling in place that will enable us to have a coded, adequately sized piechart while still maintaining mobile responsiveness. Until that happens, here is how to update the piechart when numbers change.
- Start the server.
- Open the browser and navigate to the Apply page.
- Update the
datasection instatic/js/piechart.js#L30. - Uncomment out following in
full-time-program.html.
  <!-- <div class="blue-background">
     <canvas id="myChart" width="700" height="350"></canvas>
  </div> -->
- Take a screenshot of the piechart on the rendered page.
- Add the screenshot to the
static/imgdirectory saved with YEAR-H#-Cohort-Demographics.jpg, ex. 2023-H1-Cohort-Demographics.jpg. - Update
full-time-program.htmlto point to the new image you just added. Update the alt text if necessary.
 <img
     src="{{ url_for('static', filename='img/2023-H1-Cohort-Demographics.jpg') }}"
     alt="2023 Cohort Demographics."
     class="full-width-img"
  />
- Recomment the following.
  <!-- <div class="blue-background">
     <canvas id="myChart" width="700" height="350"></canvas>
  </div> -->
- Stop the server
- Commit your code and open a pull request
This project uses pip-tools to manage dependencies. If you need to add or remove a Python library dependency:
-
Edit
requirement.in -
Generate
requirements.txt:pip-compile -U
Once the new library is used in the code base, you'll need to update the isort config to reflect third party library usage:
pre-commit run seed-isort-config -a --hook-stage manualFor development dependencies:
-
Edit
dev.in -
Generate
dev.txt:pip-compile -U dev.in
#create your virtualenv using anaconda
conda create -n py3810 python=3.8.10
#activate it
conda activate py3810
#install pip version 23
pip install --upgrade pip==23
#install and upgrade pip-tools
python -m pip install -U pip-toolsMake sure you branch off develop, if you want to make changes.
a. push changes to new branch
b. merge new branch into develop
c. push develop to GitHub
d. delete new branch
e. deploy develop to staging
f. merge develop into main
g. push main to GitHub
h. deploy main to techtonica.org
i. tag the date after deployment
-
Follow the instructions in the Setting up and deploying Python Flask to Dreamhost blog post.
-
Update package tools, while you're still operating in the virtual environment:
pip install -U pip setuptools pip-tools
-
Create a
config.inifile in the root directory of the repo (either locally or in whichever Dreamhost server) if there isn't one already present, and populate it with the necessary keys.[default] # Acceptable values are sandbox or production environment = sandbox dev_password = dev_password [production] square_application_id = production_application_id square_access_token = production_access_token square_location_id = production_location_id [sandbox] square_application_id = <sandbox app id> square_access_token = <sandbox access token> square_location_id = <sandbox location id> [slack] slack_webhook = <slack webhook>
Important: Only ever Pull form the server!
-
Log in via SSH using your SSH key.
-
Change directory to the appropriate domain:
cd techtonica.orgor
cd staging.techtonica.org -
Activate the virtual envrionment:
. bin/activate -
Change to the source directory:
cd techtonica -
Pull the latest code using
git pull
-
Update requirements:
pip-sync
-
"Restart" the server to showcase new changes
// staging.techtonica.org
systemctl --user stop gunicorn_staging
systemctl --user enable gunicorn_staging
systemctl --user restart gunicorn_staging
systemctl --user status gunicorn_staging

  // testing.techtonica.org
systemctl --user stop gunicorn_testing
systemctl --user enable gunicorn_testing
systemctl --user restart gunicorn_testing
systemctl --user status gunicorn_testing

// techtonica.org
systemctl --user stop gunicorn_techtonica
systemctl --user enable gunicorn_techtonica
systemctl --user restart gunicorn_techtonica
systemctl --user status gunicorn_techtonica
-
Deactivate virtual envirement and exit server:
deactivate
exit
