Table of Contents
Hyperloom is a web based application that leverages ChatGPT and Midjourney to provide users new & expansive fictional worlds. Users are able to browse previously generated worlds or create new ones with the click of a button. Hyperloom aims to foster the imagination and excitement of its users while providing them with high resolution images to give the sense of an immersive experience.
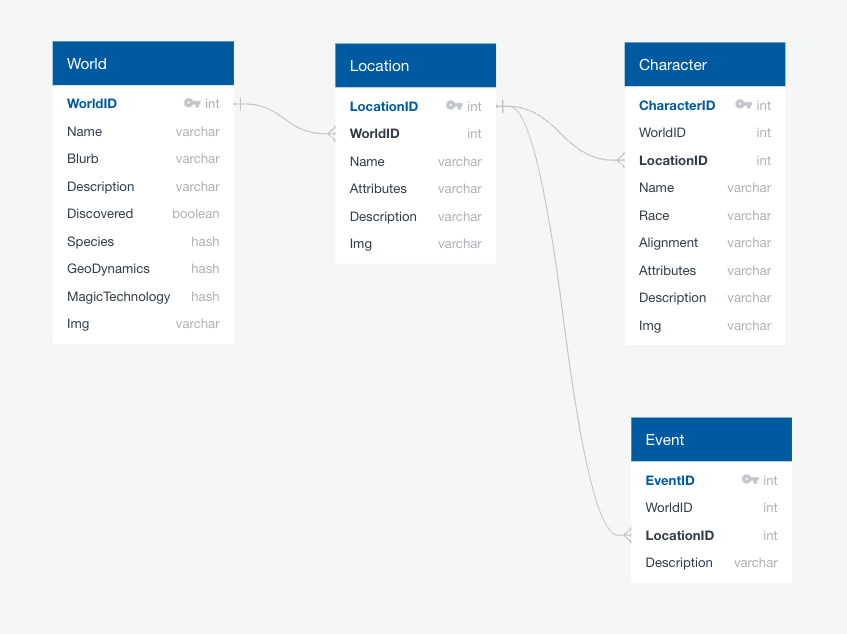
Hyperloom was built with a separate frontend and backend. The backend API service exposes RESTful endpoints returning JSON data for the frontend to consume. The backend seeds its database using a script for generating textual descriptions of worlds via the ChatGPT API. The ChatGPT API creates the AI-generated textual metadata for an imaginary world. This metadata is then also used to create the prompt that is sent to the Midjourney API to create AI-generated images based off of those descriptions.
- Production Website
- Backend API Service (/worlds endpoint)
- Hyperloom GitHub
- Frontend Repository
- Backend Repository
To get a local copy of Hyperloom up and running, follow these simple example steps for the backend.
These instructions are only for the backend. To setup the frontend locally, follow the instructions in the frontend repository's README.md file.
- Create a virtual environment
python -m venv hyperloom
- Activate the virtual environment
source hyperloom/bin/activate - Clone the repo inside the virtual environment directory
git clone https://github.com/The-Never-Ending_Story/back-end.git
- Install python packages from requirements.txt
python -m pip install -r requirements.txt
- Make migrations
python manage.py makemigrations
- Run migrations
python manage.py migrate
- Create an admin super user with your own username and password
python manage.py createsuperuser
- Run the server
python manage.py runserver
- Visit http://localhost:8000
- Get a OpenAI API key
- Get a Midjourney API key
- Create .env file and setup environment variables for both the OpenAI API key and the Midjourney API key
# .env file
OPENAI_API_KEY = <YOUR OPENAI API KEY>
MIDJ_API_KEY = <YOUR MIDJOURNEY API KEY>- Run the script for the world generator service
python services/world_generator.pyPrefix all endpoints with the deployed backend API domain: https://hyperloom-d209dae18b26.herokuapp.com
API documentation is done using Swagger (linked below), following the OpenAPI Specification from the OpenAPI Initiative. API responses return JSON.
Hyperloom API Documentation in Swagger
To run the Pytest test suite, follow the following steps:
- Activate your virtual environment
- Navigate to the application root directory where the
pytest.inifile is - Run:
pytest
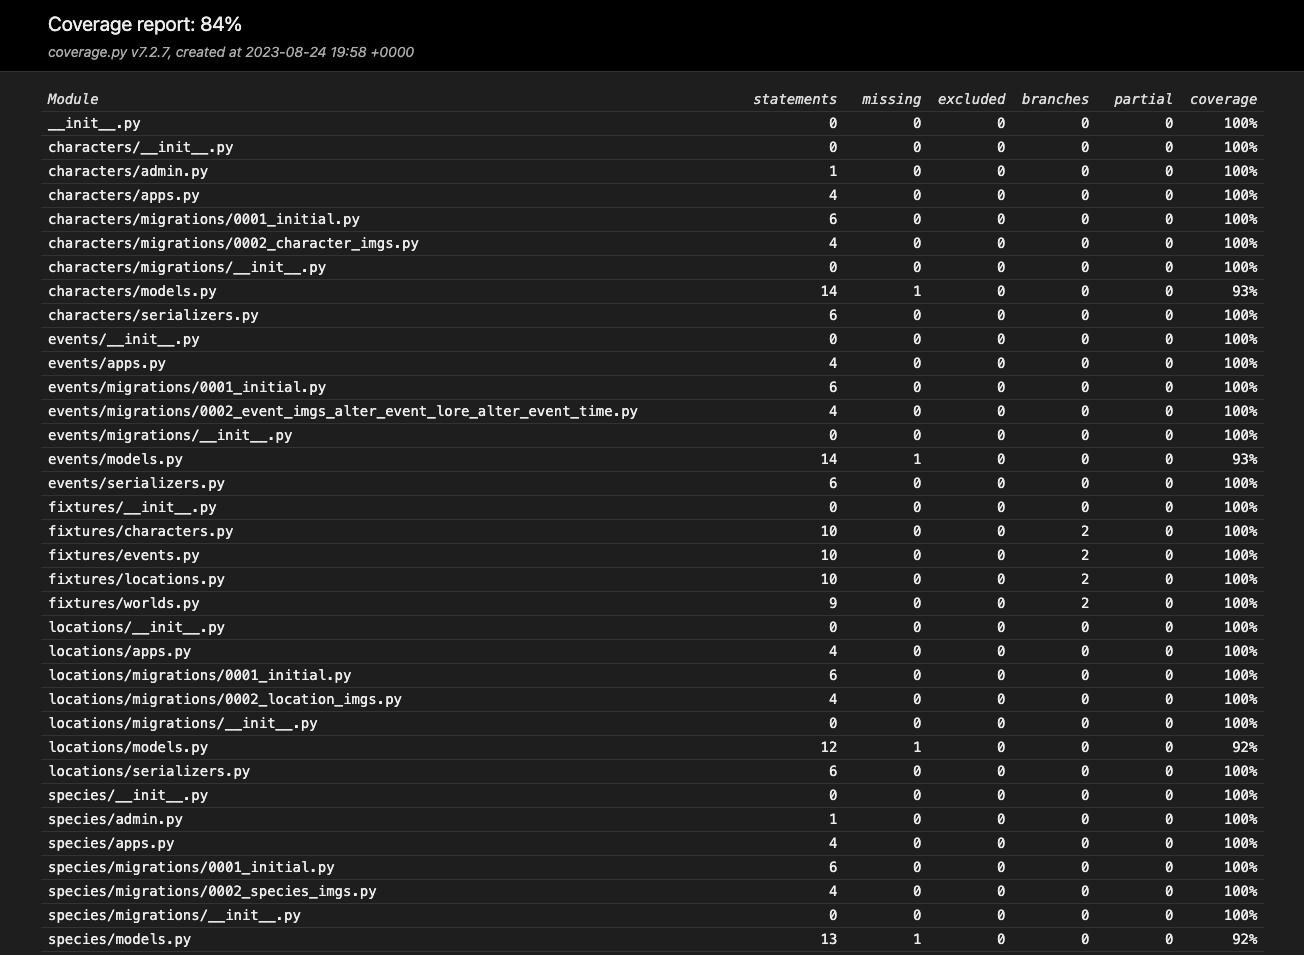
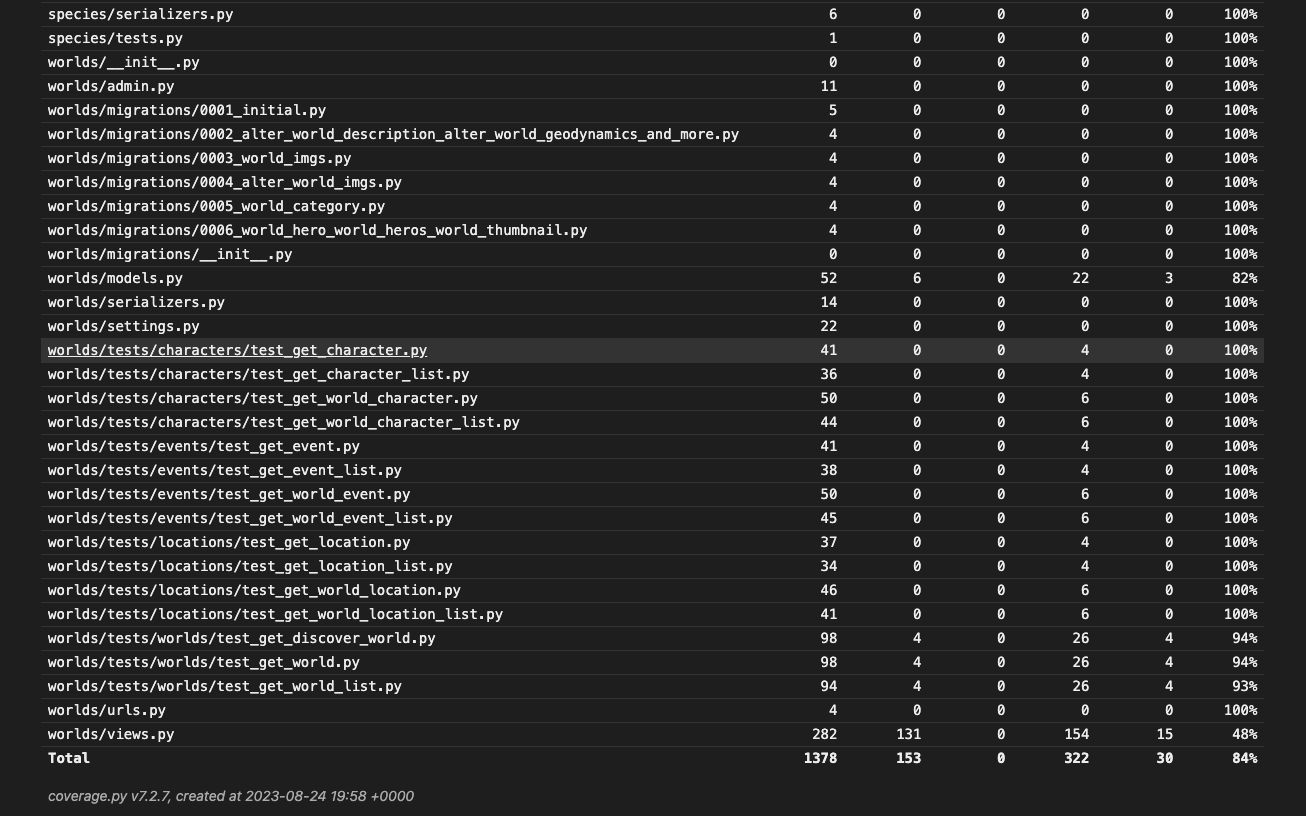
- Open the Pytest coverage report with:
open htmlcov/index.html
Use the built-in Python Debugger (PDB) for debugging by adding the following line of code to set a breakpoint: a
import pdb;pdb.set_trace()Coverage report:
Potential features, functionality, or refactors for the future:
- Add a background worker to Heroku to continuously run the world generator script to generate and seed more data in the database
- Additional tests for endpoints
- User features to save and share favorite worlds
- Search features to find worlds
Distributed under the MIT License. See LICENSE.txt for more information.
Special thanks to Brian Zanti, our instructor and project manager


