Postman Collection for BIM 360 Issues API

Description
This repository provides a postman collection that demonstrates the usage of BIM360 Issues Version 2 (v2) .
The API supports 3 legged token only. This collection takes Inheriting auth to apply 3-legged token to every endpoint in the collection automatically
Setup
-
Autodesk Platform Services (APS) Account: Learn how to create an APS Account, activate the subscription and create an app by this tutorial. Ensure to select API Type BIM 360. Get APS client id, client secret and callback url. Please register APS app with the callback url as
https://www.getpostman.com/oauth2/callback -
BIM 360 account and project: must be an Account Admin to add the app integration. Learn about provisioning. Make a note of the account name
-
Create a project in BIM 360 or reuse existing project. Make a note of the project name
-
Follow the product help document of BIM 360 to create some test entities, e.g.
- common issues
- pushpin issues with document
- create some custom attributes definitions and attach them to issues.
- create some comments with issues
- add some attachments to issues (either with documents from visible folder or from a local uploaded file)
- create some custom issue types and root causes. specify them with issues
-
(Optional) Create a couple of assets in Assets module. This is to test fetching/creating reference with Issues and Assets.
-
Clone this repository or download it. We recommend to install GitHub Desktop. To clone it via a command line, use the following in (Terminal on MacOSX/Linux, and Git Shell on Windows):
git clone https://github.com/Autodesk-Forge/forge-autodesk.docs.issue.api-postman.collection -
Import the collection and environment files to Postman
-
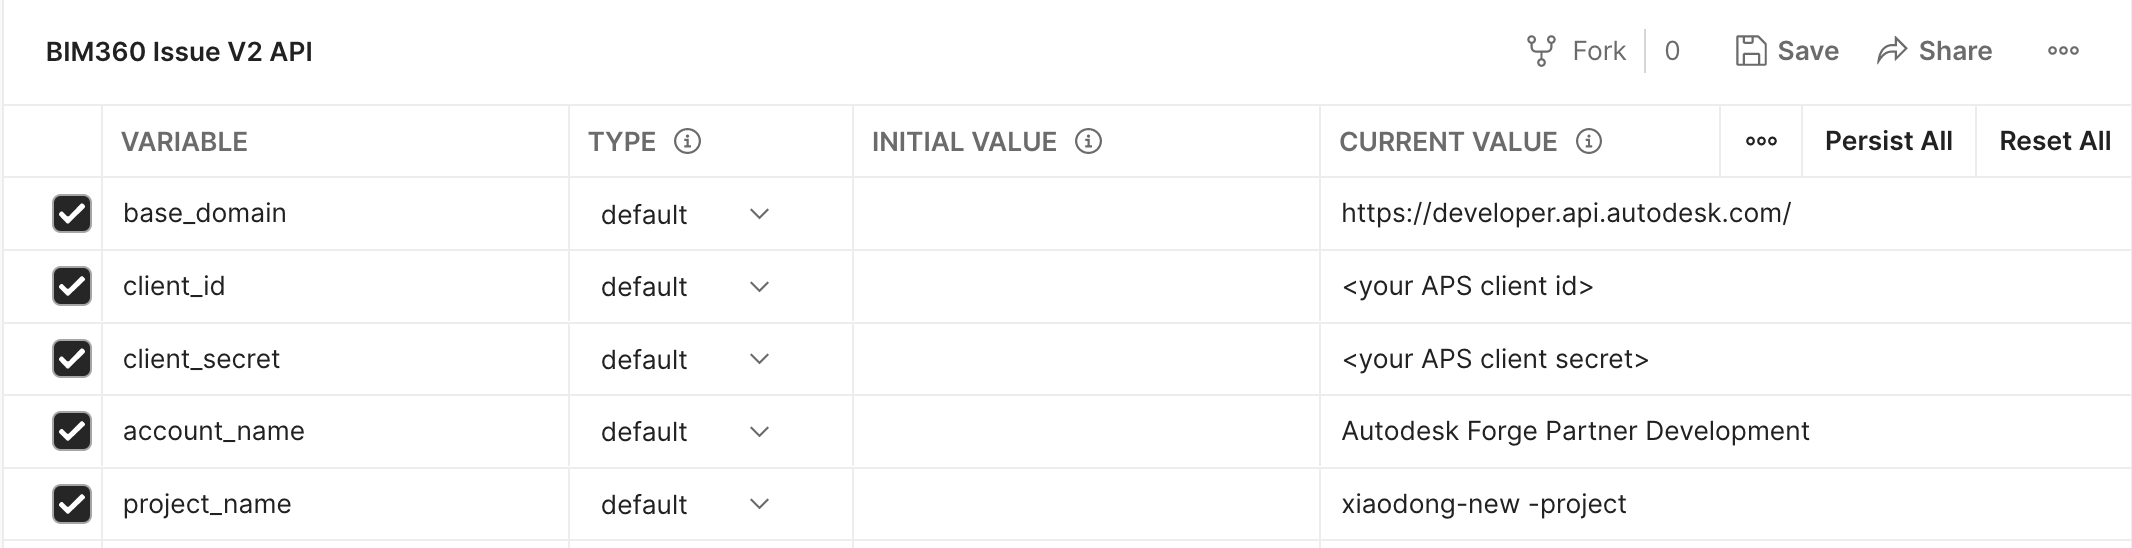
In environment, input client id, client secret, account name and project name.
-
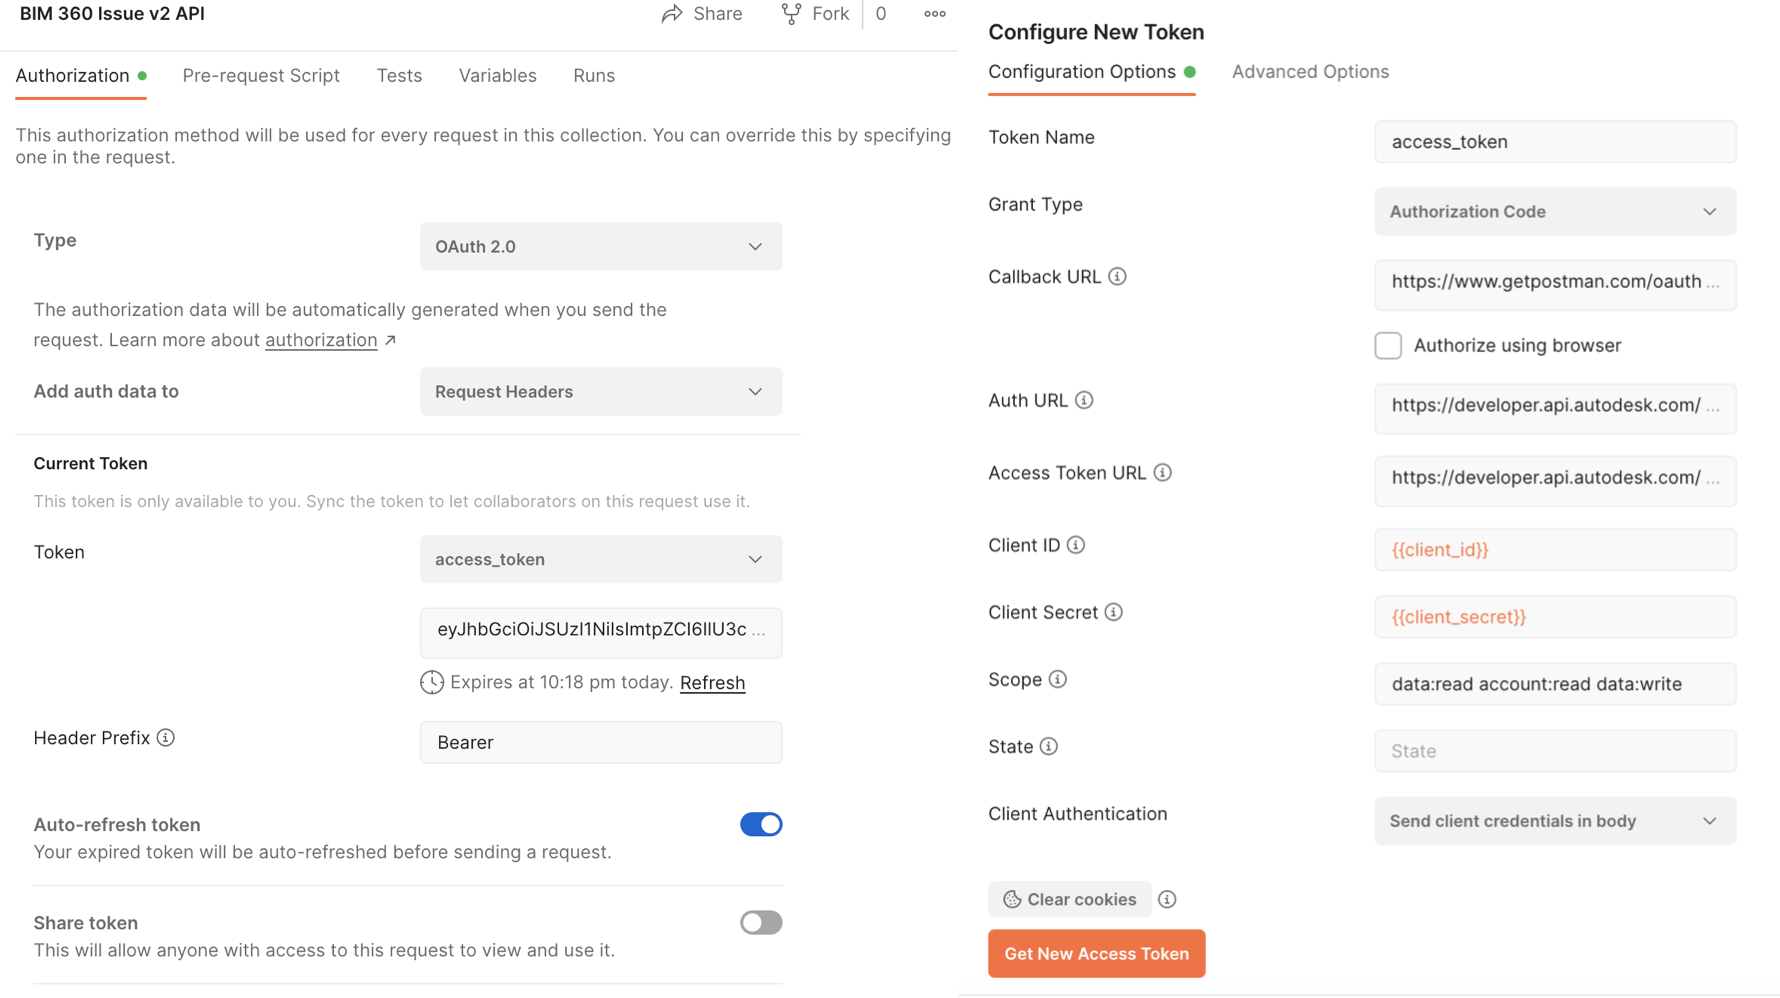
In the context menu of collection >> select Edit, switch to the tab Authorization, click Get New Access Token, and input the variables as below:
-
Grant Type:
Authorization Code -
Callback URL:
https://www.getpostman.com/oauth2/callback -
Auth URL:
https://developer.api.autodesk.com/authentication/v1/authorize -
Access Token URL:
https://developer.api.autodesk.com/authentication/v1/gettoken -
Client ID:
{{client_id}} -
Client Secret:
{{client_secret}} -
Scope:
data:read data:write -
Client Authentication:
Send client credentials body
-
-
Click Get New Access Token. It will direct to login Autodesk user account login. After it succeeds, the token will be generated. Click Use Token.


API Test
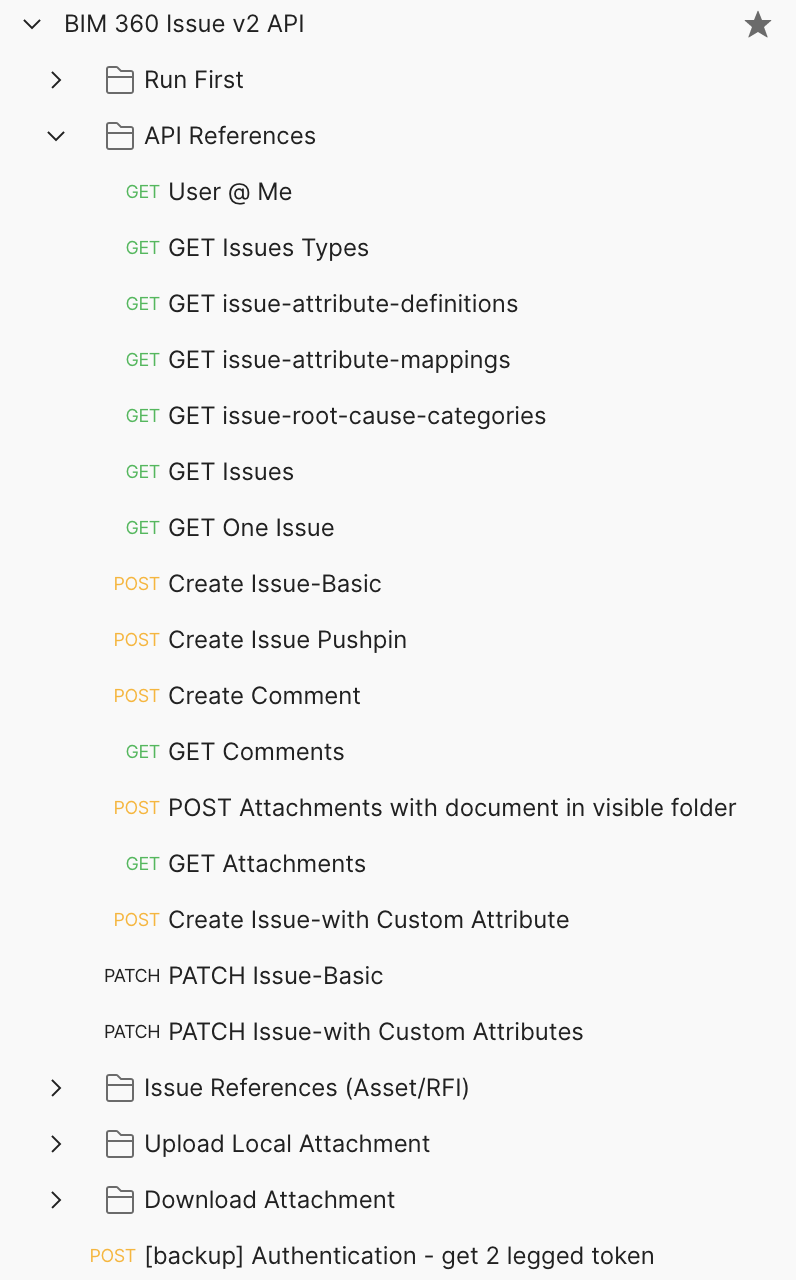
API References
Assume the steps to Setup above have been followed and the access token is successfully generated. Run the scripts in Run First. It will get account (hub) id, project id and one user id (for an assignee), location id, one document urn (to attachan issue). Run the endpoints under API References folder in Postman collection. Follow API References to verify if the APIs work well. Try to change the parameters in various scenarios to see how it works. Check UI if it works well with items created or updated using API. For example, creating/patching new issues and adding new comments.
Download Attachment
To test downloading attachment files, run scripts in Download Attachment. It assumes one issue is available with a few attachments.
- Step-01 will return information of the first attachment. If urnType is dm, the urn pattern is like a base64 encoded string. The post script will transform it to a version urn. If the urnType is oss, it is a storage urn already. The post script will get bucket key and object key directly.
- if urnType is dm, run step-02 to get a storage urn by Data Management API. Finally get bucket key and object key.
- Step-03 is to get S3 signed url
- Step-04 is to download the file by the signed url
Upload Local Attachment
To test uploading local files as attachments, run scripts in Upload Local Attachment. It assumes at least one issue is available.
- Step-01 creates an attachment to the issue with urnType = oss. It will create the storage in the invisible folder for the issue in Docs
- Step-02 will generate S3 signed url for uploading by Data Management API
- Step-03 is to upload the local binary file by the signed url
- Step-04 is to complete the uploading by Data Management API
- Step-05 is to notify the server to associate the file with the issue.
To verify if the attachment is attached successfully, follow the steps in Test R.
Test Reference by Relationship API
In BIM 360, the reference of issue with assets or rfis is managed by Relationships API, which is a common component across different modules in BIM 360. To work with Issue>>References, you can use Relationship API. This sample Postman collection includes one sample usage. For more detail about Relationships API, please take a look at this blog.
- Step-01 is to get supported Relationships. You can use this stop to check entity types that you can set relationships with BIM 360 issues.
- Step-02 is to get one asset id by Asset API
- Step-02 is add a reference between one issue and one asset
- Step-04 gets all referenced assets of one issue
Documentaions
- Field Guide
- Migration Guide: outlines and details of comparison of version 1 and version 2
- Retrieve Container ID of Issue
- Retrieve Issues Data
- Create Issues Data
- Attach BIM 360 Document Management Files to Issues
- Retrieve Issue Custom Attributes Mapped to an Issue Type
- Render Document-related (Pushpin) Issues and RFIs in Your App
- Create Document-related (Pushpin) Issues and RFIs in Your App
- Upload Local Attachment
Blogs
- Autodesk Platform Services (APS) Blog
- Field of View, a BIM focused blog
License
This sample is licensed under the terms of the MIT License. Please see the LICENSE file for full details.
Written by
Xiaodong Liang @coldwood, Developer Advocate and Support team