Example JavaScript Website
- Author: Stef Schulz
- Repository: https://github.com/slothsoft/example-javascript-website
- Open Issues: https://github.com/slothsoft/example-javascript-website/issues
- Website: http://app.slothsoft.de
An example for setting up a static HTML website using well tested JavaScript:
Content:
- Preface
- 0. Setup Environment
- 1. Dependency Management
- 2. Transpile Code
- 3. Tests
- 4. Create Website
- 5. Deploy Finished Product
- 6. Hook to CI Server
- 7. Localization
- Conclusion
Preface
Let me preface this document by saying: I'm not a JavaScript developer. I don't want to be a JavaScript developer. I've over ten years in Java and I don't plan to change that any time soon.
But I'm a firm believer of using the right tool for the job, so I'm trying to learn how to swing the JavaScript pocket knife, just in case I need something different than my Java hammer someday.
I was sorely disappointed to learn there is evidently no standard environment to develop JavaScript, so I'm trying to figure out how to do it on my own.
For Java the de facto standard is to use Maven, which does the following:
- Manage dependencies
- Compile the code
- Test
- Create a distribution (JAR for Java)
- Deploy the finished product
- Run on CI server
So I figure the same is needed for a JavaScript project (except we don't need a compiler, but maybe a transpiler (to create older code that is supported by more browsers) and / or a minimizer (to strip whitespaces and stuff like that)).
So that's what I'm trying to get into this environment.
Oh, and localization, even though that's a plain Java feature and not Maven. But it's needed for every application. Note that this is no tutorial, it's a diary where I try to understand what I'm doing.
So let's go!
0. Setup Environment
The only thing almost everyone seems to agree on is that we need NodeJS. You can get it from nodejs.org. NodeJS let's you run JavaScript outside of the browser. Which can be used to create JavaScript servers (I've yet to find out why that would be a good idea) or of course for executing tests.
So if you've installed NodeJS correctly you should get the following output on the command line:
>node --version
v10.16.3
1. Dependency Management
For this setup dependency management is done by NodeJS's very own package manager: npm.
It should be available if NodeJS is installed, so check that by using the command line:
>npm --version
6.11.2
Since npm updates more frequently than NodeJS it's probable this version is outdated. Use this to update:
npm install npm@latest -g
So now we can create a project:
mkdir example
cd example
npm init
npm will now play twenty questions with you, but you can just press enter to use the defaults.
This will generate a file package,json. A basic one looks something like this:
{
  "name": "example",
  "version": "1.0.0",
  "description": "My first project",
  "main": "index.js",
  "scripts": {
    "test": "echo \"Error: no test specified\" && exit 1"
  },
  "author": "Stef Schulz <s.schulz@slothsoft.de>",
  "license": "MIT"
}
You can see my package.json for a more comprehensive example. Although maybe finish reading this document first, some properties will be explained.
2. Transpile Code
So evidently NodeJS is only for creating server applications with JavaScript. Maybe I'll tackle this later but right now I want to create a simple website.
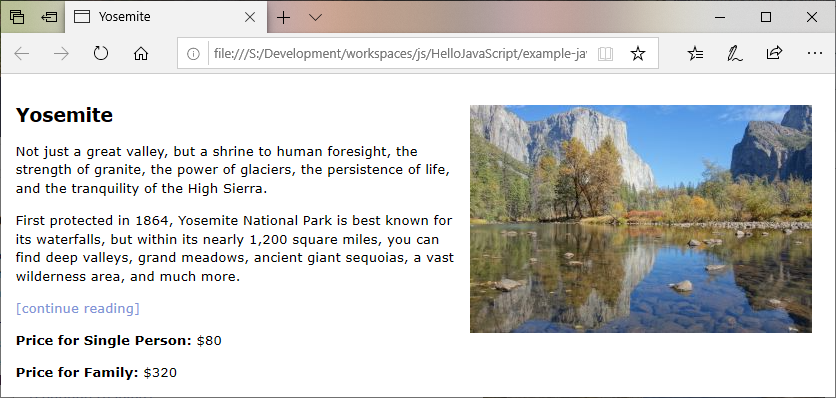
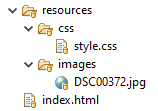
So... simple website, right? I created a small HTML page (index.html), a very basic CSS file (style.css) and copied an image from my last vacation (image). The structure of the project is from appcropolis:
Check out the HTMl file. The important line is the following:
<b>Price for Family:</b> $<span id="family-price"></span>It gives us an entry point for our JavaScript. Speaking of which I created a file src/box-office.js with a legendary algorithm:
function calculatePrice(personCount) {
	return 80.0 * personCount;
}
And now I want to somehow get the result of the function into my HTML. So far everything's pretty standard, but now we'll work with NodeJS.
NodeJS wants to have an actual application that does stuff, so let's create a src/main.js:
var calculatePrice = require('./box-office.js')

document.getElementById('family-price').innerHTML = calculatePrice(4);
Now how do we get the NodeJS application into our nice little website? The answer is: browserify.
We'll install it via command line:
npm install --save-dev browserify
(The tutorial on the browserify page suggests using npm install -g browserify to install it globally. For me the above worked better for some reason.)
During the execution of the above command line the following happens:
- npm creates a file package-lock.json that contains all dependencies; it also tells us
You should commit this file.(but most modules I saw on GitHub still don't) - a folder node_modules/ is created; this folder contains the dependencies as NodeJS modules; there is no reason to commit this folder, since you can generate it from the package-lock.json
Next we'll create a script in the package.json file that bundles our "main" application into a file "bundle.js":
  "scripts": {
    "bundle": "browserify src/main.js -o dist/resources/js/bundle.js",
  }
Run it via npm browserify and voilá: we have everything bundled nicely. We'll just add the script into our HTML page via the following line:
<script src="resources/js/bundle.js"></script>(I found out the hard way that this only works directly before the closing </body> tag.)
Isn't it nice?
But wait... the bundle.js is still very big. So we'll add another module to minimize it, Butternut.
npm install --save-dev butternut
(I'll keep adding these modules locally, because I have no idea why that would be a bad idea.)
And then we extent the script:
  "scripts": {
    "bundle": "browserify src/main.js | squash > dist/resources/js/bundle.js",
  }
Even for such a small application this step saved us over 100 bytes (16% of the length of the file).
So all is good but it's really annoying to create the bundle.js by hand. We'll just add another bundle to do this for us: watchifiy.
We'll install it via:
npm install --save-dev watchify
And we'll add another script:
  "scripts": {
    "bundle": ...
    "watch": "watchify src/main.js -o dist/resources/js/bundle.js -v"
  }
Run it via npm watch and you'll see the following anytime you change one of the files in src/:
860 bytes written to dist/resources/js/bundle.js (0.03 seconds) at 22:14:09
860 bytes written to dist/resources/js/bundle.js (0.01 seconds) at 22:14:18
860 bytes written to dist/resources/js/bundle.js (0.01 seconds) at 22:14:20
If you don't like the output, remove "-v" from the above script.
So now we're able to create a tightly packaged bundle.js and are able to recreate it on any change of the source files. Nice.
3. Tests
For creating tests I used QUnit because it looked simple. As with everything here there are a bunch of options around. I've personally worked with jasmine and mocha as well.
Using QUnit the tests for the legendary algorithm™ look like this:
QUnit.module("calculatePrice()", function() {
	QUnit.test("for 0 persons", function(assert) {
		assert.equal(calculatePrice(0), 0.0);
	});
	QUnit.test("for 1 person", function(assert) {
		assert.equal(calculatePrice(1), 80.0);
	});
	QUnit.test("for 2 persons", function(assert) {
		assert.equal(calculatePrice(2), 160.0);
	});
	// ...
});
For me the most problematic part was the definition of equal: equal(actual, expected). Because I'm used to writing it the other way around (expected, then actual).
If you copy the QUnit example HTML page you can even see the tests work:
<!DOCTYPE html>
<html>
<head>
	<meta charset="utf-8">
	<meta name="viewport" content="width=device-width">
	<title>QUnit Example</title>
	<link rel="stylesheet" href="https://code.jquery.com/qunit/qunit-2.9.2.css">
</head>
<body>
	<div id="qunit"></div>
	<div id="qunit-fixture"></div>
	<script src="https://code.jquery.com/qunit/qunit-2.9.2.js"></script>
	<script src="../src/box-office.js"></script>
	<script src="../test/box-office-test.js"></script>
</body>
</html>
(Example for a file dist/test.html)
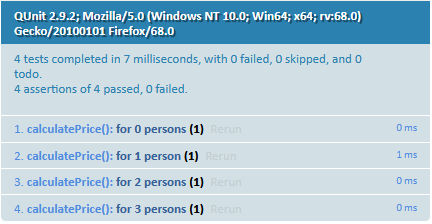
The result looks something like this:
But we know if a human has to check the tests, then the human will become the problem, so I'd rather have the build process check the tests.
First we want to install QUnit to the project using this command line:
npm install --save-dev qunit
After the installation it's time to tell the project to run QUnit as test, so we'll change the following lines of the package.json:
  "scripts": {
    "bundle": ...
    "watch": ...
    "test": "qunit"
  }
If we run that now via npm test you'll get the following error:
ReferenceError: calculatePrice is not defined
It's clear that the test doesn't know the file with the legendary algorithm™, so we'll add:
calculatePrice = require('../src/box-office.js')...and export the corresponding method:
module.exports = function calculatePrice(personCount) {
	return 80.0 * personCount;
}(Note: If you followed this step by step then the dist/test.html will stop working after these two changes, because require() and module.exports are NodeJS functions.)
Execute the tests again using npm and you'll get something like that:
TAP version 13
ok 1 calculatePrice() > for 0 persons
ok 2 calculatePrice() > for 1 person
ok 3 calculatePrice() > for 2 persons
ok 4 calculatePrice() > for 3 persons
1..4
# pass 4
# skip 0
# todo 0
# fail 0
So tests now work.
4. Create Website
Since we deploy the website directly to the server we don't need to do something special here. Our script "bundle" already creates a nice working website in the dist/ folder.
5. Deploy Finished Product
So now we have a website ready to deploy. We want to deploy it to a server, but what else do we want?
- Test the code (stop if there are errors)
- Bundle the code (because "watch" doesn't minify the code)
- Deploy
We can already do the first two. So let's tackle the last one.
There is a pretty easy to use module already in NodeJS to deploy websites: ftp-deploy. So we install it:
npm install --save-dev ftp-deploy
Since I want to commit the actual code to deploy without compromising my server's login and password, I have two files: deploy.js for the general config and deploy-config.json for security relevant info (this file should not be committed).
So the deploy.js looks like this:
var FtpDeploy = require('ftp-deploy');
var ftpDeploy = new FtpDeploy();

var serverConfig = require('./deploy-config.json');
var generalConfig = {
    port: 21,
    localRoot: __dirname + '/dist/',
    remoteRoot: '/htdocs/app/example-javascript-website/',
    include: ['*', '**/*'],
    deleteRemote: true,
    forcePasv: true
};
var mergedConfig = {...generalConfig, ...serverConfig};


ftpDeploy.deploy(mergedConfig, function(err, res) {
    if (err) console.log(err)
    else console.log('Finished:', res);
});
This script overwrites the config of generalConfig with whatever is present in the deploy-config.json. Username, password and host are mandatory, but you can overwrite the port or something else if you feel like it.
I'd leave a template in the repository, but mark the file as non-committable (--assume-unchanged in Git). Then each committer would have to replace the authorization data once upon checkout.
We run the script via node deploy.js which leaves the deploy script as:
  "scripts": {
    "bundle": ...
    "watch": ...
    "test": ...
    "deploy": "npm run test && npm run bundle && node deploy.js"
  }
6. Hook to CI Server
Before letting a CI server do anything to the code, we need to commit it. You can use this handy .gitignore template for NodeJS to figure out what to commit.
Hooking the project to a CI server is incredibly easy for GitHub projects. That's why I love Travis.
You only create a file .travis.yml:
language: node_js
node_js:
  - "stable"
  - "10"
The entries below "node_js" tell Travis which NodeJS versions to test against. For simplicity's sake I'll use 10 (the current long term support) and the last stable version (currently 12).
On default Travis executes npm test, which works nicely for us.
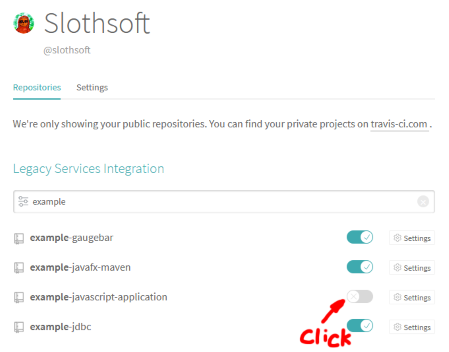
Log into Travis using your GitHub account, search your repository in your list and enable it:
That's it. You can trigger a build manually or wait for Travis to react to a commit.
The output will be the same as for the regular test runs. You can find this project's Travis configuration here.
Why is it important to use a CI server?
- You can check if your code (and development environment) has dependencies to something that's just on your machine, e.g. when I added Travis I found out I was still missing some dependencies
- Checks that the code in your repository still works, even if you forgot to run some of the tests (or all the tests)
- If you work with others, frequent feedback from the tests allows for bugs to be found much sooner, so that the original author might still be able to fix them
- You can test the code against different versions of dependencies
- And really, if you can automate some tasks, why wouldn't you? Tedious tasks like deploying to a development server should be done by a CI server.
7. Localization
To localize the app I used localizify, because it has no other dependencies:
npm install localizify --save
Note that this is the first time a dependency is added to the property "dependencies" instead of "devDependencies" in the package.json file.
The tutorial for localizify is pretty straight forward. Since I don't really want to complicate my small HTML page, I added the localization only for the currency symbol.
So the JSON files for translating look like this:
{
  "currency": "${value}",
}
de.json (or any other EU country):
{
  "currency": "{value} €",
}
I created another JavaScript file to include these messages files (so that the test can use them as well) inside the file - src/init-i18n.js:
const localizify = require('localizify');

const en = require('./messages/en.json');
const de = require('./messages/de.json');

localizify.add('en', en).add('de', de);

var userLang = navigator.language || navigator.userLanguage;
localizify.setLocale(userLang);

module.exports = localizify;
And finally copied our legendary algorithm™ and its test so I can create versions with localization:
So now we can open two versions of the website:
Left a German browser, right an American English one.
Conclusion
So now I've created a working environment to create a static HTML website with well tested NodeJS JavaScript. And if you followed this guide you might have, too. Or you can just download this repository if you like. I bet I will in the future.
If you find mistakes of any kind just write me an email or raise an issue. I love to learn new stuff, so I'll be thrilled to hear from you!
Questions
Every time I install a new module, package-lock.json will get scrambled and random previous installed modules will vanish. Why?
I assume this has to do with the following question. The dependencies were missing from the package.json, so they weren't taking into account for the generation of the package-lock.json.
Some modules inserted themselves into package.json -> "dependencies" or "devDependencies". Most didn't. Why?
Sometimes there is the following warning during the installation:
npm WARN saveError EPERM: operation not permitted, rename 'S:\path\to\project\package.json.3710518402' -> 'S:\path\to\project\package.json'
(Which really, really should be an error, because it prevents the dependency from being permanent.)
In my case the folder node_modules/ was set to read only. After removing that flag the above warning vanished and the dependency was added to the package.json file correctly.
External Links
I've read a lot of stuff to come this far (which is not very far to be sure), but here are some of my resources:
- Configuring a basic environment for JavaScript development
- How to Build a reusable Javascript development environment.
- A crash course on testing with Node.js
- How to organize your HTML, CSS, and Javascript files
Used modules and other resources:


