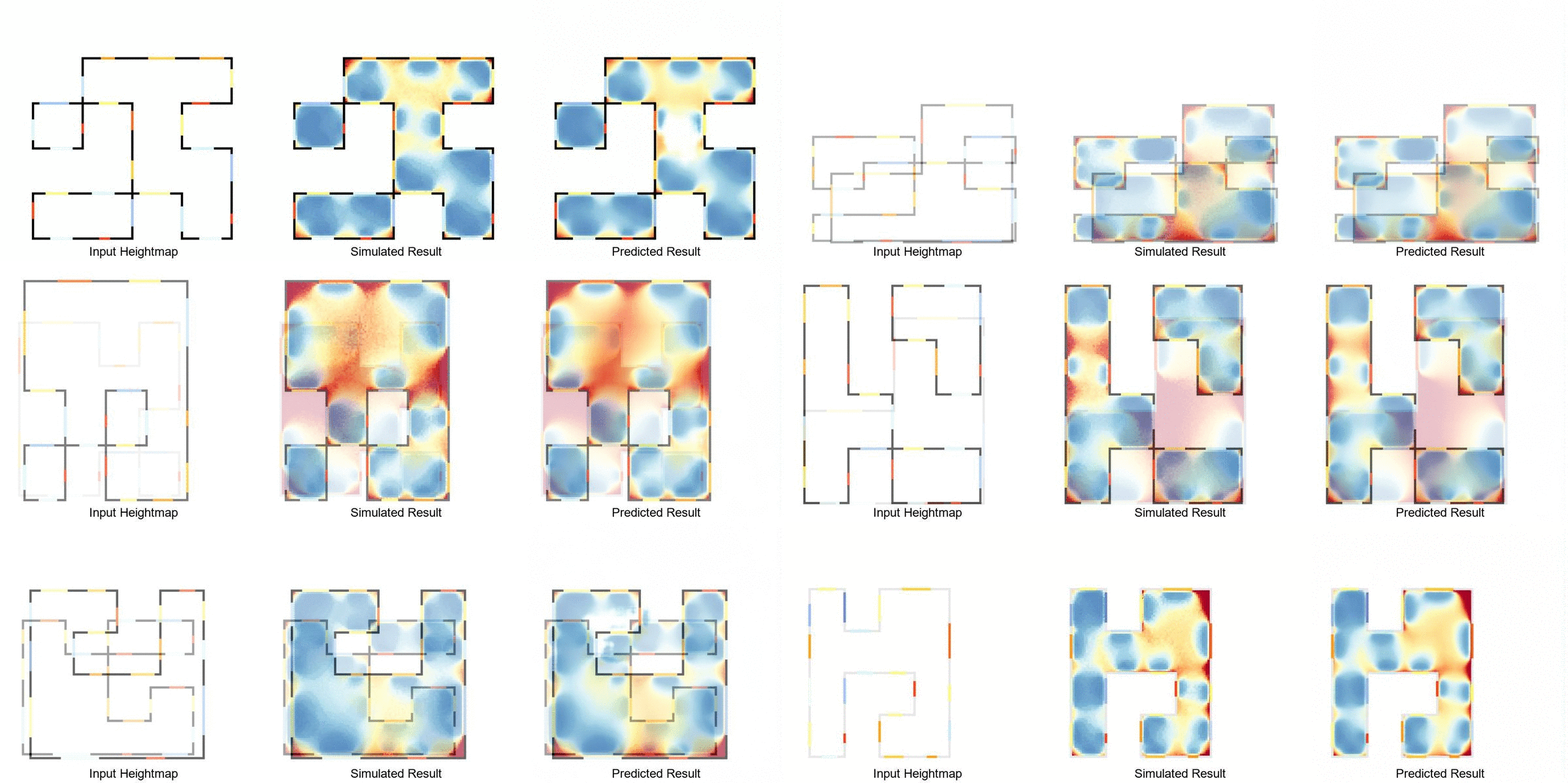
Real-time daylight prediction pipeline, using Rhinoceros 3D, Grasshopper 3D, Ladybug Tools and pyTorch.
This work heavily relies on the work referenced in the papers below. Additionally, the official repo implementation (included in this repo for convenience) can be found here: https://github.com/junyanz/pytorch-CycleGAN-and-pix2pix.
Unpaired Image-to-Image Translation using Cycle-Consistent Adversarial Networks.
Jun-Yan Zhu*, Taesung Park*, Phillip Isola, Alexei A. Efros. In ICCV 2017. (* equal contributions)
Image-to-Image Translation with Conditional Adversarial Networks.
Phillip Isola, Jun-Yan Zhu, Tinghui Zhou, Alexei A. Efros. In CVPR 2017.
If you wish to train your own model on the DA datasets, you can download the files from the following locations:
Copenhagen: https://bit.ly/34GmXzg
Sydney: https://bit.ly/2yXv2ng
Extract the files in cycleGAN/datasets folder.
You can also download the pretrained models from the following locations:
Copenhagen: https://bit.ly/2REcj6Y
Sydney: https://bit.ly/2VfURYJ
Extract the files into cycleGAN/checkpoints folder.
To create the virtual environment for training your own models with Pix2Pix, you can create an anaconda (https://www.anaconda.com/) environment and use the requirements.txt in the cycleGAN folder to install the necessary libraries.
After extracting the dataset you can train your own model by running:
python train.py --dataroot ./datasets/da --name p2p_512 --checkpoints_dir ./checkpoints/da --model pix2pix --batch_size 4 --norm instance --init_type kaiming --dataset aligned --direction AtoB --load_size 512 --crop_size 512 --no_flip --display_winsize 512 --gan_mode lsgan --lr_policy linear --netG unet_512 --netD n_layers --n_layers_D 4This will train a pix2pix model on 512x512 input heightmaps, using a batch size of 4. Feel free to reduce either the batch size or the input image resolution if your GPU memory isn't enough.
To train your own model you need to generate 3d geometry models using a parametric design of your choice (you can use the ParametricModel.gh file as a starting point). You will also need to run annual daylight simulations for each model, using the process detailed in the Run Daylight Simulation with Honeybee and Ladybug.ipynb file. Finally, you can generate your input and output images using the PostProcess.gh file.
After you have all your images, you can use a paired image dataset using the Create paired image dataset from simulation results.ipynb file. Make sure to save the folders in cycleGAN/datasets under the name of your choosing, e.g. cycleGAN/datasets/yourNameHere.
To train a 512x512 pix2pix model you can run the following command:
python train.py --dataroot ./datasets/yourNameHere --name p2p_512 --checkpoints_dir ./checkpoints/yourNameHere --model pix2pix --batch_size 4 --norm instance --init_type kaiming --dataset aligned --direction AtoB --load_size 512 --crop_size 512 --no_flip --display_winsize 512 --gan_mode lsgan --lr_policy linear --netG unet_512 --netD n_layers --n_layers_D 4Again feel free to use a lower resolution or a smaller batch size to fit the model on your GPU.
To visualize your models perfromance during training you can open a new anaconda prompt inside your environment and type
python -m visdom.serverYou can then navigate to the location shown in the terminal with your browser.
