Introduction
Paul Rivaud wrote this tutorial to help people in the class get oriented with practical aspects of the data. This tutorial addresses some issues with down-loading data de novo--which you are not dealing with currently. There is a ton of useful information here.
This Github repository contains data files and code examples to get you started in the Computational Biology class taught at Caltech. The goal of this course is to have the students analyze some single-cell sequencing data using programming languages (Julia, R, Python, Matlab, etc.). The content of this README is listed below:
General Information
Data structure
Normalization
Dimensionality reduction
Machine learning
Good practices
JULIA
Installing Julia (and Juno)
Installing packages in Julia
Running the julia example
Loading mtx files in Julia
Loading labels in Julia
R
Loading mtx files in R
Loading labels in R
PYTHON
Loading mtx files in Python
Loading labels in Python
Hierarchical clustering and heatmap in Python
MATLAB
Loading mtx files in Matlab
Loading labels in Matlab
General information
Data structure
Single-cell sequencing data is often stored as sparse matrix objects to cope with the data low density (~10-15% of the entries are non-zero entries). Working with sparse matrices is computationally more efficiency but requires more rigor when it comes down to keeping track of row and column labels, which are stored in separate arrays (Reminder: Array indexing starts at 0 in Python, 1 in Julia, R and Matlab). Dataframe objects ie dense matrices (R, Python) deal with that aspect but tend to perform slower and can be hard to load in memory when the datasets get larger.
Once unziped, the data folders contain three files:
-- matrix.mtx: the read values of the gene expression matrix and their respective row and column indices, in a matrix market format.
-- barcodes.tsv: a file containing the column (cell) labels.
-- genes.tsv: a file containing the row (gene) labels.
-
Sparse Matrices (MatrixMarket/.mtx format):
Info here
Mtx files store MatrixMarket format matrices. The base principle is to store the row and column indices of each non-zero entry in the matrix. The MatrixMarket format contains three distinct parts:- Comment lines that start with
% - Header line: total number of rows, total number of columns, total number of non-zeros entries (space separated)
- Entries: row index, column index, entry value (space separated)
The gene and barcode labels are stored in separate files and need to be read separately.
- Comment lines that start with
-
Sparse matrices (MatrixMarket deconstructed into multiple vectors):
Info here (10X's HDF5 format)
10X Genomics also deconstructs sparse matrices into multiple vectors: the sparse matrix is a Matrix Market object in RAM when used, but is not stored as one under their HDF5 format. Storing all these vectors under one file enables users to not lose track of matrices respective's labels. The different vectors are:data (or nzval): non-zero entry values (length: number of entries)indices (or rowval): row indices (length: number of entries)indptr (or colptr): column index pointers. Index of the start of each column (length: number of columns +1, the last value indicates the end index of the last column +1).barcodes: barcode labels (length: number of columns)gene_names: gene labels (length: number of rows)
We can illustrate this concept with a Julia example. Lets' consider the following matrix M_dense:
M_dense
5×3 Array{Int64,2}:
1000  1200    0
   0     0    2
   2   400    0
   0     0  500
   0     0    0
The matching sparse matrix M is:
M
5×3 SparseMatrixCSC{Int64,Int64} with 6 stored entries:
  [1, 1]  =  1000
  [3, 1]  =  2
  [1, 2]  =  1200
  [3, 2]  =  400
  [2, 3]  =  2
  [4, 3]  =  500
The deconstructed vectors of M are:
M.nzval
Int64[6]
1000
2
1200
400
2
500

M.rowval
Int64[6]
1
3
1
3
2
4

M.colptr
Int64[4]
1
3
5
7
Normalization
There are various ways to normalize datasets (division, substraction, log, etc.). The two examples below do not form an exhaustive list of data normalization methods.
- Column normalization:
Column normalization aims at correcting sequencing depth differences found between cells. To column-normalize, divide each column (cell) of the matrix by its sum. An optional step is to multiply all columns by a common factor. If you multiply by 10^6, your matrix now contains counts per million.
Example matrix before normalization:
M
5×3 Array{Int64,2}:
1000  1200    0
   0     0  300
 300   400    0
 200     0  500
   0   200    0
After column normalization:
M_normalized
5×3 Array{Int64,2}:
 .67   .67    0
   0     0 .375
  .2   .22    0
 .13     0 .625
   0   .11    0
- Row normalization:
Row normalization aims at correcting expression level differences found between genes (distribution spread). To row-normalize, divide each row (gene) of the matrix by its standard deviation. After doing so, all standard deviations equal to one.
Before normalization: Three genes with different means and standard deviations:

After normalization:

Another common way to row normalize is to substract the gene mean first, i.e.  . This method (called standard normalization) has the disadvantage to induce negative values in the data because of the mean-centering step. The latter is required in methods such as PCA, but some methods like NMF (see section below) work under the positive values only constraint.
Dimensionality reduction
Dimensionality reduction methods enable users to analyze high-dimensional problems through a reduced low-dimensional space. In our case, cells are described by ~20,000+ variables, which are genes. It is possible to reduce that number by obtaining a set of principal variables. Dimensionality reduction can be divided into two parts: feature selection (using a subset of variables only) and feature extraction (combining variables to obtain a limited number of macro variables).
-
Principal Component Analysis (PCA):
PCA is one of the main techniques in dimensionality reduction. It reduces the high-dimensional space in a way that the data variance is maximized in the low-dimensional space. The new variables, called principal components (PC1, PC2, etc.) are linear combinations of the original variables (genes). Each cell gets scores for each principal component.
Note: Since PCA is often a column-based method, it might be necessary to transpose the gene expression matrix (variables must be columns in that case). -
Non-negative Matrix Factorization (NMF):
NMF works under the condition that values must be positive (as opposed to PCA). It factorizes a matrix V into two matrices W and H so that W.H ~ V. With V of size (m,n), W and H will have respective sizes (m,k) and (k,n), so that rows of W can be multiplied with columns of H (both of length k).
Each column of W is a feature, i.e. a linear combination of genes that can be relevant to a group of cells / a cell type. Each column of H is a cell and contains its scores for all k features: the higher the score, the more representative the feature. -
t-distributed Stochastic Neighbor Embedding (t-SNE):
t-SNE is a non-linear dimensionality reduction method. It aims at clustering similar objects in a low-dimensional space. As opposed to PCA, t-SNE is based on probability distributions as it performs random walks in neighborhood graphs to find structures in the data. This method also retains both local and global structures in the low-dimensional space. The algorithm works as follows:
The high-dimensional distance between two data points xi and xj is translated into a conditional probability pj|i:

where sigmai is the variance of the gaussian centered around xi.
It is possible to compute a similar conditional probability qj|i between data points yi and yj, which are the respective low-dimensional counterparts of xi and xj:

t-SNE aims at minimizing the difference between pairs of conditional probabilities (pj|i,qj|i), since an exact representation of high-dimensional data in a low-dimensional space would replicate conditional probability values. The algorithm minimizes the Kullback-Leibler divergence of distribution Q from distribution P, using a heavy-tail Student's t-distribution. Once the algorithm converged to a result, the data points are now represented with a low number of dimensions. If that number is 2, it is easy to plot the data using these X,Y coordinnates: the data that used to be described by an important number of dimensions can now be handled in a visual way.
Important note: t-SNE is a quadratic algorithm, and it is advised to run it on PCA (cells x PCs) or NMF (cells x features) data (~30 PCs or features).
Scikit-learn t-SNE
Distributed t-SNE


Machine learning
Machine learning is the ability to learn from datasets without being explicitely programmed. This field contains various subdomains, but only clustering is described below.
Unsupervised learning (clustering) is a set of methods that cluster the data points based on similarities found (correlation or distance for example) without having any prior knowledge about the data. A lot of subcategories exist, providing numerous methods that behave differently.
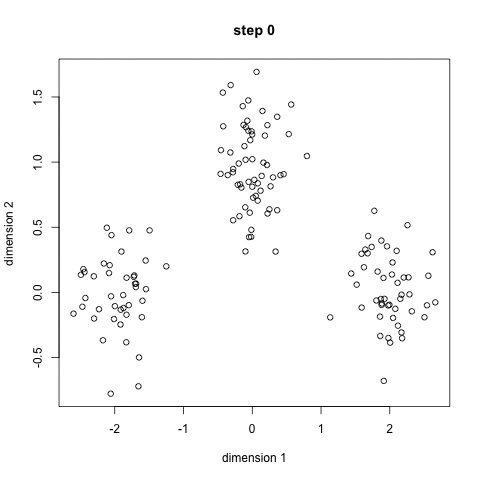
- An example is the k-means algorithm, which is a centroid-based clustering algorithm. K centroids are picked randomly at first, as centroids of k clusters. Each data point is assigned to a cluster, minimizing the distance between that point and centroids. Once all points have been assigned to a cluster, each cluster calculates its new centroid based on the points in the cluster, and the algorithm iterates again, finding the closest centroid for each data point. Please see example below with k=3:
- Another useful example is hierarchical clustering, a connectivity-based algorithm. From a dissimilarity matrix (pairwise distance square and symmetric matrix. Multiple metrics can be used to generate that matrix, euclidean distance or 1-correlation for example), the algorithm picks the smallest distance value, and clusters objects together before updating the dissimilarity matrix based on the existing clusters and picking the new smallest value available. Note that multiple variants of this algorithm exist (single, complete, etc.) and will provide different results. A good example (complete variant) of the algorithm steps can be found here. Once all objects are linked together, the linkage (also called dendrogram, see image below) can be cut to get clusters. Note that if you want to cluster both rows and columns, you will have to apply the algorithm twice. This example shows how to perform hierarchical clustering in Python, and how to plot the clustered matrix as a heatmap. If you download the script and the data files on your computer, you can launch the script from the terminal using
python hclust_heatmap.py(Python 2.7).

Good practices
Although some students might be familiar with programming, some of them might find the task a bit more challenging. Some of the following points could help:
- Looking for information online:
There's a ton of information out there on the web and most likely an answer to your question. Looking something up on Google is really part of the process of learning programming. Don't forget to look up official documentation online, for example if you were to wonder about Numpy ndarray's attributes or methods, you would want to look here first. - Start small:
It's not always easy to apply new methods or algorithms to datasets. You got a result, but is it correct? Does it make sense? A valuable advice is to start small, maybe by truncating a dataset, or just playing around with mock data. That way, applying methods will be faster, and you will have a better chance at detecting errors in your code or interpreting the results. For example, using a (5x3) matrix to test normalization methods and confirm the results is easier than using a regular (20,000x5,000) gene expression matrix. - Streamline your code:
Performing tasks directly in a shell does not scale very well, does not give the best overview and makes it harder for the user to retrieve some code back. It is useful to have script files where you can store your code in functions, and call functions as needed. Reminder: Some programming languages offer an interactive mode that lets the user access variables after the script stops, wether the script ends or is stopped by an error (-ioption in Python for example). Please find an example below:
pca.pyfile:
def load(path):
    //code to load dataset
    return dataset

def apply_pca(dataset,param1,param2):
    //code to apply pca
    return results

def save_results(output,pca_object):
    //code to save results in a file

d1 = load(`path_to_d1.mtx`)
d2 = load(`path_to_d2.mtx`)
pca1 = apply_pca(d1,1,5)
pca2 = apply_pca(d2,4,10)
save_results('pca1.file',pca1)
save_results('pca2.file',pca2)
If you are using an IDE, you can run this script and access the variable values easily. If you are using the terminal, you can use python -i pca.py to run the script, and access variables from the shell once the script is done running, or if an error eventually pops up. Also, don't hesitate to overuse the print function if you are using the terminal to get intermediate results as your script progresses.
Julia
Installing Julia (and Juno)
Visit the JuliaComputing web page https://juliacomputing.com/products/juliapro.html to navigate your way to the download section. You may be asked to enter an email address to have access to a free download.
- Linux:
SelectJuliaPro-0.6.2.1 - MKL (for Linux), or the latest release. Once the download is complete, just uncompress the archive and add the bin folder to the PATH variable in the .bashrc file or from the terminal. The command should look similar to the following:
export PATH=$PATH:/home/user/Downloads/julia-235245113/bin- Mac OSX:
SelectJuliaPro-0.6.2.1-MKL (for Mac), or the latest release. Once the download is complete, uncompress the archive and go through the installation process.
Those installations will install Julia (command line version) and should install Juno as well, a Julia IDE based on Atom. If you have trouble installing Juno, we recommend to look at this page: https://github.com/JunoLab/uber-juno/blob/master/setup.md.
∧
Installing packages in Julia
Packages are installed thanks to Julia commands (https://docs.julialang.org/en/stable/stdlib/pkg/). The most common way to install and use packages is:
Pkg.add("packageName")
using packageNameRunning the Julia example
Prior to running the example featured in that repository, run the install_packages.jl script using the following:
julia install_packages.jlLook up the Installing packages section to learn more about package management.
∧
Loading mtx files in Julia
Once the MatrixMarket package installed, you can use the following:
"""
    read_csc(pathM)
Read an mtx file pointed to by `pathM` and return a SparseMatrixCSC object.
"""
function read_csc(pathM::String)
     x=MatrixMarket.mmread(pathM);
     Float64.(x)
end
Note:
Strings in Julia must be delimited by double quotes ("), not single quotes (').
The dot used after Float64 applies broadcasting. It enables an operation to be applied to every entry in an object (it is similar to mapping).
∧
Loading labels in Julia
"""
    read_barcodes(tsvPath)
Read a tsv file and return its values in an array of strings.
"""
function read_barcodes(tsvPath::String)
    f=open(tsvPath)
    lines=readlines(f)
    a=String[]
    for l in lines
        push!(a,uppercase(l))
    end
    close(f)
    return a
end
"""
    read_genes(tsvPath)
Read a tsv file and return its values in an array of strings.
"""
function read_genes(tsvPath::String)
    f=open(tsvPath)
    lines=readlines(f)
    a=String[] #Array{}
    for l in lines
        push!(a,uppercase(split(l,"\t")[2]))
    end
    close(f)
    return a
end
R
Loading mtx files in R
R base package Matrix lets you load .mtx files directly. The returned object is a dgTMatrix.You can load a file as shown below:
> readMM("my_path/matrix.mtx")
32738 x 1985 sparse Matrix of class "dgTMatrix"
Note: Even though Matrix is a base R package, it has to be loaded manually (through the Packages section in R studio or library("Matrix") in the R console.)
∧
Loading labels in R
barcodes<-scan("my_path/barcodes.tsv",what='',sep='\n')genes<-read.table("my_path/genes.tsv",header=FALSE,sep='\t')[[2]]Python
Loading mtx files in Python
Mtx files can be loaded in Python using the io module of Scipy. There are multiple ways to install Scipy (Homebrew, pip, conda, etc.). For example, type in your terminal:
pip install scipyYou can then use in Python:
import scipy.io
M = scipy.io.mmread('my_path/matrix.mtx')
M is a coo_matrix object, you can use M.tocsc() to convert the coo_matrix to a csc_matrix. The latter sorts the columns in the object which facilitates column-based operations.
∧
Loading labels in Python
The csv module will help you read cell and gene labels from the barcodes.tsv and genes.tsv files.
barcodes = [row[0] for row in csv.reader(open('my_path/barcodes.tsv'), delimiter="\t")]
genes = [row[1].upper() for row in csv.reader(open('my_path/genes.tsv'), delimiter="\t")]
Note that you can also use very basic file processing if you find it easier:
barcodes = []
with open('my_path/barcodes.tsv') as f:
    for line in f:
        barcodes.append(line.strip('\n'))
Hierarchical clustering and heatmap in Python
This example shows how to load a matrix, perform hierarchical clustering on both rows and columns and plot the results as a heatmap with dendrograms (linkages). It also shows how to save the clustered matrix. If you download the script and the data files on your computer, you can launch the script from the terminal using python hclust_heatmap.py (Python 2.7).
Matlab
Loading mtx files in Matlab
If you want to use Matlab, you can download functions here to read and write MatrixMarket files. After loading the files in Matlab, you can simply use:
m = mmread('my_path/matrix.mtx');Loading labels in Matlab
barcodes = textscan(fopen('my_path/barcodes.tsv','r'),'%s');Note: barcodes{1}{i} will return the i^th^ cell's barcode.
genes = textscan(fopen('my_path/genes.tsv'),'%s%s');Note: genes{1}{i} will give you return the i^th^ gene's Ensembl name, whereas genes{2}{i} will return the i^th^ gene's symbol.