Intellij support for Gauge project.
VS Code has good support for Java and the Gauge VS Code works great with the Gauge java plugin. We are deprecating the IntelliJ Gauge plugin in favour of the Gauge VS Code plugin.
The Gauge team will stop addding new features to the IntelliJ Gauge plugin, only bug fixes will be done henceforth. The Gauge team will officially end support for IntelliJ Gauge plugin in October 2020.
If you wish to take up owership of this plugin, please contact us. We would be happy to transfer the plugin ownwership.
> git clone git@github.com:getgauge/Intellij-Plugin.git
> cd Intellij-Plugin
> ./gradlew buildPlugin
The plugin zip will be available at build/distributions. Install the zip file from IntelliJ IDEA
Plugin can be installed by downloading from Jetbrains plugin repository.
Steps to install Gauge Intellij IDEA plugin from IDE:
-
Open the Settings dialog (e.g. ⌘ Comma).
-
In the left-hand pane, select Plugins.
-
On the Plugins page that opens in the right-hand part of the dialog, click the Install JetBrains plugin or the Browse repositories button.
-
In the dialog that opens, search for Gauge. Right-click on Gauge and select Download and Install.

-
Confirm your intention to download and install the selected plugin.
-
Click Close.
-
Click OK in the Settings dialog and restart IntelliJ IDEA for the changes to take effect.
Note: The plugin you have installed is automatically enabled. When necessary, you can disable it as described in Enabling and Disabling plugins.
To install plugin by downloading it manually or to update plugin, follow the steps here.
Create a new Gauge project and start writing your tests.
Explore all the features of Gauge Intellij IDEA plugin now!
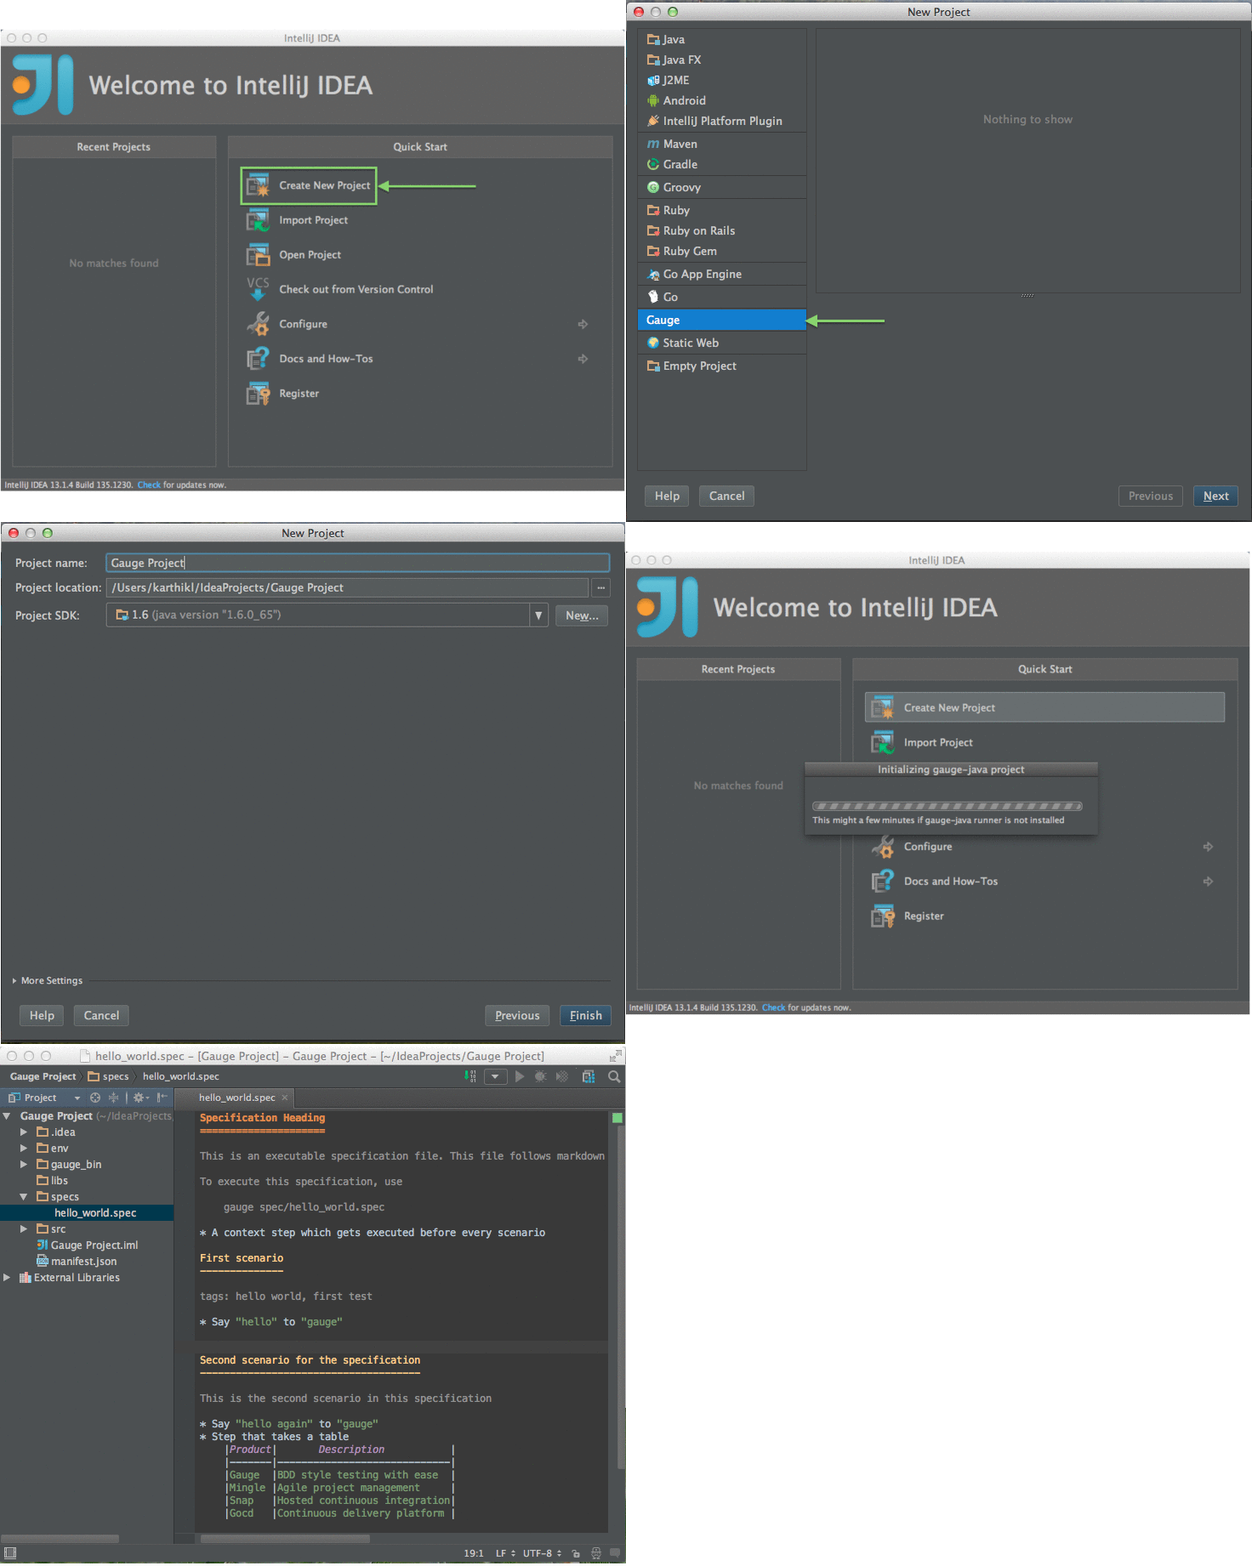
- File -> New Project.
- Choose 'Gauge'
- Choose the project location and java sdk
- Finish
Note: If gauge-java is not installed, it will download it for the
first time.
-
File -> New Project
-
Choose
Maven -
Select
Create from Archetype -
Select the gauge archetype -
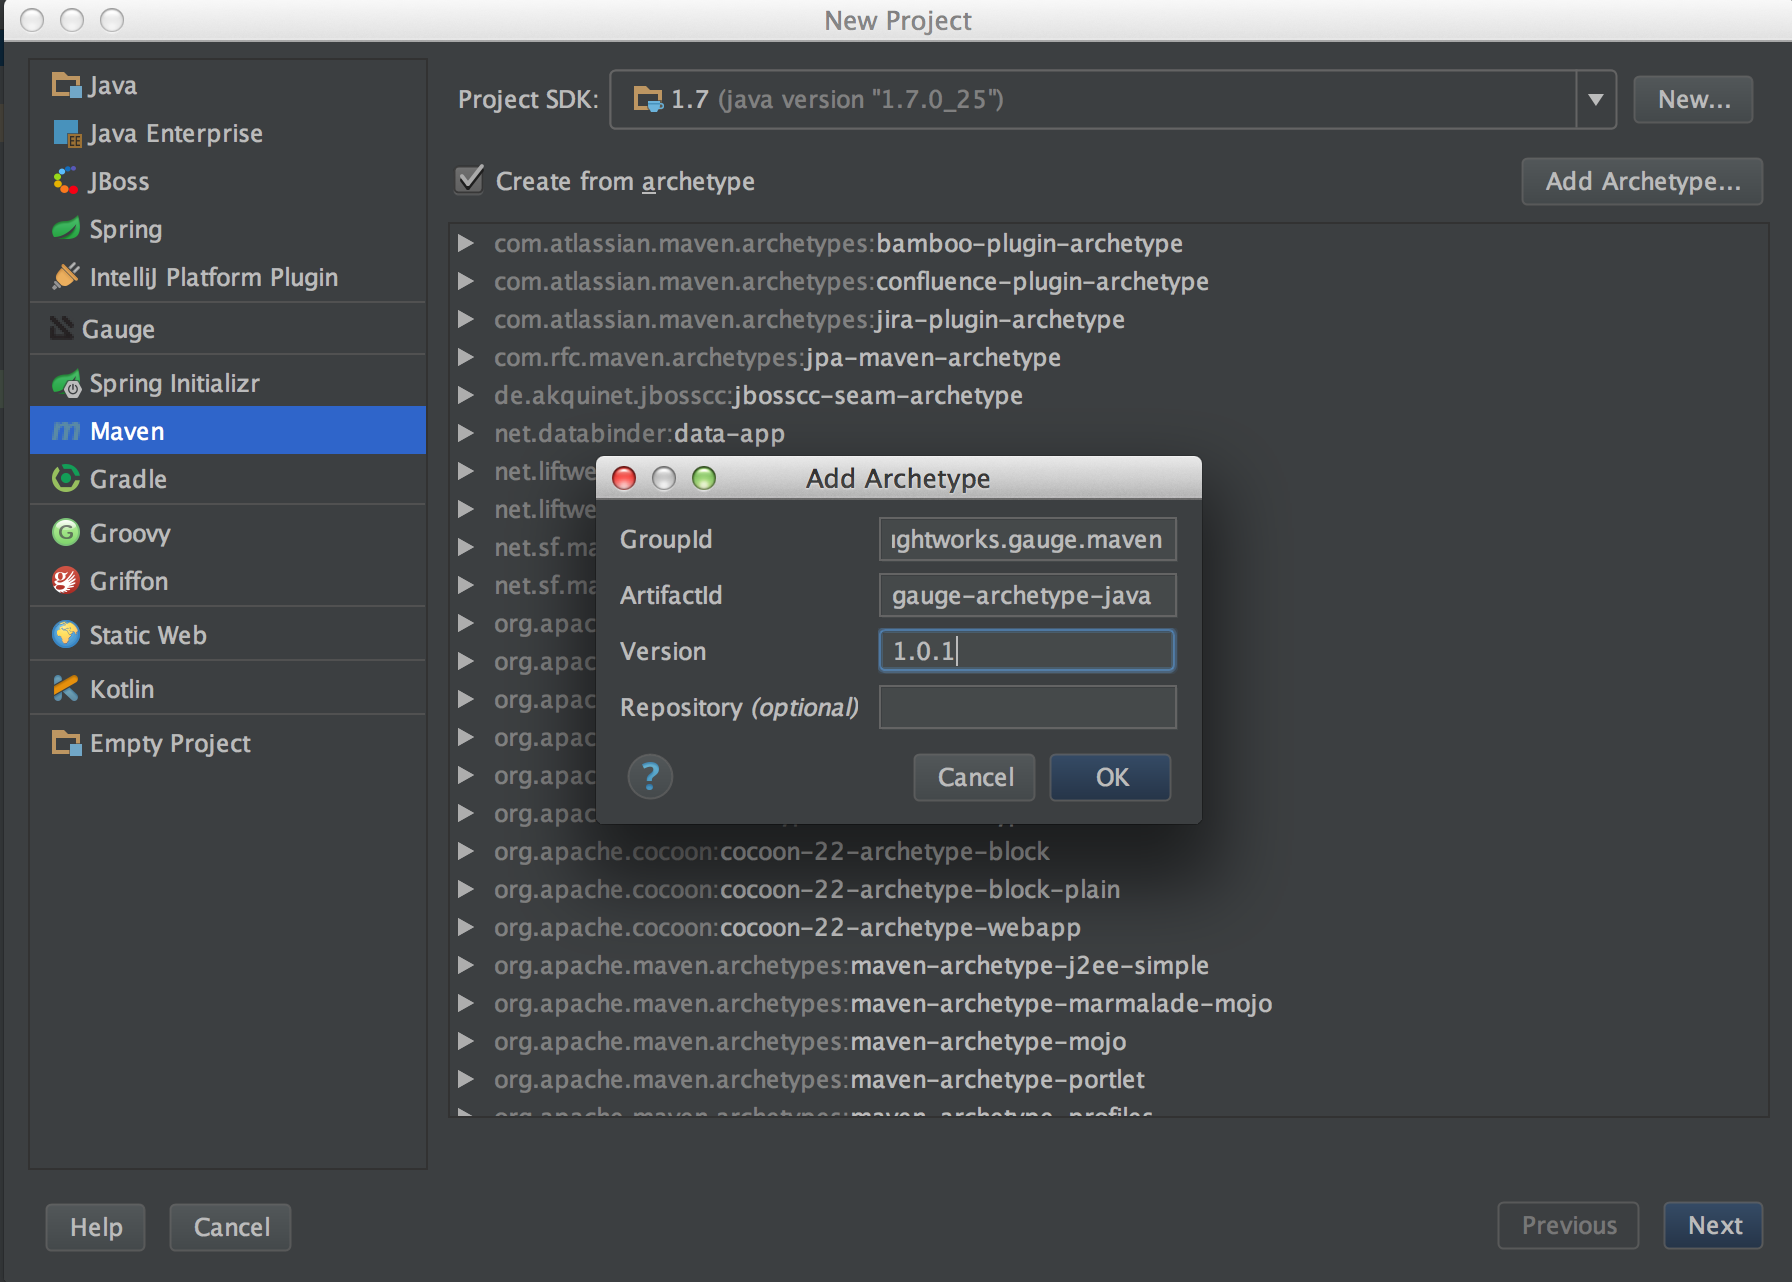
com.thoughtworks.gauge.maven -
If the
com.thoughtworks.gauge.mavenarchetype is not added selectAdd Archetype- Enter GroupId: com.thoughtworks.gauge.maven
- Enter ArtifactId: gauge-archetype-java
- Enter Version: 1.0.1 or the `latest version number from https://repo1.maven.org/maven2/com/thoughtworks/gauge/maven/gauge-archetype-java/
maven add archetype
- Enter the
groupIdandartifactIdfor your project. - Enter
Project Nameand finish - The project will be created in batch mode, watch the console for progress.
- After project creation
close and re-open the projectto enable auto-complete features. - Enable
auto-importfor the project. UnderFile > Settings > Maven > Importing, mark the checkboxImport Maven projects automatically.
See gauge-maven-plugin for more details on using the gauge maven plugin.
- Syntax Highlighting
- Auto Completion
- Quick fix
- Navigation
- Formatting
- Execution and Debugging
- Rephrase Steps
- Find Usages
- Extract Concept
- Create Spec and Concept files
- Templates
- HTML Preview
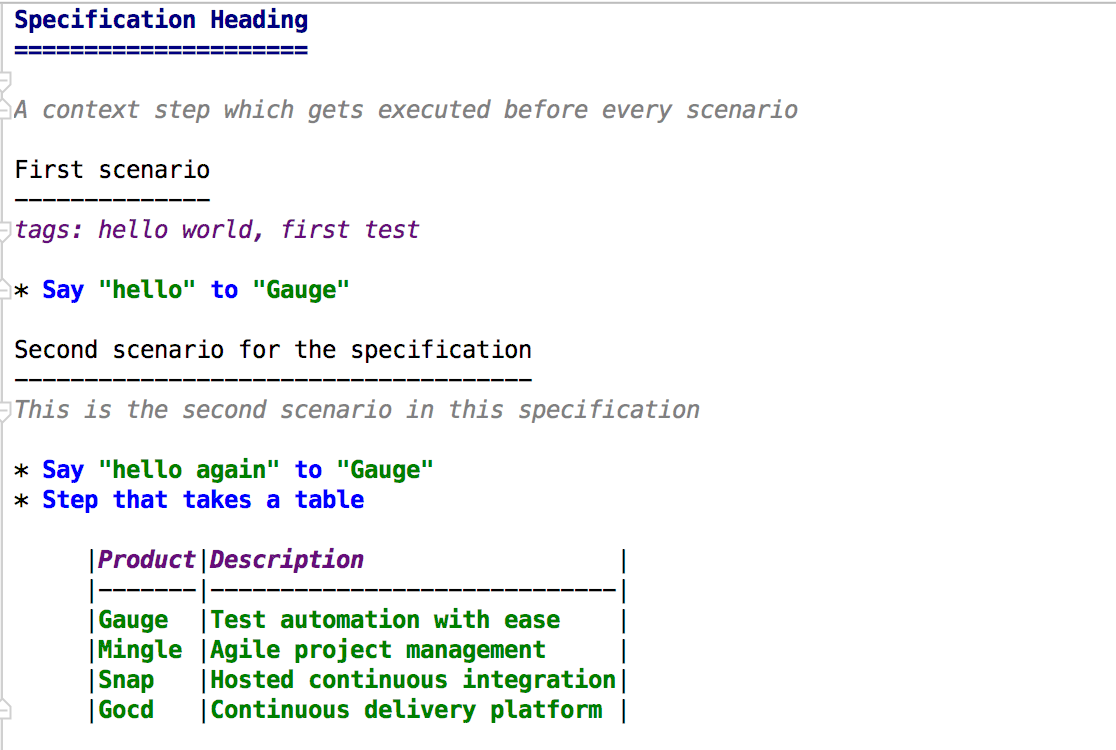
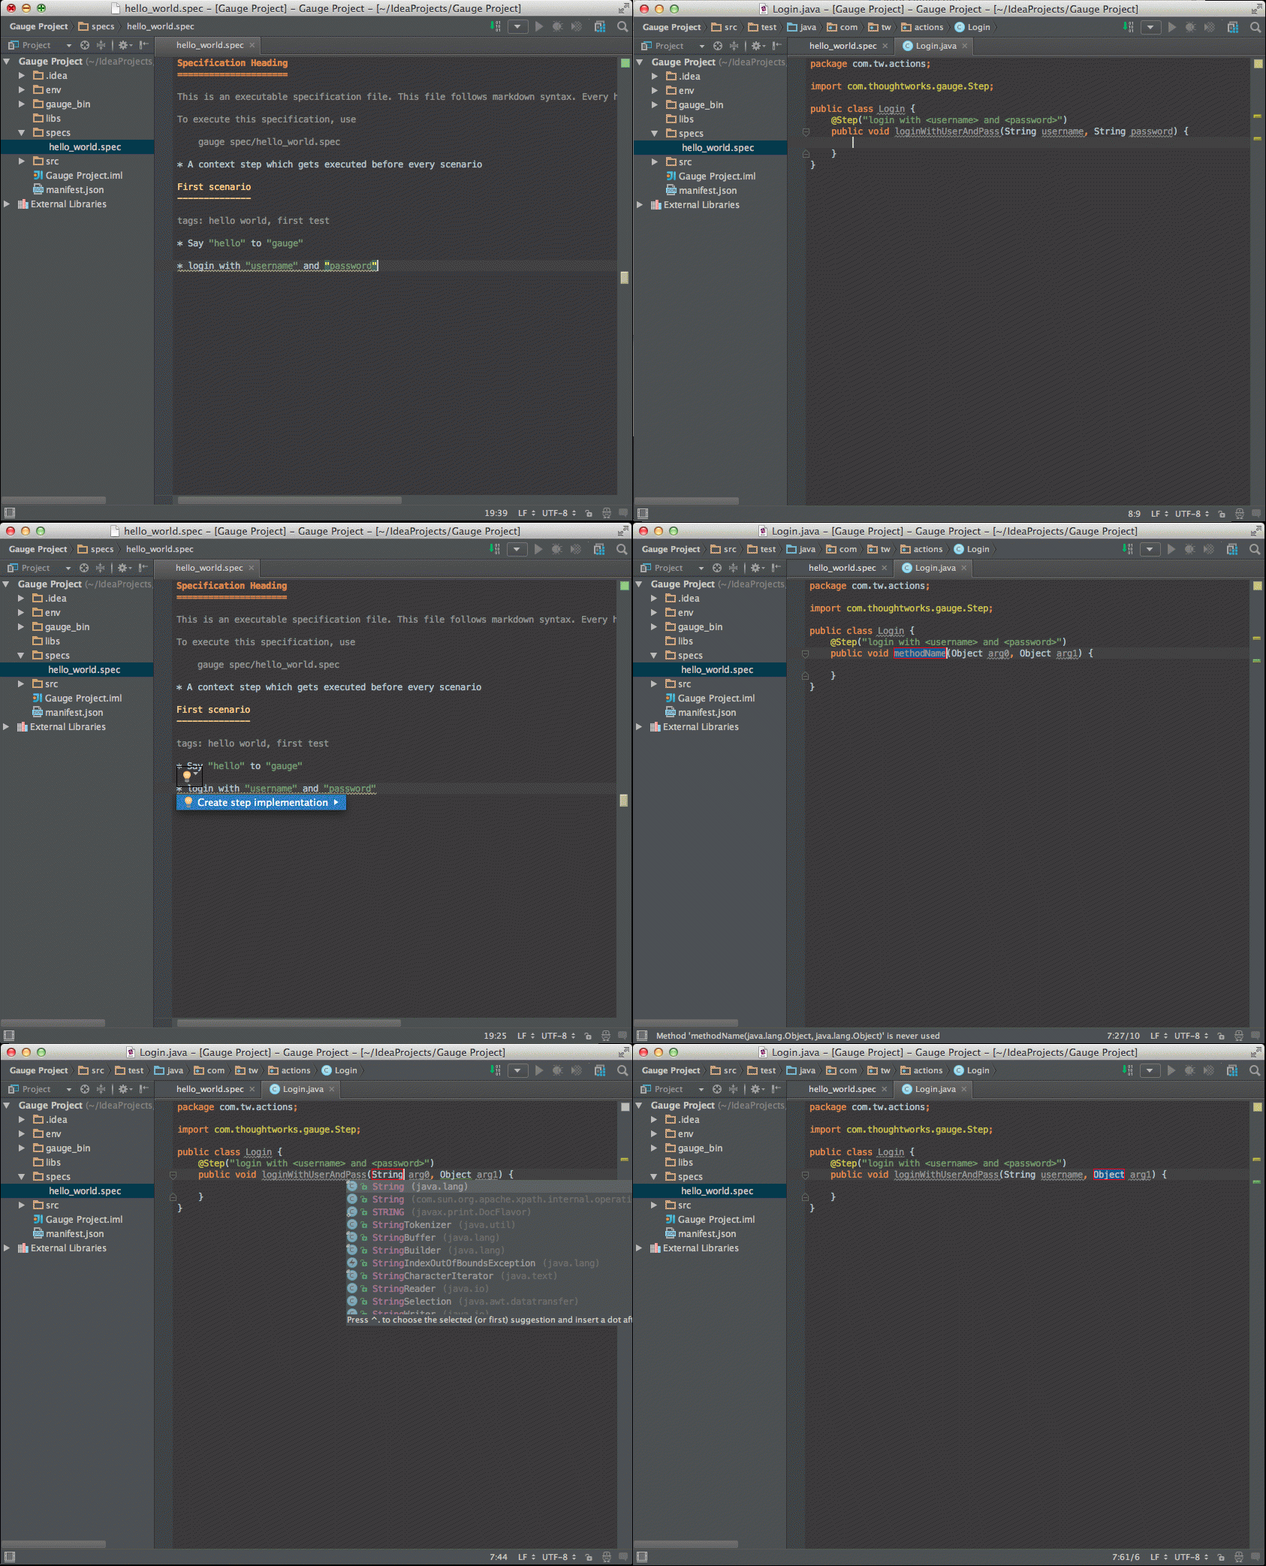
Specifications, Scenarios, Steps and Tags are highlighted. Steps with missing implementation are also highlighted.
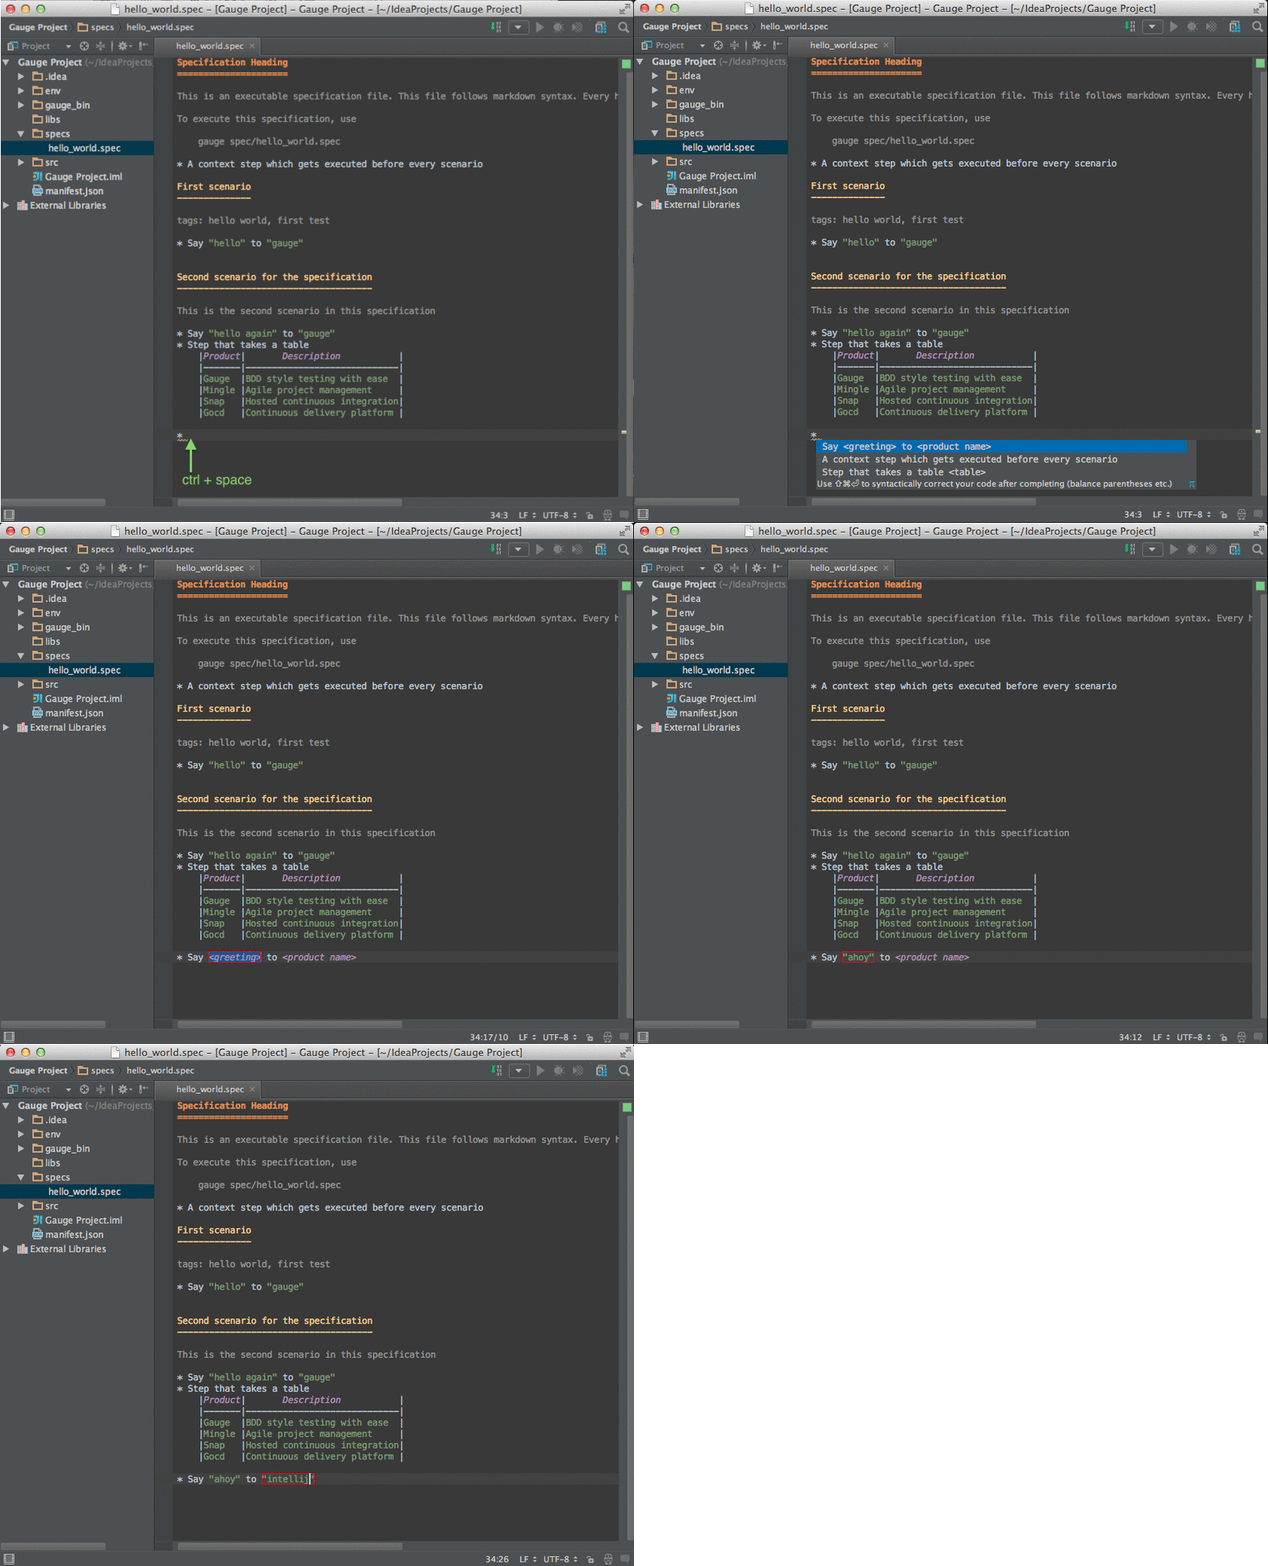
Steps present in the current project can be listed by invoking the auto
completion pop up ctrl+space after the '*'.
Usage: right Click -> Go to -> Declaration
A specification file can be formatted easily using the keyboard
shortcut of Spec Format in the action menu ctrl+shift+a.
This formats the specification including indentation of tables and steps.
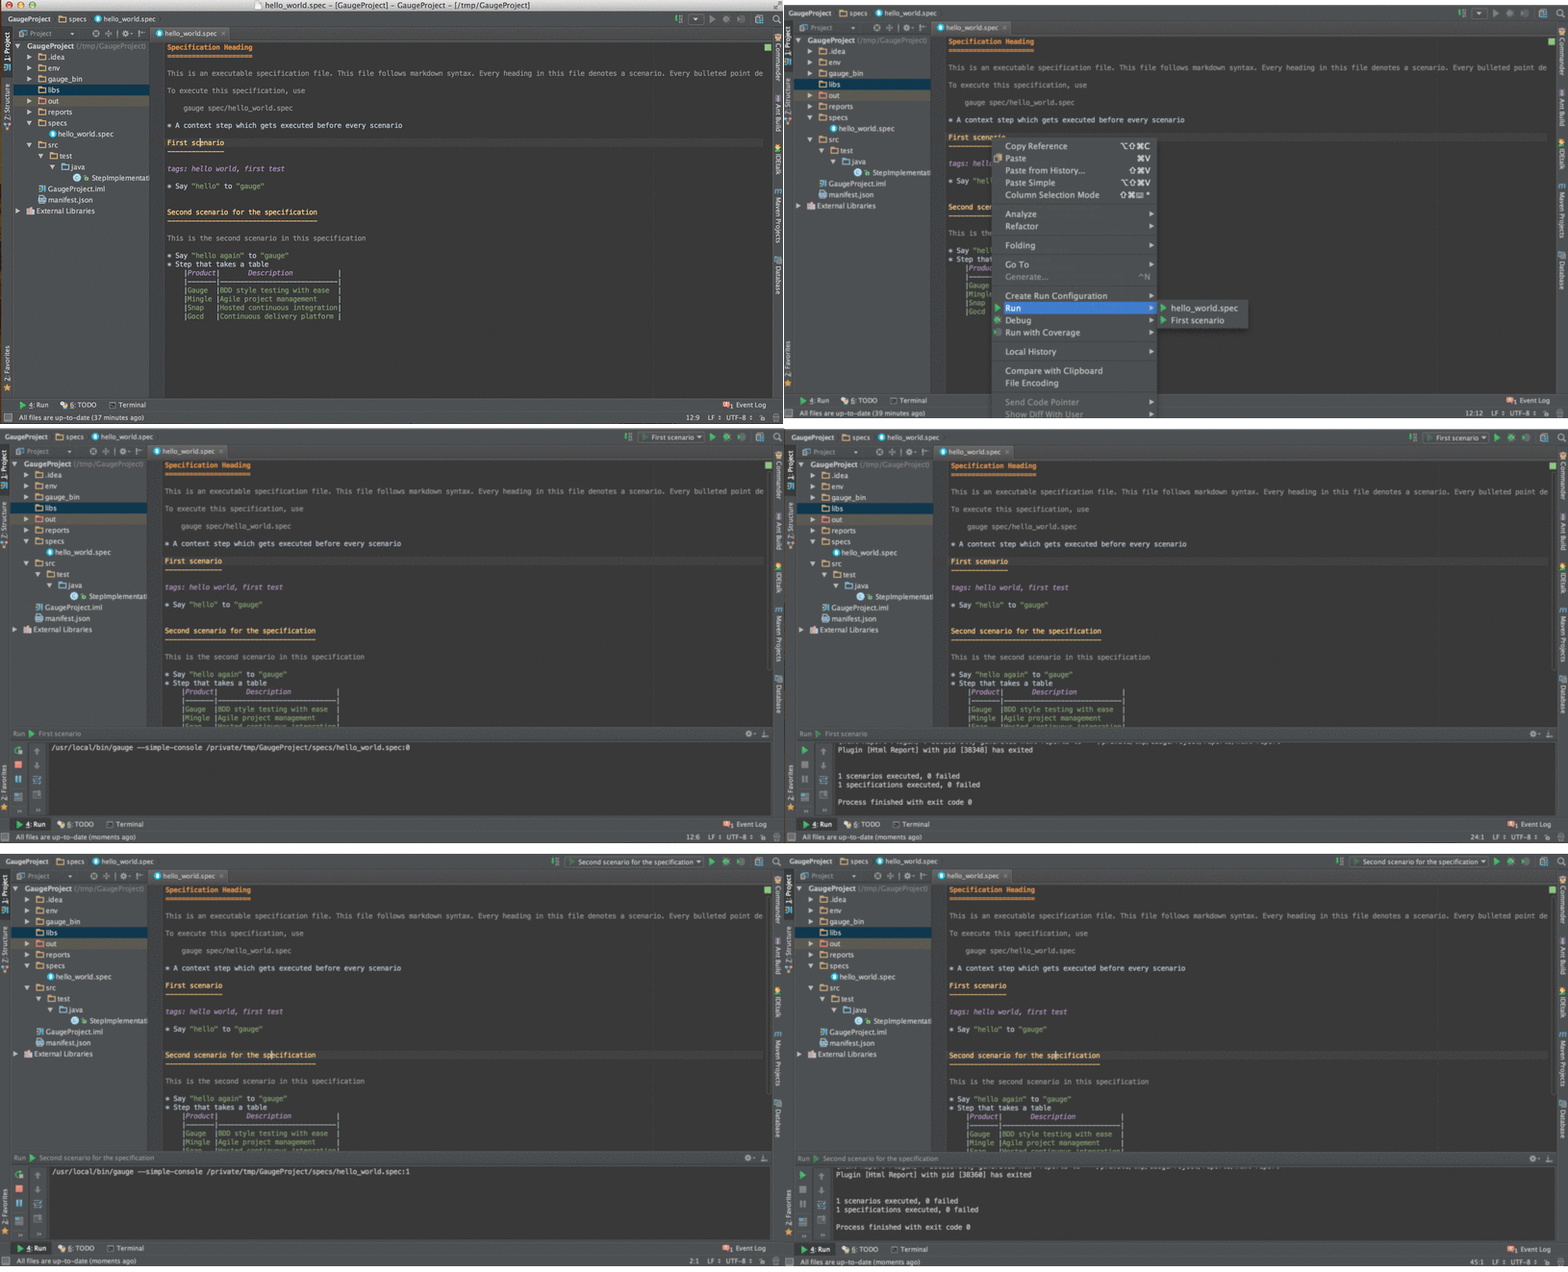
- Specs can be executed by
right click -> Run spec. - Execute all specs inside a directory by
right click -> Run specifications
A single scenario can be executed by doing a right click on the scenario
which should be executed and choosing the scenario.
right click -> run -> Scenario Name
.. note:: If the right click is done in context other than that of scenario, by default, first scenario will be executed.
To run multiple specifications in parallel
- Right click on the
specsdirectory and selectCreate Specificationsoption. - In the new Run configuration select
In Paralleloptions. This will distribute specs execution based on number of cores the machine has. - You can also specify the
Number of parallel execution streams.
Select parallel nodes based on current systems performance. For example on a 2 core machine select upto 4 parallel streams. A very large number may affect performance.
- Select
ok. Now you can run this new configuration for parallel execution of specs.
Debugging can be performed the same way spec execution works.
- Right click on a specification or specs directory -> Debug. Execution will halt on marked breakpoints.
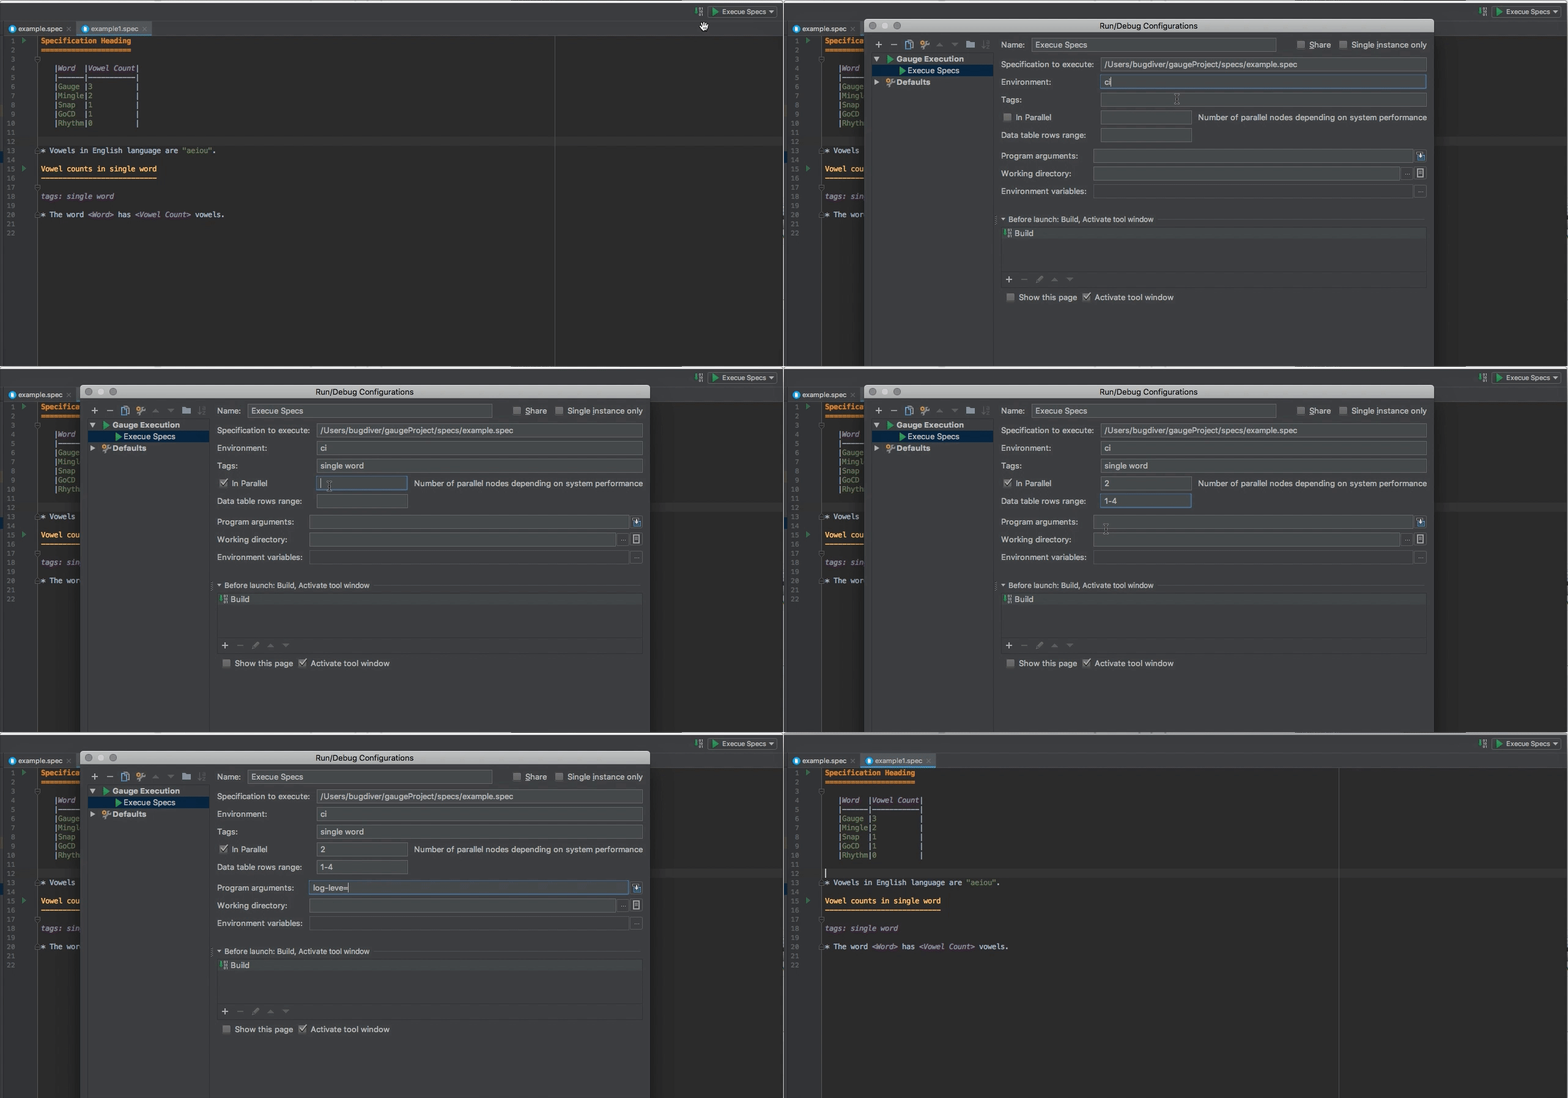
You can edit the run configuration to make changes to:
- The scenario or spec file to be executed
- Choose table-rows to be executed
- The environment to run against
- Add a tag filter to the execution
- Choose the number of parallel streams
- Add program arguments (Example: --log-level)
To execute multiple specs/scenarios add || seperated list of spec/scenarios in Specification to execute section
The delimiter for multiple spec files in run config has been changed from comma (,) to double bar (||). Until v0.1.0 of IntelliJ plugin, the delimiter is ,. Any higher version will have delimiter ||.
right click -> Refactor -> Renameon a step to rephrase it.- The parameters will be in
< >in the rephrase dialog. They can be reordered,removed or new parameters can be added. - The rephrase change will reflect across all the specs in the project.
right click -> Find Usageson step/concept to see the usages.
-
In the editor, select the steps to be transformed into a concept.
-
On the main menu or on the context menu of the selection, choose
Refactor | Extract to Conceptor press⌥⌘C. -
In the Extract Concept dialog box that opens
- Specify the concept name with parameters to be passed from the usage. Example: Say "hello" to "gauge".
- Select the file name from the spec file dropdown list or specify the new file name/path relative to the project.
- Click OK.
-
The selected steps will be replaced with the specified concept name.
The intellij idea gauge plugin comes with more features to simplify writing specifications.
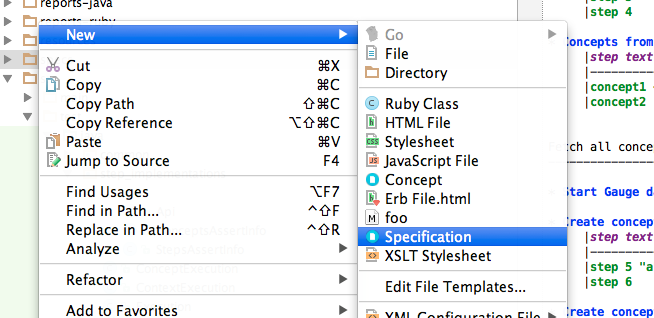
- You can right-click in under any directory in the specs directory and create a new specification or concept file. They will be created with a template to get you started.
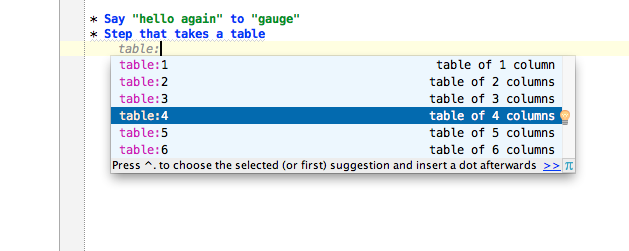
- To easily create markdown tables in specification(.spec) or concept(.cpt) files you can use predefined table templates specifying the number of columns needed.
For example, to create a table with 4 columns type
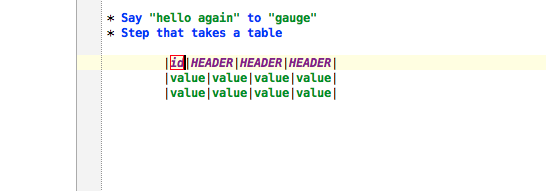
Then fill the column names in the template.
- To write the specification heading in markdown, you can use the predefined heading template.
Then fill the specification name in the template.
- Scenario heading in markdown can be easily written using the predefined scenario heading template.
Then fill the scenario name in the template.
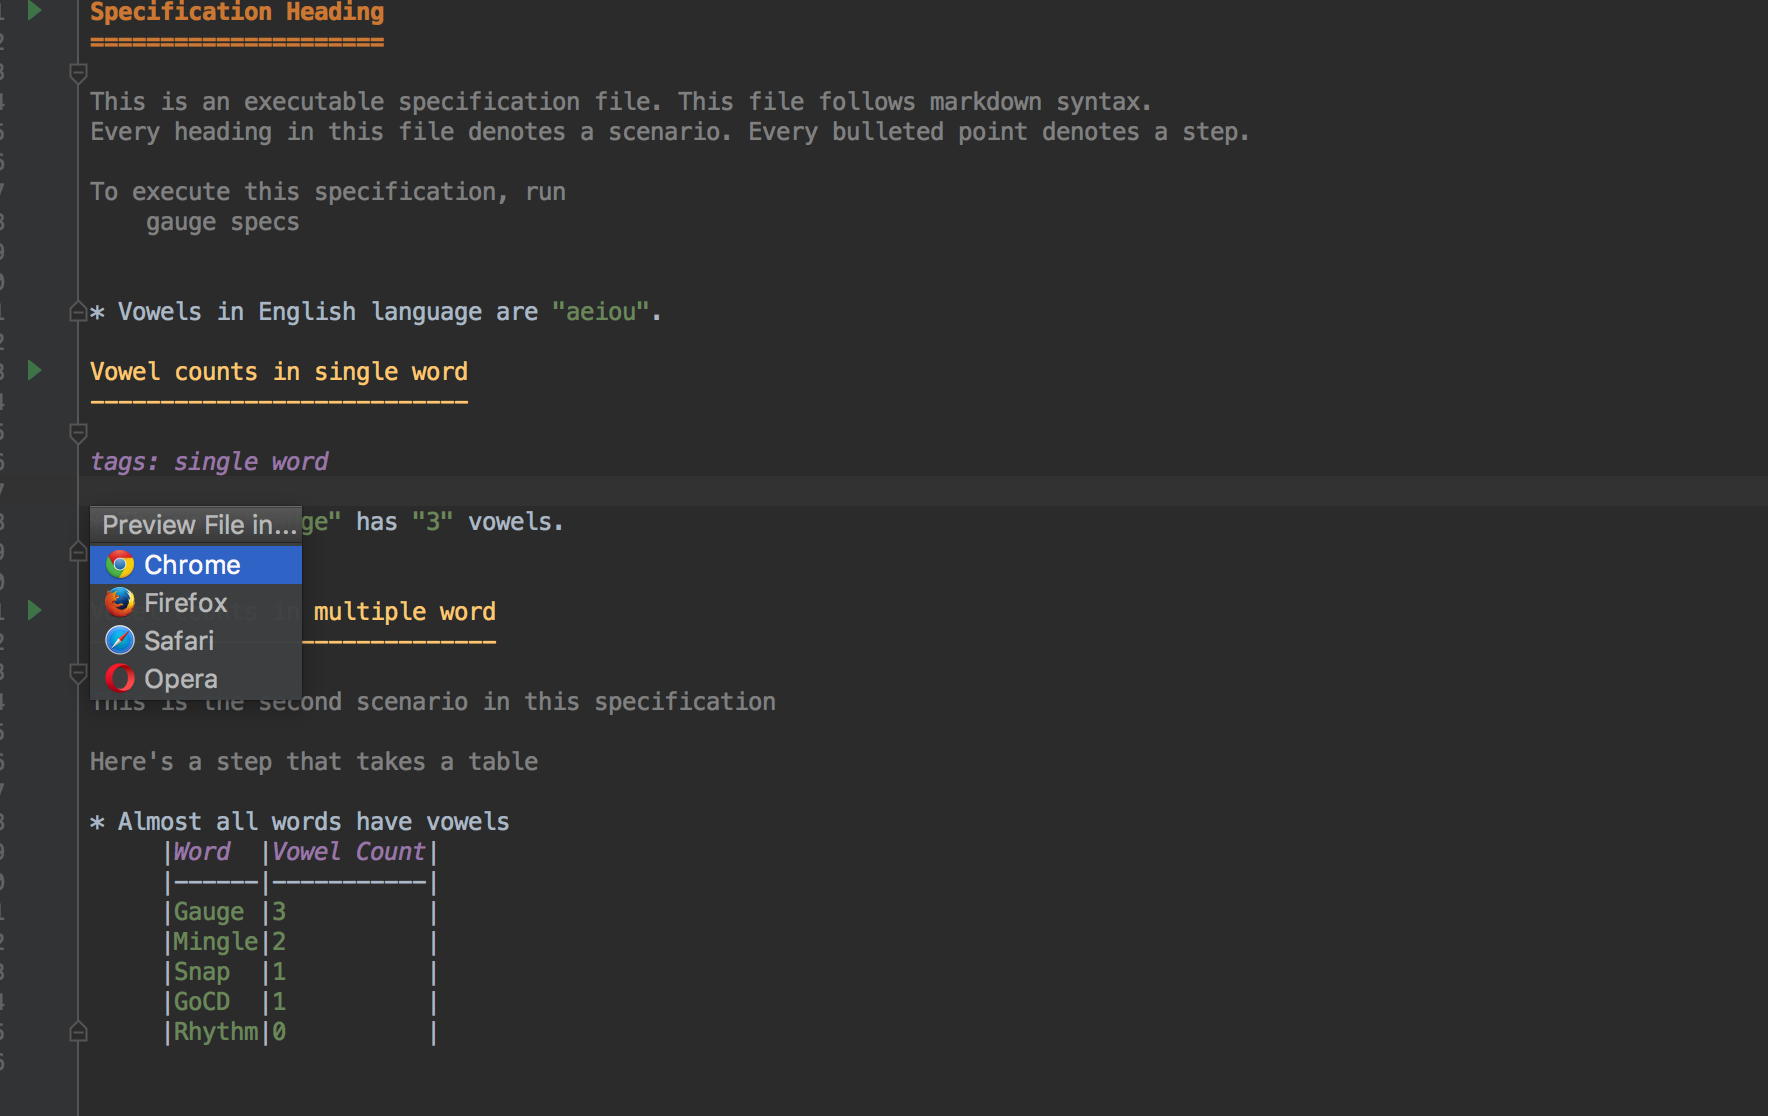
- A specification file, written in markdown can be viewed as HTML in browser.
This is a spec file in markdown.
Press alt + F2 or right click and select open in Browser option. It gives option to choose a browser.
On choosig a browser, it opens a browser window with HTML equivalent preview of spec file.
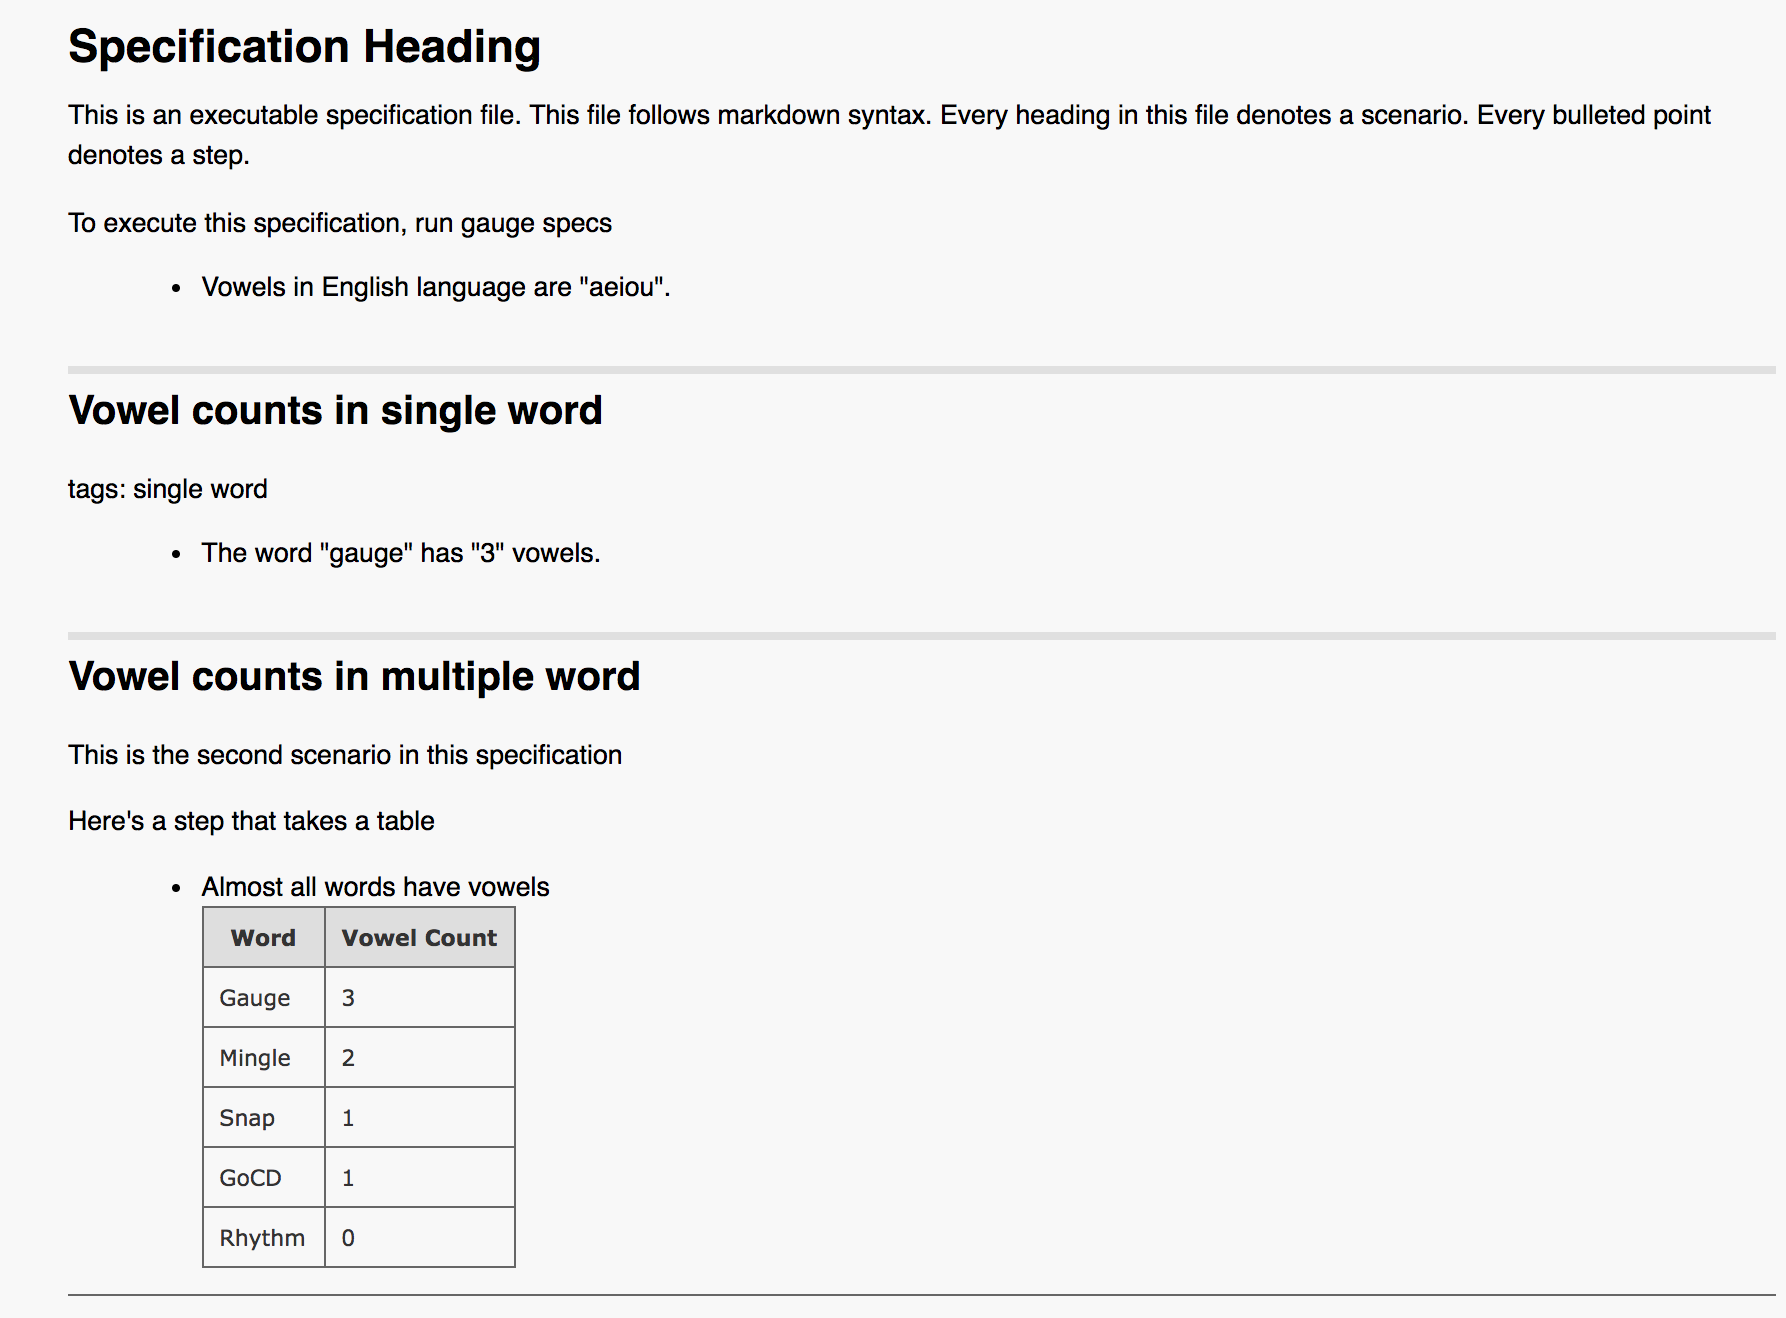 Since specs are written in markdown, they can be converted to HTML using
any markdown to HTML convertors.

Copyright 2018 ThoughtWorks, Inc.

