Based on initial & ongoing work by Henrik Forstén/@Ttl.
Documentation: Read The Docs
Releases have a version number in the following format: X.YYY.ZZZ
- X is the hardware version.
- YYY is the release version
- ZZZ is the minor update version
The FMCW package is a library designed to interact at a high level with the fmcw radar from Henrik Forstén/@Ttl. If you are not familiar with it, start with taking a look at Henrik's blog post on the third version of the radar: FMCW 3
For additional information on this type of radar, you can also take a look at the previous blog posts written by Henrik. These older radars are not be compatible with this library but can help shine some light on radar theory and the history of the project:
Additionnaly, Henrik's fmcw project was covered in a few articles. For instance:
Short answer: you have to make it yourself.
Longer answer: only a few boards seem to have been made so far, all based on the files that Henrik uploaded on his GitHub repository. If you plan on building one, make sure you have:
- proper hardware to place the components & reflow them
- 200+ hours ahead of you (VERY dependant on your existing knowledge)
- ~$500
Of course, these are rules of thumbs and should not be taken at face value.
Congratulations! There are two main options:
- You write your own script based on the library. This is expected to be hard as the documentation is lagging behind the code I write.
- You reuse the latest release I have for the main script. This is the recommended option.
In what follows, I will describe how I use the library with 190830_rt_fmcw3.py, uploaded with release 3.1.ZZZ.
Four main tasks are being executed by the script:
- Read the data from the FPGA
- Process the data
- Save the data to file
- Display the data in real time
A picture is better than a thousand words so here is a schematic:

This step is less easy than it sounds for a simple the reason: the FPGA is a real time chip while everything else (the usb port, the OS on my laptop, python...) is not. As a result, the FPGA outputs data are fixed intervals and if anything down the chain is not ready to receive it, the 4 kb buffers on the FTDI chip will quickly overflow and be overwritten. I have not found a silver bullet for that problem so far and only managed to mitigate it.
See here for more information: Stack Overflow
The data coming from the FPGA is parsed to separate it in sweeps. Valid sweeps are then processed in order to display 3 types charts in real time. Invalid sweeps (most of the time incomplete sweeps due to dropped bytes on the USB bus) are zeroed and displayed as such.
Threads are used to write the data to file. A total of three threads are spawned from the main process:
- One for writing the settings to file. Note that it is immediately closed after writing to file.
- One to write the raw, byte data to a text file.
- One to write the processed data to a csv file.
The main script offers the option to display data in real time. But there is no such thing as perfect real time: there is always a lag. Depending on how many sweeps you read at once from the USB port before processing, and how long these sweeps are, the lag can be increased or reduced. With the default settings, the lag is a few hundred ms.
The refresh rate is also severly limited on most laptop given the amount of work needed to refresh a plot that can have tens of thousands of pixels on it. Despite minimizing the amount of elements to refresh when updating a plot and keeping each plot in a separate subprocess, 10 Hz appears to be the maximum refresh rate on my CPU (i7-8565U).
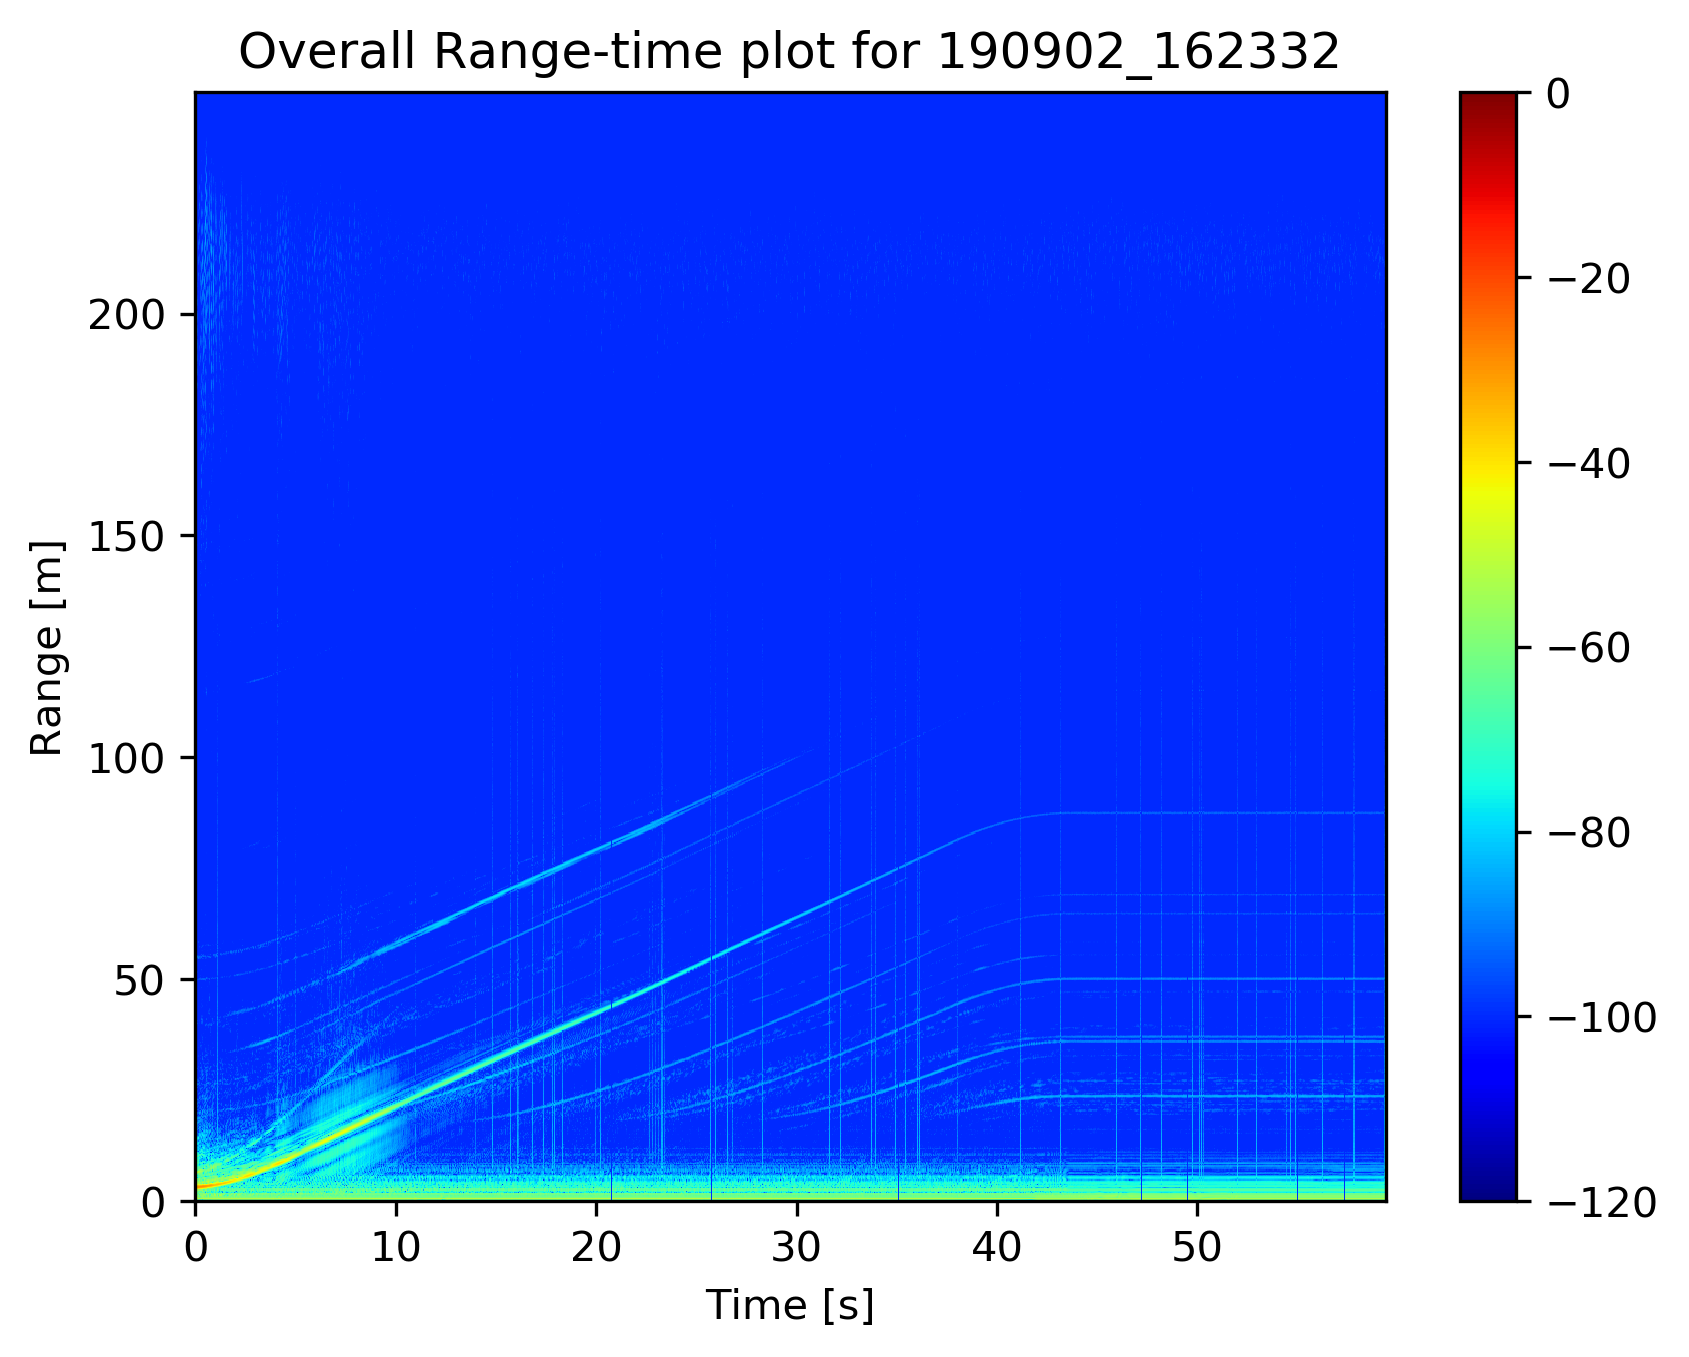
Below, a few examples of the displayed plots:


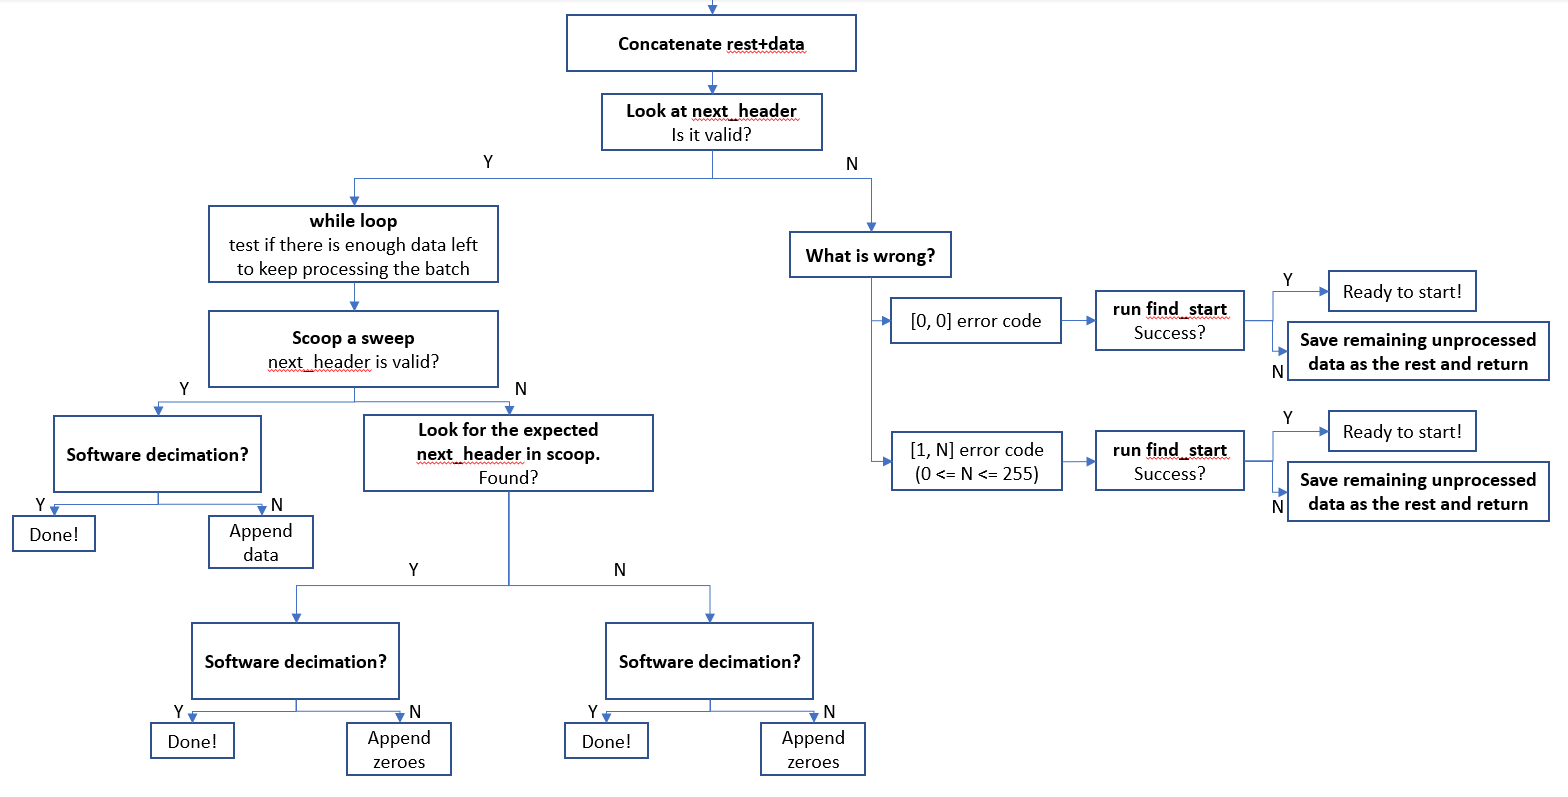
Here is quick description of how a batch of data is processed.
 Feel like this is cryptic? It is.
In a nutshell, the point is to mitigate the non-real time nature of the script as much as possible. It is not perfect and some data will be lost, but these days less than 5% is lost.
If you ever want to learn more just reach out to me.
