Serverless package manager for Azure Functions. (Private preview)
This is the quick demo of strikes (Private Preview).
When we want to share the Azure Function code, it usualy require to set up other resources, like CosmosDB, Storage Account, EventHubs and so on. This project is inspired by helm which is the popular package manager for kubernetes. Lightning strikes help you to install serverless project with whole Azure Resources.
Lightning strikes is a package manager for Azure Functions with Azure Resources. You can install your favorite packages into your Azure Subscription by just one command with managing the resources. Also you can create your own packages for your productivity, also you can push it to share your greate Azure Functions app and environment.
Lightning strikes is a single binary app. Just download the latest version and add put into your path enviornment variables.
Lightning strikes support Terraform](https://www.terraform.io/) for deploy resources. It is also single binary app. You can download and add in your path environment variables. Currently, Lightning strikes only support Terraform as a provider. However, I'm considering ARM or Azure CLI shell script might be supported.
You don't need Azure CLI. However, we need the Service Principal configration file. I'll explain later how to get it. You can install to see Install the Azure CLI. However if you don't want to install the tool, you can use Azure Cloud Shell. It is already installed and configured.
You can use Azure CLI or Azure Cloud Shell.
The simplest way of getting config file is the follwoing. For more detail. See Create an Azure service principal with Azure CLI
az ad sp create-for-rbac -n "StrikesSP" --sdk-auth > .configThis command create a service principal and show you the config file contents. For windows, you can remove > .config and create .config file which include the output of the json file. Refer the following.
$ az ad sp create-for-rbac -n "StrikesSP" --sdk-auth > .config
Retrying role assignment creat
$ cat .config
{
  "clientId": "YOUR_CLIENT_ID",
  "clientSecret": "YOUR_SECRET",
  "subscriptionId": "YOUR_SUBSCRIPTION_ID",
  "tenantId": "YOUR_TENANT_ID",
  "activeDirectoryEndpointUrl": "https://login.microsoftonline.com",
  "resourceManagerEndpointUrl": "https://management.azure.com/",
  "activeDirectoryGraphResourceId": "https://graph.windows.net/",
  "sqlManagementEndpointUrl": "https://management.core.windows.net:8443/",
  "galleryEndpointUrl": "https://gallery.azure.com/",
  "managementEndpointUrl": "https://management.core.windows.net/"
}
After getting .config file, initialize the strikes. You can specify the location with -l flag. By default, it is japaneast.
$ strikes init -l japaneast
This command will create a .strikes directory on your Home directory. It will create two config files, config and powerplant. The config file is exactly the same file as you created as .config. This command also create a storage account called powerplant on your Azure Subscription. PowerPlant is the in-your-subscription component of Lightning strikes. It manage your instance which deployed using Lightning strikes. Powerplant is the equivalent concept of Helm Tiller. PowerPlant is for Serverless Azure Functions's Tiller. The PowerPlant is created on the strikes-storage-{LOCATION} resource group which you specified the command.
Done! Now you are ready to enjoy the life of Lightning strikes.
Let's get started. Setup the your strikes first. You can download a binaries from Releases on this repo. Add it to your Envrionment Variables.
Login to the Azure Portal. Open the Azure Cloud Shell with bash.
You can get the service principal and output. copy the json part then, create .config on your local machine.
$ az ad sp create-for-rbac -n "StrikesSP" --sdk-authIf you don't have terraform, please download from Download Terraform. Then add it to your enviironemnt variables.
Make sure .config is created. -l is the location. feel free to change fit your enviornment.
$ strikes init -l japaneastNow ready to use.
You can find packages by search subcommand. You can also specify keywor d to search the packages.
$ strikes search
Now searching...
durable-world 1.0.0
hello-world 1.0.0For deploying package on your subscription, please try this. You need to change {ResourceBase} with your prefered name. It should start with Lower case alphabet, then it allows to use alphanumericl with -. It should be unique on World Wide. e.g. sahellow2038.
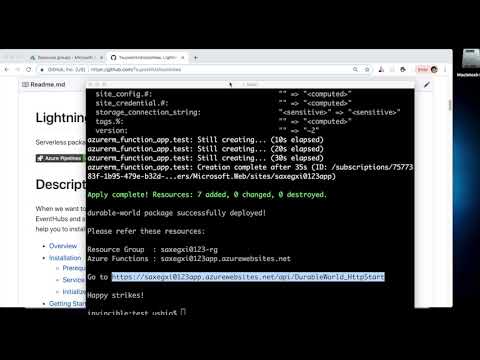
$ strikes install hello-world {ResourceBase}This command will install the hello-world package on your subscription with {ResourceBase-rg} resource group. You can find Function App is already deployed with Storage account and App Serice Plan(Consumuption plan.) You can go potal and send request to the HttpTrigger with ?name=something.
You can find the useful subcommand enable us to use. this list is just currently implemented. i’ll expand more.
$ strikes search [keyword]
example:
$ strikes search h*
Now searching...h*
hello-world 1.0.0
Install package on your Subscription. Specify the Package Name. (e.g. hello-world) Base Name is the base name of whole environment. Base Name is used for all resources. For example, Resource Group is [Base Name]-rg, Function App name is [Base Name]-app and so on. [Base Name] should be unique on World wide.
You can specify the local directory which include package. If the [Package name] directory exist on the current directry, it will install from the local file system. If you want to override the default value which is defined on values.hcl configration via --set key=value flags. For more detail Please refer Create package. This command will create .strikesTemp directry to download packages and extract it.
$ strikes install [Package Name] [Base Name]
example:
$ strikes install hello-world sahello1004
If you don't want to update the PowerPlant information, you can specify -i flag which means IgnorePowerPlant. This flag might be useful when you create your package and testing it.
After installing packages, you can see the instances which you already deployed.
$ strikes list
example:
$ strikes list

       INSTANCEID      |  INSTANCENAME   |   RESOURCEGROUP    |  PACKAGENAME  |     TIMESTAMP
+----------------------+-----------------+--------------------+---------------+--------------------+
  betc3snbuiv4ceoll5r0 | sahell0120      | sahell0120-rg      | hello-world   | 2018/10/8 02:33:22
  betlpmcfbncl1e0svqag | sadurable201811 | sadurable201811-rg | durable-world | 2018/10/8 13:34:20
If you share the Subscription with others, you might want to share the PowerPlant environment with your colleague or firends. In this case, you can get config file from ~/.strikes directry (Home Directory) then carefully send your friend and place it on the same place. The config file is OS agnostic.
You can create your own packages for sharing or use it locally for gaining your productivity.
You can create your own package from the template. Currently, ProviderType is only for terraform.
$ strikes new [ProviderType]Then it will ask you several questions. Just answer it.
example:
$ strikes new terraform
Strikes Package Generator

0: basic:		 Function App (V2) and Storage Account
1: cosmos:		 Function App (V2), Storage Account, and CosmosDB
2: cosmosSearch:	 Function App (V2), Storage Account, CosmosDB, Azure Search
3: servicebus:		 Function App (V2), Storage Account, and Service Bus

0
PackageName : hello-world
Description [default: hello-world package.]: This is hello world package.
Author name : Tsuyoshi Ushio
Project Page : [ default: https://github.com ] https://github.com/TsuyoshiUshio/strikes/samples
Project Repository : [ default: https://github.com ] https://github.com/TsuyoshiUshio/strikes/samples
Release Note : [ default: Initial Release. ] This is the first release.
ZipFileName : [ default: hello-world.zip ] hello.zip

TemplateDir: /terraform/basic
PackageName: hello-world
Description: This is hello world package.
Author: Tsuyoshi Ushio
ProjectPage: https://github.com/TsuyoshiUshio/strikes/samples
ProjectRepo: https://github.com/TsuyoshiUshio/strikes/samples
ReleaseNote: This is the first release.
ZipFileName: hello.zip
Then this will create a package direcory with the package name. Feel free to edit the file which is generated. At least, you need to put your Azure Functions zip file to fit the ZipFileName which you specified under the package directory.
$ tree hello-world/
hello-world/
├── circuit
│   ├── NOTE.txt
│   ├── manifest.yaml
│   ├── template.description
│   ├── terraform.tf
│   └── values.hcl
└── package
I'll explain the details. It has two parts. circuit and package. circuit include config file, and package includes Azure Functions zip files. I'll explain the these files.
| File name | Description |
|---|---|
| NOTE.txt | The template which is printed after the install. It can include the end point of the Azure Functions. (Currently not implemented. I'll implement it soon.) |
| manifest.yaml | Configration file of the package. |
| template.description | Description text file of this package. |
| terraform.tf | Terraform deployment script |
| values.hcl | Variables which you can change when you execute strikes install. It also includes default value |
You can find the example in samples dir.
Once you create the package, you can publish it to the repository.
strikes push -p [Package dir]
It will your package to the respository.
I'd happy to get contributors on this repo. If you add new contribution of this repo, feel free to send a pull request. However, currently, this repo is Private Preview I might change the UI or structure of the data or backend system. If you want to join this development, feel free to contact me with SNS. My twitter account is @sandayuu .
You need go lang (I currently using 10.3 however, don't care to try latest version.) and dep as the pacakge management system. Also, Terraform. That's it. If you want to contribute the Repository (backend server.) This is written by Azure Functions (C# precompiled V2.) You can refer Strikes Repository. I'm hosting Strikes Repository.
This is the procedure on Mac. However, you can do the same thing to Windows, and Linux.
$ cd $GOPATH
$ mkdir -p src/github.com/TsuyohsiUshio/
$ cd src/github.com/TsuyoshiUshio
$ git clone git@github.com:TsuyoshiUshio/strikes.git
$ cd strikes
$ dep ensure
$ go build cmd/strikes/
You can find several templates under the strikes / template / templates This template is included on the strikes binary. I'm using vfsgen for this purpose. If you add / change the templates, then you want to reflect to the binary, Just execute
go run template/cmd/generate.go
It will generate template/assets/assets.go file. Dont' edit this. Then build the binary. Then you can get the new templates. :)
You can output detail log for development purpose.
export ST_LOG=DEUBGYou can find it in cmd/strikes/main.go.
Unfortunatelly I don't implemnet CD for strikes. (I do for Strikes Repository.) However I implement CI with Azure DevOps. I do build with coverage report. If you send pull request, it will trigger the CI and check if it is successfully built or not. You can refer the configration on azure-pipeline.yml
ARM is cool as a backend architecture. However, IMO it is not human readable. I'm planning implement ARM provider, however Terraform has a lot of advantages. You can find the Azure Resource Provider for the detail and great example.
- Simple.
- Human friendly (They are using HCL).
- Easy to install. Just a single binary.
- Actively integrate with Azure (e.g. You can use it on the Azure Cloud Shell.)
- Flexibility (It can use ARM template, execute local command to configre something etc...)
- Work fine on any platform!