From now on,writing brief,elegant,future-oriented CSS.
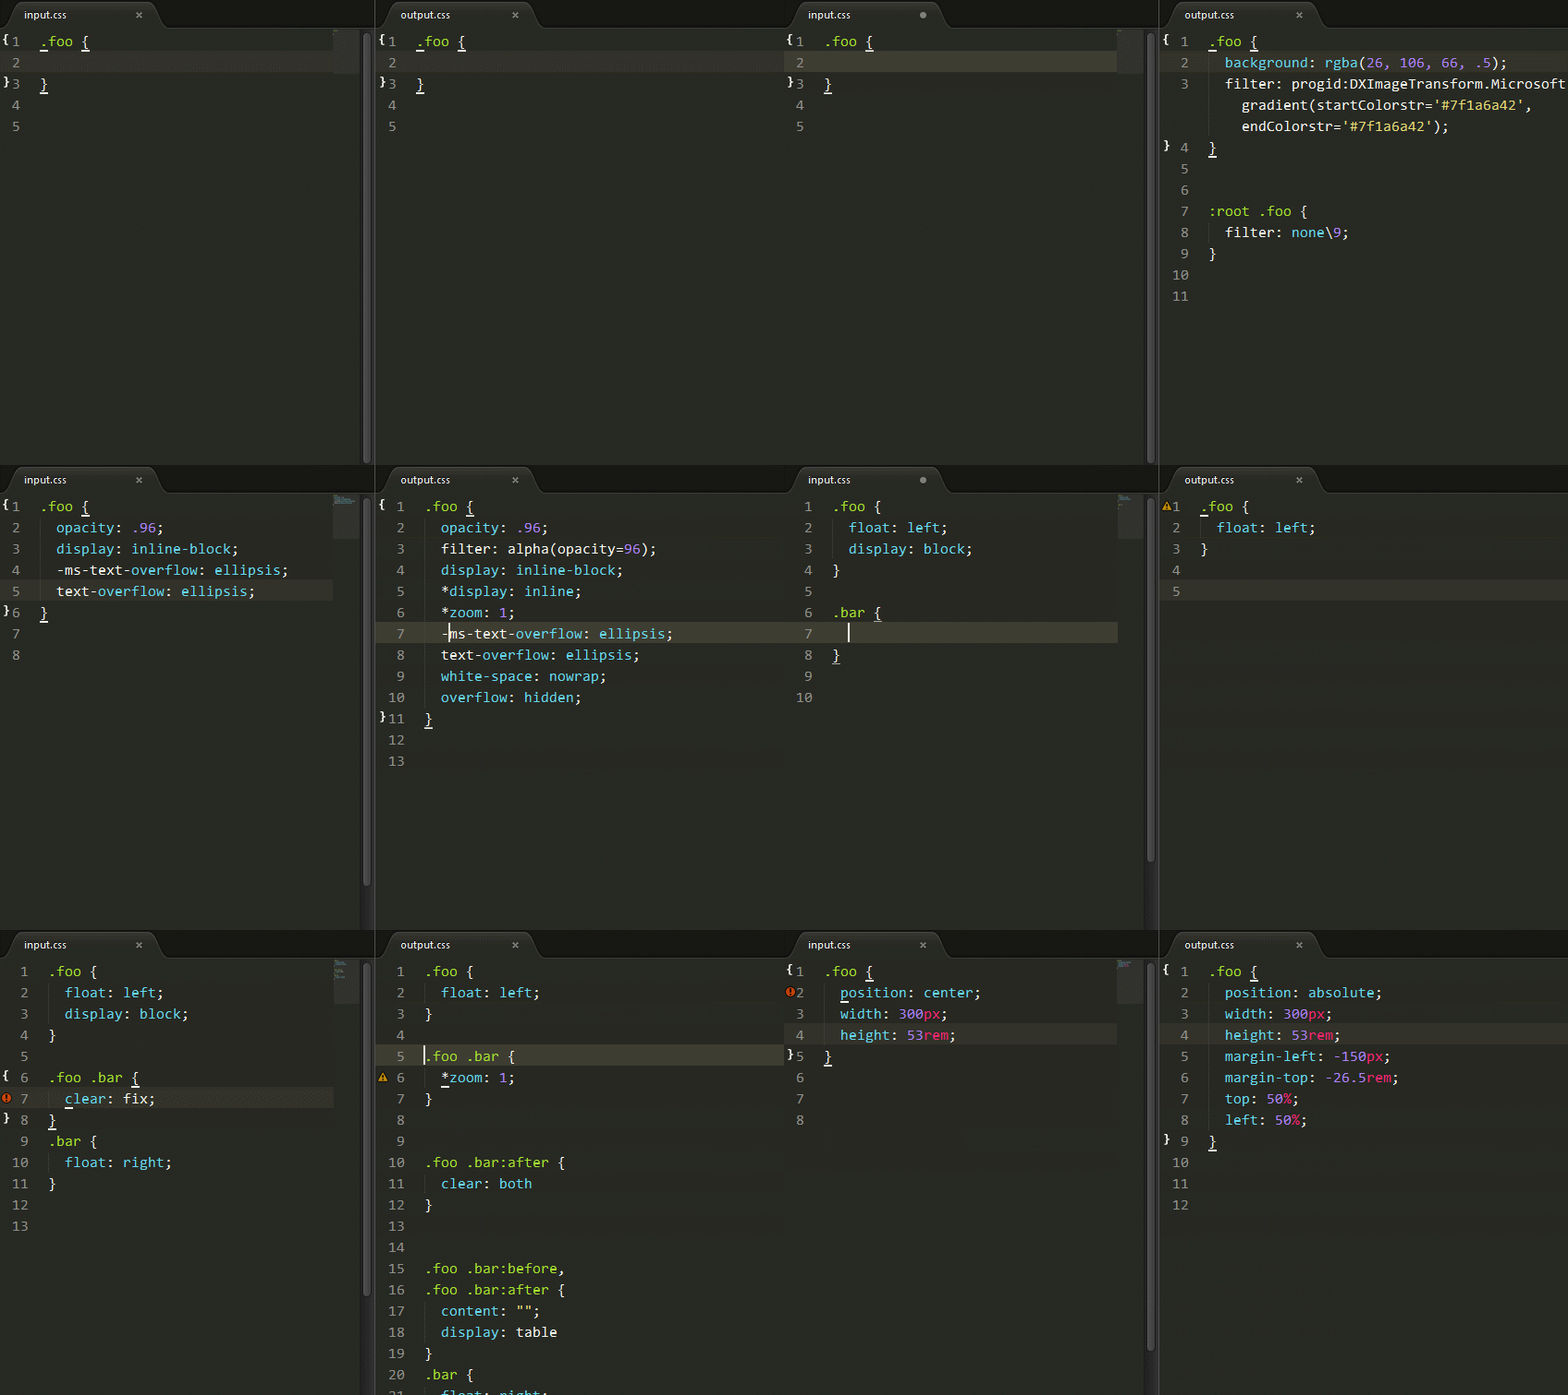
CSS Grace is a plugin for PostCSS.It does not change the original grammar CSS, let CSS to write more simple and more elegant。
-
Download and install Node.js.
-
Installation cssgrace.
npm install cssgrace- test.js
npm install chokidarvar fs = require('fs')
var cssgrace = require('cssgrace')
var src = 'src/input.css'
console.info('Watching…\nModify the input.css and save.')
chokidar.watch(src, {
ignored: /[\/\\]\./,
persistent: true
}).on('all',
function(event, path, stats) {
var css = fs.readFileSync(src, 'utf8')
fs.writeFileSync('build/output.css', cssgrace.pack(css))
})- input.css:
.foo::after {
  position: center;
  width: 210px;
  height: 80px;
  background: rgba(112, 26, 0, .3);
}

.bar {
  display: inline-block;
  opacity: .5;
}
node test,we will getoutput.css.
.foo:after {
  position: absolute;
  left: 50%;
  top: 50%;
  margin-left: -105px;
  margin-top: -40px;
  width: 210px;
  height: 80px;
  background: rgba(112, 26, 0, .3);
  filter: progid:DXImageTransform.Microsoft.gradient(startColorstr='#4c701a00', endColorstr='#4c701a00');
}

:root .foo:after {
  filter: none\9;
}

.bar {
  display: inline-block;
  *display: inline;
  *zoom: 1;
  opacity: .5;
  filter: alpha(opacity=50);
}var fs = require('fs')
var chokidar = require('chokidar')
var postcss = require('postcss')
var cssgrace = require('cssgrace')
var nested = require('postcss-nested') //CSS 代码嵌套
var minmax = require('postcss-media-minmax') //使用 >=/<= 代替 @media 中的 min-/max
var selector = require('postcss-custom-selectors') //自定义选择器
var src = 'src/input.css'
console.info('Watching…\nModify the input.css and save.')
chokidar.watch(src, {
ignored: /[\/\\]\./,
persistent: true
}).on('all',
function(event, path, stats) {
var css = fs.readFileSync(src, 'utf8')
var output = postcss()
.use(minmax())
.use(cssgrace)
.use(selector())
.use(nested)
.process(css)
.css;
fs.writeFileSync('build/output.css', output)
})npm install grunt-postcss
module.exports = function(grunt) {
  grunt.initConfig({
    pkg: grunt.file.readJSON('package.json'),
    postcss: {
      options: {
        processors: [
          require('postcss-custom-selector')(),
          require('cssgrace'),
        ]
      },
      dist: {
        src: ['src/*.css'],
        dest: 'build/grunt.css'
      }
    }
  });

  grunt.loadNpmTasks('grunt-contrib-uglify');
  grunt.loadNpmTasks('grunt-postcss');

  grunt.registerTask('default', ['postcss']);
}npm install gulp-postcss
var gulp = require('gulp');
var rename = require('gulp-rename');
var postcss = require('gulp-postcss');
var cssgrace = require('cssgrace');
var autoprefixer = require('autoprefixer-core')

gulp.task('default', function () {
    var processors = [
        require('cssgrace')
    ];
    gulp.src('src/input.css')
        .pipe(postcss(processors))
        .pipe(rename('gulp.css'))
        .pipe(gulp.dest('build'))
});
gulp.watch('src/*.css', ['default']);input:
.foo {
  background-image: -webkit-image-set(
                    url(./test/img/yuxifan@1x.jpg) 1x,
                    url(./test/img/yuxifan@2x.jpg) 2x);
}
output:
.foo {
  background-image: url(./test/img/yuxifan@1x.jpg); /* Fallback */
  background-image: -webkit-image-set(
                    url(./test/img/yuxifan@1x.jpg) 1x,
                    url(./test/img/yuxifan@2x.jpg) 2x);
}
@media
  only screen and (-o-min-device-pixel-ratio: 2/1),
  only screen and (min--moz-device-pixel-ratio: 2),
  only screen and (-moz-min-device-pixel-ratio: 2),
  only screen and (-webkit-min-device-pixel-ratio: 2),
  only screen and (min-resolution: 192dpi),
  only screen and (min-resolution: 2dppx) {
  .foo {
    background-image: url(./test/img/yuxifan@2x.jpg);
    background-size: 320px 427px;
}
}Using the image-width and image-height to obtain the image's width or height.
input:
.foo {
  background: url(./test/img/post-and-pre.png);
  width: image-width;
  height: image-height;
}

.foo {
  background: url(./test/img/post-and-pre.png);
  margin: image-width image-height -image-height;
  content: 'image-width';
}
output:
.foo {
  background: url(./test/img/post-and-pre.png);
  width: 720px;
  height: 719px;
}

.foo {
  background: url(./test/img/post-and-pre.png);
  margin: 720px 719px -719px;
  content: 'image-width';
}input:
.foo {
  clear: fix;
}
output:
.foo {
  *zoom: 1;
}
.foo:after {
  clear: both;
}
.foo:before,
.foo:after {
  content: '';
  display: table;
}
If there is already can remove floating property, don't generate compatible code.
input:
.foo {
  clear: fix;
  overflow: hidden;
}
output:
.foo {
  overflow: hidden;
}Automatic calculation of margin value, the mother will never have to worry about my math is not good.
input:
.foo {
  position: center;
  width: 300px;
  height: 123px;
}
output:
.foo {
  position: absolute;
  left: 50%;
  top: 50%;
  margin-left: -150px;
  margin-top: -61.5px;
  width: 300px;
  height: 123px;
}input:
.foo {
  position: absolute;
  display: block;
}

.foo {
  position: center;
  display: block;
}

.foo {
  float: left;
  display: block;
}
output:
.foo {
  position: absolute;
}

.foo {
  position: center;
}

.foo {
  float: left;
}Remove float: left|right.
input:
.foo {
  position: absolute;
  float: left;
}
output:
.foo {
  position: absolute;
}input:
.foo {
  resize: vertical;
}

.foo {
  resize: both;
  overflow: hidden;
}
output:
.foo {
  resize: vertical;
  overflow: auto;
}

.foo {
  resize: both;
  overflow: hidden;
}input:
.foo {
  text-overflow: ellipsis;
}

.foo {
  text-overflow: ellipsis;
  overflow: auto;
  white-space: normal;
}
output:
.foo {
  text-overflow: ellipsis;
  white-space: nowrap;
  overflow: hidden;
}

.foo {
  text-overflow: ellipsis;
  overflow: hidden;
  white-space: nowrap;
}input:
.foo {
  opacity: .6;
}

.foo {
  opacity: 0.8293;
}
output:
.foo {
  opacity: .6;
  filter: alpha(opacity=60);
}

.foo {
  opacity: 0.8293;
  filter: alpha(opacity=83);
}input:
.foo {
  background: rgba(153, 85, 102, 0.3);margin
}
output:
.foo {
  background: rgba(153, 85, 102, 0.3);
  filter: progid:DXImageTransform.Microsoft.gradient(startColorstr='#4c995566', endColorstr='#4c995566');
}

:root .foo {
  filter: none\9;
}input:
.foo {
  display: inline-block;
}
output:
.foo {
  display: inline-block;
  *display: inline;
  *zoom: 1;
}- Install all the dependent modules.
- Respect the coding style (Use EditorConfig).
- Add test cases in the test directory.
- Run the test cases.
$ git clone https://github.com/postcss/postcss-media-minmaxs.git
$ git checkout -b patch
$ npm install
$ npm test


