Simple library for building Go command-line interfaces.
Disgo provides four essential features for most user-friendly CLI applications:
- Simple output levels
- Output formatting
- Step-by-step outputs
- Simple user prompting
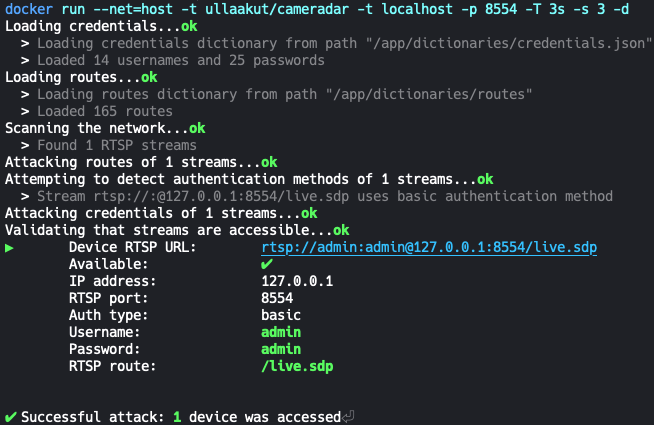
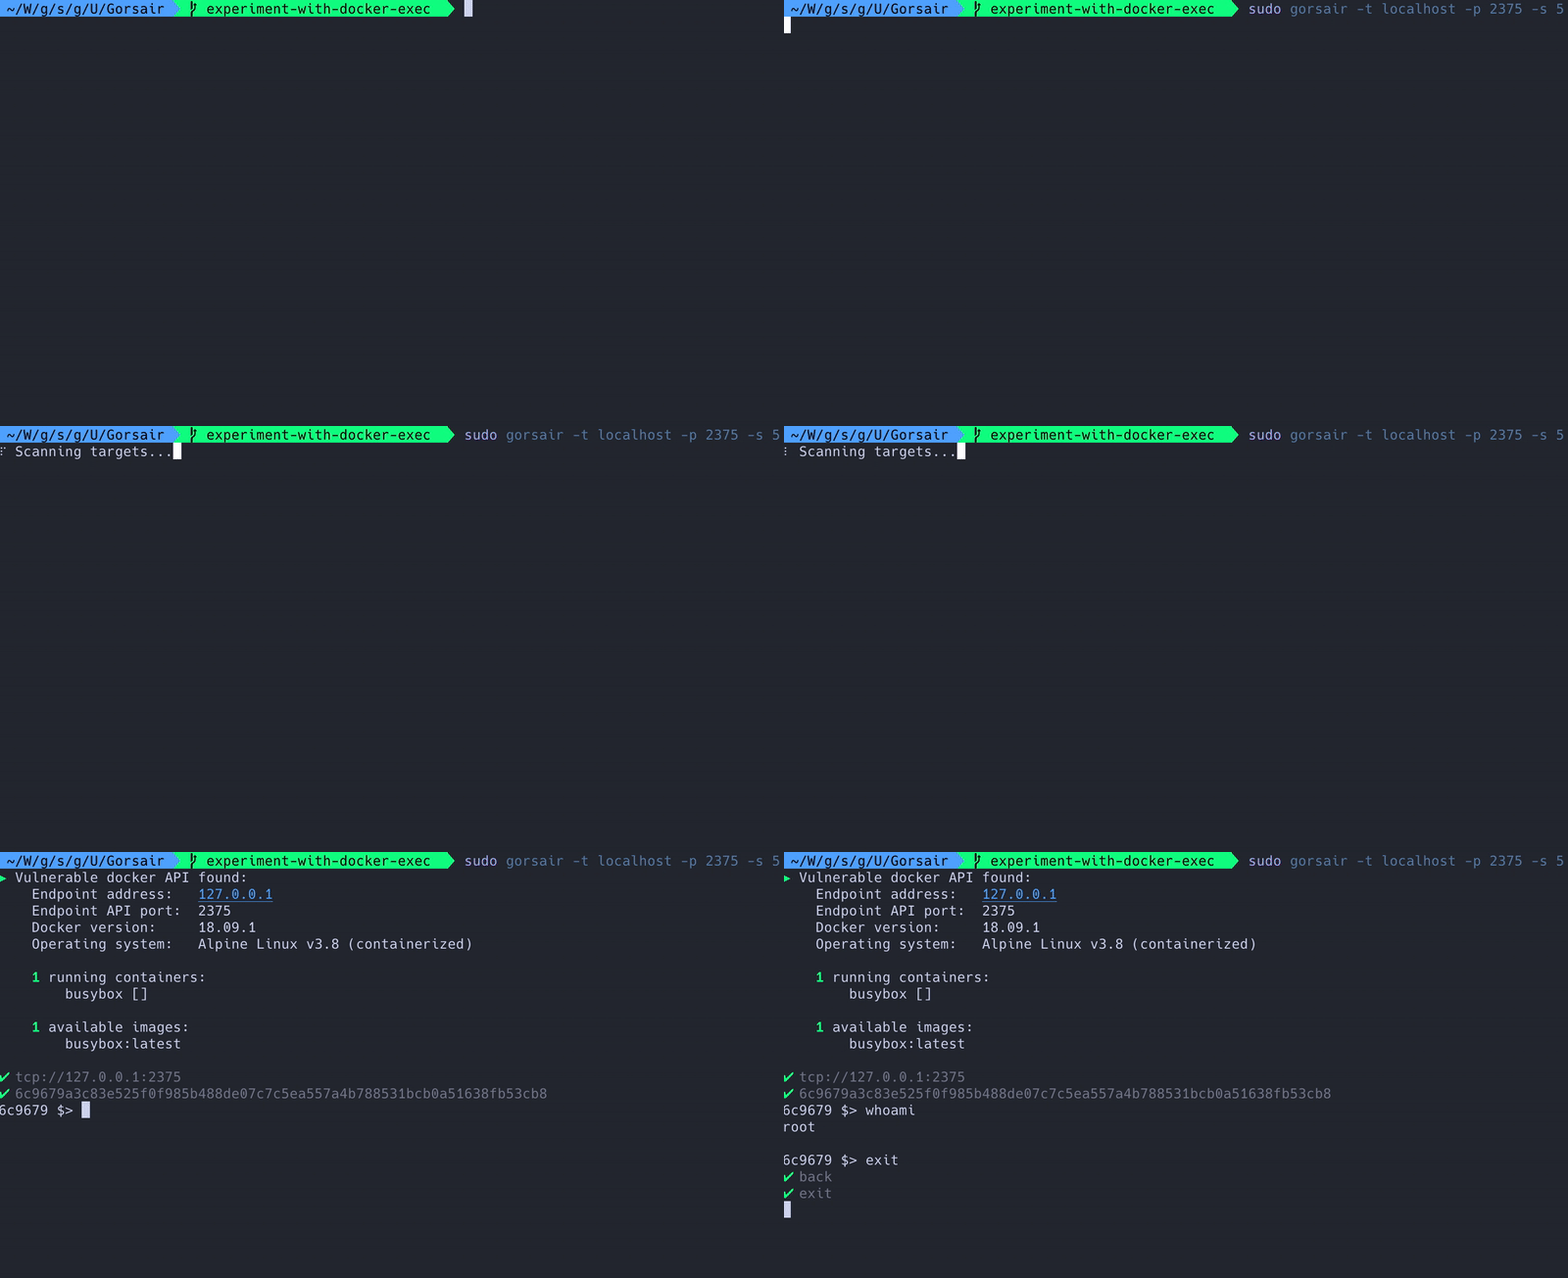
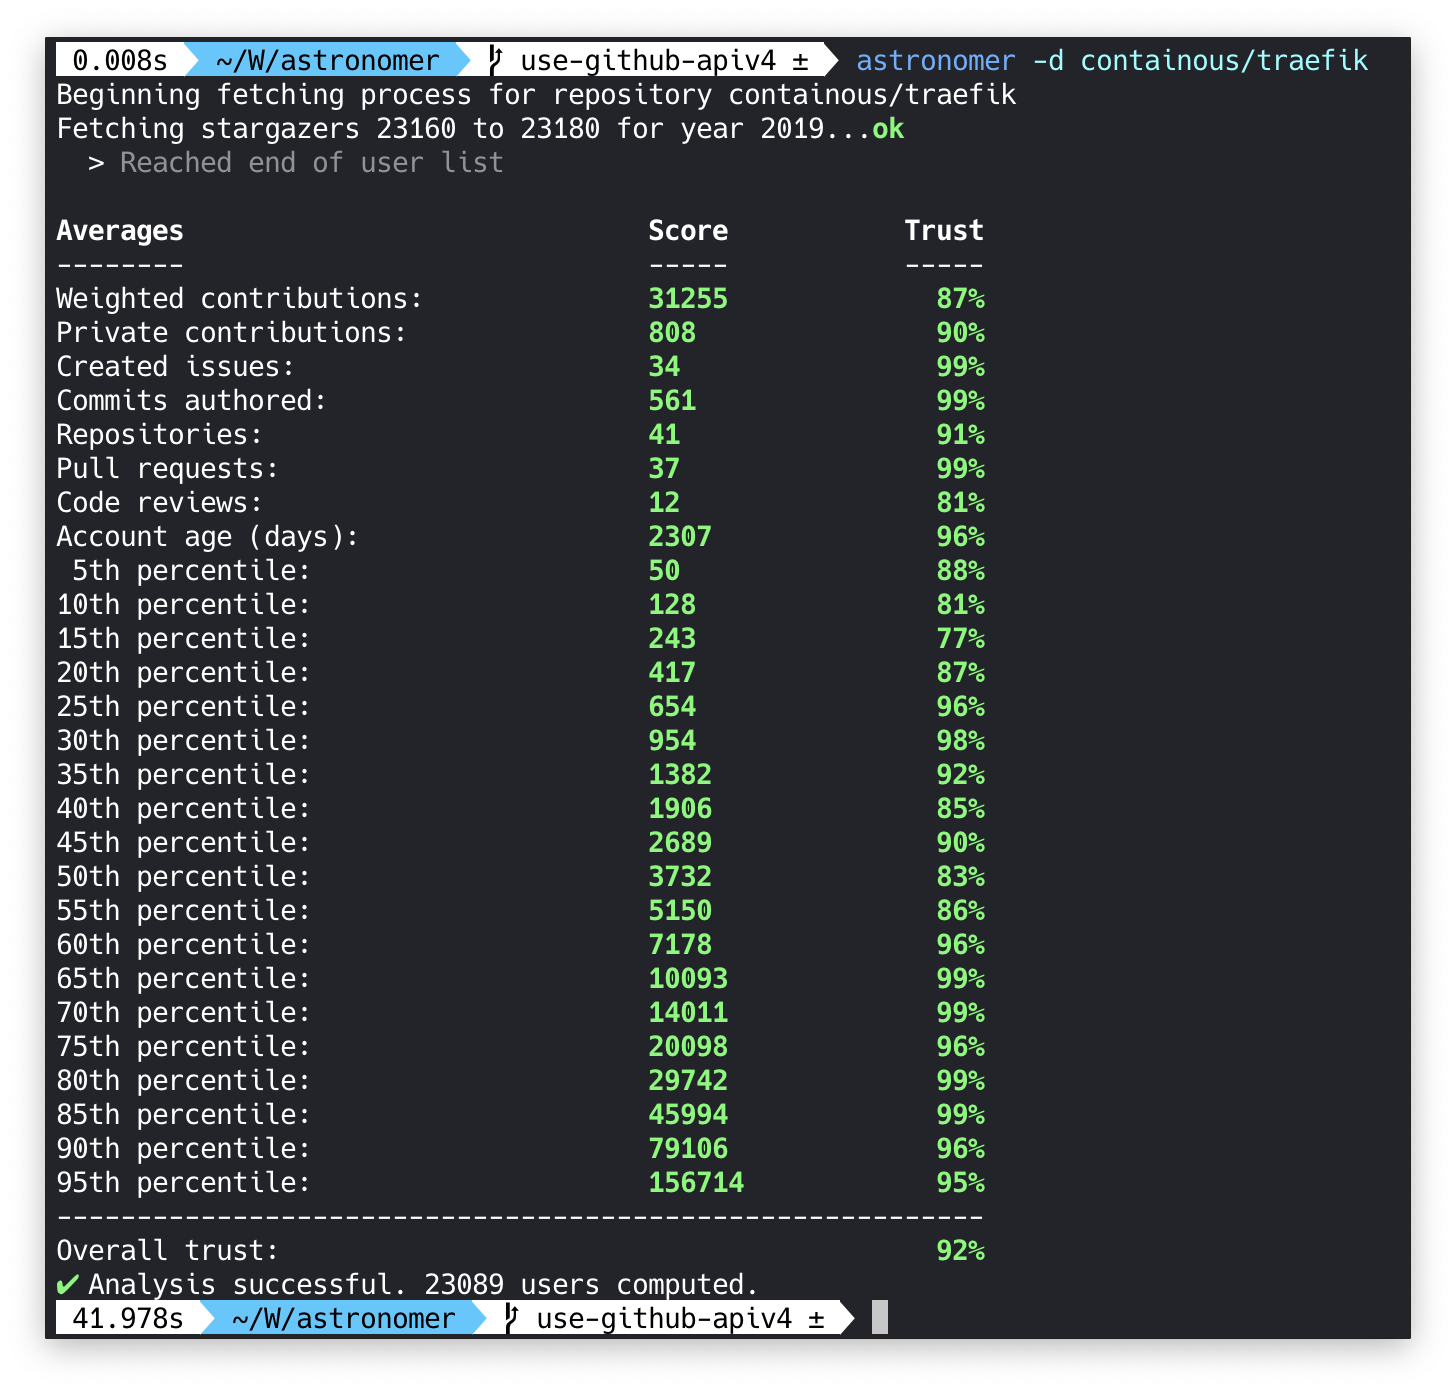
Here are a few examples of Disgo's output, used by other repositories:
The disgo Terminal provides an easy way to build user-friendly command-line interfaces.
You can use it globally within your application, or you can instantiate your own Terminal.
When creating a Terminal instance or when using the global Terminal that this package provides, you might want to give it some options, such as:
WithDebug, which lets you enable or disable the debug output (it is disabled by default)WithDefaultWriter, which lets you specify anio.Writeron whichDebugandInfo-level outputs should be written (it is set toos.Stdoutby default)WithErrorWriter, which lets you specify anio.Writeron whichError-level outputs should be written (it is set toos.Stderrby default)WithReader, which lets you specify anio.Readerfrom which the Terminal will be able to prompt the user (it is set toos.Stdinby default)WithColors, which lets you explicitely enable or disable colors in your output (it is enabled by default)WithInteractive, which specifies whether the Terminal should run in an interactive way, meaning prompts should wait for user input. If set to false, prompts will instantaneously returns their configured default value (it is set totrueby default)
You can either pass those options to disgo.NewTerminal() when creating a Terminal instance, like so:
term := disgo.NewTerminal(disgo.WithDebug(true))Or, if you are using the global terminal, you will simply need to call the SetTerminalOptions function:
disgo.SetTerminalOptions(disgo.WithDebug(true))Now that your terminal is set up, you can start writing to it.
Here is how to use them on an instantiated terminal:
    // All of those give the same output:
    // "Number of days in a year: 365" followed by a newline.
    term.Infoln("Number of days in a year:", 365)
    term.Infof("Number of days in a year: %d\n", 365)
    term.Info("Number of days in a year: 365\n")

    // Debug methods are similar to info, except that they are not printed
    // if debug outputs are not enabled on the terminal.
    term.Debugln("Number of days in a year:", 365)
    term.Debugf("Number of days in a year: %d\n", 365)
    term.Debug("Number of days in a year: 365\n")

    // Error methods are similar to info, except that they are written on
    // the error writer (os.Stderr by default).
    term.Errorln("Number of days in a year:", 365)
    term.Errorf("Number of days in a year: %d\n", 365)
    term.Error("Number of days in a year: 365\n")
When using the global terminal, call the terminal printing functions directly:
    // All of those give the same output:
    // "Number of days in a year: 365" followed by a newline.
    disgo.Infoln("Number of days in a year:", 365)
    disgo.Infof("Number of days in a year: %d\n", 365)
    disgo.Info("Number of days in a year: 365\n")

    // Debug methods are similar to info, except that they are not printed
    // if debug outputs are not enabled on the terminal.
    disgo.Debugln("Number of days in a year:", 365)
    disgo.Debugf("Number of days in a year: %d\n", 365)
    disgo.Debug("Number of days in a year: 365\n")


    // Error methods are similar to info, except that they are written on
    // the error writer (os.Stderr by default).
    disgo.Errorln("Number of days in a year:", 365)
    disgo.Errorf("Number of days in a year: %d\n", 365)
disgo.Error("Number of days in a year: 365\n")A lot of command-line interfaces describe step-by-step processes to the user, but it's difficult to combine clean code, clear output and elegant user interfaces. Disgo attempts to solve that problem by associating steps to its terminal.
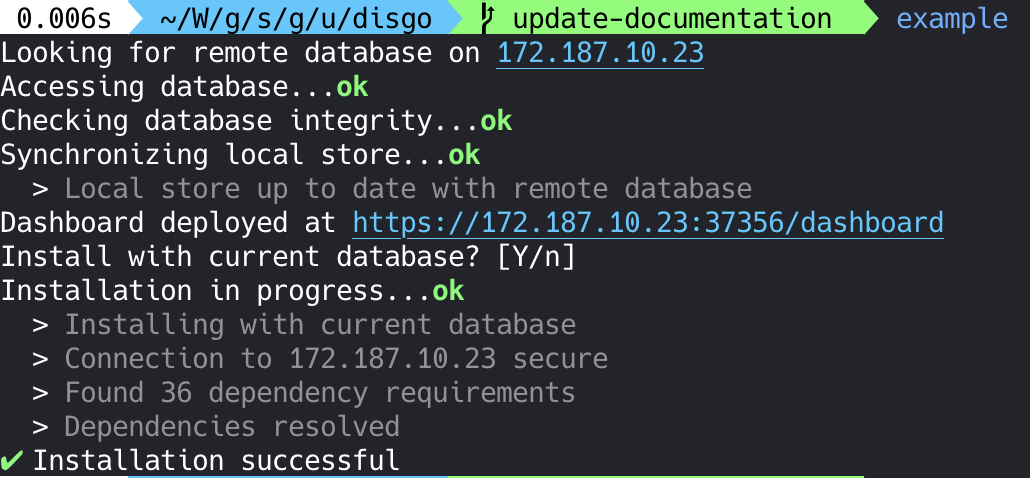
For example, when beginning a task, you can use StartStep and specify the description of that step. Then, until that task is over, all calls to Disgo's printing functions will be queued. Once the task is complete (by calling EndStep, FailStep or by starting another step with StartStep), the task status is printed and all of the outputs that were queued during the task are printed with an indent, under the task, like so:
It is also important to note that FailStep and FailStepf can be used to return errors at the same time as they report a step as having failed. This allows you to write:
    disgo.StartStep("Doing something")
    if err := doSomething(); err != nil {
        return disgo.FailStepf("unable to do something: %v", err)
    }
Instead of having to call FailStep in your error handling before returning. You are still free to do so if you prefer, though.
Using the global terminal for step management is not thread-safe though, as it was built with simplicity in mind and can only handle one step at a time.
The confirmation prompt lets you prompt users for a yes or no answer.
    result, err := disgo.Confirm(disgo.Confirmation{
        Label:              "Install with current database?",
    })
Will produce the following output:
Install with current database? [y/n]To which the user can answer by y, n, Y, N, yes, no, YES, NO, 0, 1, true, false, etc.
The confirmation prompt supports default values, like so:
    result, err := disgo.Confirm(disgo.Confirmation{
        EnableDefaultValue: true,
        DefaultValue:       false,
        Label:              "Install with current database?",
    })
This will set the default value to false, so that when the user does not have access to a TTY or that he simply presses enter to skip the prompt, a value of your choosing is used.
It's also possible to add your own confirmation parsers, if you don't want the user to answer to a yes/no question for example. This also means that you can customize the choices that will be presented to the user:
    result, err := disgo.Confirm(disgo.Confirmation{
        Label:              "Install with current database?",
        Choices:            []string{"yes", "no"},
        Parser:             func(input string) (bool, error) {
            switch input {
            case "yes":
                return true, nil
            case "no":
                return false, nil
            default:
                return false, fmt.Errorf("invalid input %q", input)
            }
        },
    })
This will output:
Install with current database? [yes/no]And will use a custom parser for parsing the user's answer.
Not implemented yet.
The style package provides simple output formatting functions as well as some cherry-picked UTF-8 symbols that can be useful for building rich command-line interfaces.
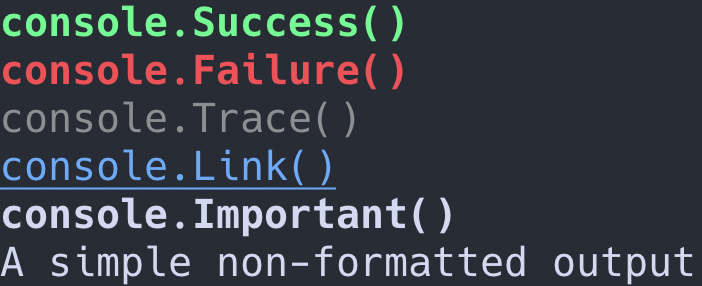
The style package exposes six different output formats, which print its argument with a specific color, font-weight and font-style depending on what the output's content should convey to the user. For example, if you want to attract a user's attention to an error, you might use the style.Failure() formatting function, like so:
    if err := validateConfiguration; err != nil {
        disgo.Errorln("Invalid configuration detected:", style.Failure(err))
        return err
    }
Other output formats include Success, Trace, Important and Link.
You can of course combine those formats in elegant ways, like shown in the examples section.
Disgo provides aliases to UTF-8 characters that could be useful to build your command-line interfaces.
    disgo.Infoln(style.SymbolCheck) // ✔
    disgo.Infoln(style.SymbolCross) // ✖
    disgo.Infoln(style.SymbolLeftArrow) // ❮
    disgo.Infoln(style.SymbolRightArrow) // ❯
    disgo.Infoln(style.SymbolLeftTriangle) // ◀
disgo.Infoln(style.SymbolRightTriangle) // ▶MIT License
Copyright (c) 2019
Permission is hereby granted, free of charge, to any person obtaining a copy of this software and associated documentation files (the "Software"), to deal in the Software without restriction, including without limitation the rights to use, copy, modify, merge, publish, distribute, sublicense, and/or sell copies of the Software, and to permit persons to whom the Software is furnished to do so, subject to the following conditions:
The above copyright notice and this permission notice shall be included in all copies or substantial portions of the Software.
THE SOFTWARE IS PROVIDED "AS IS", WITHOUT WARRANTY OF ANY KIND, EXPRESS OR IMPLIED, INCLUDING BUT NOT LIMITED TO THE WARRANTIES OF MERCHANTABILITY, FITNESS FOR A PARTICULAR PURPOSE AND NONINFRINGEMENT. IN NO EVENT SHALL THE AUTHORS OR COPYRIGHT HOLDERS BE LIABLE FOR ANY CLAIM, DAMAGES OR OTHER LIABILITY, WHETHER IN AN ACTION OF CONTRACT, TORT OR OTHERWISE, ARISING FROM, OUT OF OR IN CONNECTION WITH THE SOFTWARE OR THE USE OR OTHER DEALINGS IN THE SOFTWARE.


