This is an interactive dialogue system which allows audio interactions with in-game NPCs designed for VR (VRTK).
Users will be able to create custom Dialogue trees and traverse said trees using speech.
The NPC will appear to be immersive to the users who strikes a conversation.
- Operating System Requriements: Windows 10
- Minimum Unity Version: Unity 2018.4
- Reccommended VR Headset: Oculus Rift (preferred, for VR)
- Audio Input Device (If no VR Headset)
- Audio output device (If no VR Headset)
- Internet Connectivity
- VRTK (for VR, setup)
- An on-going internet connection
(get user to receive the assets required for the system, and install it)
First open the desired scene to insert the system into. In this case, it will be blank scene.
Within the opened scene, navigate within the Project panel to
Assets\PatientSystem\Prefabs, click the folder and drag the prefab into the Hierarchy.
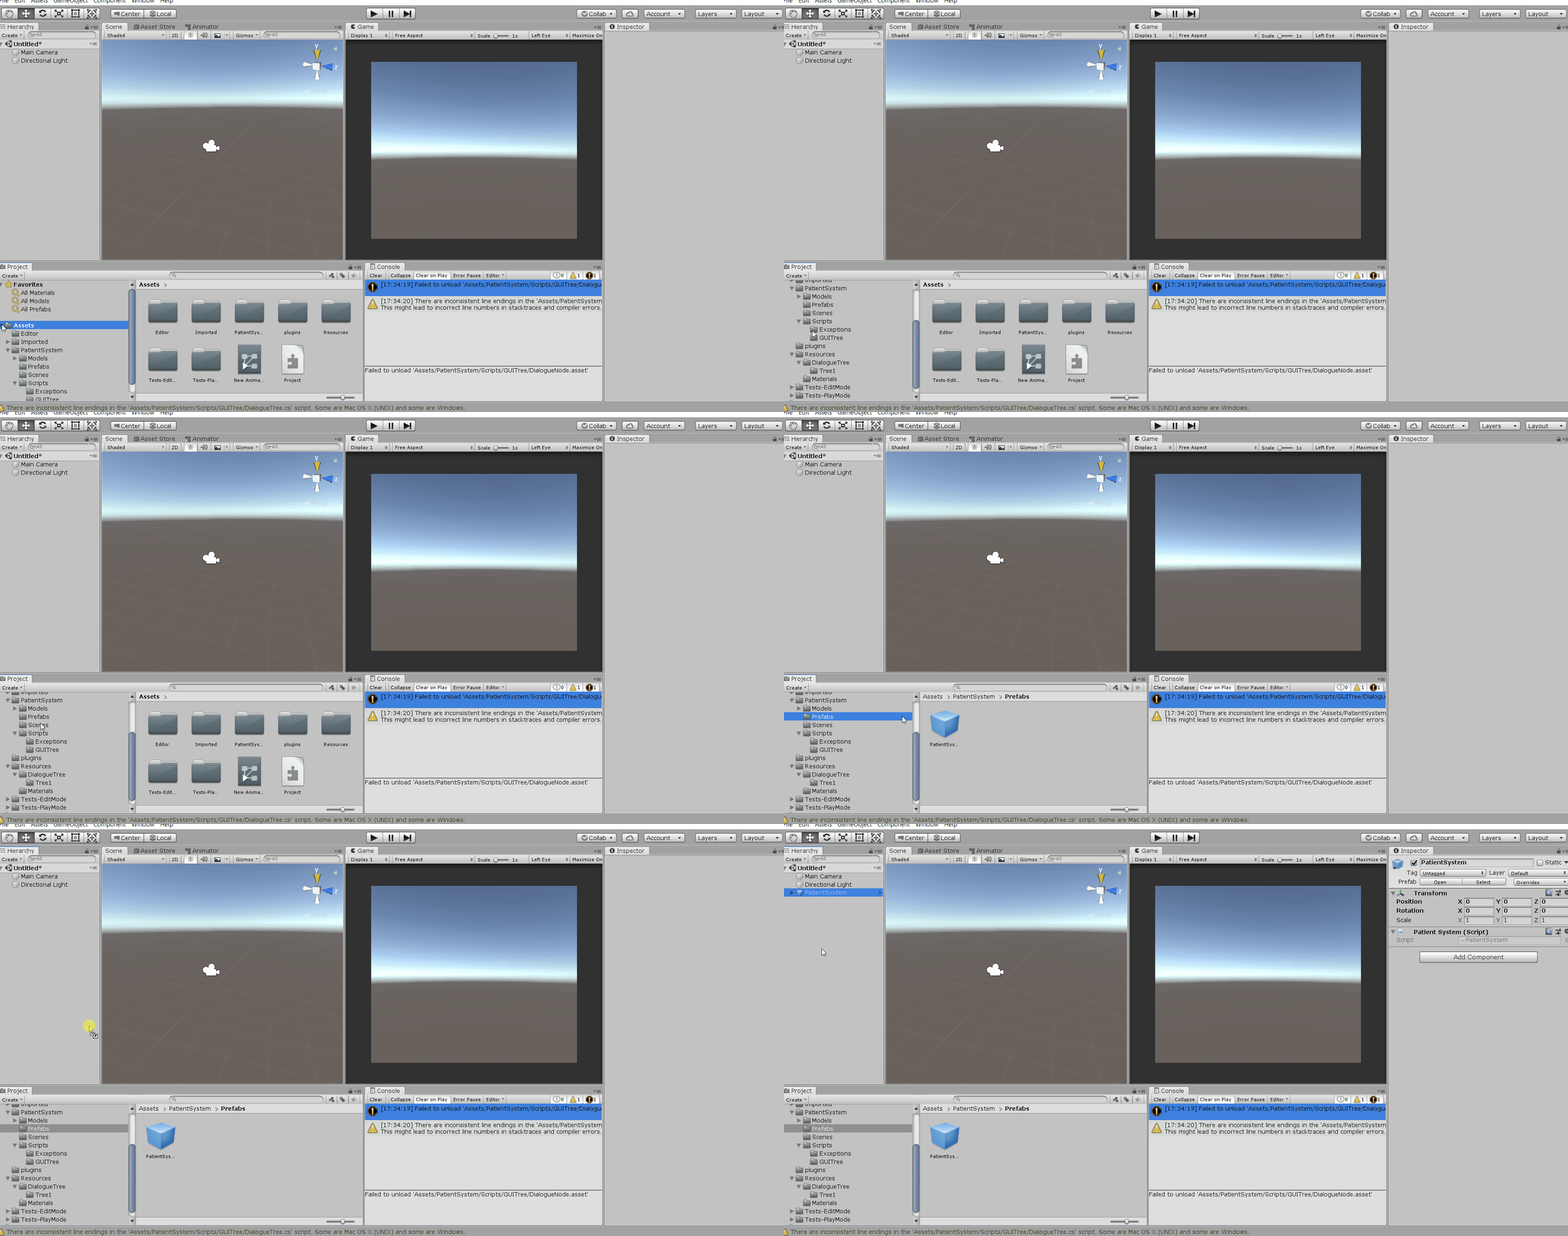 Figure 1: Dragging A prefab into Unity Project Panel
Next, you need a game object that has a Animator component. This is the object that the animations will play on.
Within the Hierarchy, expand the PatientSystem object and open the NPC game object in the Inspector.
Drag the game object with the Animator component onto the Animator field in the Inspector.
(AudioSource is not implemented)
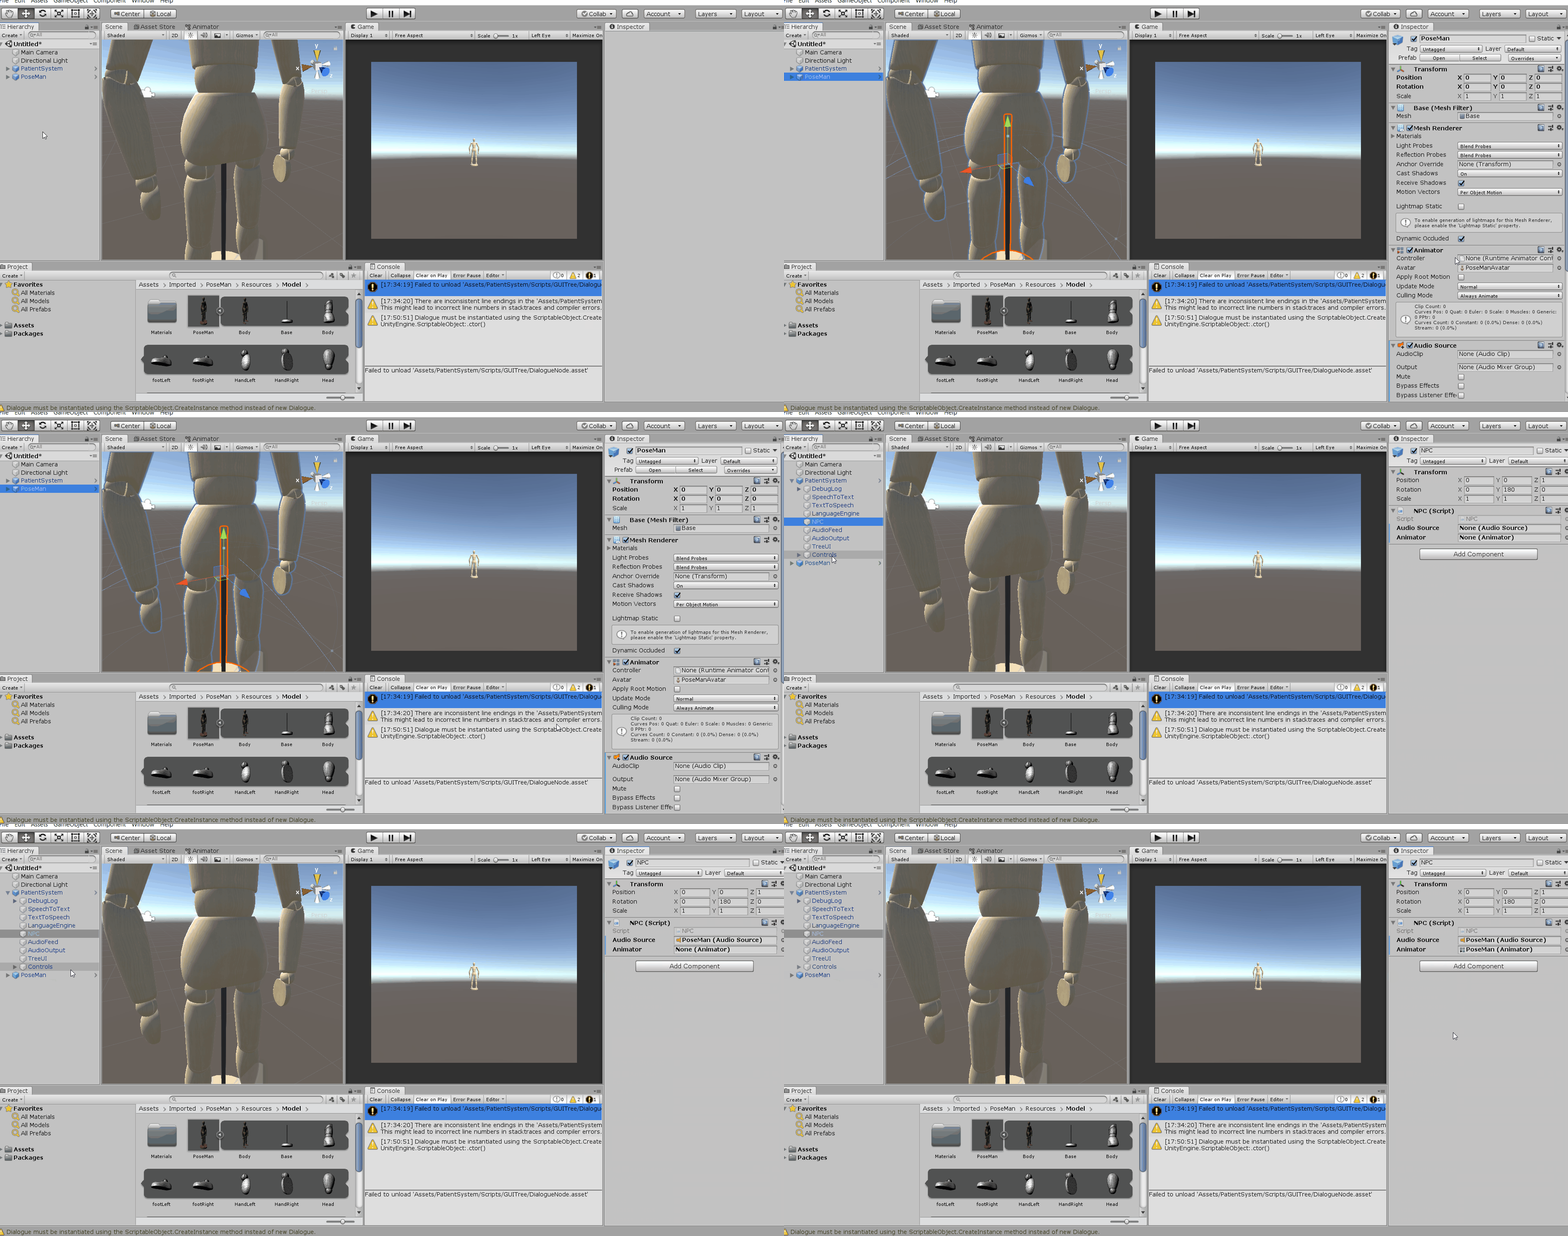 Figure 2: Dragging an animation into a scene
To open the Tree Editor window, click Window in the top menu bar, then click the customGUI option.
The Tree Editor is now open, where all dialog trees will be create and modify various responses.
The left side of the window shows the Dialogue Trees for the project. To create or add a tree, press the Add button.
Once created a new tree will appear within the Tree Editor with an empty NPC prompt. You can click the tree within the list to focus on it.
A grey node is a NPC prompt, this is what the NPC will say to the user and play the given animation (if present).
There is a New Child button to add a user response depicted by the white nodes. If this response is matched by the verbal user input and the language engine, the system will traverse this branch.
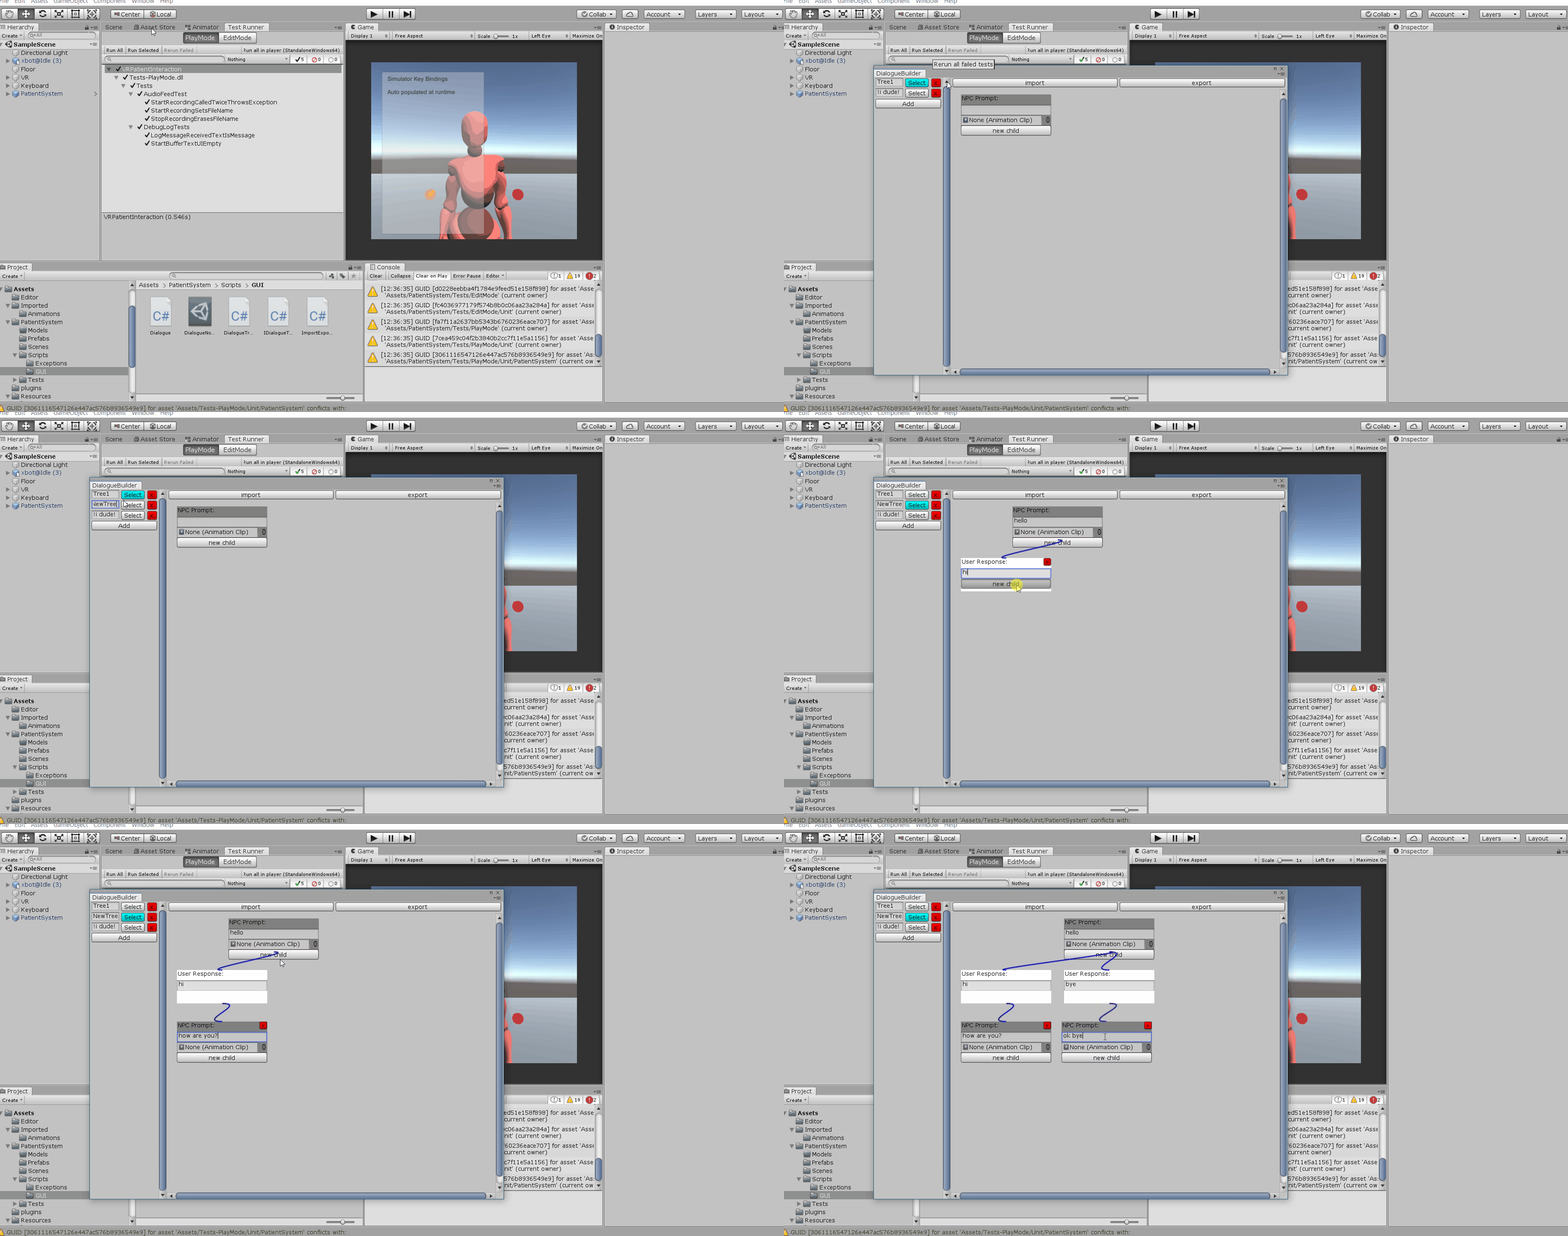 Figure 3: Navigating to a the tree creation menu
Finally, with our newly created Dialogue Tree, the root node now needs to be add the to the TreeUI game object.
First, find the Dialogue node in the Project panel, navigate to Assets\Resources\DialogueTree\TreeX (replace X with your tree number) and click the folder.
In the Hierarchy, expand the PatientSystem game object, and open the TreeUI game object in the Inspector.
Drag the Dialogue (with no numbered node represents root) node from the Project Panel over to the Current Node field in the Inspector.
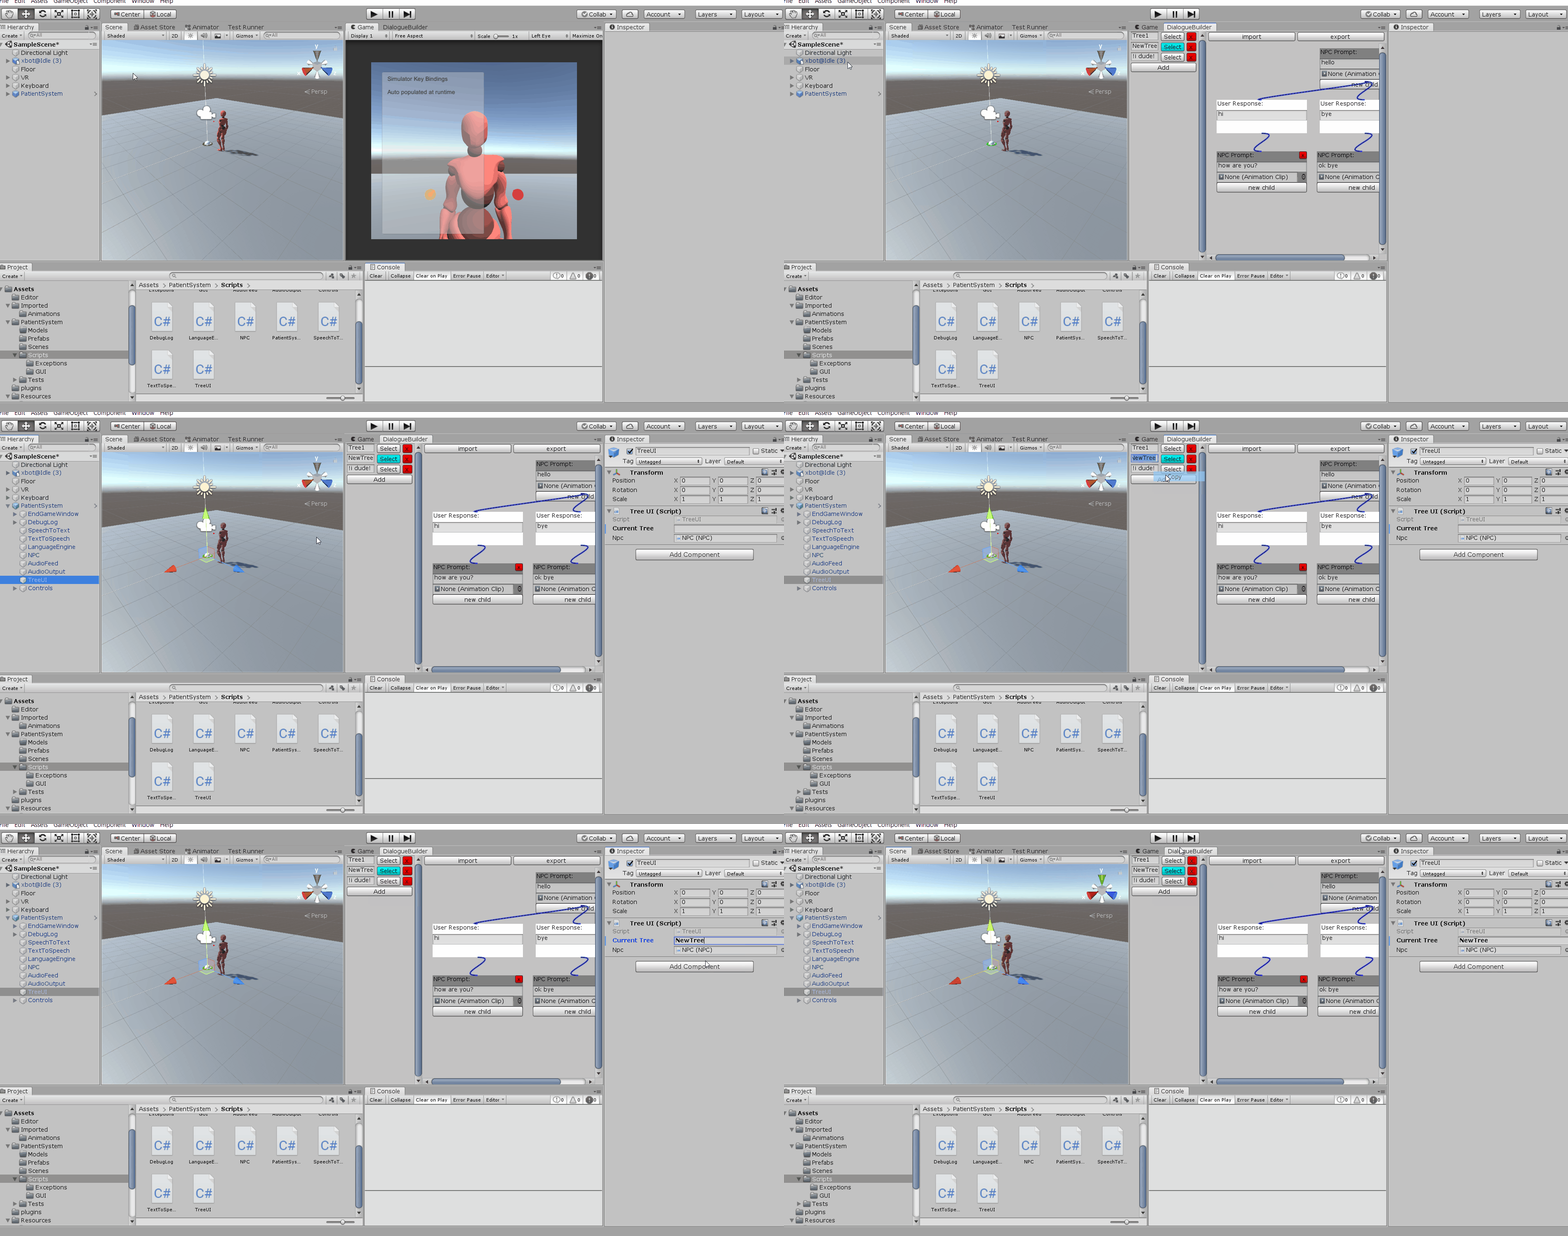 Figure 4: Applying a tree to a scene
The system is now good to go. Once the scene is run, the root Dialogue node's prompt will be said by the NPC.
The user can then give a verbal response to the system and if language engine detects a match, it traverse to that branch.
If no match is found, the NPC will repeat the previous prompt.
Once the tree had hit a leaf node, the NPC will indicate the end of the conversation and the NPC will stop listening for input.
Dictation Support is not enabled on this Device
The Online Speech Recognition option needs to be enabled in Windows.
To do this, open Windows Settings, open the Privacy menu, and the Speech menu, and enable the Online Speech Recognition option.
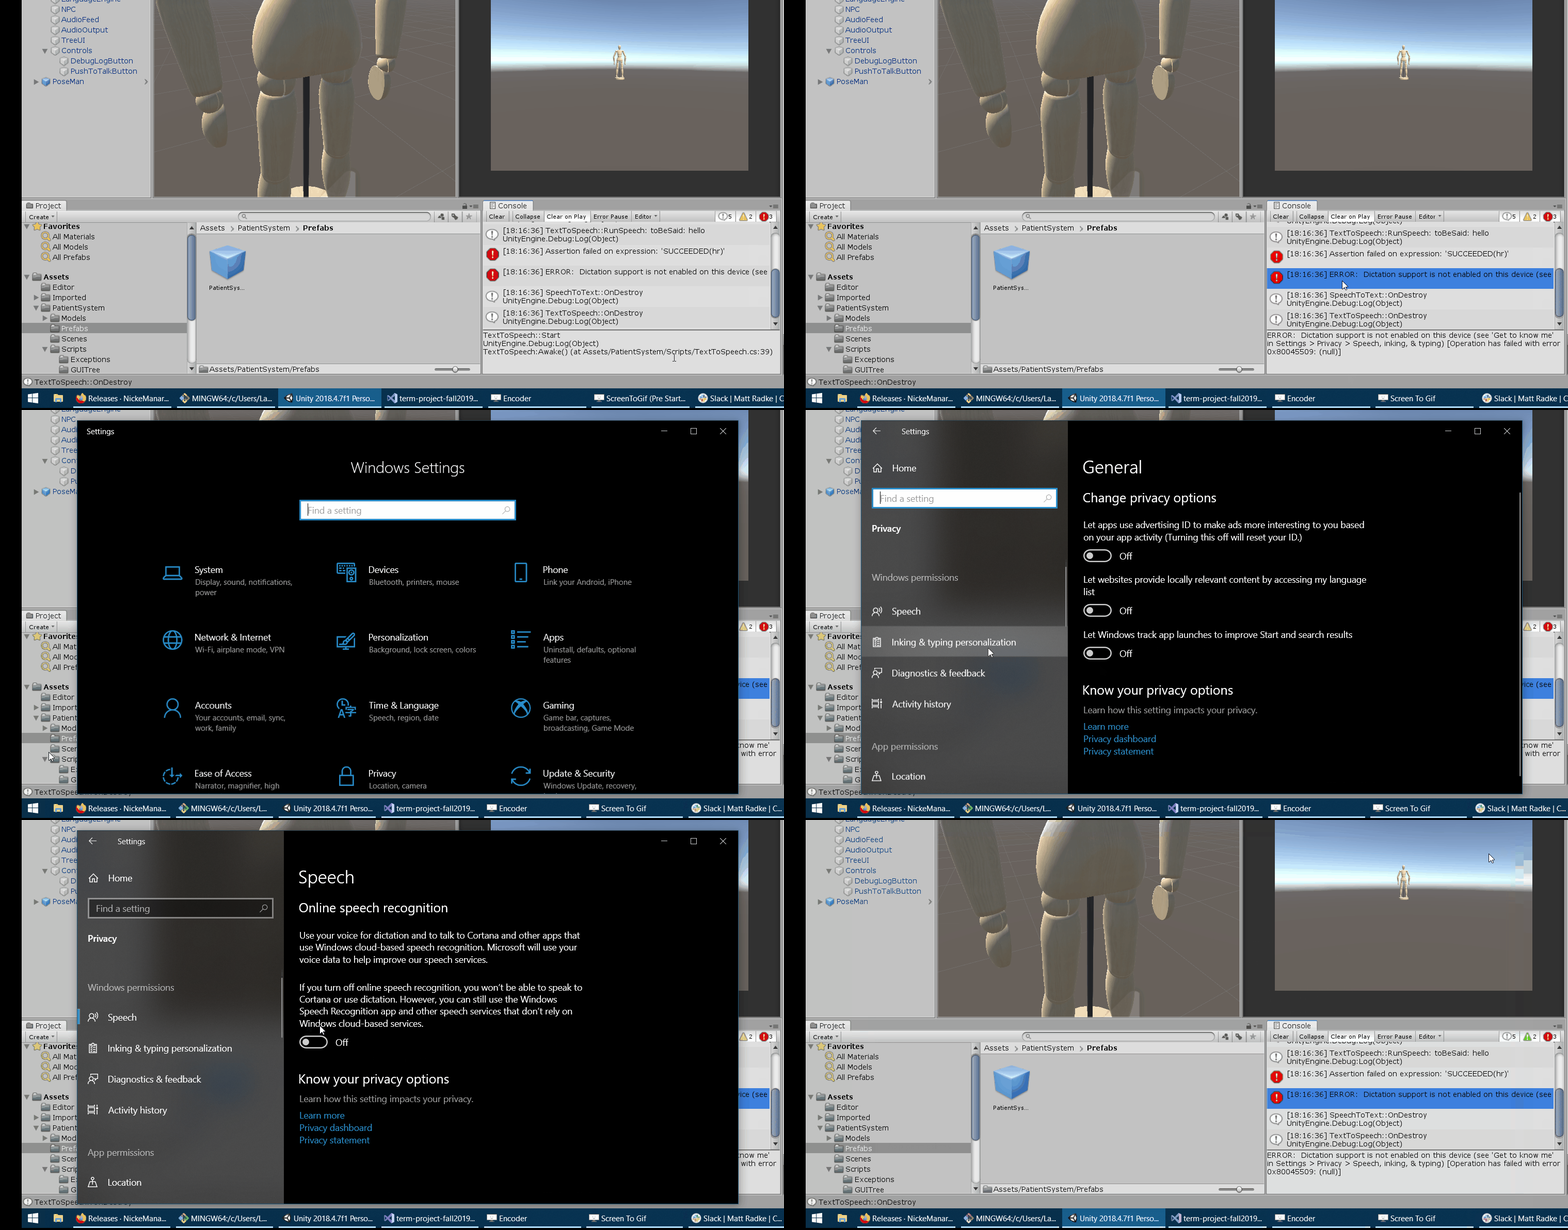 Figure 5: Configuring windows speech libraries
- Sometimes the scroll bars within the tree editor error, shrinking the tree menu to small to see the tree. If this occurs, delete the tree and create a new one.
Scene uses: https://github.com/ExtendRealityLtd/VRTK
(find speechlib, SpVoice object)
Creators:
- Sam Horovatin
- William McGonigal
- Matt Radke
- Mathew Cathcart
- Oluwaseyi Kareem
- Mason Demerais
- Hibatullah
- James Scarrow
- Clayton Vanderstelt