The sections below are:
About
A Django web application to display sensor data on a map and allow comparison with regional estimates.
All data is loaded into the web app's database by the (admin) user at run-time, from 4 CSV files
which comprise 2 data files and 2 metadata files.
Example data files are provided in the /examples folder.
Regional estimates can also be calculated at run-time. The estimation methods are those available in the python library: https://pypi.org/project/region-estimators ('concentric-regions' and 'distance-simple' at time of writing)
Users can also upload their own data locally (within a browser session), again via a CSV file upload, allowing their own data to be compared alongside the actuals/estimates data pre-loaded by admin.
Example screenshots
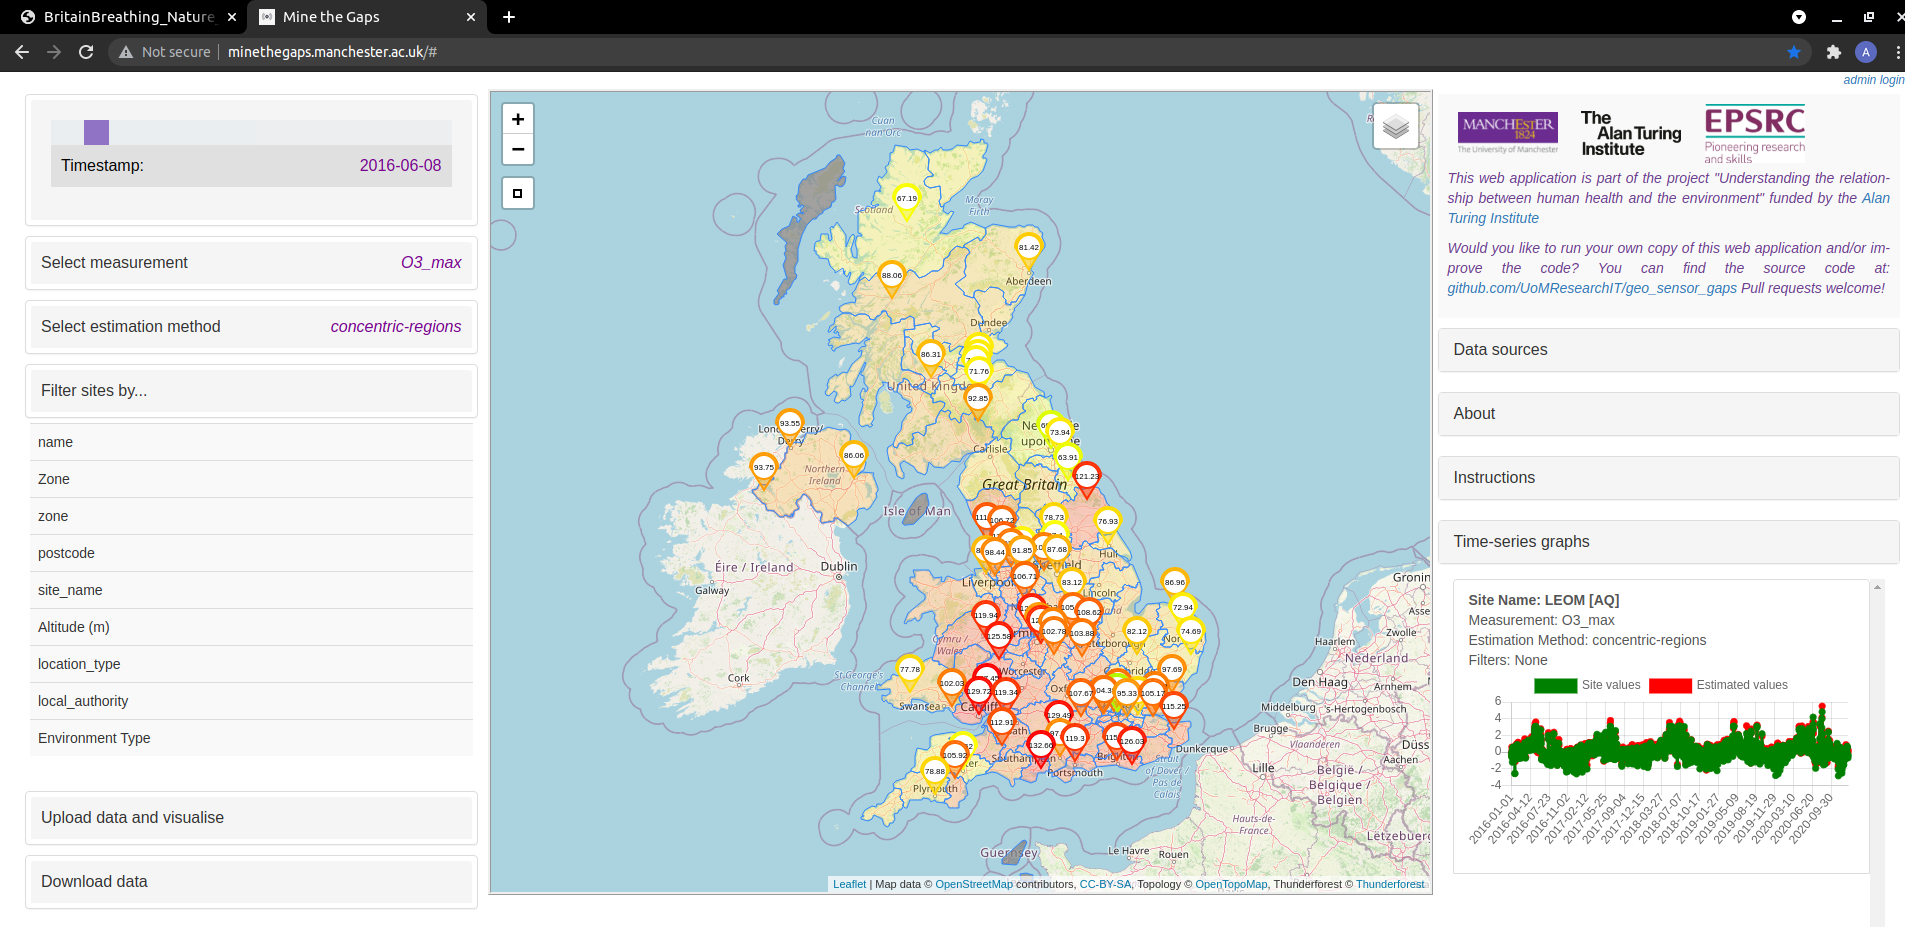
Example with daily UK AQ data
(currently running on our web app deployment: see http://minethegaps.manchester.ac.uk/)

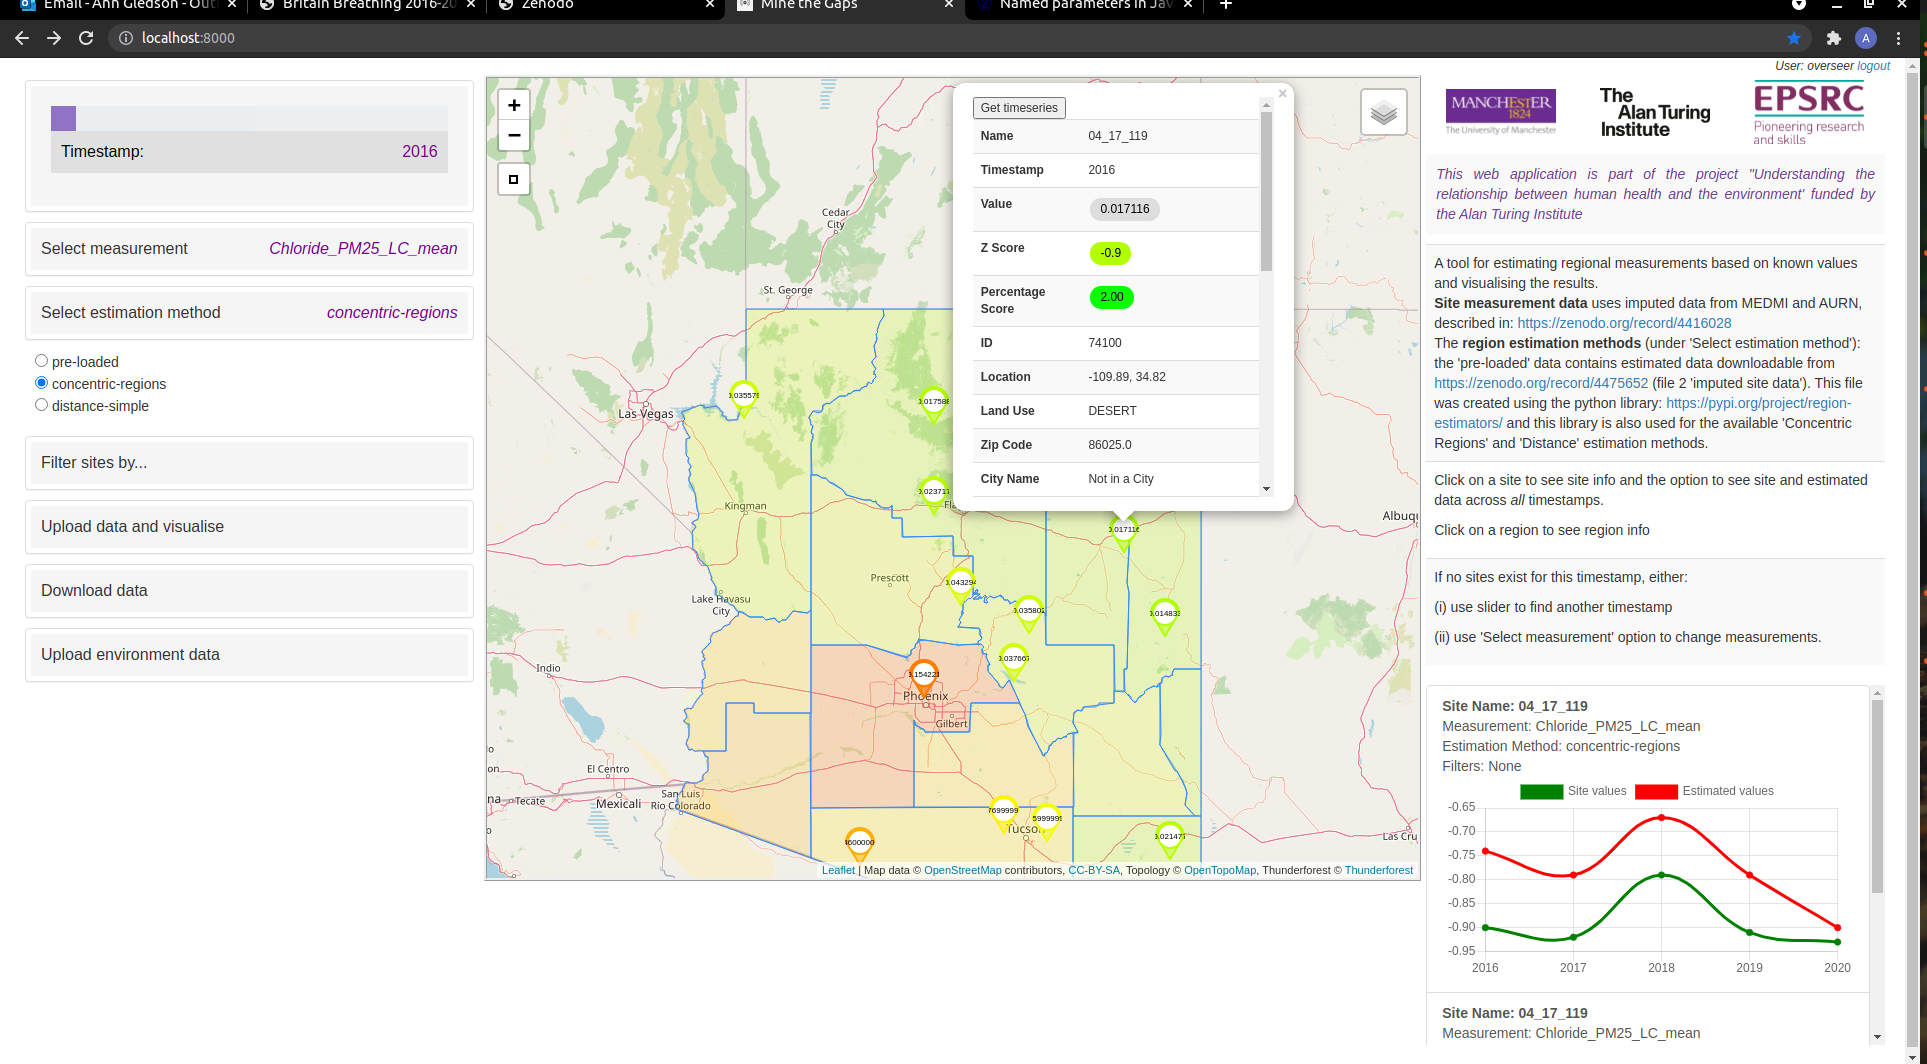
Example with yearly Arizona Chloride PM2.5 LC data
User instructions
See our user instructions readme for general and admin user instructions on how to use this web application (and try this out on our example deployment: mine-the-gaps)
Install and test locally
The following instructions are to get this Django web app running on any machine, using a browser and localhost.
Clone this repository
Make a copy of this code on your computer by:
cd ~/Code/ [cd to a folder on your local machine where you would like to install this code]
and then either:
git clone https://github.com/UoMResearchIT/mine-the-gaps.git
or:
click on 'Code' on this github repository homepage, then 'Download ZIP' and save to your chosen folder. Then extract this zip file.
QUICK START (Makefile) Instructions
These instructions are for Linux, Mac OS and Windows Sub-system Linux users only. We have created a Makefile which you can easily call from the shell. It runs a docker container which runs the Mine-the-Gaps web app, accessible from a browser, at localhost.
Open a shell/command prompt and check you are in the mine-the-gaps project directory:
cd [folder into which you cloned the mine-the-gaps code]/mine-the-gaps
You should be in the same folder as the Makefile file.
Call the Makefile to start the app
make docker-serve
This installs and runs the app on localhost.
Check the app is running
Open a browser and navigate to http://127.0.0.1:8000/ . You should see the mine-the-gaps web app running, but with no
data. (You may need to wait a few seconds and/or refresh the browser.)
Set up super-users (admin users) on the web app (after Makefile/docker quick installation)
To load data into the mine-the-gaps app, an admin user is required. To set up an
admin user (aka superuser), we need to run the Django management tool (which runs within the docker container).
Run:
docker-compose run web python manage.py createsuperuser
This will ask several questions via the command line. Once the superuser is set up,
that user can log in to the web application.
Log in as superuser and upload data
Return to the web application on your browser (localhost:8000) and click on admin login in the
top right-hand side of the main page. Use the new admin log-in credentials to log in.
See our instructions for admin users for admin user instructions on how to use this web application, including how to upload data.
Further details when using the Quick Start set-up (using Makefile and docker)
The docker containers will now run in the background (-d specifies run as detached process)
until they are stopped.
To see a list of all running containers, run either:
docker ps
or
docker container ls
If both containers are running as expected, the output should show the two containers running:
one for the mine-the-gaps_webapp and another for a postgis database image.
The output should look something like:
CONTAINER ID   IMAGE                COMMAND                  CREATED          STATUS          PORTS                                       NAMES
88a4aeebe9a8   mine-the-gaps_web   "/entrypoint /start"     56 minutes ago   Up 56 minutes   0.0.0.0:8000->8000/tcp, :::8000->8000/tcp   mine-the-gaps_web_1
31f5a454ff2b   postgis/postgis      "docker-entrypoint.s…"   56 minutes ago   Up 56 minutes   5432/tcp                                    mine-the-gaps_db_1
If the output does not look like above, then try running:
docker-compose logs -f
which gives you a detailed log file, showing all logs, including errors, for both containers.
To stop the docker container run:
docker-compose down
or
make docker-stop
Note that in the current set-up, once the container is stopped, any admin users and loaded data
(added using instructions below) will be lost.
To clean out the docker settings files run:
make clean
To clean out the docker settings files and the Secret Key, run:
make clean-all
To create a new settings file, run:
make settings
Alternatively, you can open the /geo_sensor_gaps/settings/local.py file to set the SECRET_KEY and the
MAX_NUM_PROCESSORS settings.
To create a new secret key for docker (stored in text file), run:
make keys
Alternatively:
- you can open the
/geo_sensor_gaps/settings/local.pyfile to set theSECRET_KEYsetting. - you can update the secret key in the file
keystring.txt.
To set the maximum number of processors to be used:
Open the /geo_sensor_gaps/settings/local.py file to set the MAX_NUM_PROCESSORS setting.
To access the web app's source code, run:
docker exec -it mine-the-gaps_web_1 /bin/bash
Note: mine-the-gaps_web_1 should match the NAME of the container, listed when you get the list
of all running containers (see above).
Instructions for full database and Django set-up (NOT using Makefile / Docker)
These instructions are based on the Ubuntu OS. They will need to be adapted to run on other Linux distributions, Windows and other OSs.
This web app is tested on python versions 3.7, 3.8 and 3.9
    sudo apt-get update
    sudo apt-get install -y libproj-dev libgeos-dev gdal-bin libgdal-dev libsqlite3-mod-spatialite
    python -m pip install --upgrade pip
Virtual Environment
See https://docs.python.org/3/tutorial/venv.html for instruction on how to set up a virtual environment (recommended). This virtual environment will hold the required version of Python, Django and other necessary modules.
To activate your new virtual environment run:
source venv/bin/activate [Replace 'venv' with the path to your new virtual environment]
Install Django and additional modules.
Ensure that your newly created virtual environment is activated (see above), and then run:
cd [code-directory] [Replace [code-directory] with the path of the project folder that contains requirements.txt]
pip install -r requirements.txt
Install the PostGIS (Spatial PostreSQL database)
As this web app requires geographical functionality, we can't rely only on Django's default database set-up. We require a database that can hold and process geo-spatial data and PostGIS is used for this purpose. For general documentation on PostGIS see https://postgis.net/docs/
Within the above instructions, there are installation instructions found at: https://postgis.net/docs/postgis_installation.html#install_short_version
For instructions on using PostGIS with Django: https://docs.djangoproject.com/en/3.2/ref/contrib/gis/install/postgis/
Add a .envs file
Using the mine-the-gaps/settings/.env.template, copy this file to mine-the-gaps/settings/.env
then fill in the SECRET_KEY value with a newly generated key (string)
(e.g try this online key generator https://djecrety.ir/)
Fill in the other database log-in values with your own: Replace the NAME, USER and PASSWORD values with those set up when you created your PostGIS database in previous step.
GEO_SENSOR_GAPS_SECRET_KEY=[INSERT_YOUR_SECRET_KEY]
GEO_SENSOR_GAPS_ALLOWED_HOSTS=localhost 127.0.0.1 [::1]
GEO_SENSOR_GAPS_SQL_DATABASE=geo_sensor_gaps [OR REPLACE WITH YOUR DB NAME]
GEO_SENSOR_GAPS_SQL_USER=geo_sensor_gaps_user [OR REPLACE WITH YOUR DB USER NAME]
GEO_SENSOR_GAPS_SQL_PASSWORD=[INSERT_YOUR_DB_PASSWORD]
GEO_SENSOR_GAPS_SQL_HOST=localhost
Check Django installation
Ensure your new virtual environment is activated, and then you can check Django is installed using the following online set-up instructions.
Note that Django has already been installed in the previous step https://docs.djangoproject.com/en/3.2/intro/install/
Run the development server
Ensure that the new virtual environment is activated and run:
cd [code-directory] [Replace [code-directory] with the path of the project folder that contains requirements.txt]
optional test:
python manage.py test
and run:
python manage.py runserver
The output to the last command should be similar to:
$ python manage.py runserver

Watching for file changes with StatReloader
Performing system checks...

System check identified no issues (0 silenced).
July 22, 2021 - 16:15:44
Django version 3.2.5, using settings 'mine-the-gaps.settings.dev'
Starting development server at http://127.0.0.1:8000/
Quit the server with CONTROL-C.
Using your browser, navigate to http://127.0.0.1:8000/ (or the link shown in your output) and this should open up the web-application. Note that no data has been loaded yet, so the map will be empty.
Set up super-users (admin users) on the web app (when not using Makefile / docker install)
To load data into the mine-the-gaps app, an admin user is required. To set up an
admin user (aka superuser), we need to run the Django management tool (which runs within the docker container).
Run:
python manage.py createsuperuser
This will ask several questions via the command line. Once the superuser is set up,
that user can log in to the web application.
Log in as superuser and upload data
Return to the web application on your browser (localhost:8000) and click on admin login in the
top right-hand side of the main page. Use the new admin log-in credentials to log in.
See our instructions for admin users for admin user instructions on how to use this web application, including how to upload data.
See the Django documents for more details on setting up user authentication: https://docs.djangoproject.com/en/3.2/topics/auth/default/
Deployment
See the Django documentation for deploying Django applications: https://docs.djangoproject.com/en/3.2/howto/deployment/
Research
Acknowledgement
This web application is part of the project "Understanding the relationship between human health and the environment' funded by the Alan Turing Institute
Authors
Ann Gledson, Douglas Lowe, Manuele Reani, David Topping and Caroline Jay
Copyright & Licensing
This software has been developed by Ann Gledson from the Research IT group at the University of Manchester.
(c) 2020-2021 University of Manchester. Licensed under the MIT license, see the file LICENSE for details.
