Intersections are often the sites of vechile accidents due to various reasons.Intersection Detection will help study and improve driver safety in both traditional and autonomous driving systems by adding active safety systems or passive arning systems in vehicles . This project aims to percive and identify intersections from image/video feeds based on the visual cues contained in them.
- Step 1: Clone the repository to local machine
git clone https://github.com/VTTI/Intersection-Detection.git
- Step 2: cd to downloaded repository
cd [repo-name]
- Step 3: Build the docker image using Dockerfile.ML
docker build -f Dockerfile.ML -t intersection .
- Step 4: Run container from image and mount data volumes
docker run -it --rm -p 9999:8888 -v $(pwd):/opt/app -v [path to data]:/opt/app/data --shm-size=20G intersection
example:docker run -it --rm -p 9999:8888 --user=12764:10001 -v $(pwd):/opt/app -v /vtti:/vtti --gpus all --shm-size=20G intersection
You may get an error
failed: port is already allocatedIf so, expose a different port number on the server, e.g. '9898:8888'
ssh -N -f -L 9999:localhost:9999 host@server.xyz
Organize the data as follows in the repository. We use a custom dataset 70/20/10 train/val/test split respectively the dataset compiled from SHRP2 and Signal Phase video data. Our data set contains:
- 4020 training images.
- 455 validation images.
- and 472 test images.
./
 |__ data
        |__ Intersection
            |_Front_videos
                |_Day
                |_Night
        |__ Non-Intersection
            |_Front_Videos
                |_Day
                |_Night
You may have as many next directories like "Front_videos" the code will be able to pick up the necessary data as long as the structure as shown.
- Baseline built on resnext50 backbone : To run the model use the configs/config_baseline.yaml file as input to --config flag and run.
cd /opt/app
python main.py \
--config [optional:path to config file] \
--mode ['train', 'test', 'test_single'] \
--comment [optional:any comment while training] \
--weight [optional:custom path to weight] \
--device [optional:set device number if you have multiple GPUs]
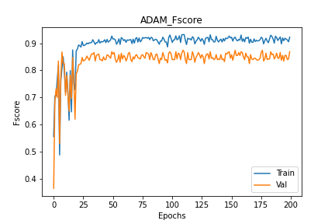
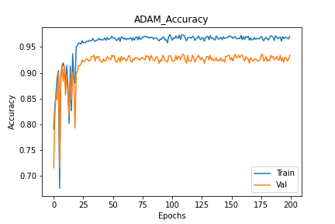
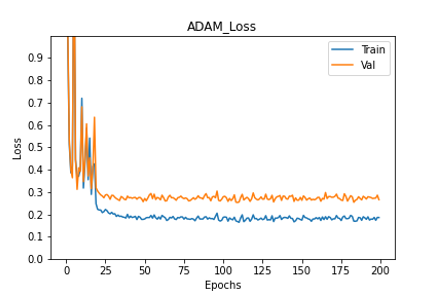
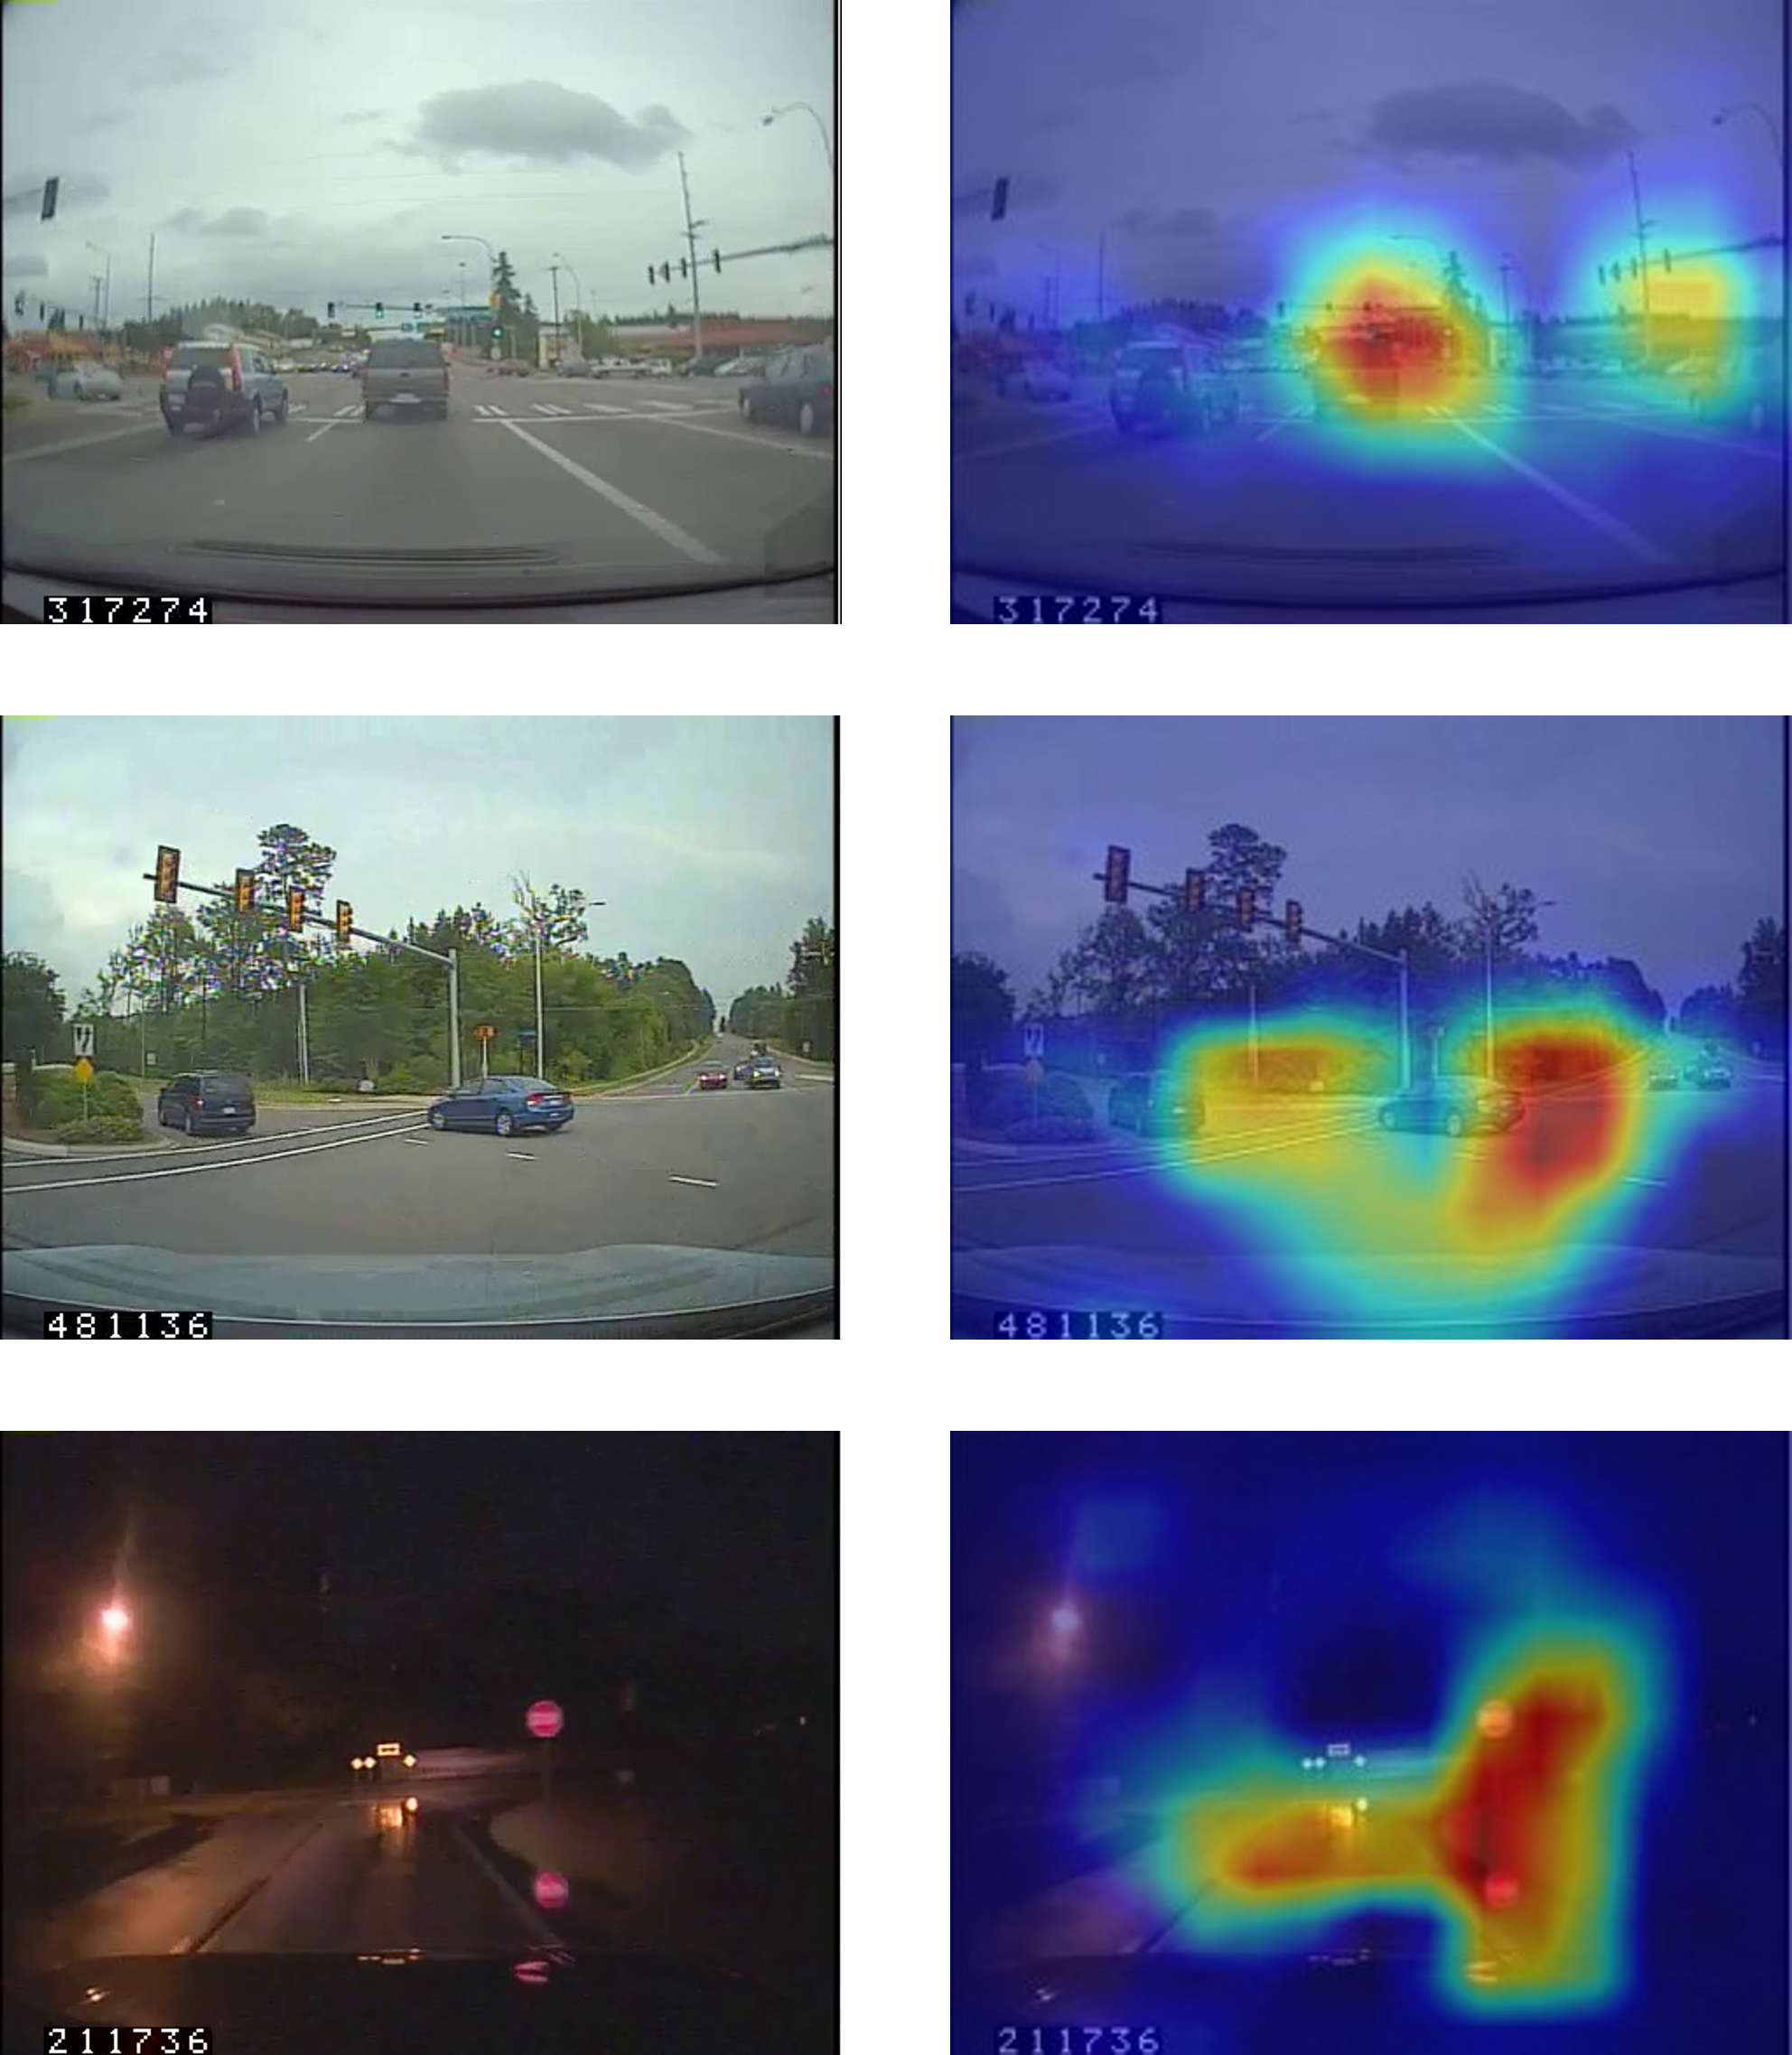
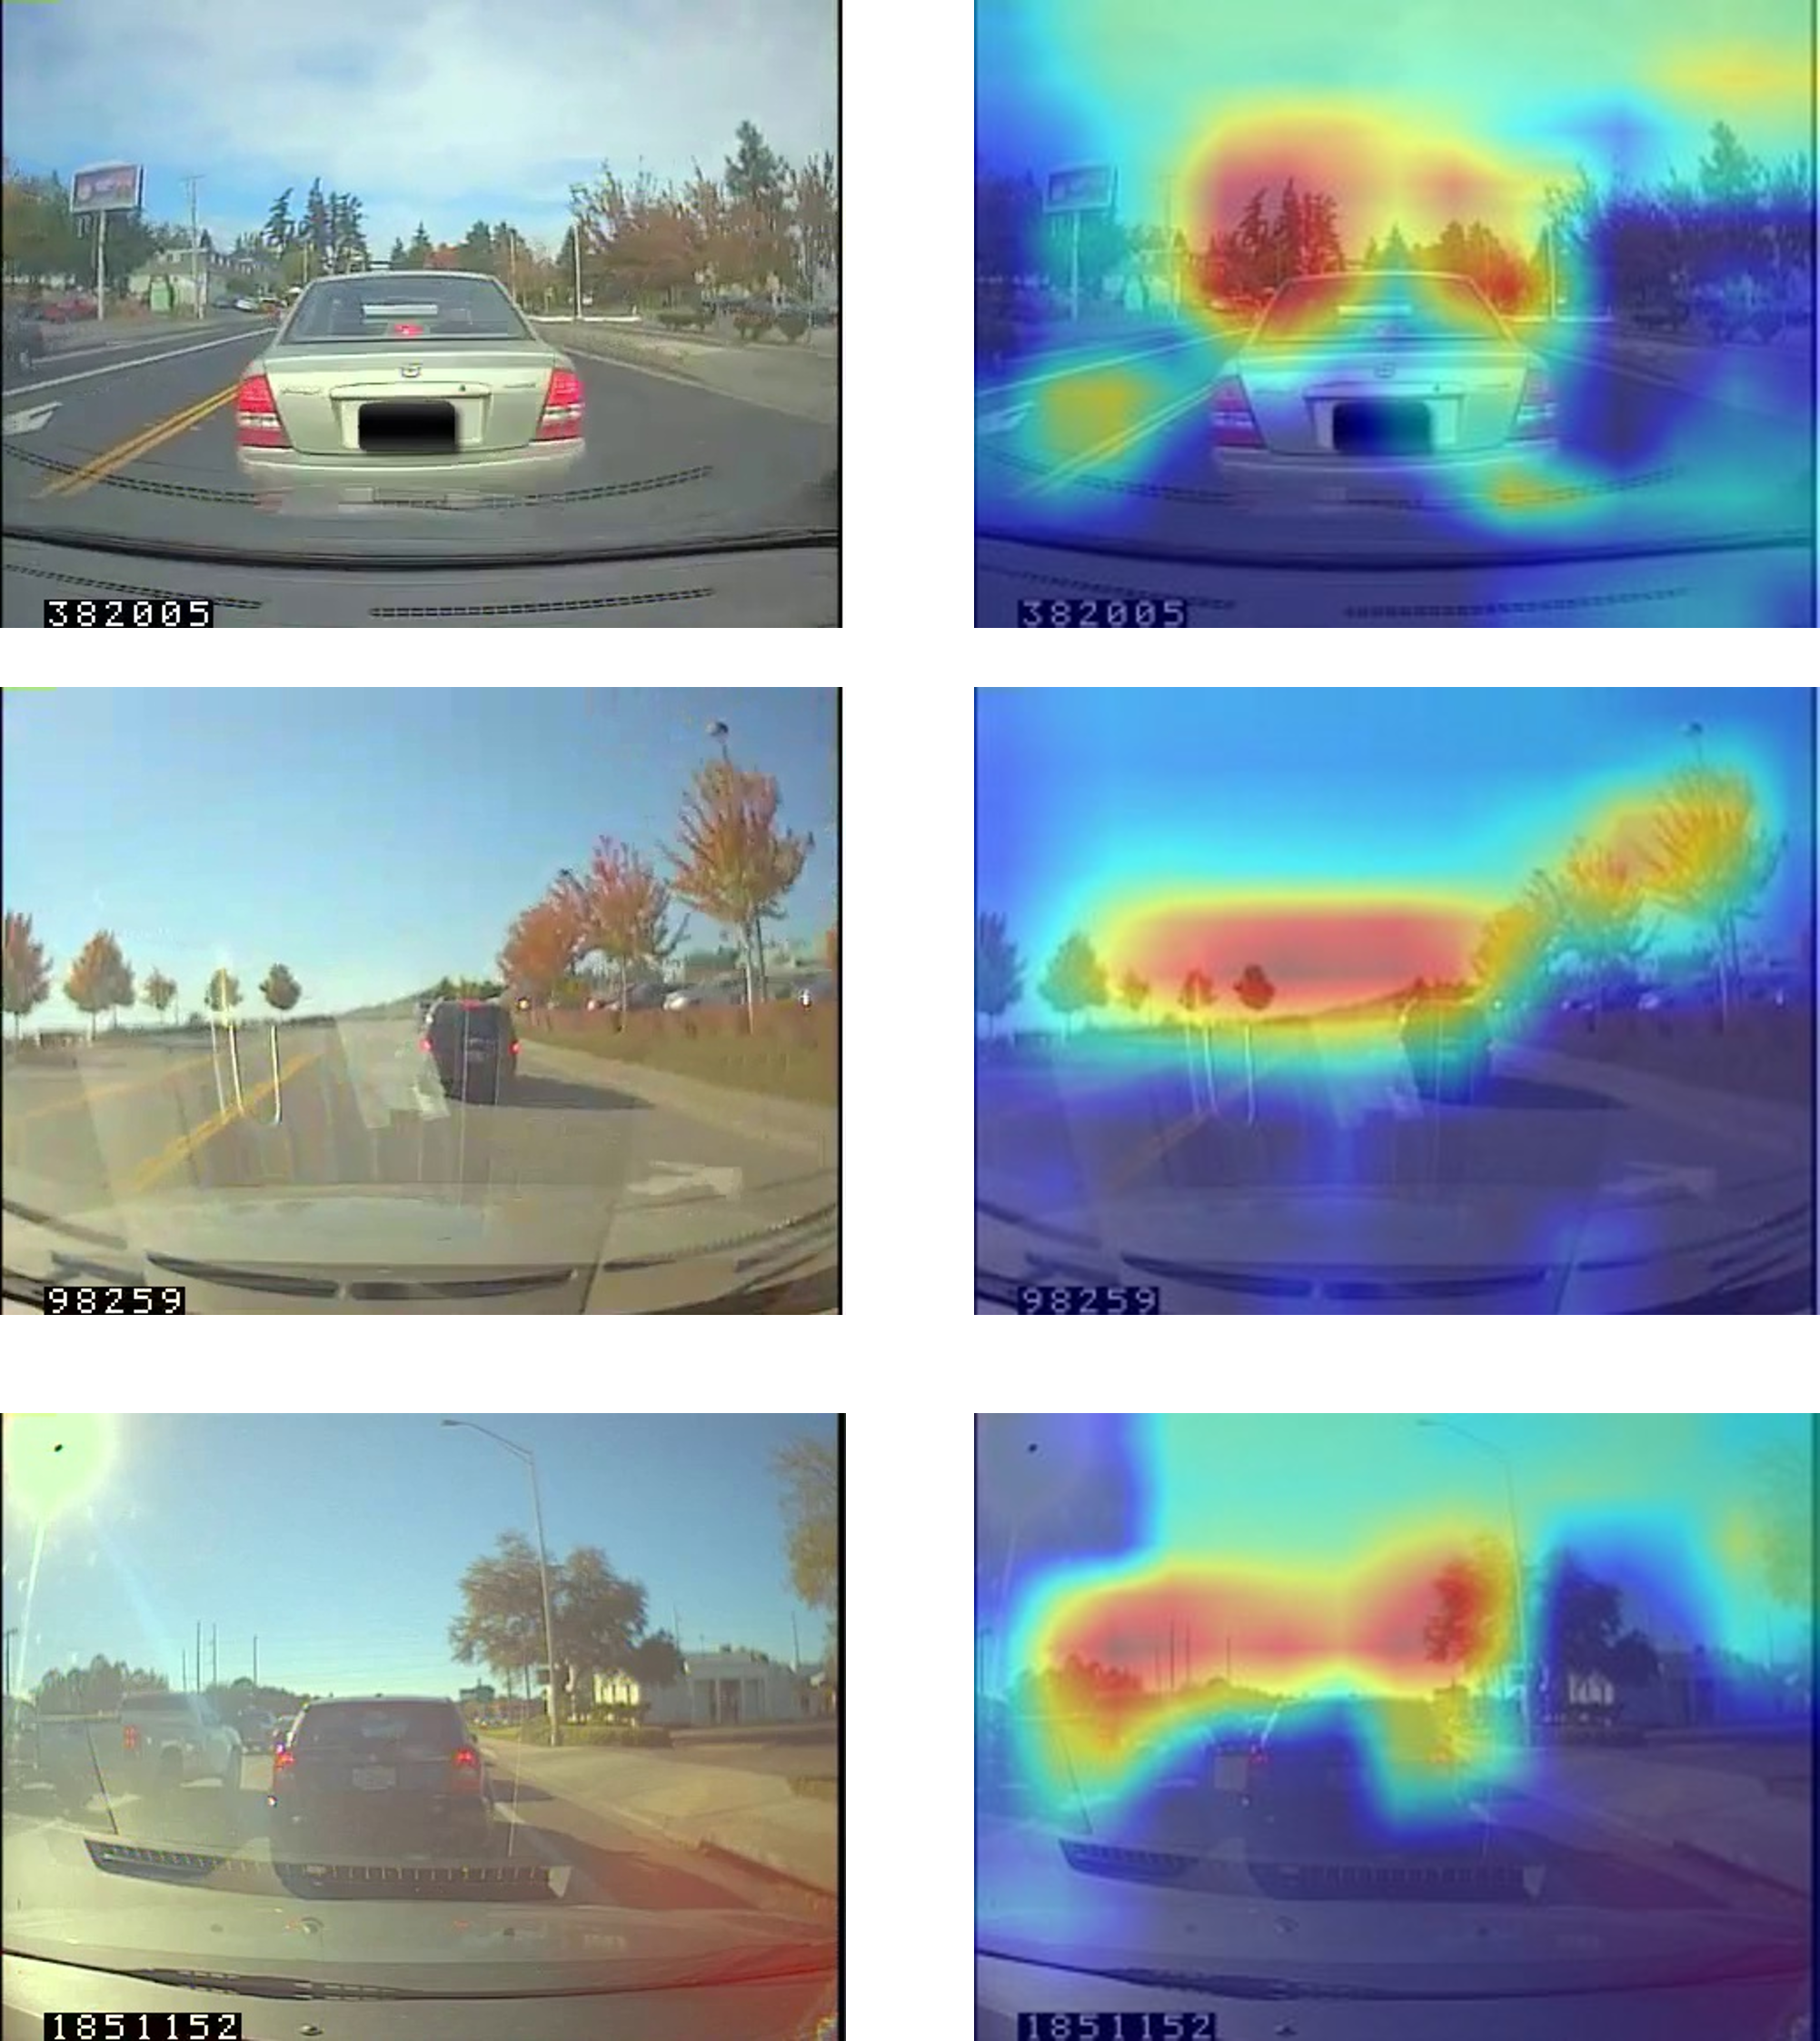
We trained the network on train and validation sets and tested its performance on a test set that the network never sees during training. The performance of the network is evaluated based on a combination of its loss, F-score and accuracy curves for training and validation, and its performance on the same metrics with the test data. Further, we also analyze the saliency maps of the classified images to gather insights on the basis of classification. Note that all models are initialized with pretrained weights from training on ImageNet calssification task.
The best model obtianed from training with various configurations of optimizers and hyperparameters including learning rate and epochs is with the use of AdamW optimizer. We trained the network for 200 epochs and ploted the performance curves which are as shown here.
 |
 |
 |
The results obtained by this base line on the entire test set :
- Loss: 0.4217
- Fscore: 88.11%
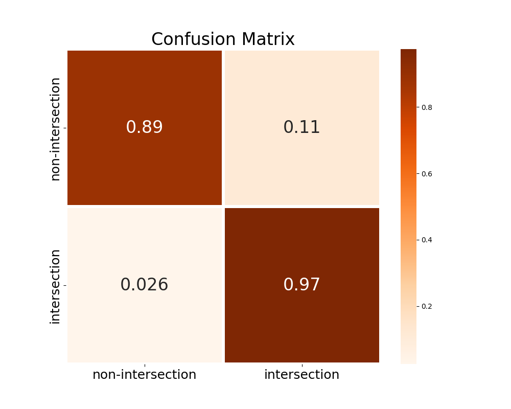
- Confusion Matrix:
- [tp,tn,fp,fn] : [129, 315, 20, 7]
- Accuracy : 94.27%
The confusion matrix on test set is as follows:
 |
Some examples of saliency maps observed for each class.
- Intersection
 |
- Non-Intersection
 |