This repo provides a wrapper library and collection of example Jupyter notebooks for pan-Defra users of the Earth Observation Data Service. You can find example videos on how to use these scripts at https://earthobs.defra.gov.uk/help/
This repo provides alternative ways to build your environment.
The options are:
- Method #1. Ananconda. Specifically, we recommend using the
miniconda(slimmed down) package manager of the Anaconda Distribution System. If you use a Windows OS, this is what we recommend. Tested withpython==3.8.8and the pinned package versions in ./environment.yml. - Docker. We include a
Dockerfilein the root of the repo for builing a docker Image locally. We recommend this approach if you're using MacOS or Linux. Tested withpython==3.8.8and the pinned container tags version in ./Dockerfile, which uses the pinned package versions in ./requirements.txt. - Alternatively, for macOS/Linux users, you can build your environment with
pipand python'svirtualenvmodule. Tested withpython==3.8.9with the pinned package versions in ./requirements.txt.
- You will need to authenticate using your EODS username and api token, note your token is different to your password.
- Credentials are entered into an Environment file (
.env), located in the root of the repo. A sample file is provided:
$ cat sample.env
HOST=https://earthobs.defra.gov.uk/
API_USER=someuser
API_TOKEN=sometoken- Either override the defaults with your own credentials, or create a new
.envfile with your own credentials. - Within the example notebooks, there is an opportunity to reference your own environment file, here is an python example to reference a specific environment file:
from dotenv import load_dotenv
load_dotenv('user-specific.env')

# alternatively:
from dotenv import load_dotenv
load_dotenv() # if you name you environment file ".env" and it sits in the root, then you do not need to specific a named file.- If you are unsure of your credentials, you can retrive your username and token from the EODS portal https://earthobs.defra.gov.uk/.
- Login, on the navigation bar, click your username on the right, and select "Profile" from the droplist
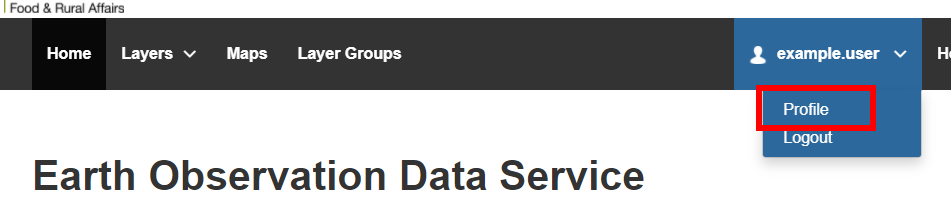
- Your username and Token are available on the Profile page:
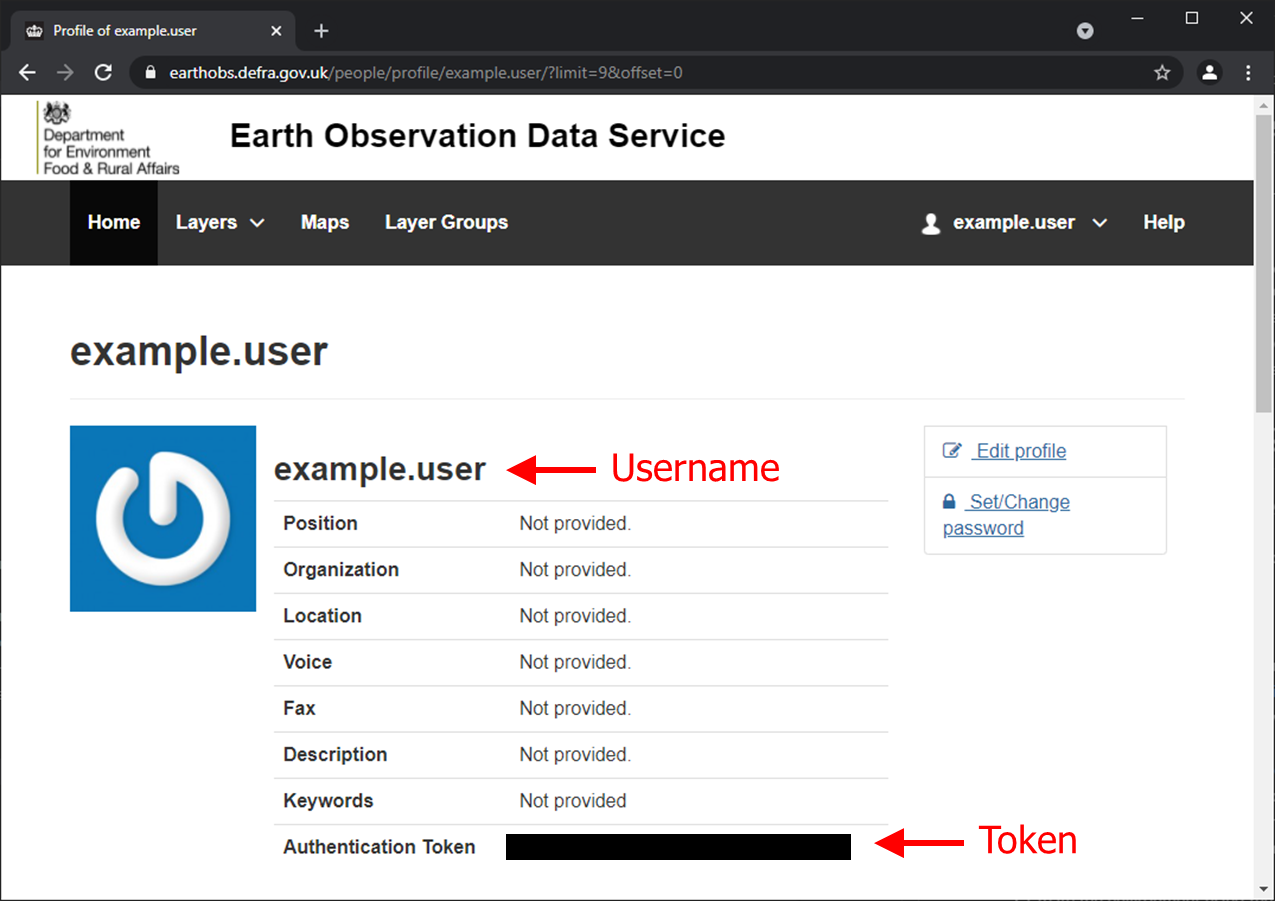
- Once you have your credentials, you can paste into the .env


- Recommended for Windows uses, as miniconda nicely pulls in the C libraries for GDAL, which can be problematic when using python virtual envs (see other Build option).
- Prerequisite. Ensure you've configured your credentials in the .env referenced above.
- If you do not already have it, download and install Miniconda on your system: https://docs.conda.io/en/latest/miniconda.html
- Once installed, open the Anaconda Powershell Prompt – this should now be available on your start menu. Navigate to this repo using the Anaconda Powershell Prompt using the following command:
cd - Create the environment using the following command:
conda env create --file environment.yml- Activate the environment using the following command
conda activate eods- Launch the Jupyter Notebook in your browser with the following command:
jupyter notebook- The Jupyter Notebook server should now be open in your web browser, enabling you to view and navigate the contents of this repo. Double click on any/the relevant Jupyter Notebook.
If for any reason you need to update your conda environment using the environment.yml file, use this command:
conda env update --file environment.ymlFor macOS, linux or Windows Subsystem for Linux, you have the option of using the native virtual environment feature within python3, see docs.
This assumes you have a working copy of python3 (python version >3.3) pre-installed.
Navigate your shell to the root of the repo:
Within the root of the repo

# STEP1. Ensure you have the python3-venv package
$ apt-get install python3-venv

# STEP2. Create a python virtual environment
$ python3 -m venv .venv

# STEP3. Source into your virtual environment
$ source .venv/bin/activate

# STEP4. Install the requirements
$ pip install -r requirements.txt

# STEP5. Check your python installation
$ which python

# STEP6. Launch the jupyter notebook server
$ jupyter notebook

# NOTE. If you have multiple pythons installed on your system, `python -m venv <env>` can sometimes be problematic

# alternatively, you can use `virtualenv` package, assuming you want to use something other than system python, e.g.:
$ /usr/bin/python3.8 --version

# STEP1. install `virtualenv` package
$ sudo apt-get install python-virtualenv

# STEP2. create the virtual environment
$ virtualenv --python=/usr/bin/python3.8 .venv

# NOTE on STEP3. pick up above with sourcing the virtual env.

# NOTE on STEP4. You might have to edit `requirements.txt` and drop specific versions to accomodate your python version.
This build was tested with python 3.8.9
A Dockerfile is also available for building a docker image locally on your system. This assumes you've got either docker destop or docker engine installed on your system.
# ensure you're in the repo root directory

# STEP1. Build the docker image locally and install dependancies
$ docker build . --tag eodslib

# STEP2. Run the container to launch the jupyter notebook
$ docker run --rm -p 8888:8888 -v <local-repo-directory>:/opt/app/ eodslib

# In the console output, copy the URL to the local notebook server and paste to your web browser