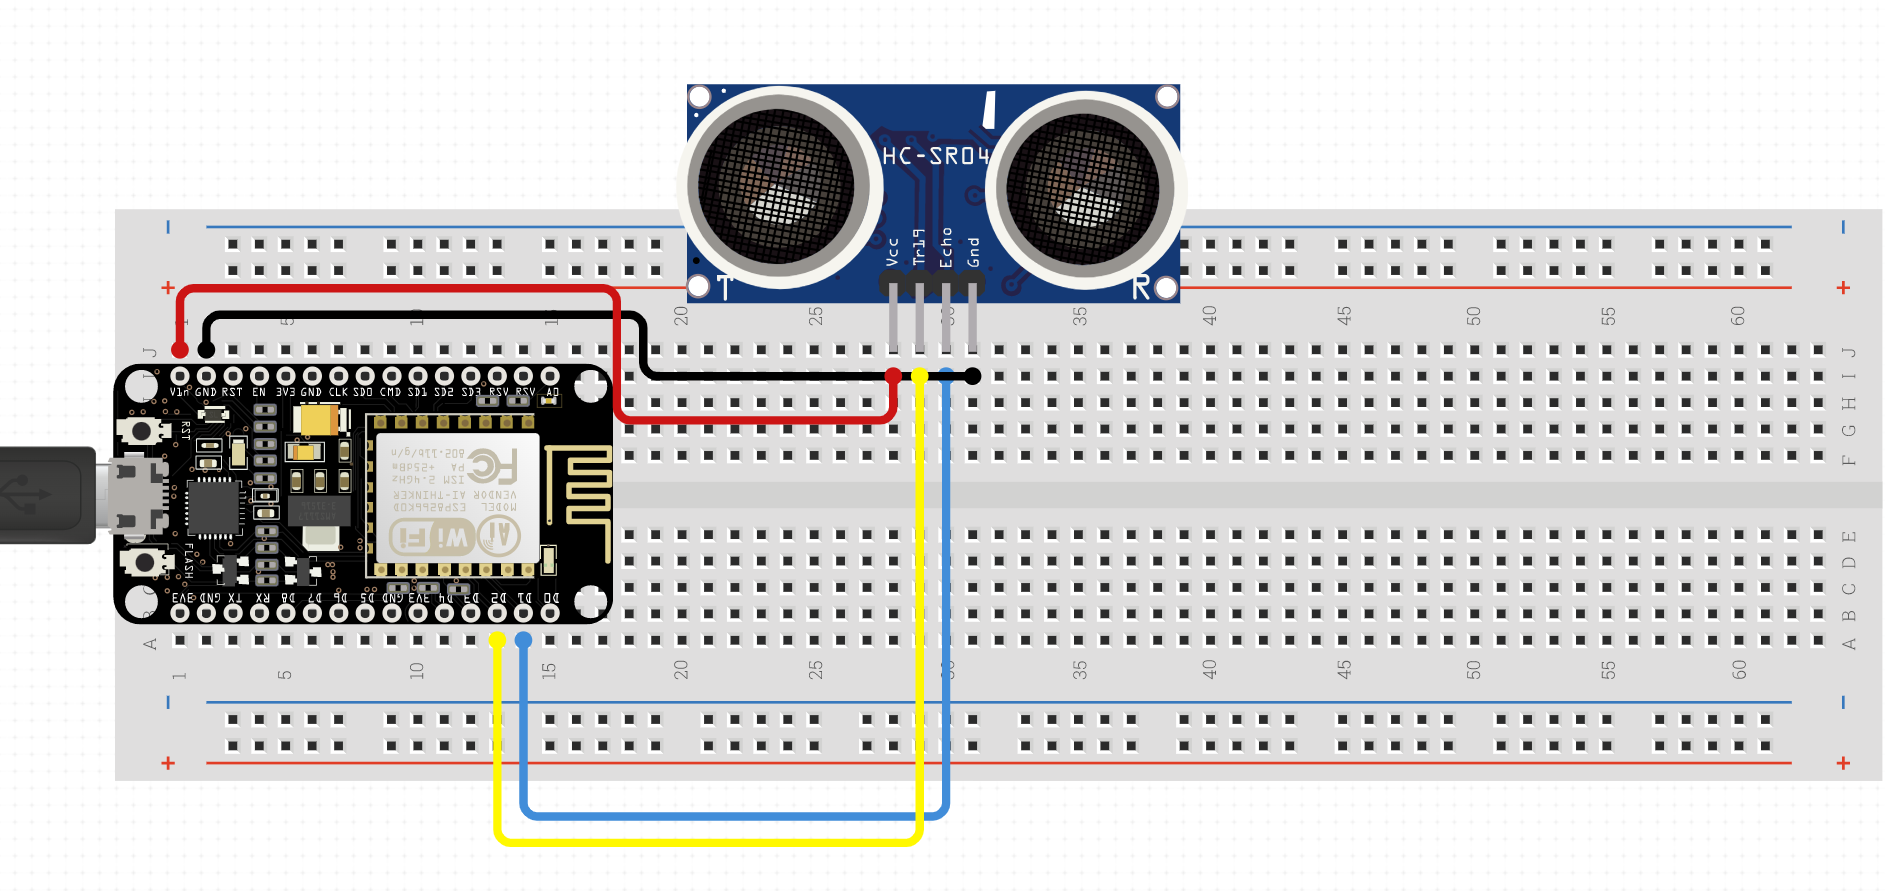
Door Defender is a device I created because I was tired of getting caught off guard when my parents entered my room. This device is featured on BlueHandCoding's Tik Tok here.
(These parts are usually sold in large quantities, but only one is needed)
As stated in the Tik Tok, Door Defender is built using the following:
- ESP8266 - This is the brains of Door Defender and is used to communicate with the ultrasonic sensor and your computer.
- HC-SR04 Ultrasonic Sensor - This is the sensor used to detect if the door is opened.
- Breadboard - The breadboard allows for the ESP8266 and the HC-SR04 to be connected together. The adhesive backing also allows it to be stuck next to a door.
- Power/Data Cable - It is really important to have a good cable to connect to your ESP8266 to both power it and send all the code to it. While many people do have their own Micro USB cables, if they don't work, I suggest this cable.
- Jumper Cables - Used to connect everything on the breadboard.
The following programs/software is necessary for Door Defender:
- Arduino IDE - Used to write and send code to the ESP8266 (Follow the instrcutions on the Amazon page for the ESP8266 for setup). This project makes use of version 2.3.0 of the ESP8266 Library.
- Python - This is what is run on the local computer to exceute the Python program.
- UART Drivers - This driver is necessary in order for you to send your code over to the ESP8266
The setup is fairly simple if you are familiar with creating virtual environments and flashing code to a microcontroller.
- Clone or download the .zip for this Github repo to your machine.
- Open the file and then replace the 'xxx' with the necessary information.
- Assemble Door Defender according to the pin numbers shown in the code. This can then be placed anywhere you want.
- To get the local server running, createa virtual environment and install flask and pyautogui.
PLEASE READ ALL THE COMMENTS FOR THE CODE BEFORE FLASHING OR RUNNING
