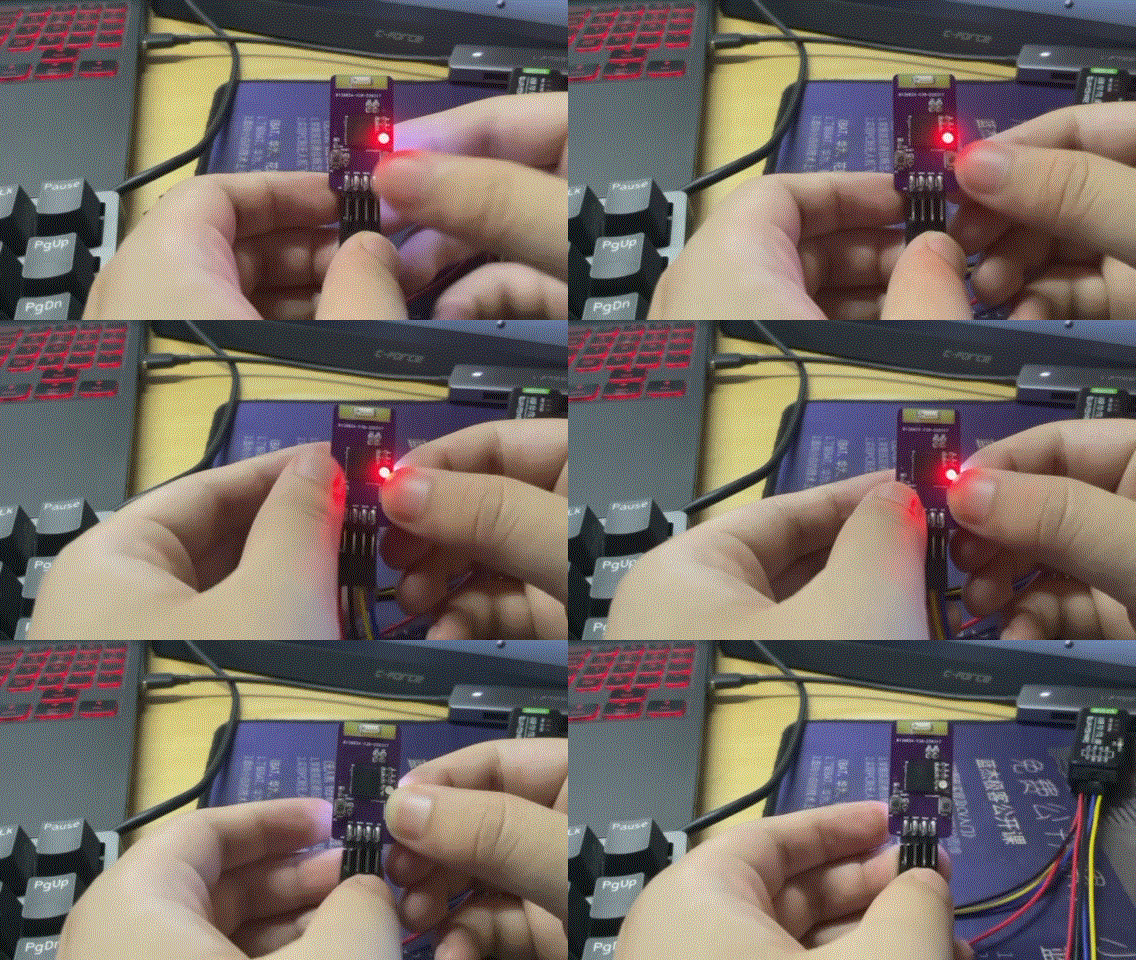
This project is a wireless module based on the ESP32-pico-d4 chip from Espressif Systems, with multiple communication protocol interfaces: UART, SPI. The original intention of the design is to facilitate the debugging of the camera algorithm for smart car competitions, and to reduce the difficulty of debugging by cooperating with the upper computer.
The esp32 hardware supports 5Mbps UART and 10Mbps SPI slave
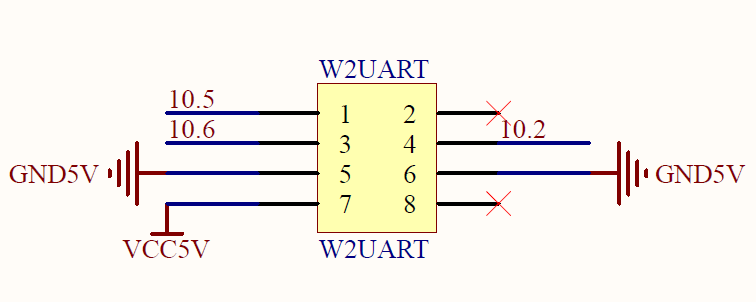
One of the features of this module is that it can be compatible with ZhuFei wireless serial port interface, has hardware flow control function, and can directly use ZhuFei wireless serial port driver to achieve one-way communication, eliminating the need for car friends to test this module. The need for re-board making, currently only supports one-way transmission to the upper computer
This project software and hardware are rough, welcome everyone to communicate and make suggestions for improvement, my QQ: 1626632460
The open source smart car image transmission upper computer can use Zhiyong upper computer, this module is mainly used with this upper computer, the user manual and single-chip microcomputer routines are in this upper computer warehouse, link: https://gitee.com/zhou-wenqi/ipc-for-car
Bilibili video link: https://www.bilibili.com/video/BV1oZ4y1m7y2
PCB simulation is as follows
| Category | UART+SPI |
|---|---|
| 3D simulation | 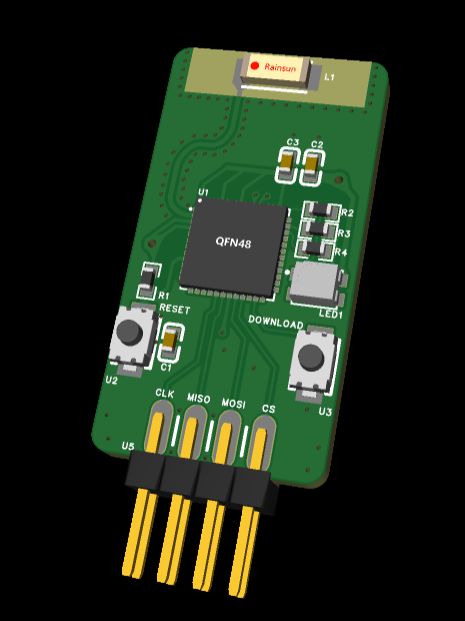 |
| Welding effect | 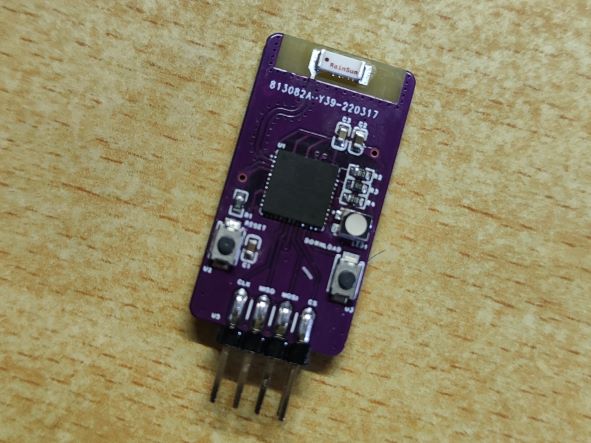 |
| JLC open source link | https://oshwhub.com/Wander_er/891fe1d235694ef7afe684f5a2f05b73 |
| Name | Function |
|---|---|
| doc | Chip document |
| driver | Driver file |
| firmware | Firmware |
| hardware | Hardware |
| image | Picture |
| software | Simple image transmission upper computer python script |
- Based on esp32-pico-d4
- spi interface
- uart interface
- A reset button
- A download button
- Power indicator light
- rgb tricolor light
- 5V power input, 3.3V power stabilization
Two communication modes
-
UART baud rate up to 5Mbps, receive up to 20000 bytes at a time
Use serial polling to extract received data from the buffer. There are two parameters, which are the receive buffer size and maximum wait time. When the number of bytes received reaches the buffer size, it is immediately regarded as completing a reception; when sending is completed but not reaching the receive buffer size , Then wait for a maximum waiting time before viewing as completing a transfer. This waiting time is fixed at 20ms.
So it can be regarded as having two modes, switch by modifying
lengthparameter inuart_read_bytes() function in firmware.-
Transparent mode: refers to no fixed byte limit for transmitted data. Each communication can transmit data of various sizes, more flexible.
It is recommended that using transparent mode should have an interval greater than
serial port transmission time+20ms+udp transmission time (rate calculated at 30Mbps)When
lengthparameter is buffer sizeRX_BUF_SIZE -1, it is transparent mode , That is assuming that no data will reach this length. -
Fixed byte mode: refers to having a fixed byte limit for transmitted data. The speed is faster than transparent mode but can only transmit fixed-size data.
It is recommended that using fixed byte mode should have an interval greater than
serial port transmission time+udp transmission time (rate calculated at 30Mbps)When
lengthparameter equals number of bytes of fixed data sent , It's fixed bytes , For example , When transmitting a grayscale image of 60 x 90 when it is 5400.Of course, sending data lower than this length can also be regarded as transparent mode.
-
-
SPI baud rate up to 10Mbps, receive up to 25000 bytes at a time
- Only supports data reception of multiples of 4 bytes in length, SPI mode is 3
- Recommended transmission interval is greater than
SPI transmission time+udp transmission time (calculated at 30Mbps)
The firmware integrates UART and SPI two communication modes, which can be configured by serial communication protocol and written into Flash, without losing power, eliminating the need for repeated modification of firmware
How to connect with the lower computer?
-
UART
Pic-o Link Lower computer RXD TXD TXD RXD RTS (multiplex MOSI) CTS (if not available, it does not matter much, but you need to disable flow control detection in the lower computer serial transmission function) -
SPI
Pic-o Link Lower computer CLK CLK MISO MISO MOSI MOSI CS CS -
5V power supply, ground wire must be connected
How to calculate the time it takes to send a complete image?
Take UART 3Mbps transmission of a grayscale image of size as an example. First calculate the number of bits in the image: 60 x 90 x 8 = 43200 bits. Then divide the number of bits by the baud rate: 43200 / 3000000 = 0.0144 s = 14.4 ms
How to enter and use configuration mode?
Use USB to TTL serial assistant on your computer to connect Pic-o Link, short-circuit MOSI and CS pins and then reset. The rgb indicator light shows yellow indicates that you have entered configuration mode. At this time, you can configure Pic-o Link parameters through serial port. The baud rate is 115200, and the protocol is shown in the table
| Category | Remark | Frame header | Length | | :--------------------------: | :------------------------------: | :------: |- ----:| | Communication protocol selection |8bits unsigned integer, 0 : UART, 1 : SPI| 0x41 (A) | 1byte | | UART communication mode baud rate | 32bits unsigned integer, <=5000000 | 0x42 (B) | 4bytes | | UART communication mode receive buffer byte number| 16bits unsigned integer, <=20000 | 0x43 (C) | 2bytes | | WiFi account | string, up to 32 bytes | 0x44 (D) | 32bytes | | WiFi password | string, up to 64 bytes | 0x45 (E) | 64bytes | | UDP Server ip address |string, up to 16 bytes| 0x46 (F) | 16bytes | | UDP Server port |16bits unsigned integer, <=65535| 0x47 (G) | 2bytes | | Read module parameters |single instruction | 0x48 (H) |none | |Write module memory parameters into Flash|single instruction | 0x49 (I) |none |
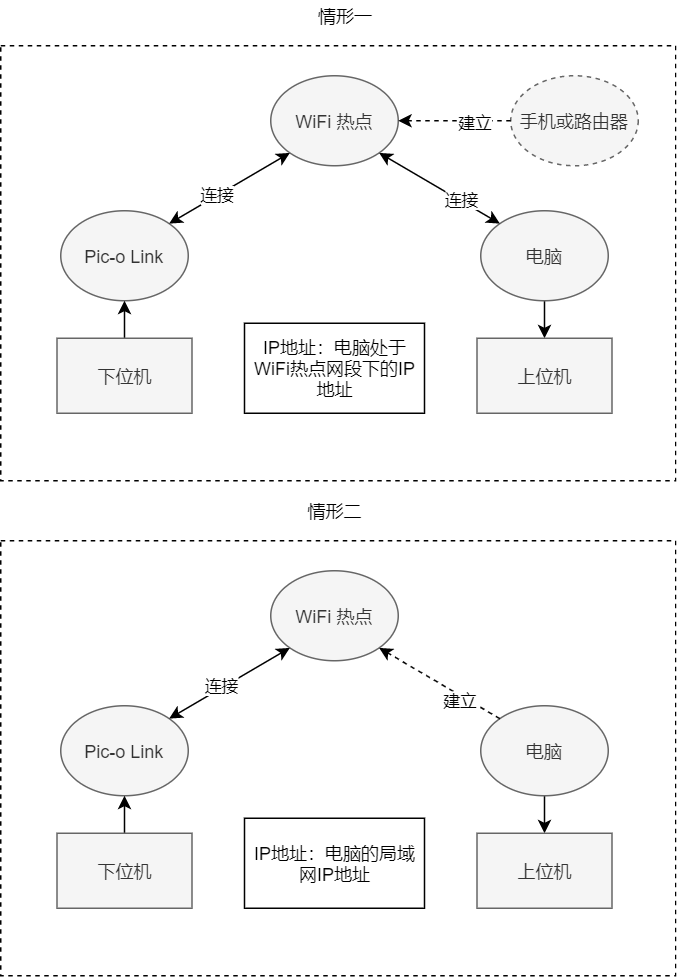
Which IP address should I configure specifically?
The following two situations indicate the IP address parameters configured by Pic-o Link:
How to open the firmware project?
- Install the Platform IO plugin for VS code, then right-click the
Pic-o Linkfolder and selectOpen with Code, wait for a while after opening, the plugin will automatically install the dependencies and compile toolchain
How to enter download mode and flash firmware?
- Use USB to TTL serial assistant to connect
Pic-o Linkto your computer, press and hold theDOWNLOADbutton on Pic-o Link and then press theRESETbutton, then click the download button at the bottom of Platform IO to compile and download with one click, remember to press theRESETbutton after downloading
How to modify the hostname of the module?
- Modify the
CONFIG_LWIP_LOCAL_HOSTNAMEitem in thesdkconfig.pico32file and recompile and flash firmware
What WiFI frequency does the module support?
- Only supports 2.4GHz
Interface and PCB drawing requirements?
- Interface: 2.54mm 2x4p female header
- 5V power supply must ensure at least 500mA output current
UART mode takes TC264 as an example (refer to ZhuFei wireless serial port interface schematic diagram, can be directly copied, note that compared with general UART interface an additional flow control pin is required, can imitate ZhuFei wireless serial port send driver use a GPIO as input mode to simulate)
- Power on
- nvs flash initialization
- Load Flash configuration parameters
- Check whether to enter configuration mode
- Enter communication mode according to configuration parameters
- Set as WiFi STA mode
- WiFI hardware initialization successful start scanning WiFi, indicator light shows current status -> red
- WiFi connection successful, indicator light shows current status -> green (will flash very fast, immediately enter 9)
- Set as udp client mode, indicator light shows current status -> blue
- Wait for lower computer transmission data, indicator light shows current status -> white
- Lower computer transmission data completed, module starts sending data through WiFi udp to upper computer udp server
- Return to 10
Simple python image transmission upper computer display script, with frame header and frame tail detection, similar to Zhiyong upper computer
Python libraries required for running:
- numpy
- opencv-python
Espressif official test of ESP32 udp/tcp rate:
| Type/Throughput | Air In Lab | Shield-box | Test Tool | IDF Version (commit ID) |
|---|---|---|---|---|
| Raw 802.11 Packet RX | N/A | 130 MBit/s | Internal tool | NA |
| Raw 802.11 Packet TX | N/A | 130 MBit/s | Internal tool | NA |
| UDP RX | 30 MBit/s | 85 MBit/s | iperf example | 15575346 |
| UDP TX | 30 MBit/s | 75 MBit/s | iperf example | 15575346 |
| TCP RX | 20 MBit/s | 65 MBit/s | iperf example | 15575346 |
| TCP TX | 20 MBit/s | 75 MBit/s | iperf example | 1557534 |
