Install Node.js on Linux, Windows, and MacOS using (nvm)
nvm is a version manager for node.js, designed to be installed per-user, and invoked per-shell. nvm works on any POSIX-compliant shell (sh, dash, ksh, zsh, bash), in particular on these platforms: unix, macOS, and windows WSL.
To install or update nvm, you should use the following cURL(for Linux, and MacOS) or Wget ( for Windows Powershell users) command:
curl -o- https://raw.githubusercontent.com/nvm-sh/nvm/v0.39.7/install.sh | bashwget -qO- https://raw.githubusercontent.com/nvm-sh/nvm/v0.39.7/install.sh | bashRunning either of the above commands downloads a script and runs it. The script clones the nvm repository to ~/.nvm, and attempts to add the source lines from the snippet below to the correct profile file (~/.bash_profile, ~/.zshrc, ~/.profile, or ~/.bashrc).
export NVM_DIR="$([ -z "${XDG_CONFIG_HOME-}" ] && printf %s "${HOME}/.nvm" || printf %s "${XDG_CONFIG_HOME}/nvm")"
[ -s "$NVM_DIR/nvm.sh" ] && \. "$NVM_DIR/nvm.sh" # This loads nvmTo verify that nvm has been installed, do:
command -v nvmor
nvm -v # to see the version number example: 0.39.3If you want to see what versions are available to install:
nvm ls-remoteTo install a specific version of node:
nvm install 14.7.0 # or 16.3.0, 12.22.1, etcTo install the Long-term Support (A.K.A Stable version) of node:
nvm install --lts# installs fnm (Fast Node Manager)
winget install Schniz.fnm
# download and install Node.js
fnm use --install-if-missing 20
# verifies the right Node.js version is in the environment
node -v # should print `v20.14.0`
# verifies the right NPM version is in the environment
npm -v # should print `10.7.0`or download the windows installer via (Node Windows installer) and follow install instructions
To verify that Node.js has been installed properly, in your shell type the following command:
node --versionIn your terminal type in the command that matches your linux distribution
For administrator privileges be sure to use sudo
For the latest stable version for your release of Debian/Ubuntu
apt-get install gitFor Ubuntu, this PPA provides the latest stable upstream Git version
add-apt-repository ppa:git-core/ppa

apt update

apt install gityum install gitdnf install gitemerge --ask --verbose dev-vcs/gitpacman -S gitzypper install giturpmi gitnix-env -i gitpkg install gitSolaris 9/10/11 (OpenCSW)
pkgutil -i gitpkg install developer/versioning/gitpkg_add gitapk add gitgit --versionIn your terminal type these commands without quotes
Enter your Github user name
git config --global user.name "Your Github User Name Here"Enter the email you used to sign-up for GitHub (Very Important)
git config --global user.email "your@email.com"Change the name of the master branch to main (Very Important)
git config --global init.defaultBranch mainEnter in terminal to see the config
git config --listThe terminal should look something like this
git config --list
user.name=Your Github User Name Here
user.email=your@email.com
init.defaultbranch=mainRemain in the terminal and enter these commands
ssh-keygen -t ed25519 -C yourgithub@email.comHit Enter until the process is done
In the terminal open the file id_ed25519.pub inside the .ssh directory within your Home directory with the following command.
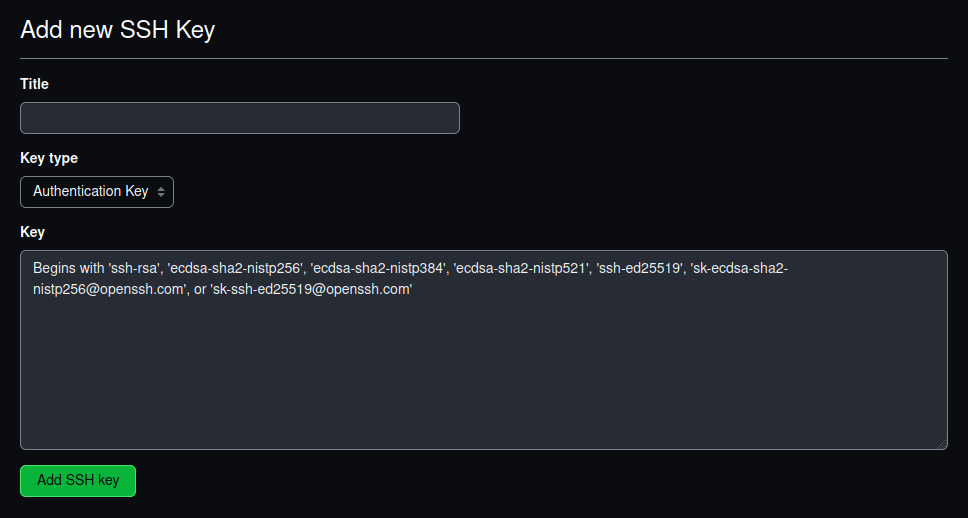
cat id_ed25519.pubcopy paste the code to your github account by adding the ssh key here
Click New ssh key button
 Fill out the required fields and click the add ssh key button

Once the ssh key is added, create a repository on GitHub, clone it, add files, commit and push. When you try to push the repository a popup with ask to add your system to github fully type yes, and hit ENTER.
Have fun and enjoy your new development environment.
Special thanks to nvm, Node.js, and git for helping me with the detailed information.