| OS | linux | darwin | windows | freebsd |
|---|---|---|---|---|
| Build-Status |
- Credits
- How to install it
- Installing on Linux
- Installing on Windows
- Installing on macOS
- Building from source
- Login
- Quick overview - Navigation (switching between boxes / containers)
- Extending Cordless via the scripting interface
- Contributing
- Why should or shouldn't you use this project
- Similar projects
- Troubleshooting
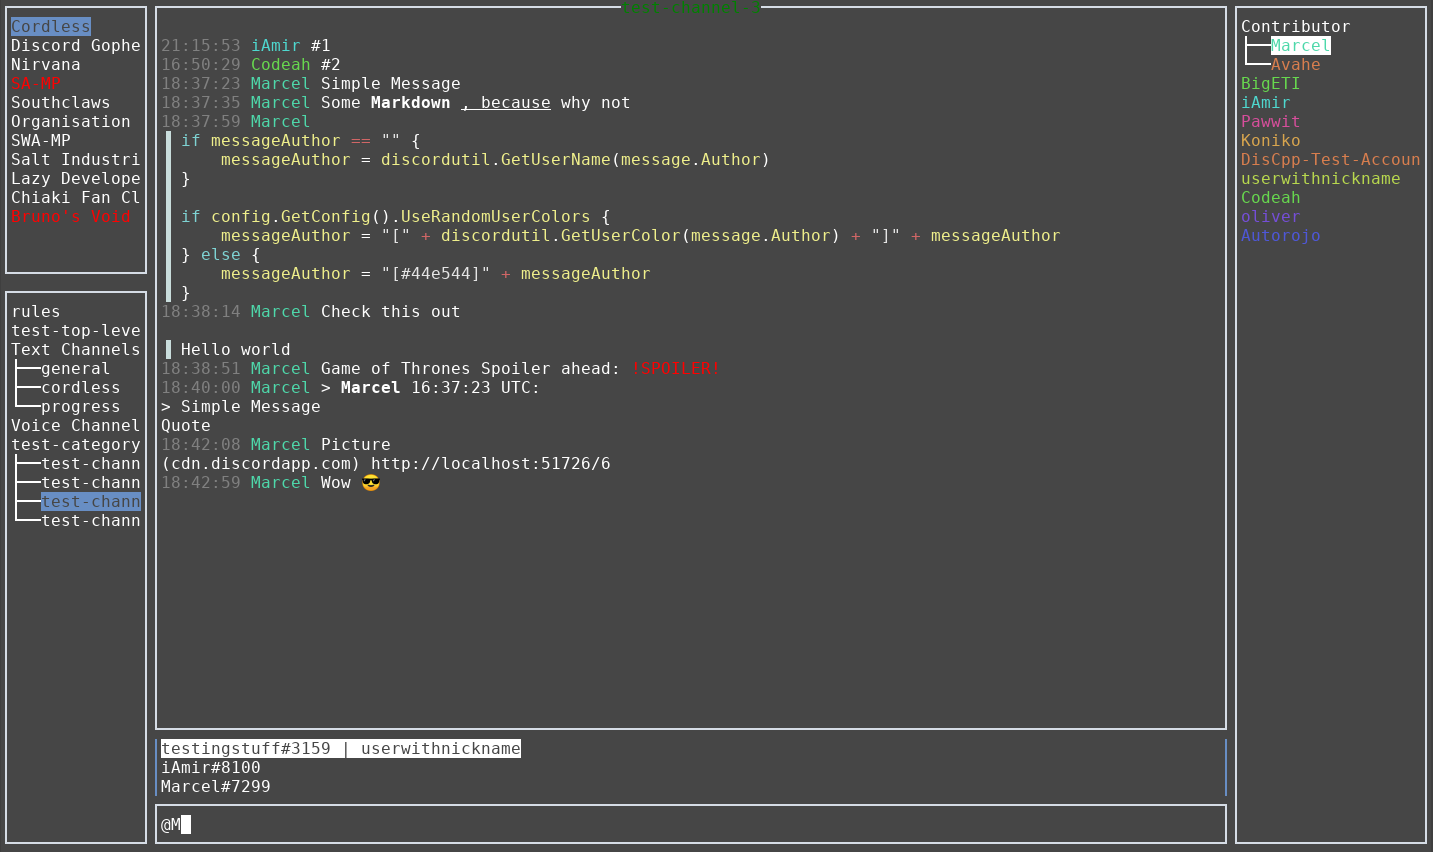
Cordless is supposed to be a custom Discord client that aims to have a low memory footprint and be aimed at power-users.
WARNING: Self-bots are discouraged and against Discords TOS.
This project was mainly inspired by Southclaws Cordless, which he sadly didn't develop any further.
The application only uses the official Discord API and doesn't send data to any third party. However, this application is not a official product by Discord Inc.
For those who don't want to use paypal but still donate, here's my ETH wallet public key: 0x49939106563a9de8a777Cf5394149423b1dFd970
Big thanks to JetBrains for providing the cordless project with free licenses!
On linux the recommended way of installation is the snap.
Simply run (Might require sudo):
snap install cordlessSnap will automatically install updates.
On Arch based distributions, you can use the AUR package to install cordless:
$ git clone https://aur.archlinux.org/cordless-git.git
$ cd cordless-git
$ makepkg -sric$ yay -Syu cordless-gitor
$ yay -S cordless-git$ trizen -S cordless-git$ pacuar -S cordless-gitIn order to install the latest version on Windows, you first need scoop.
After installing scoop, run the following:
scoop bucket add biosmarcel https://github.com/Bios-Marcel/scoopbucket.gitThis adds the bucket (repository) to your local index, allowing you to install any package from that bucket.
Install cordless via
scoop install cordlessIn order to install updates, run:
scoop update cordlessUse Homebrew to install cordless on macOS:
brew tap Bios-Marcel/cordless
brew install cordless
If you don't install via homebrew, then you should get pngpaste, since it's
what allows you to paste images.
In order to execute the following commands you need to have go 1.12 or a more recent version installed.
UPDATES HAVE TO BE INSTALLED MANUALLY
You can either install the binary into your $GOPATH/bin by running:
go get -u github.com/Bios-Marcel/cordlessWhich you can then execute by running the executable, which lies at
$GOPATH/bin/cordless. In order to be able to run this from your terminal,
$GOPATH/bin has to be in your PATH variable. The very same command can
be used for updating.
or you manually grab the source:
git clone https://github.com/Bios-Marcel/cordless
cd cordless
go build .
If done this way, updates have to be installed via:
cd cordless
git pull
go build .
Note:
- X11 users need
xclipin order to copy and paste. - Wayland users need
wl-clipboardin order to copy and paste.
Logging in works via the UI on first startup of the application.
If you are logging in with a bot token, you have to prepend Bot (yes, with
the space) in front of the token. Pasting only works via your terminals normal pasting shortcut.
THIS APPLICATION NEVER SAVES YOUR ACTUAL PASSWORD LOCALLY.
If you need to find out how to retrieve your token, check the wiki at.
| Shortcut | Action |
|---|---|
| Alt + S | Sets the focus on the servers (guilds) container |
| Alt + C | Sets the focus on the channels container |
| Alt + T | Sets the focus on the messages container |
| Alt + M | Sets the focus on the messages input field |
| Alt + U | Sets the focus on the users container |
| Alt + P | Opens the direct messages container |
| Alt + . | Toggles the internal console view |
Further shortcuts / key-bindings can be found in the manual on the internal
console with the command manual.
If any of the default commands don't work for you, open the keyboard shortcut changer via Ctrl + K.
All kinds of contributions are welcome. Whether it's correcting typos, fixing
bugs, adding features or whatever else might be good for the project. If you
want to contribute code, please create a new branch and commit only changes
relevant to your planned pull request onto that branch. This will help
isolating new changes and make merging those into master easier.
If you encounter any issues, whether it's bugs or the lack of certain features, don't hesitate to create a new GitHub issue.
If there are specific issues you want to be solved quickly, you can set a bounty on those via IssueHunt. The full 100% of the bounty goes to whoever solves the issue, no matter whether that's me or someone else.
If none of those ways of contributing are your kind of thing, feel free to donate something via Liberapay. It may not directly have an impact on the project, but it will surely motivate me to keep working on this project, as it shows that people care about it.
Reasons to use it:
- Your PC is not very powerful
- You're on a mobile device and value your battery life
- You want to reduce your bandwidth usage
- You just like terminal applications
Reasons not to use it:
- You like fancy GUI
- You want to see images, videos and whatnot inside of the application itself
- You need the voice/video calling features (This might soon change!)
- You need to administrate a server (no administration features yet)
Here is a list of similar projects:
Hit me up if you have a similar project and I'll gladly add it to the list.
If you happen to encounter a crash or a bug, please submit a bug report via the projects GitHub issue tracker.
For general problems faced by cordless users, check out the wiki at: https://github.com/Bios-Marcel/cordless/wiki/Troubleshooting
If you need help or have questions that you don't want to create an issue for.
feel free to hit me up on Discord: Marcel#7299. Alternatively, just join the
public Cordless server linked at the top of the Readme.

