This project is a CubeMX project that utilizes STM32’s DMA to automatically flip parallel GPIO ports in order to drive an LED matrix panel.
You will need
- an LED screen with a HUB75E interface
- currently only supports a size of 64x64
- a stm32f429 development board
- all PB ports as output
- at least 60kB of memory
- CubeMX and Keil development environments
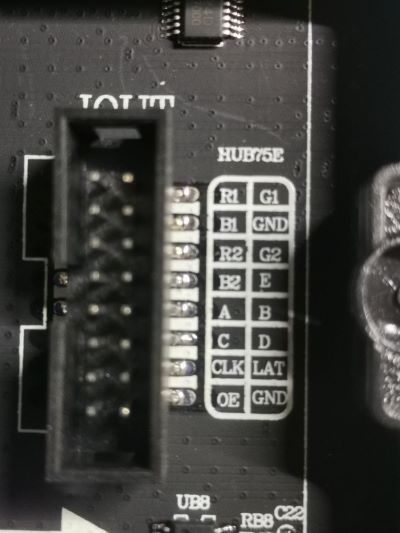
Firstly, make sure your panel has HUB75E interface as shown following.
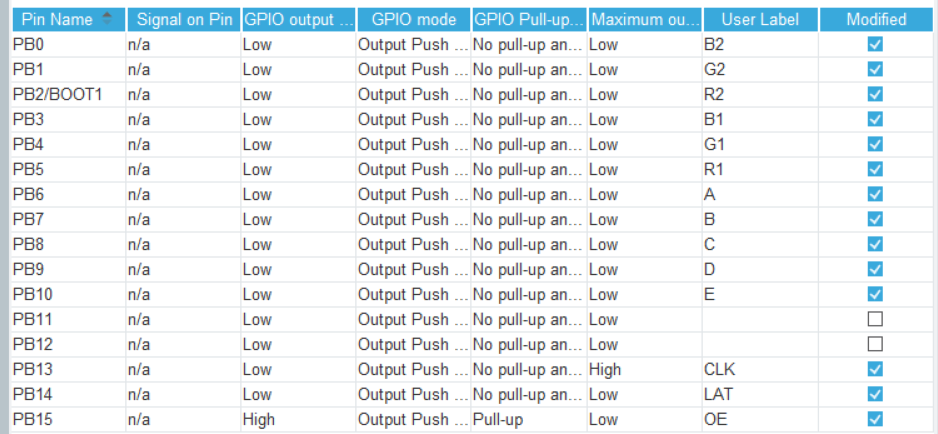
connect them to your development board as shown following. PB12 & PB11 are not used. Notice that there are two hub75e interfaces on board, one is IN and the other is OUT. You should connect your PB pins to the IN hub75e interface.
/**
*      PB 15 14  13  12 11 10 9 8 7 6 5  4  3  2  1  0
*         OE LAT CLK  ?  ?  e d c b a r1 g1 b1 r2 g2 b2
*/Firstly, configure your PB ports as shown following.
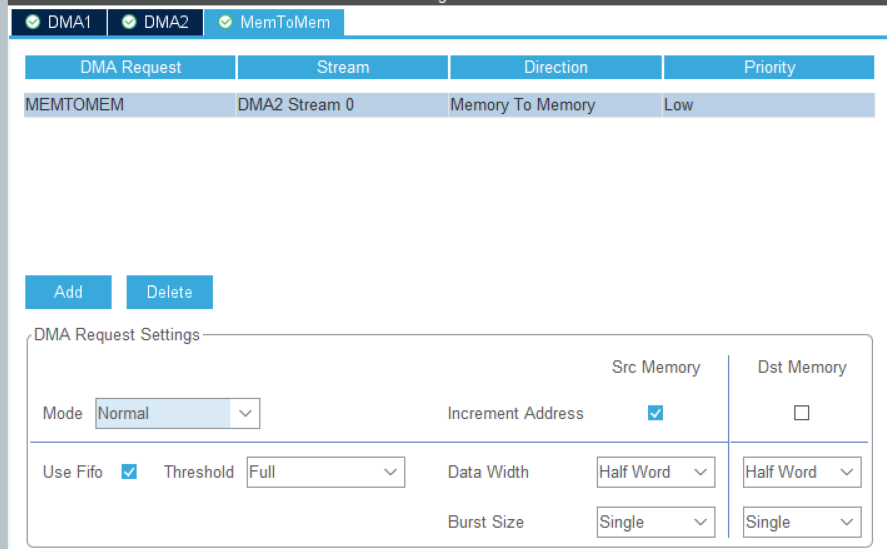
Then, enable DMA memtomem as shown following. Notice "Increment Address" of "Dst Memory" is unchecked.
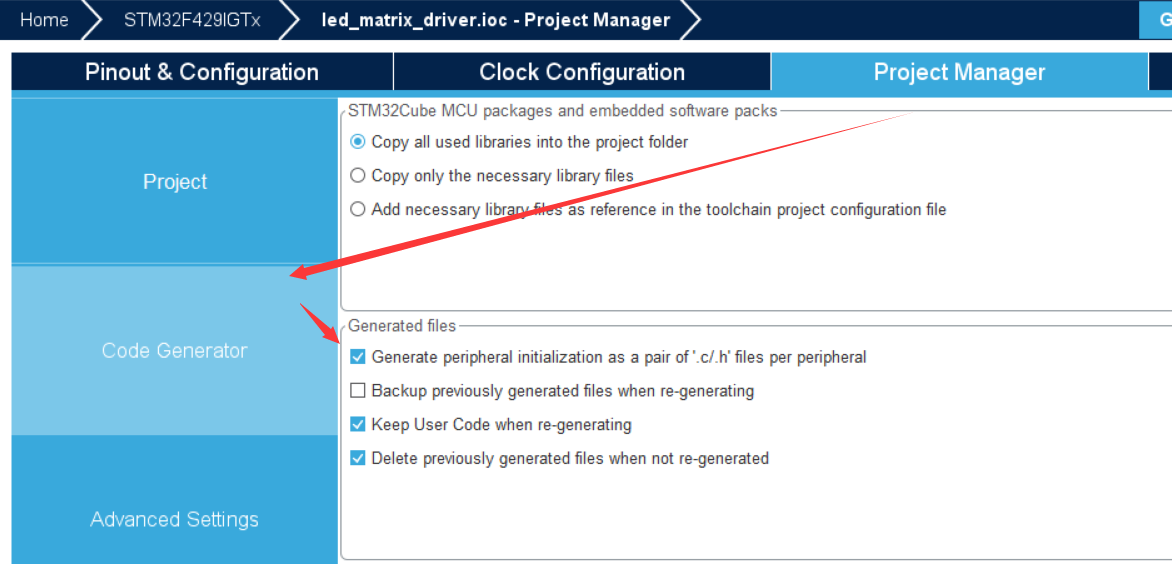
Next, at Project Manager > Code Generator, check the option "Generate peripheral initialization as a pair of .c/.h per peripheral"
Finally, choose "MDK-ARM" to generate a keil project and open it.
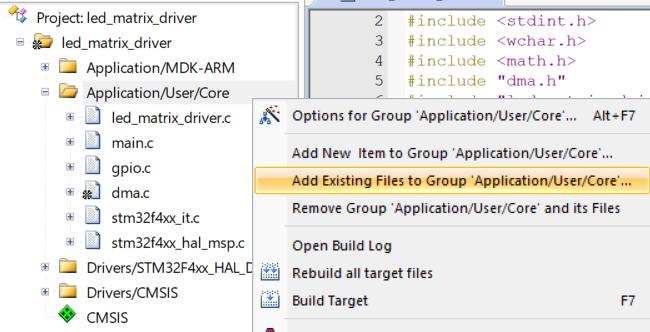
Copy this project's Core/Src/led_matrix_driver.c & Core/Inc/led_matrix_driver.h into your folders. Add the .c file into your Keil's Application/User/Core as shown following.
Then open your main.c and edit main function like this:
int main(void)
{
  /* USER CODE BEGIN 1 */

  /* USER CODE END 1 */

  /* MCU Configuration--------------------------------------------------------*/

  /* Reset of all peripherals, Initializes the Flash interface and the Systick. */
  HAL_Init();

  /* USER CODE BEGIN Init */

  /* USER CODE END Init */

  /* Configure the system clock */
  SystemClock_Config();

  /* USER CODE BEGIN SysInit */

  /* USER CODE END SysInit */

  /* Initialize all configured peripherals */
  MX_GPIO_Init();
  MX_DMA_Init();
  /* USER CODE BEGIN 2 */
  init_driver(0, 1, &hdma_memtomem_dma2_stream0);

  /* USER CODE END 2 */

  /* Infinite loop */
  /* USER CODE BEGIN WHILE */
  uint32_t last, now;
  int cnt = 0;
  last = HAL_GetTick();
  while (1)
  {
    clear_frame();
    ++cnt;
    if (cnt > 63) {
      cnt = 0;
    }
    for (int i = 0; i <= cnt; ++i) {
      draw_line(0, i, 63, i, to_rgb565(128, i*4, 128));
    }
    present_frame();
    HAL_Delay(100);
    /* USER CODE END WHILE */

    /* USER CODE BEGIN 3 */
  }
  /* USER CODE END 3 */
}
compile & flash to your device!
flash above main code and you should see your panel output colorful lines like this:
- purpose of this project
- difference from other projects
- better code
- more examples
- font & text rendering
- reduce ram usage(possibly cannot)

