RoboTutor XPrize System Build
This version was uploaded to XPRIZE on 11/20/2018. For subsequent changes, see (https://github.com/RoboTutorLLC/XPrizeSystemBuild)[https://github.com/RoboTutorLLC/XPrizeSystemBuild].
Steps to install:
- Start from a fresh install of Android 7.1.1 (NMF26H)
- Enable Developer Options, USB Debugging, Install from unknown sources, etc etc
- Connect to Android via USB. Allow your RSA to access.
- You must not have any accounts, Google or otherwise on your device. How to remove accounts.
- Run
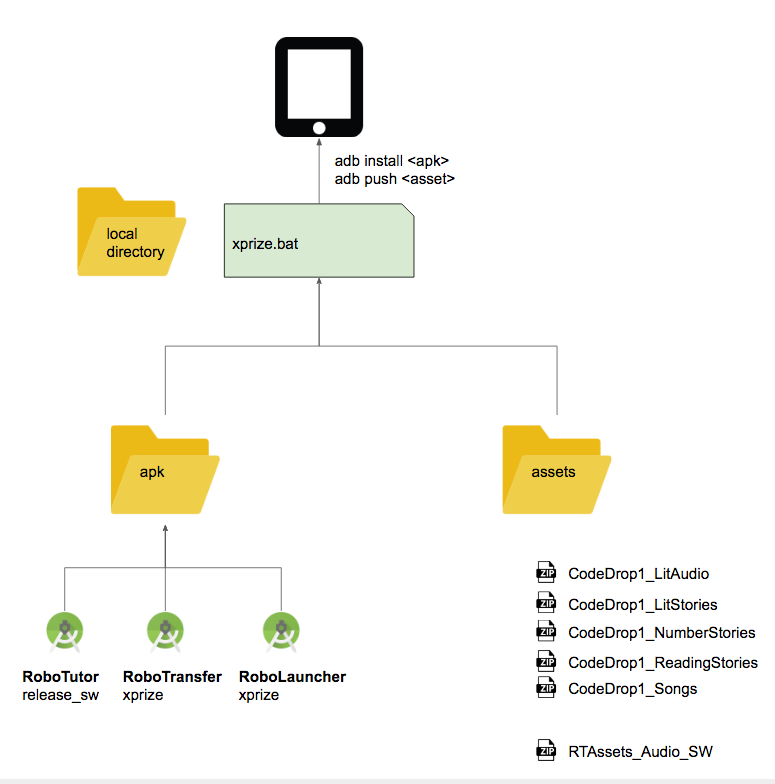
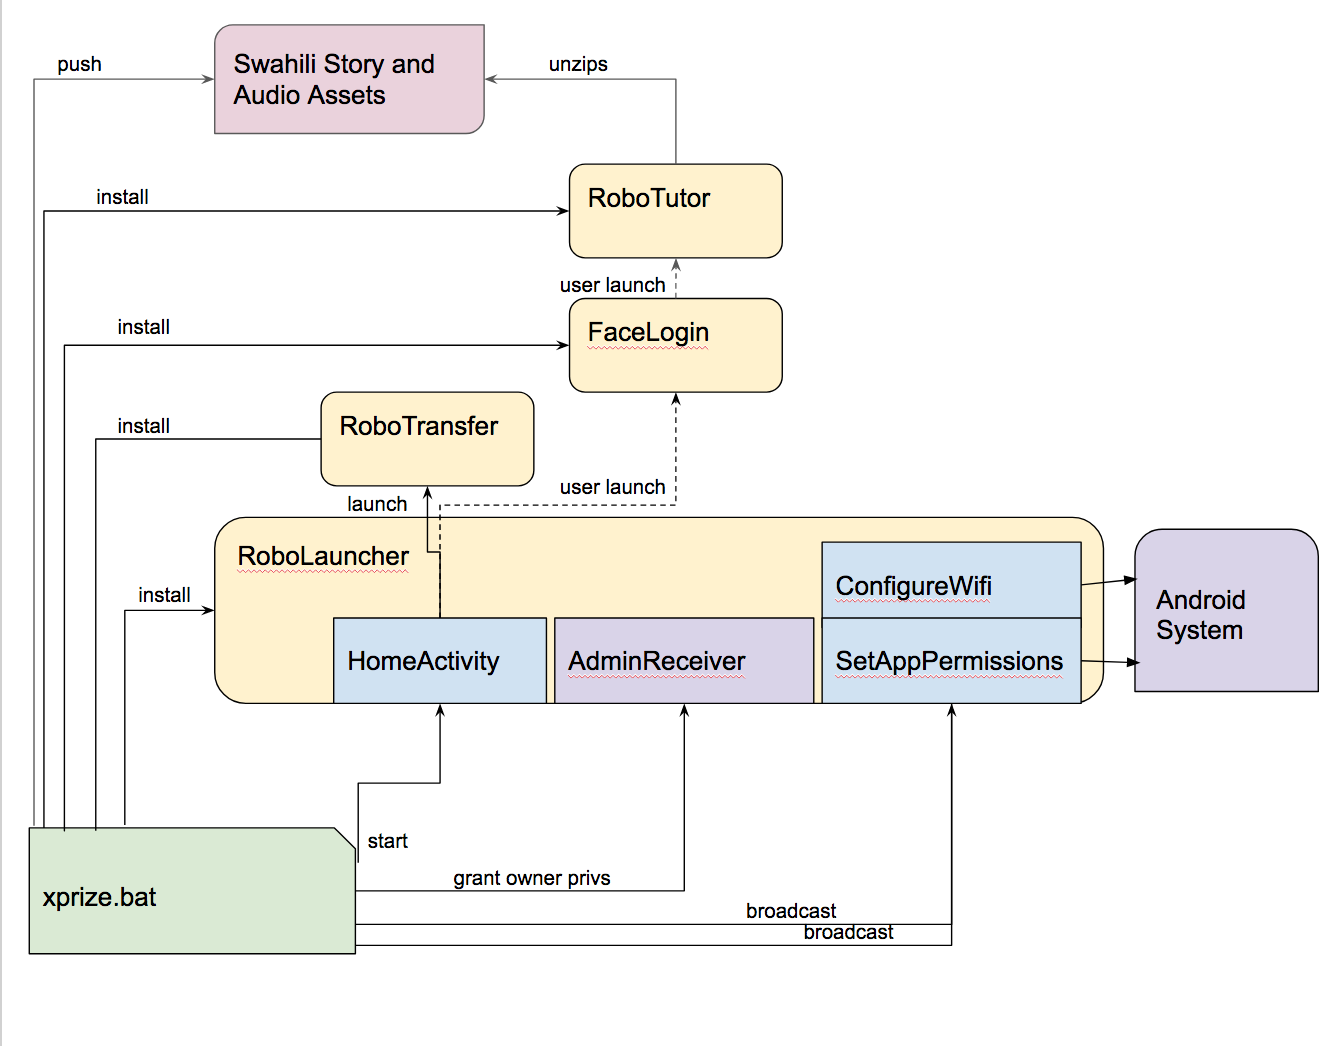
xprize.bat(orxprize.shon Mac/Linux). Note that this will put your device into kiosk mode, so that no other system services can be accessed. - Wait until the script finishes, then start RoboTutor by tapping on the screen.
- When RoboTutor starts up, it will unzip all of the asset files.
Instructions for Testing
- After installation, you should not be able to pull down the top menu, press the home button, or press the recent button.
- While on home screen, tap anywhere on screen.
- If your first time installing, wait for the assets to unzip (there will be a yellow bar on a gray screen).
- Select any activity area.
- There may be a demo video that starts before the tutor begins. Wait for this to finish.
- Exit the tutor by tapping the arrow in the top left corner.
- On the home screen, tap on the door in the lower right to Exit. This should bring you back to FaceLogin.
- Repeat steps 3.3 to 8 two or three times. This will generate some log files to be transferred.
- Check the FTP server for files in the remote folder titled "RoboTutor......json".
Resetting the tablet should bring you back to the RoboTutor home screen
To start over:
- Run
xprize_uninstall.bat(orxprize_uninstall.shon Mac/Linux). This will uninstall all the RoboTutor apps, release kiosk mode, and release device ownership.
Preparing Installation
Only follow these if you have not been given a prepared version of the code for XPrize upload.
-
Go to the RoboTutor repository and go to the Building RoboTutor section. Follow steps 1-7 to generate the APK robotutor.release_sw.1.8.8.1.apk, and then copy it into the apk folder.
-
Go to the RoboLauncher repository and go to the Steps for generating APK section. Follow steps 1-5 to generate the APK RoboLaunch.xprize.1.0.0.apk and then copy it into the apk folder.
-
Go to the RoboTransfer repository and go to the Building Home_Screen section. Follow steps 1-5 to generate the APK []and copy the APKs into the .
-
Go to the CodeDrop1_Assets repostiory and go to the XPrize Pre-Installation process section. Follow steps 1-4 to generate the following zip files. Transfer these files to the assets folder.
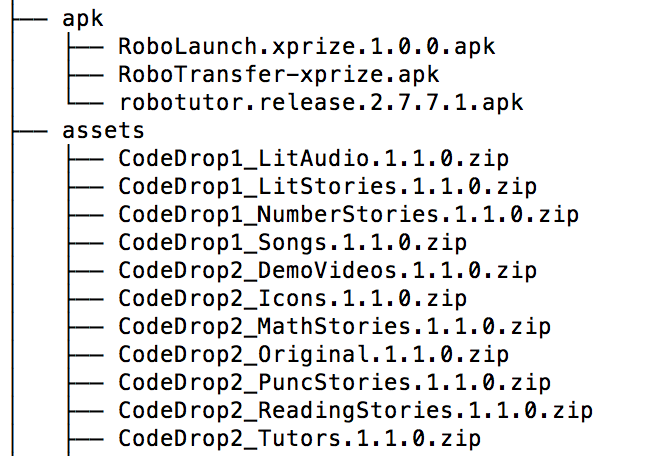
- CodeDrop1_LitAudio.1.1.0.zip
- CodeDrop1_LitStories.1.1.0.zip
- CodeDrop1_NumberStories.1.1.0.zip
- CodeDrop1_Songs.1.1.0.zip
- CodeDrop2_DemoVideos.1.1.0.zip
- CodeDrop2_Icons.1.1.0.zip
- CodeDrop2_MathStories.1.1.0.zip
- CodeDrop2_Original.1.1.0.zip
- CodeDrop2_PuncStories.1.1.0.zip
- CodeDrop2_ReadingStories.1.1.0.zip
- CodeDrop2_Tutors.1.1.0.zip
-
After the listed APKs and assets have been added, your apk and assets directories should look like this:
- Once these files are present, continue below to push assets and install APKs.
Setting up adb on Windows
Follow steps here


