Unreal Engine 5.3 Learning Agents: How to setup Machine Learning with C++ in Unreal Engine
Unreal Engine released a plugin called Learning Agents. Its still in beta and there arent' many recoures on it yet.
Unreal Engine released a Basic Introduction Tutorial .This project is building the same project but with C++ and then is exapanding upon this. The tutorial only goes over basic Reinforcement learning with blueprints.
In this write up i will explain how to setup
- Basic Reinforcement learning with c++
- Imitation learning
- Recording
- Imitation Training
- Deploying the recorded network
- Combine the neural networks with a behavior tree to combine best of both worlds
Table of Contents
- Initial Setup
- Manager Component Layout
- Basic Reinforcement Learning
- Basic Imitation Learning
- Deploying the Neural Network
- Combine with a Behavior Tree
- Everything in Action
- Conclusion
Initial Setup
First create a new Unreal Engine project with version 5.3 or higher. You should make a C++ project to be able to follow this write up.
Then we need to enable the plugin and add private and public DependencyModuleNames
Enable the plugin

After Enabeling the plugin you will be prompted to restart Unreal Engine, You should do so.
Adding Private and Public Dependencies to the project
If we want to work with C++ we should add the Dependencies to the YourProjectName.Build.cs file. This gets generated when you solution is made.
Open up the solution with your prefered IDE and navigate to the Build.cs file. This should be located in the root of your project.
Here we add the dependencies.
PrivateDependencyModuleNames.AddRange(new string[] { "LearningAgentsTraining", "ChaosVehicles" });
PublicDependencyModuleNames.AddRange(new string[] {  "LearningAgents", "LearningAgentsTraining"  });
Note that i also added ChaosVehicles this is used to give the cars input trough c++. If you are not working with the Car template or not using a Vehicle Movement Componet you should not add this.
Manager Component Layout
This plugin uses a component layout.
You will create a manager for each type of learning or actions you want to do.
The base class of each manager is a ALearningAgentsManager which is derived from a AActor
Our Manager basicly can hold our ULearningAgentsManagerComponent
Note: These components are derived from a UActorComponent and not USceneComponent
Altough our components need to be attached to the manager to be able to work (because or manager does not really store the components but our components hold a pointer to our Manager).
void ULearningAgentsManagerComponent::PostInitProperties()
{
	Super::PostInitProperties();

	if (HasAnyFlags(RF_ClassDefaultObject | RF_ArchetypeObject))
	{
		return;
	}

	Manager = GetOwner<ALearningAgentsManager>();

	if (!Manager)
	{
		UE_LOG(LogLearning, Error, TEXT("%s: Must be attached to a LearningAgentsManager Actor."), *GetName());
	}
}
For this reason i decided to make the managers in blueprint as they are basicly emtpy vesels with minimal setup. That way our C++ componets are attached to it without any big problems.
Basic Reinforcement Learning
What components do we need for a basic Reinforcement Learning setup?
- An Interactor (Observe Data and Apply Actions)
- A Trainer (Give rewards And Execute Completions)
- A Policy (Decides What the agent does with the given Observations)
I will now go over each Component and explain what it is used for set it up for my use case
Interactor
The interactor Component will be used to:
- Setup Observations
- Set those Observations
- Setup Actions
- Apply those Actions
Create the Interactor Component

Implementing our Interactor
When our component is added to the project. Open it up in your favourite IDE and we will start with overriding the needed functions in the header file.
We will override the functions that are specified for the above mentioned jobs.
	virtual void SetupObservations_Implementation() override;
	virtual void SetObservations_Implementation(const TArray<int32>& AgentIds) override;

	virtual void SetupActions_Implementation() override;
	virtual void GetActions_Implementation(const TArray<int32>& AgentIds) override;
Setup Observations
Here we want to setup what our neural network is going to observe in the world, This can be any type of datat we want.
All Possible Observation class can be found in LearningAgentsObservations.cpp
In my case i want to observe the car's:
- Position
- Direction
- Angle to the track
- Velocity
- Distance from the middle of the track
void ULearningAgentsInteractorCar::SetupObservations_Implementation()
{
	Super::SetupObservations_Implementation();

	//Planar Observations
	CarPositionOnTrackObservation = UPlanarPositionObservation::AddPlanarPositionObservation(this, TEXT("Car Position On Track"));
	CarDirectionOnTrackObservation = UPlanarDirectionObservation::AddPlanarDirectionObservation(this, TEXT("Car Direction On Track"));
	TrackGlobalAngleObservation = UAngleObservation::AddAngleObservation(this, TEXT("Track Global Angle"));
	CarVelocityObservation = UPlanarVelocityObservation::AddPlanarVelocityObservation(this, TEXT("Car Velocity"));
	CarDistanceToTrackObservation = UFloatObservation::AddFloatObservation(this, TEXT("Car Distance To Track"),1000.f);

	//Helper Observations
	TrackSplineHelper = USplineComponentHelper::AddSplineComponentHelper(this, TEXT("Track Spline Helper"));
}
As you can see each observation takes a pointer to the Interactor. Also a TEXT() is passed this is just for debugging.
We can also pass a float to most Observations this will have the name scale This is used to normailze the data for the observations.
Any helper components that we should need will also be setup here. I would need a USplineComponentHelper in the future so i also set it up here.
At last we store the created observations and helpers as private members in our header.
//Observations
UPROPERTY(VisibleDefaultsOnly, Category = "Observations")
UPlanarPositionObservation* CarPositionOnTrackObservation;

UPROPERTY(VisibleDefaultsOnly, Category = "Observations")
UPlanarDirectionObservation* CarDirectionOnTrackObservation;

UPROPERTY(VisibleDefaultsOnly, Category = "Observations")
UAngleObservation* TrackGlobalAngleObservation;

UPROPERTY(VisibleDefaultsOnly, Category = "Observations")
UPlanarVelocityObservation* CarVelocityObservation;

UPROPERTY(VisibleDefaultsOnly, Category = "Observations")
UFloatObservation* CarDistanceToTrackObservation;

//Helpers
UPROPERTY(VisibleDefaultsOnly, Category = "Observations")
USplineComponentHelper* TrackSplineHelper;
Set Observations
In this function we set the values of those obeservations So first we need to make sure we have access to all the data we need to observe.
I would need access to the track so i made a spline that follows the track. I make a new USplineComponent* member in the header that we can set in Blueprints later. This will be the pointer to the track spline
UPROPERTY(VisibleDefaultsOnly, Category = "Spline")
USplineComponent* TrackSpline;
As you can see a TArray& AgentIdsis passed as parameter. this will be the id for every agent the neural network is training on.
Now that i have access to every piece of data i want to observe i am going to set my observations
void ULearningAgentsInteractorCar::SetObservations_Implementation(const TArray<int32>& AgentIds)
{
	Super::SetObservations_Implementation(AgentIds);
	verify(TrackSpline->IsValidLowLevel())

	for (const int32 AgentId : AgentIds)
	{
		//Get the car and check if its valid
		const AActor* carAgent =  CastChecked<AActor>(GetAgent(AgentId));
		check(carAgent->IsValidLowLevel())
		if(!carAgent->IsValidLowLevel()) continue;

		//get data of the car
		const FVector carLocation = carAgent->GetActorLocation();
		const FRotator carRotation = carAgent->GetActorRotation();
		const FVector carVelocity = carAgent->GetVelocity();

		//get data of the spline
		const float distanceAlongSplineAtPosition = TrackSplineHelper->GetDistanceAlongSplineAtPosition(AgentId, TrackSpline, carLocation);
		const FVector splineLocationAtDistance = TrackSplineHelper->GetPositionAtDistanceAlongSpline(AgentId, TrackSpline, distanceAlongSplineAtPosition);

		const FVector splineDirectionAtDistance = TrackSplineHelper->GetDirectionAtDistanceAlongSpline(AgentId, TrackSpline, distanceAlongSplineAtPosition);

		const float proportionAlongSplineAsAngle = TrackSplineHelper->GetProportionAlongSplineAsAngle(AgentId, TrackSpline, distanceAlongSplineAtPosition);
		const FVector nearestSplineLocation = TrackSplineHelper->GetNearestPositionOnSpline(AgentId, TrackSpline, carLocation);


		//Set The Actual Observations
		CarPositionOnTrackObservation->SetPlanarPositionObservation(AgentId, splineLocationAtDistance, carLocation, carRotation);
		CarDirectionOnTrackObservation->SetPlanarDirectionObservation(AgentId, splineDirectionAtDistance, carRotation);
		TrackGlobalAngleObservation->SetAngleObservation(AgentId, proportionAlongSplineAsAngle);
		CarVelocityObservation->SetPlanarVelocityObservation(AgentId, carVelocity);
		CarDistanceToTrackObservation->SetFloatObservation(AgentId, FVector::Dist(carLocation, nearestSplineLocation));
	}
}
Setup Actions
Now that we have a basic understanding how everything works weh can do the same for the Actions. We can find all possible Actions in LearningAgentsActions.cpp
Storing the actions as members:
//Actions
UPROPERTY(VisibleDefaultsOnly, Category = "Actions")
UFloatAction* CarThrottleAction;

UPROPERTY(VisibleDefaultsOnly, Category = "Actions")
UFloatAction* CarBrakeAction;

UPROPERTY(VisibleDefaultsOnly, Category = "Actions")
UFloatAction* SteeringAction;
Now that our header is filed in we can assign the actions.
void ULearningAgentsInteractorCar::SetupActions_Implementation()
{
	Super::SetupActions_Implementation();

	CarThrottleAction = UFloatAction::AddFloatAction(this, TEXT("Throttle"), 2.f);
	CarBrakeAction = UFloatAction::AddFloatAction(this, TEXT("Brake"), 0.1f);
	SteeringAction = UFloatAction::AddFloatAction(this, TEXT("Steering"), 2.f);
}
Set Actions
Now we actually need to perform the actions. The actions will be generated based upon the observations. In my case i waill pass the actions to the VehicleMovementComponent
void ULearningAgentsInteractorCar::GetActions_Implementation(const TArray<int32>& AgentIds)
{
	Super::GetActions_Implementation(AgentIds);
	for (const int32 AgentId : AgentIds)
	{
		const AActor* carAgent =  CastChecked<AActor>(GetAgent(AgentId));
		check(carAgent->IsValidLowLevel())
		if(!carAgent->IsValidLowLevel()) continue;

		const float throttleValue = CarThrottleAction->GetFloatAction(AgentId);
		const float brakeValue = CarBrakeAction->GetFloatAction(AgentId);
		const float steeringValue = SteeringAction->GetFloatAction(AgentId);

		//Apply the value's to the movement component of the actor
		 UChaosVehicleMovementComponent* vehMovementComponent = carAgent->FindComponentByClass<UChaosVehicleMovementComponent>();
		 check(vehMovementComponent->IsValidLowLevel())
		 if(!vehMovementComponent->IsValidLowLevel()) continue;

                 vehMovementComponent->SetThrottleInput(throttleValue);
		 vehMovementComponent->SetBrakeInput(brakeValue);
		 vehMovementComponent->SetSteeringInput(steeringValue);
	}
}
Trainer
The trainer is used to set rewards and completions for our neural network. It should:
- Setup Rewards
- Give Those Rewards
- Setup When a run is Complete
- Activate these Completions
Create the Trainer Component

Implementing our Trainer
We will override these functions to set rewards, completions and to reset an agent
virtual void SetupRewards_Implementation() override;
virtual void SetRewards_Implementation(const TArray<int32>& AgentIds) override;

virtual void SetupCompletions_Implementation() override;
virtual void SetCompletions_Implementation(const TArray<int32>& AgentIds) override;

virtual void ResetEpisodes_Implementation(const TArray<int32>& AgentIds) override;
Setup Rewards
Here we decide how the agent can get 'points' In my case i will give him points for Velocity and how far he is from the spline. Speaking of the spline i will probably will need a 'USplineComponentHelper'
Again All our Rewards are stored in 1 file: LearningAgentsRewards.cpp
First we make the members:
//Helpers
UPROPERTY(VisibleDefaultsOnly, Category = "Spline")
USplineComponentHelper* TrackSplineHelper;

//Rewards
UPROPERTY(VisibleDefaultsOnly, Category = "Rewards")
UScalarVelocityReward* VelocityReward;

UPROPERTY(VisibleDefaultsOnly, Category = "Rewards")
UFloatReward* DistanceReward;
Then we Setup those rewards:
void ULearningAgentsTrainerCar::SetupRewards_Implementation()
{
	Super::SetupRewards_Implementation();

	TrackSplineHelper = USplineComponentHelper::AddSplineComponentHelper(this, TEXT("Track Spline Helper"));

	//Rewards
	VelocityReward = UScalarVelocityReward::AddScalarVelocityReward(this, TEXT("Velocity Reward"));
	DistanceReward = UFloatReward::AddFloatReward(this, TEXT("Distance Reward"), 1.f);
}
Set Rewards
Now we will decide when we give Rewards/Penaltys and how big those are
void ULearningAgentsTrainerCar::SetRewards_Implementation(const TArray<int32>& AgentIds)
{
	Super::SetRewards_Implementation(AgentIds);

	for (const int32 AgentId : AgentIds)
	{
		const AActor* carActor = CastChecked<AActor>(GetAgent(AgentId));
		check(carActor->IsValidLowLevel())

		const FVector carVelocity = carActor->GetVelocity();
		const FVector carLocation = carActor->GetActorLocation();

		const float velocityAlongSpline = TrackSplineHelper->GetVelocityAlongSpline(AgentId, TrackSpline, carLocation, carVelocity);
		const FVector closestPointOnSpline = TrackSplineHelper->GetNearestPositionOnSpline(AgentId, TrackSpline, carLocation);
		const float distanceToSpline = FVector::Distance(carLocation, closestPointOnSpline);


		//The closer from the spline the bigger the reward
		//When we go over 100.f we start to penalize the agent big time
		const float closeReward = UKismetMathLibrary::MapRangeClamped(distanceToSpline, 100.1f, 1800.f, 0.f, -4.5f);
		const float farReward = UKismetMathLibrary::MapRangeClamped(distanceToSpline, 0.f, 100.f, 1.f, 0.f);
		const float distanceReward = UKismetMathLibrary::SelectFloat(closeReward, farReward, distanceToSpline >= 100.1f);

		//Set Rewards
		DistanceReward->SetFloatReward(AgentId, distanceReward);
		VelocityReward->SetScalarVelocityReward(AgentId, velocityAlongSpline);
	}
}
Setup Completions
Here we dicide the condition for the the agent to be "reset".
All Completion types can be found in LearningAgentsCompletions.cpp
Again we store this as a member to use later
	//Completions
	UPROPERTY(VisibleDefaultsOnly, Category = "Completions")
	UPlanarPositionDifferenceCompletion* OffTrackCompletion;
Now th actual implementation. In my case it will be a simple distance. When the distance between points is bigger then 1200.f the Resetting will fire.
void ULearningAgentsTrainerCar::SetupCompletions_Implementation()
{
	Super::SetupCompletions_Implementation();
	OffTrackCompletion = UPlanarPositionDifferenceCompletion::AddPlanarPositionDifferenceCompletion(this, TEXT("Off Track Completion"),1200.f);
}
Set Completions
Here we will set the value the completion should have. In my cast the 2 points.
void ULearningAgentsTrainerCar::SetCompletions_Implementation(const TArray<int32>& AgentIds)
{
	Super::SetCompletions_Implementation(AgentIds);

	for (const int32 AgentId : AgentIds)
	{
		const AActor* carActor = CastChecked<AActor>(GetAgent(AgentId));
		check(carActor->IsValidLowLevel())

		const FVector carLocation = carActor->GetActorLocation();
		const FVector closestPointOnSpline = TrackSplineHelper->GetNearestPositionOnSpline(AgentId, TrackSpline, carLocation);

		//Set Completions
		OffTrackCompletion->SetPlanarPositionDifferenceCompletion(AgentId, closestPointOnSpline, carLocation);
	}
}
Reset
Now the last step of the Trainer is the resetting of the agents when the Completion is met.
So for when the car is going offtrack i will place it on a random point on the track.
I use the allready made car blueprint from unreal engine self so i made the function in blueprints. I just call it here in c++ (I don't recommenddoing this! It is for demo purposes only)
void ULearningAgentsTrainerCar::ResetEpisodes_Implementation(const TArray<int32>& AgentIds)
{
	Super::ResetEpisodes_Implementation(AgentIds);

	for (const int32 AgentId : AgentIds)
	{
		AActor* carActor = CastChecked<AActor>(GetAgent(AgentId));
		check(carActor->IsValidLowLevel())

		//Set the car on a random point on the spline.
		//Why a random point? Because if we always start at the same point, the agent will learn the way the track goes and the learned data will not be flexible enough.
		FOutputDeviceNull OutputDevice;
		carActor->CallFunctionByNameWithArguments(TEXT("ResetToRandomPointOnSpline"), OutputDevice, NULL, true);
	}
}
Policy
A Policy decides what the agent does. It also adds 'noise'. That's a fancy term for it just tries out things and checks if the reward was greater then before.
We don't need to setup this component and only give it some settings in the manager so we can do that in blueprints.
Creating the Policy Component

Setup The Reinforcement Learning Manager
The bigest bit of setup is now done. In our manager we just need to register our made components and thats about it for the manager.
-
Create the manager

-
Set the number of agents we want to use and Add the components
-
Initialize the components and run training
 As you can see we just call Setup for every component. and promote the settings as a member variable.
Also for now we don't select a neural network asset for the Policy I will cover this a bit later in this write up.
I will also come back to talk about the Run Training settings.
As you can see we just call Setup for every component. and promote the settings as a member variable.
Also for now we don't select a neural network asset for the Policy I will cover this a bit later in this write up.
I will also come back to talk about the Run Training settings. -
Set the tick.
Now at last we only set the tick interval of the manager. This just means what is the interval for the observations.
We can find this under the manager class defaults, Its right above where we have set the Max Agent Num. In my case i set it to 0.1. If you set it this number too small you will start to get odd behaviour. because the actions and observations will not be "smoothed".
If you set it too high it will look like somebody playing with a hight ping.


Register The Agents
Now with this all setup we want our agents to be registered to our manager. In this demo i did set the Agent Max Num to 32 as shown in step 2 of setting up the manager. You can expiriment with this as you like.
- Spawn The manager in the level, Just drag the blueprint in the world and you are set
- Open up your agent you want to train and add it to the manager

- Drag the agent blueprint into the level, You can drag as many in the world as you set the limit in the manager (if you spawn more they just won't be registered in the manager)

Create a Neural Network Data Type
Last step in setting up Reinforcement Learning is creating the Neural Network and setting as our network asset in the policy inside our manager.
- Create the Neural Network Data Type
- Select the asset in our manager for our policy

Basic Imitation learning
What is the difference between reinforcement learning and Imitation learning?
With Imitation learning we will "record" what actions give what results. In most cases this just means record what a actual human does. But this can aswel be recording an allready trained neural network or recording an actor that is working with a behaviour tree.
When we recorded all the actions we will we wil train a neural network with the recorded behavour. Basicly giving it a really big push to where it should go. And with reinforcement leaning the network needs to figure out himself towards which direciton it should go to rack up points.
Recorder Manager
First we would want to record a nice big data set. This is done with the record manager. From now on we can really recycle components as most of the things are set up. We would need a:
- Interactor (reusable)
- Recorder
- Controller
Interactor Component
First of our interactor component. We can use the same interactor that we allready made so nothing more to do here.
Recorder Component
We just need to create the component for a basic setup. I won't go over how to create it as its eplained for the other components above.
our recorder component will record our Actions and Observations and store that to a Record asset.
Offcourse we can much more with this component then its basic use case. for eample We can Save the recording to a file. append it to an e isting recording and so forth.
Controller Component
As with the recorder, Its the same for our controller, We just need to create one.
The Controller component is used for "injecting" our set actions into the system. So we just use it for encoding our actions. Nothing more.
Setup Record Manager
First we create a new Manager (just another blueprint of base class Learning Agents Manager)
Then we add our created components (Interactor, Recorder and Controller).
With this setup we can open the manager and:
-
Set the Max Agent Num and Tick interval
-
Setup the components
 As you can see we dont give it a Recording asset, We will create it later and then come back to the manager to select it.
 -
Start a Recording loop
 We create a variable for how long we want to record for. and just wait that amount of time to end our recording.
Note: When we stop playing the latest recording won't be lost because EndRecording wasn't called. When we stop playing the Record Component will call it before closing the game.
Also When calling BeginRecording we want to disable Reinitialize Recording. Otherwise it will wipe out all our previous recordings if any were allready made.
We create a variable for how long we want to record for. and just wait that amount of time to end our recording.
Note: When we stop playing the latest recording won't be lost because EndRecording wasn't called. When we stop playing the Record Component will call it before closing the game.
Also When calling BeginRecording we want to disable Reinitialize Recording. Otherwise it will wipe out all our previous recordings if any were allready made. -
Set the actions Now we want to set the actions for our interactor (Because our neural network does not do it now, We do it). For this we create a new function in our interactor component
Header:
	UFUNCTION(BlueprintCallable, Category = "Actions")
	void SetActions(TSubclassOf<UObject> agentClass);
Implementation:
void ULearningAgentsInteractorCar::SetActions(TSubclassOf<UObject> agentClass)
{
	TArray<UObject*> OutAgents{};
	TArray<int32> OutAgentIds{};
	GetAllAgents(OutAgents, OutAgentIds, agentClass);

	for (const int32 AgentId : OutAgentIds)
	{
		const AActor* carAgent =  CastChecked<AActor>(GetAgent(AgentId));
		check(carAgent->IsValidLowLevel())
		if(!carAgent->IsValidLowLevel()) continue;

		//Get the input that was giving to the car
		 UChaosVehicleMovementComponent* vehMovementComponent = carAgent->FindComponentByClass<UChaosVehicleMovementComponent>();
		 check(vehMovementComponent->IsValidLowLevel())
		 if(!vehMovementComponent->IsValidLowLevel()) continue;

		CarThrottleAction->SetFloatAction(AgentId, vehMovementComponent->GetThrottleInput());
		CarBrakeAction->SetFloatAction(AgentId, vehMovementComponent->GetBrakeInput());
		SteeringAction->SetFloatAction(AgentId, vehMovementComponent->GetSteeringInput());
	}
}
In this function we get all the agents of the selected class, Go over them get the giving input ad set that as the action. (basicly setting the neural networks output)
Now we can call this in our manager.
-
Encode and Add Experience
Now we will Encode our Observations, Actions and add Exerience
Observations: When encoding our observations, we just gather all the observations made and call the SetObservations function.
Actions: This sets our actions (That we have set in our Interactor) in our controller.
Experience: This will take the Actions and Observations and place it in the recording buffer (all our experiences will be add up until a recoding is ended to make 1 recording entry).


Recording Asset
Now we just have to create a record asset, and select it in our manager.

That's it, Remove the Reinforcement learning manager out of the level, and add this one. Don't forget to edit the agent, now it still gets the Reinforcement Learning manger, Change that to the Record manager.
When this is done we can just play as an agent and it records what we are doing to learn from later. Make sure you have a nice big data set.
Imitation Manager
With this class we will create a actual neural network from our recordings. The setup of this class is pretty straightforward.
So again we create a new empty manager.
- Imitation Trainer Component This component just needs to be created and added to the new manager It will train the neural network form our recordings.
- Policy Component We can reuse the existing policy
- Interactor Component The same for the interactor. We add our allready made interactor to the manager
Setting up the Imitation Manager
- Set the tick interval and the MaxAgentNum in the class defaults This is the same as we have done it a few times allready.
- Setup the components
- Run The Training


We need to select our recording here. Make sure you first have recorded a nice big data set.
We will reinitialize our policy to make sure we start from a clean slate as this will produce better results.
Also in the Imitation training trainer settings we will reduce the number of itterations. This is to prevent overfitting. You should test out this number for your application offcourse.
Overfitting you say? What is overfitting
in basic terms, the agent will have trained too much on the given recording and will work good in the same environment that the data was recorded in. But it will have a really hard time learning new concepts or adapt to slightly different situations.
We can also set a timer for the training to stop after a certain amount of time if we want to.
This is it for our Imitation manager, We again update our agent to register to this manager and we let it run.
Inference Manager
(usaually after imitation learning you would run Reinforcement learning to further train the network before we use it)
Now the last thing we need to do is actual put the trained result to test. We create on last manager set up the tick and the max agent num.
and give it our policy and Interactor component.

We change our agent again to be added to this new manager and thats it we can now see the trained network put to work.
Passing the action values to a Behavior Tree.
What if we want to have more control over what is being done? The Behavior Tree comes to the rescue.
Litterly any setup with the behaviour tree is possible: Do we want our neural network to steer the actions of the tree? it can! Do we want our behaviour tree to decide when to use the actions of the neural network? guess what! it can be done!
I will demonstrate the latter in this project.
Changing our Interactor Component
Some things will need to be modified in order for this setup to work. First we will look at our interactor component. As the GetActions function now directly applies the actions to our MovementComponent.
For ease of use i will define a struct that holds all our generated action values.
USTRUCT(BlueprintType, Blueprintable )
struct FCarActions
{
	GENERATED_BODY()

	FCarActions() : Throttle(0.f), Brake(0.f), Steering(0.f) {}

	UPROPERTY(EditAnywhere, BlueprintReadWrite, Category = "Actions")
	float Throttle;

	UPROPERTY(EditAnywhere, BlueprintReadWrite, Category = "Actions")
	float Brake;

	UPROPERTY(EditAnywhere, BlueprintReadWrite, Category = "Actions")
	float Steering;
};
Now we can add a bool that dictates if the actions are directly applied or not and we will use the struct to fill in our actions.
Additions to the Interactor Header:
public:
	UFUNCTION(BlueprintCallable, Category = "Actions")
	UFloatAction* GetSteeringAction() const { return SteeringAction; }

	UFUNCTION(BlueprintCallable, Category = "Learning Agents")
	bool GetApplyDirectlyToCar() const { return bApplyDirectlyToCar; }

	UFUNCTION(BlueprintCallable, Category = "Learning Agents")
	void SetApplyDirectlyToCar(bool bNewApplyDirectlyToCar) { bApplyDirectlyToCar = bNewApplyDirectlyToCar; }
private:
	UPROPERTY(VisibleAnywhere, Category = "Actions")
	FCarActions CarActions{};

	UPROPERTY(EditAnywhere, Category = "Actions")
	bool bApplyDirectlyToCar = true;
Changes to the Interactor's GetActions_Implementation
void ULearningAgentsInteractorCar::GetActions_Implementation(const TArray<int32>& AgentIds)
{
	Super::GetActions_Implementation(AgentIds);
	for (const int32 AgentId : AgentIds)
	{
		const AActor* carAgent =  CastChecked<AActor>(GetAgent(AgentId));
		check(carAgent->IsValidLowLevel())
		if(!carAgent->IsValidLowLevel()) continue;

		CarActions.Throttle = CarThrottleAction->GetFloatAction(AgentId);
		CarActions.Brake = CarBrakeAction->GetFloatAction(AgentId);
		CarActions.Steering = SteeringAction->GetFloatAction(AgentId);

		if(bApplyDirectlyToCar)
		{
			//Apply the value's to the movement component of the actor
			 UChaosVehicleMovementComponent* vehMovementComponent = carAgent->FindComponentByClass<UChaosVehicleMovementComponent>();
			 check(vehMovementComponent->IsValidLowLevel())
			 if(!vehMovementComponent->IsValidLowLevel()) continue;

			vehMovementComponent->SetThrottleInput(CarActions.Throttle);
			vehMovementComponent->SetBrakeInput(CarActions.Brake);
			vehMovementComponent->SetSteeringInput(CarActions.Steering);
		}
	}
}
Here we just stored the actions values in our new struct and only apply them if the bool is set to true.
Setup the Behavior Tree
-
Create a Behaviour Tree and Blackboard
-
Fill in the blackboard keys
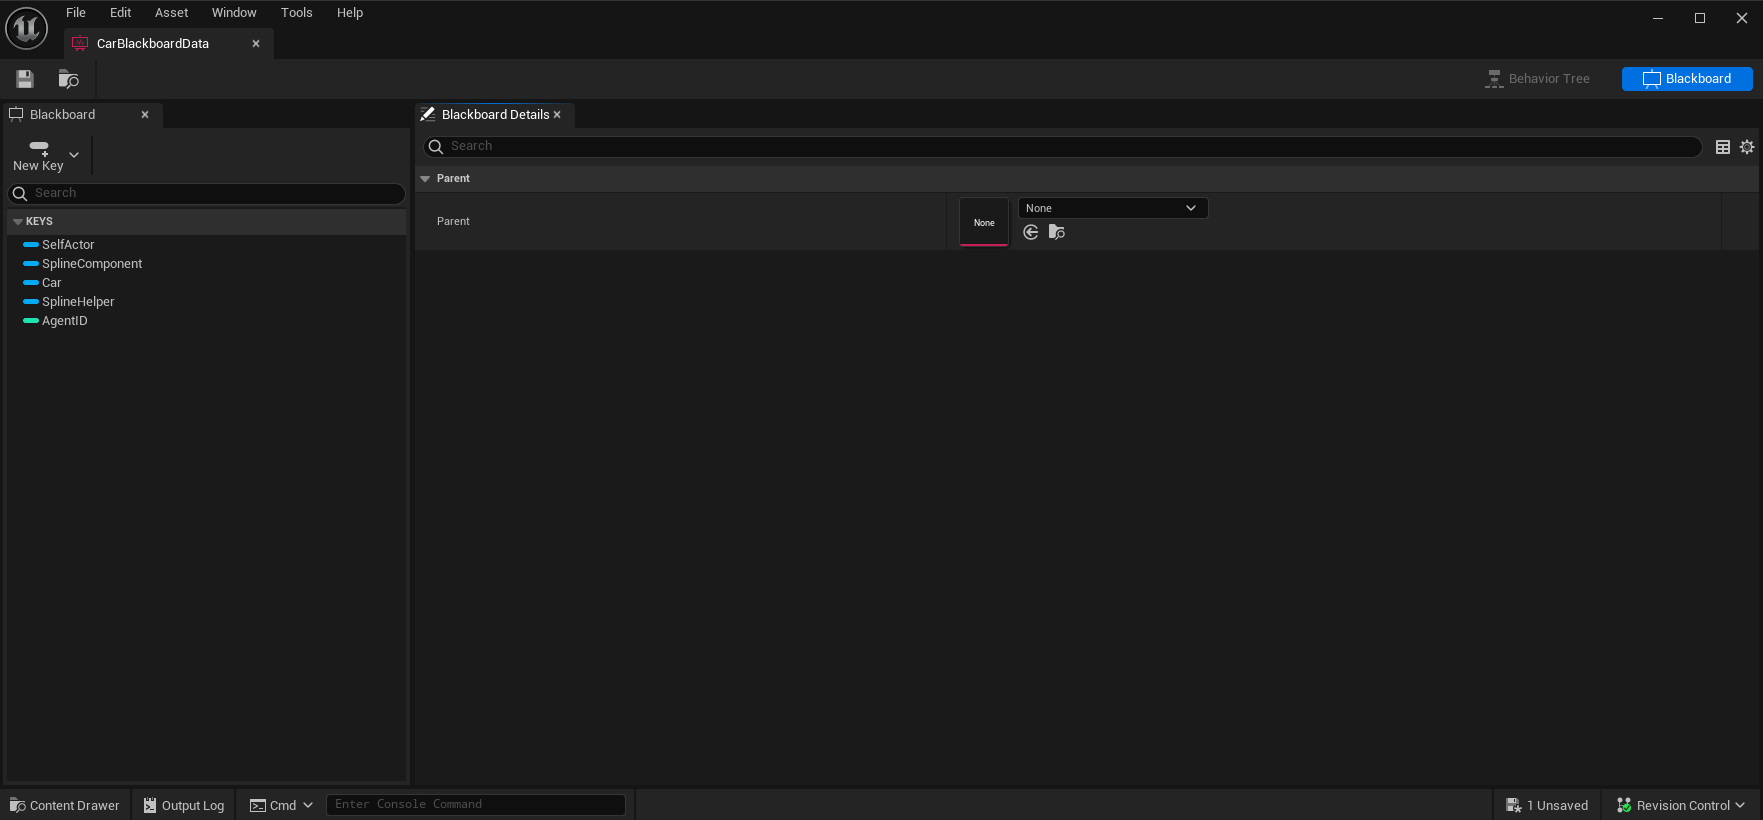
-
Create a AI Controller (Will send the behavior tree actions to the car to perform)
-
Set the Behaviour tree and fill in the blackbaord data. Open up the created Ai controller and now we are going to set it up to work with the behavior tree. I've created a link to the blueprint as this is a bit more setup in blueprints. You can find it here, you will be able to zoom in and copy the blueprints
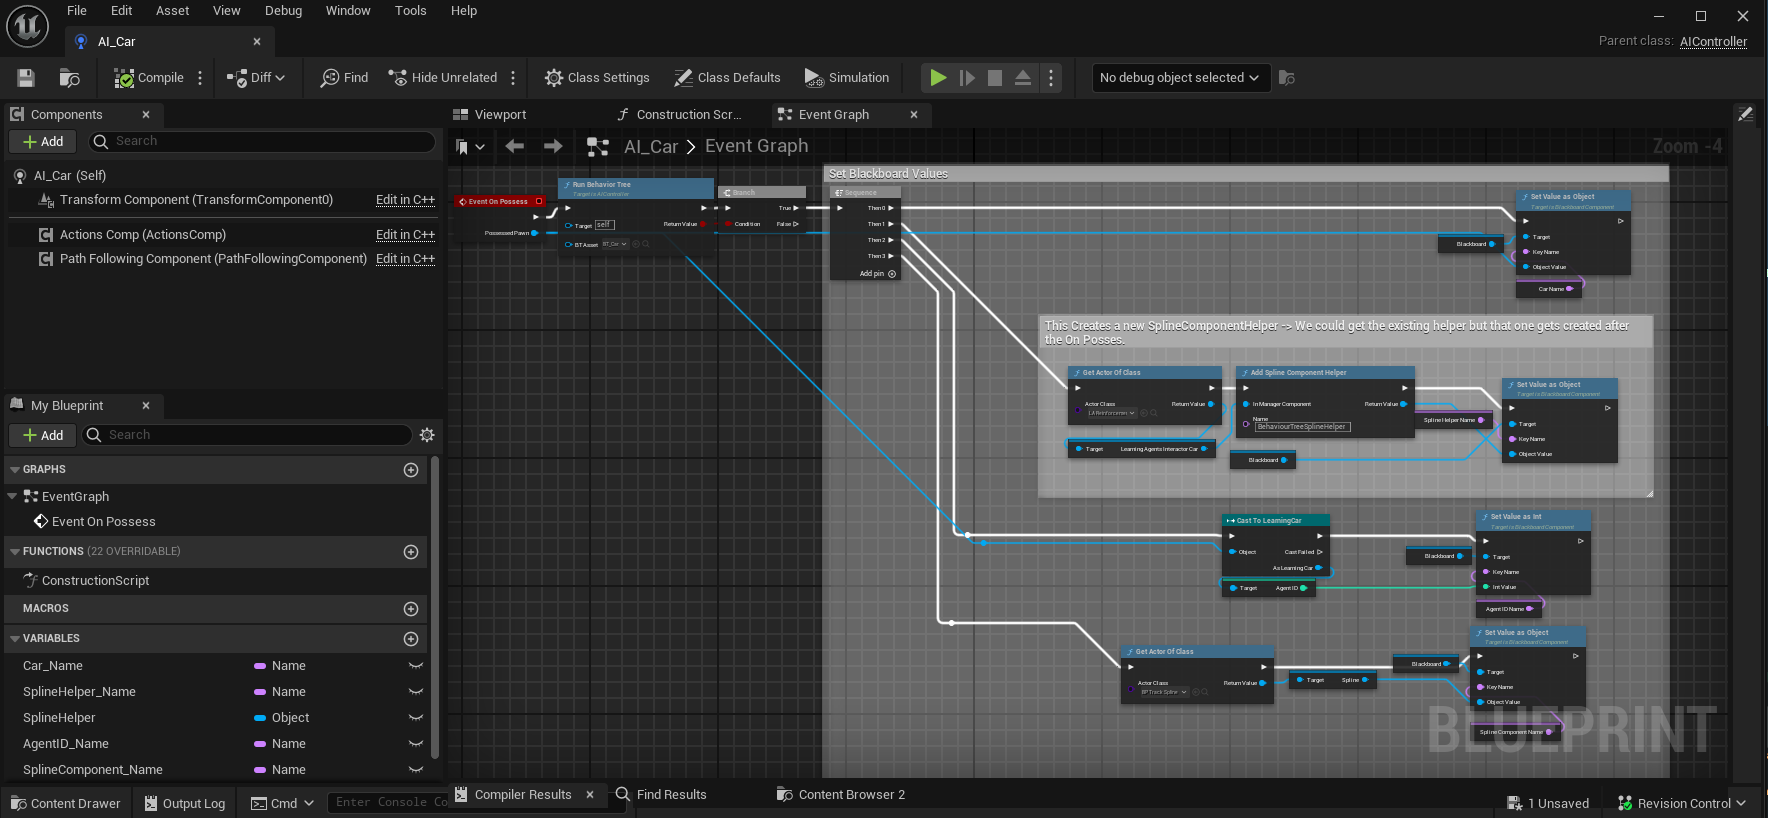 Basicly we call Run Behavior Tree and give it our made behavior tree as parameter, then we fill in our blackboard keys.
 -
Select our the ai controller in the agent and setup our agent
- We Store the manager and its interactor component On Begin Play
- We Store the actions and update them on tick. (We cant take a pointer to the custom struct due to unreal reasons)
- Select the custom Ai Controller for the car
-
Change our Inference Manager
We Expose a bool to use the behavoir tree or not and set in the interactor.
-
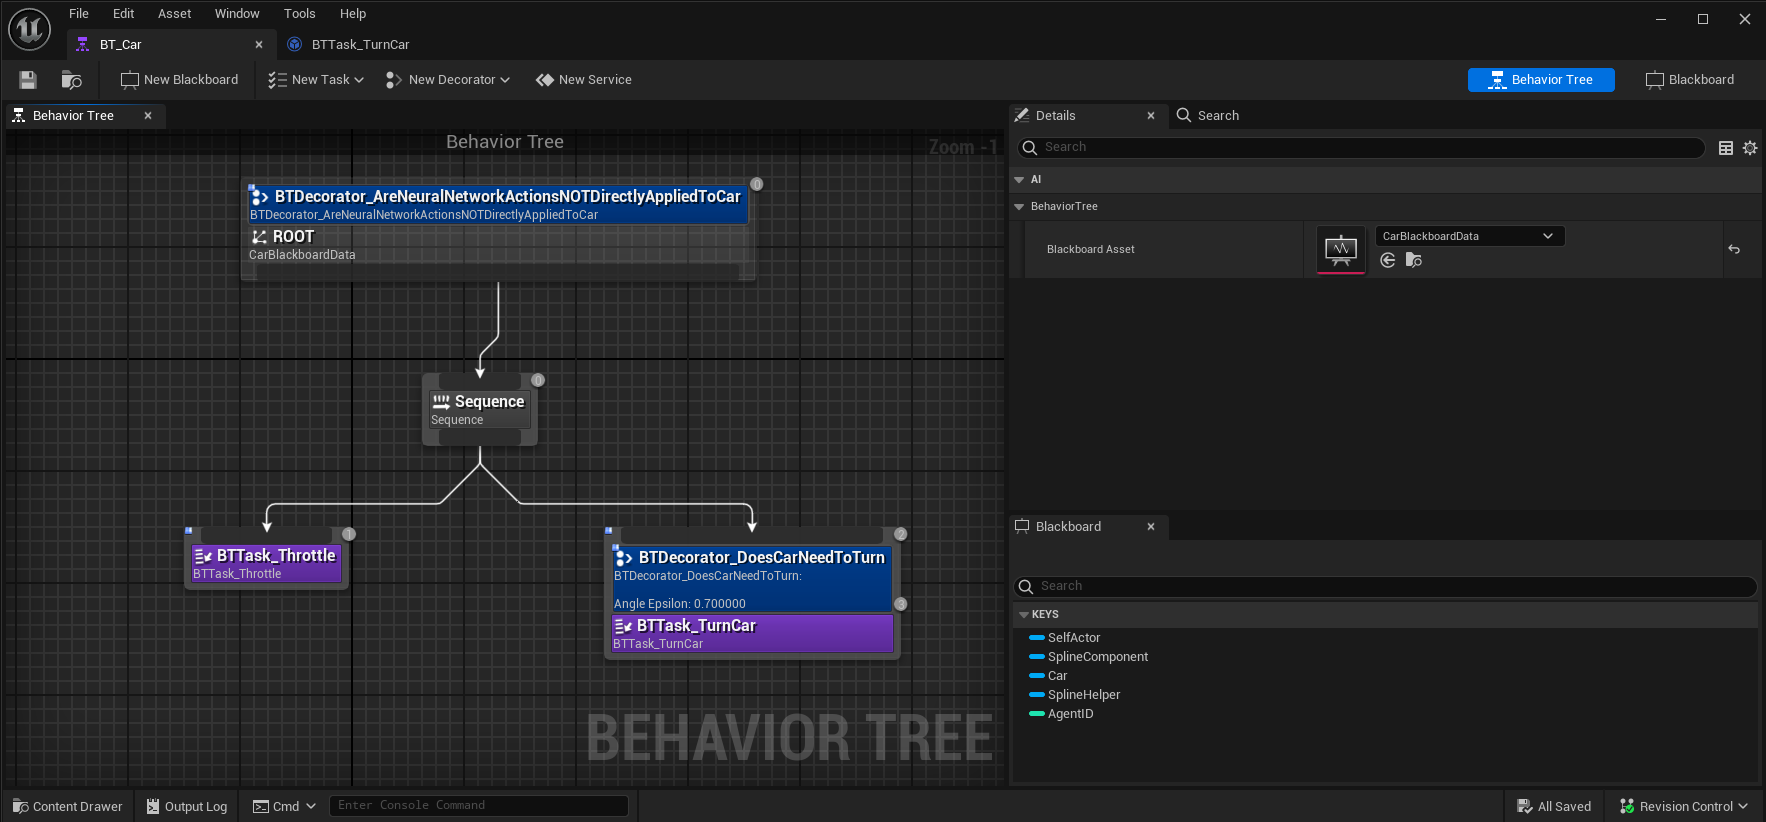
Setup our Behaviour Tree
Now we just check if the the behaviour tree should be used and set the conditions when to do an action
I will not explain how every task and decorator is setup but if you want you can take a look in the project! Thats why its here :)
In basic terms we check if the car needs to be turn, and if so we let the neural network take over and apply its actions to the movement component.
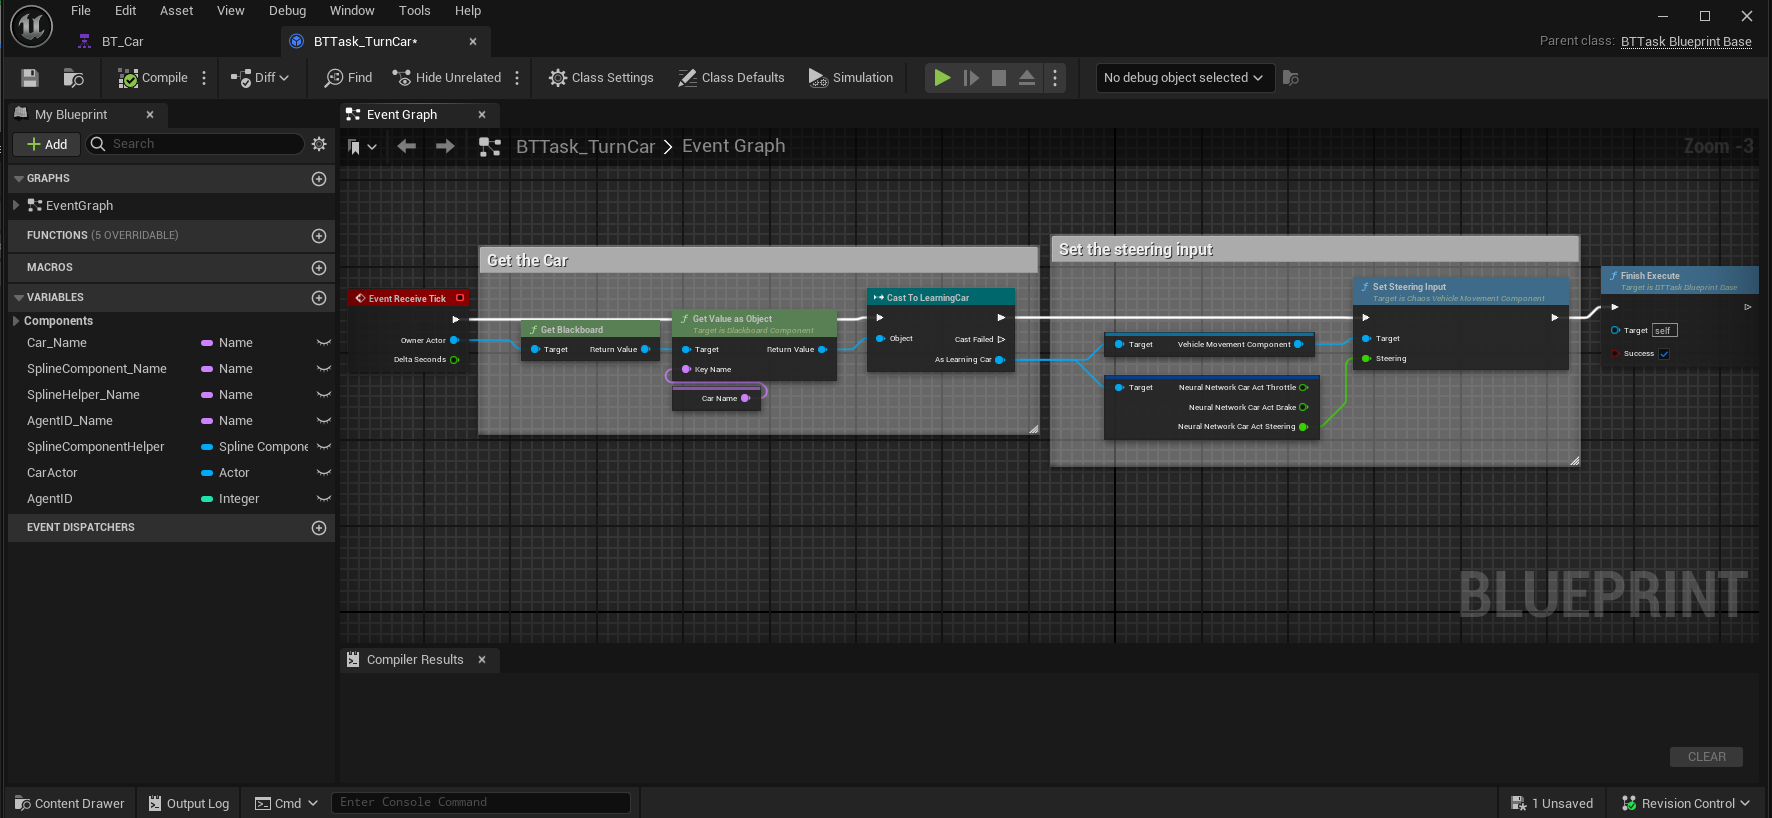


Thats it, Now we just set use Behavior tree to true in our manager and voila the neural network only gets used when we actually decide when we want to steer.
The Neural Network and the Behavior Tree in Action

Conclusion
Why use a Behavior Tree
A behavior tree is really good ad deciding WHEN an action should occur or anything "hardcoded" think a wandering radius.
We don't want to setup a neural network to learn a wandering readius? we just set a wandering radius. For things like this the combination fits perfectly.