This repo is forked from https://github.com/AlexeyAB/darknet and will contain the instructions to build and use train, map calculation and test options with YOLOV4 and YOLOV4-CSP.
To be able to use this repo, you need to build the environment first. The following build instructions contains what to do step by step and tested only on Windows .
PLease use only the referred versions of the dependencies to avoid version conflict
-
Download Visual Studio 2019 Community
-
Download CUDA Toolkit 11.5 https://developer.nvidia.com/cuda-11-5-0-download-archive?target_os=Windows&target_arch=x86_64&target_version=10&target_type=exe_local
-
Download CUDNN 8.3.0 for CUDA 11.5 https://developer.nvidia.com/rdp/cudnn-archive
-
Download OpenCV 4.5.4 https://opencv.org/releases/
Add the dependencies to your system environments as follows (according to your local path):

-
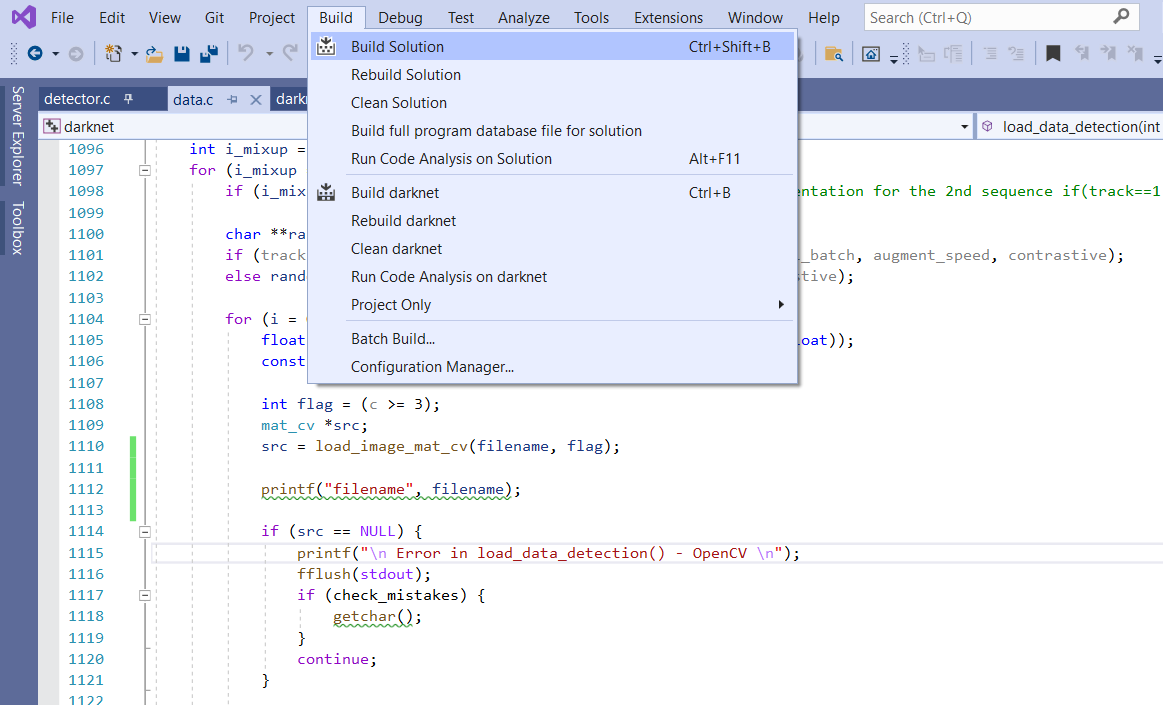
Open darknet.sln solution with Visual Studio 2019
-
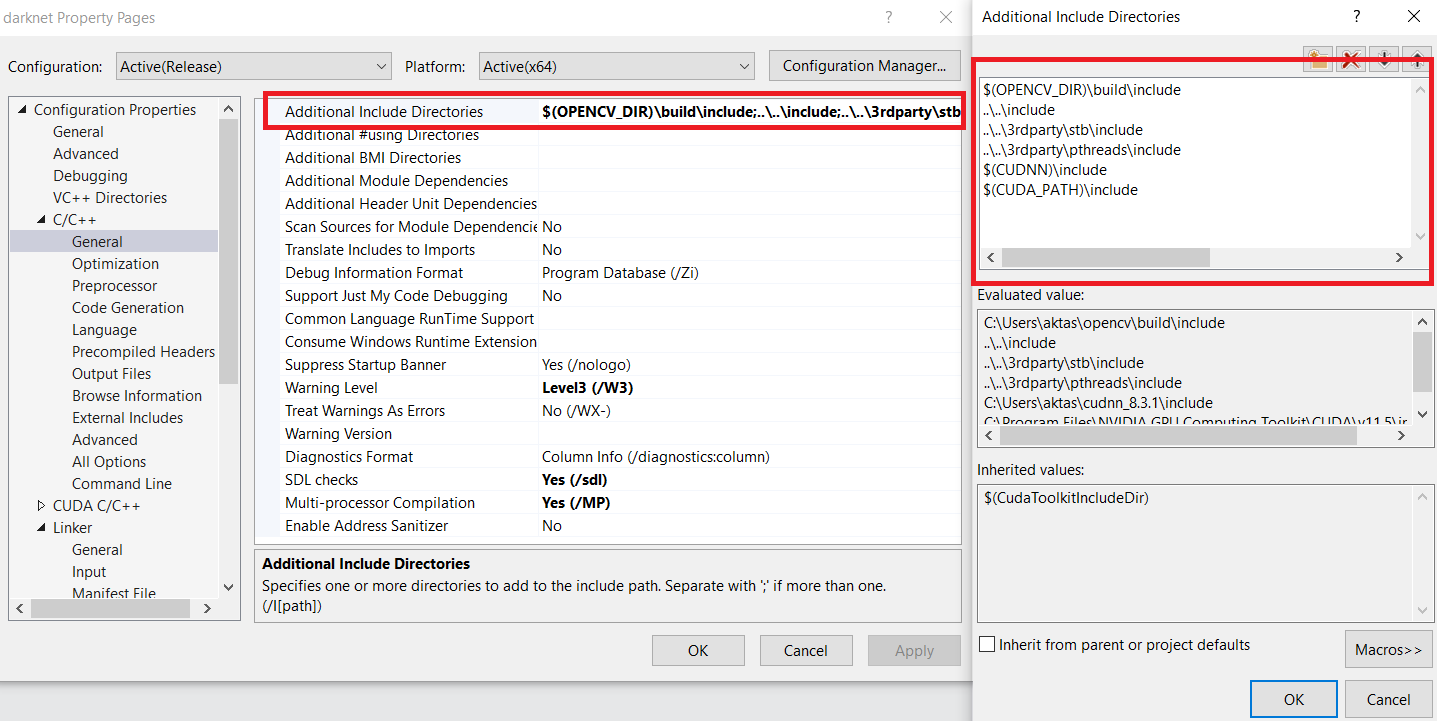
By right click on Solution Explorer at the right side of the window, select properties
-
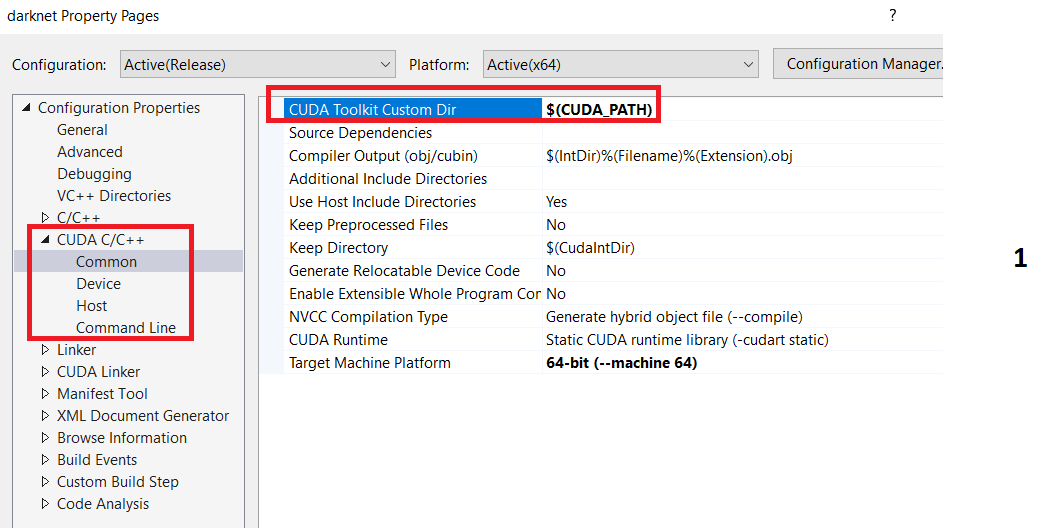
Add the necessary C/C++ libraries as follows
-
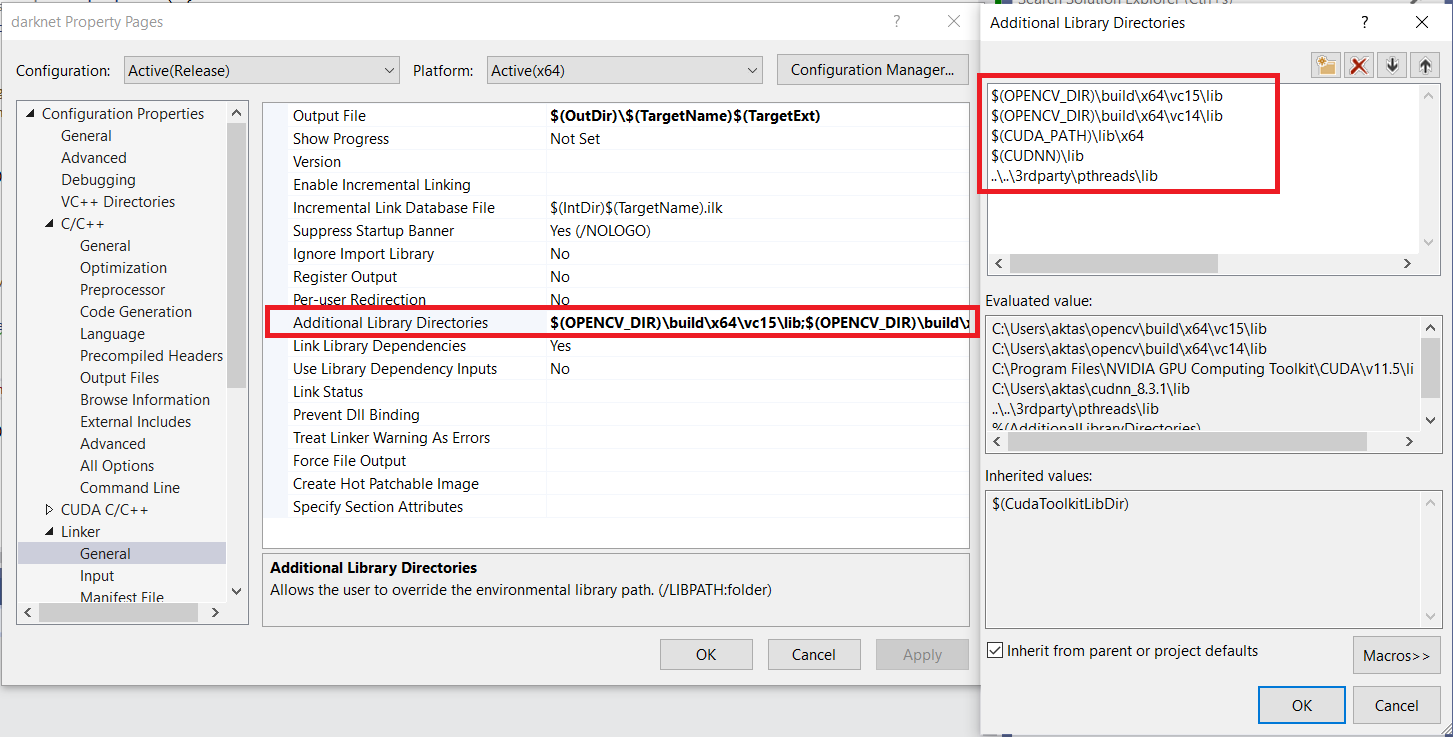
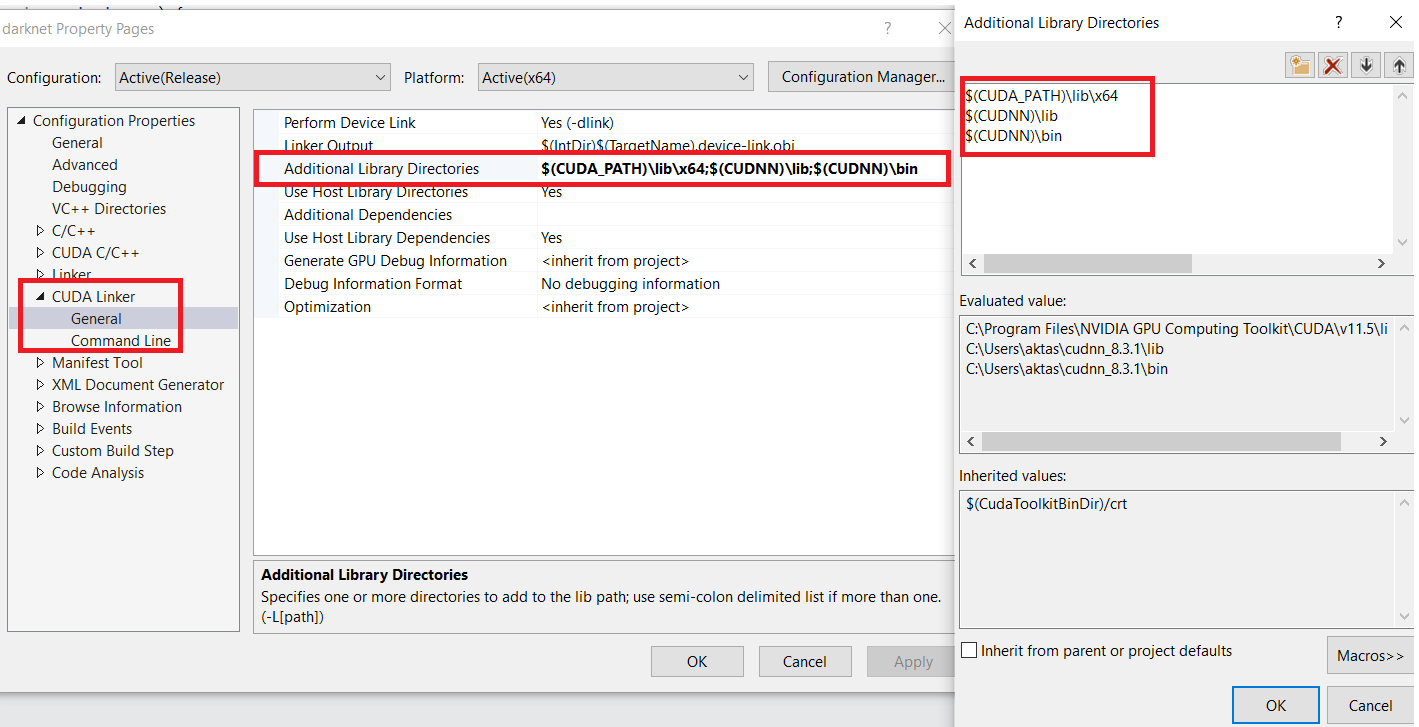
Add the necessary Linker libraries as follows
-
Add some additional Linker libraries as follows

-
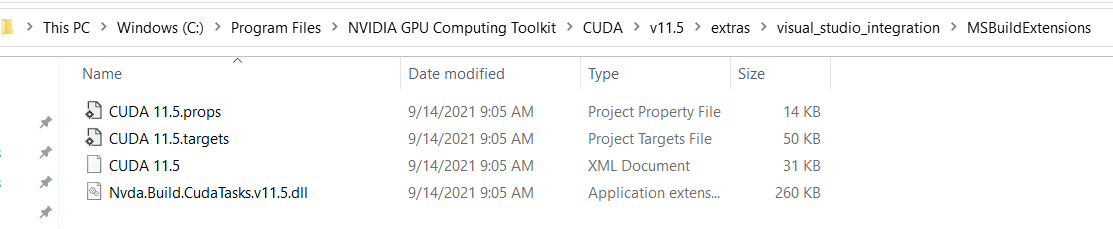
To avoid Error MSB4019 The imported project "C:\Program Files(x86)\Microsoft Visual Studio\2019\Community\MSBuild\Microsoft\VC\v160\BuildCustomizations\CUDA 10.1.props" was not found. error, please copy the following files to the C:\Program Files(x86)\Microsoft Visual Studio\2019\Community\MSBuild\Microsoft\VC\v160\BuildCustomizations\ folder. and change darknet.vcxproj properties by writing 11.5 instead of 10.1 in the following 2 lines:

-
Now you should be able to build the solution by clicking build button and obtain darknet.exe application:


Before starting to train and test your models, there are a few steps more to do.
-
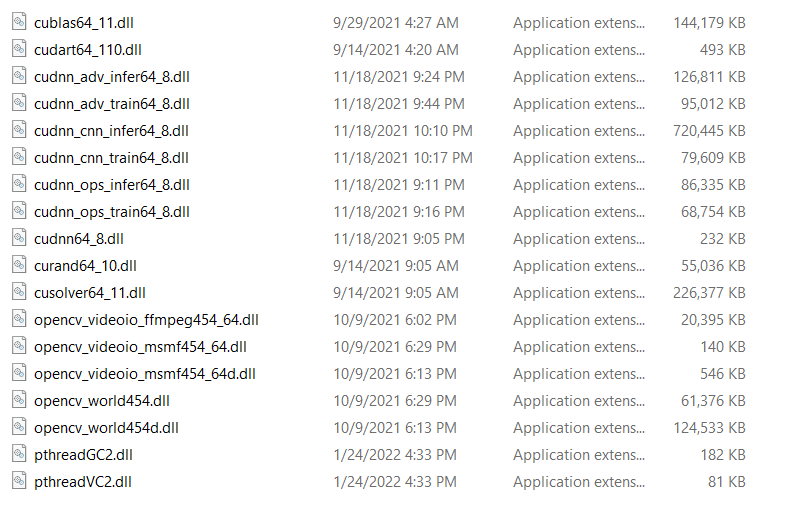
Add the following .dll files to the same folder with darknet.exe application. Your darknet.exe application should be in darknet/build/darknet/x64/
-
You must have obtained 2 more blocks in your project properties after the build is complete. Now you should add some additional directories as follows:


To train your custom model using pre-trained weights (which I do usually to have a better and faster accuracy):
-
Download the pretrained weights for Yolov4 https://github.com/AlexeyAB/darknet/releases/download/darknet_yolo_v4_pre/yolov4-csp.conv.142
-
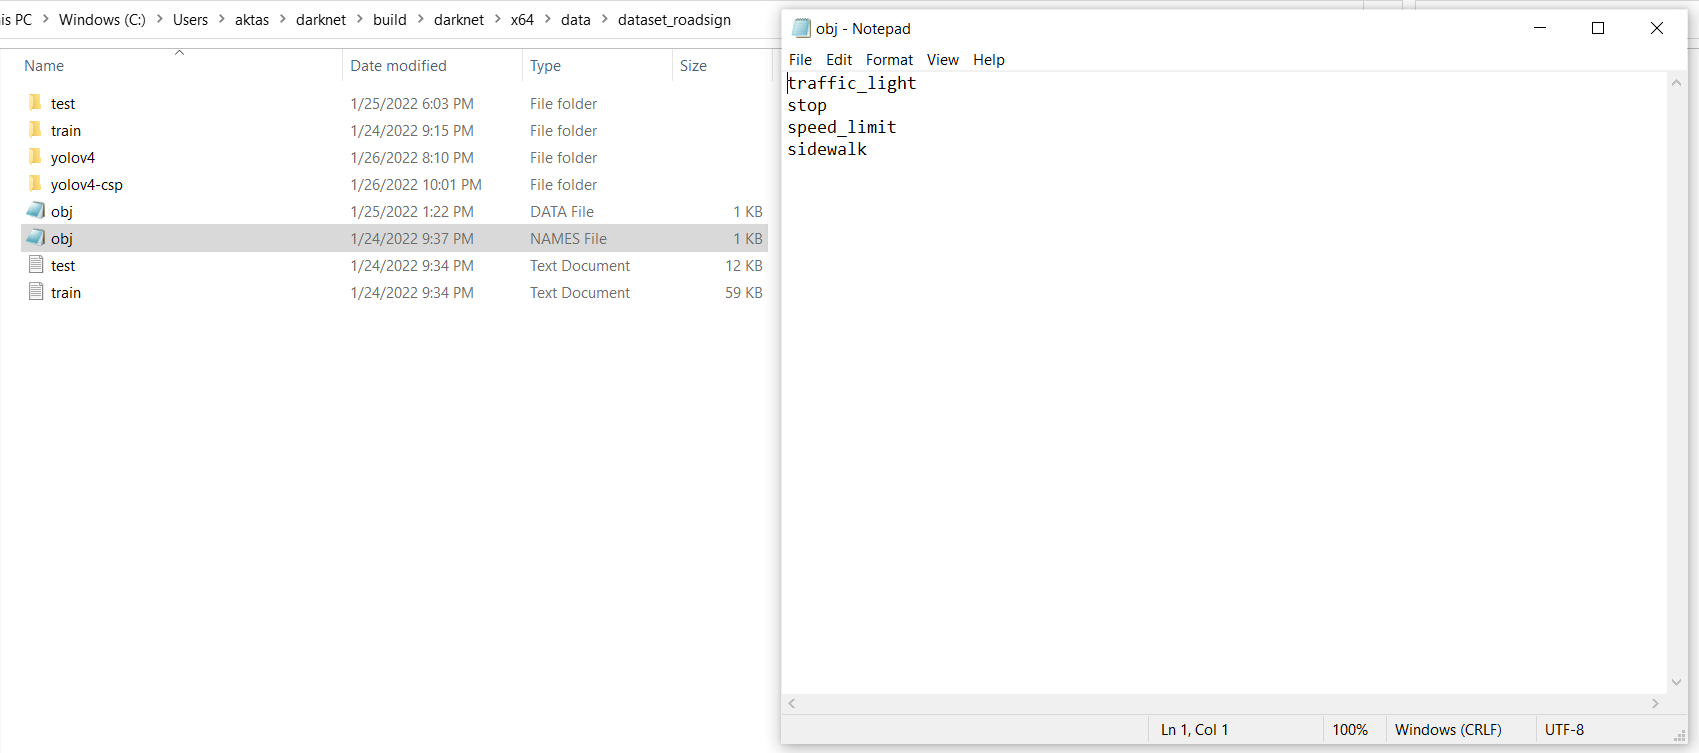
Arrange obj.names file by writing the class names in your dataset with the same order of ID's you put while labeling your data
-
Arrange obj.data file by giving train and validation dataset path (so you should have train.txt and test.txt files having the full path of your images) and some additional info as follows:

-
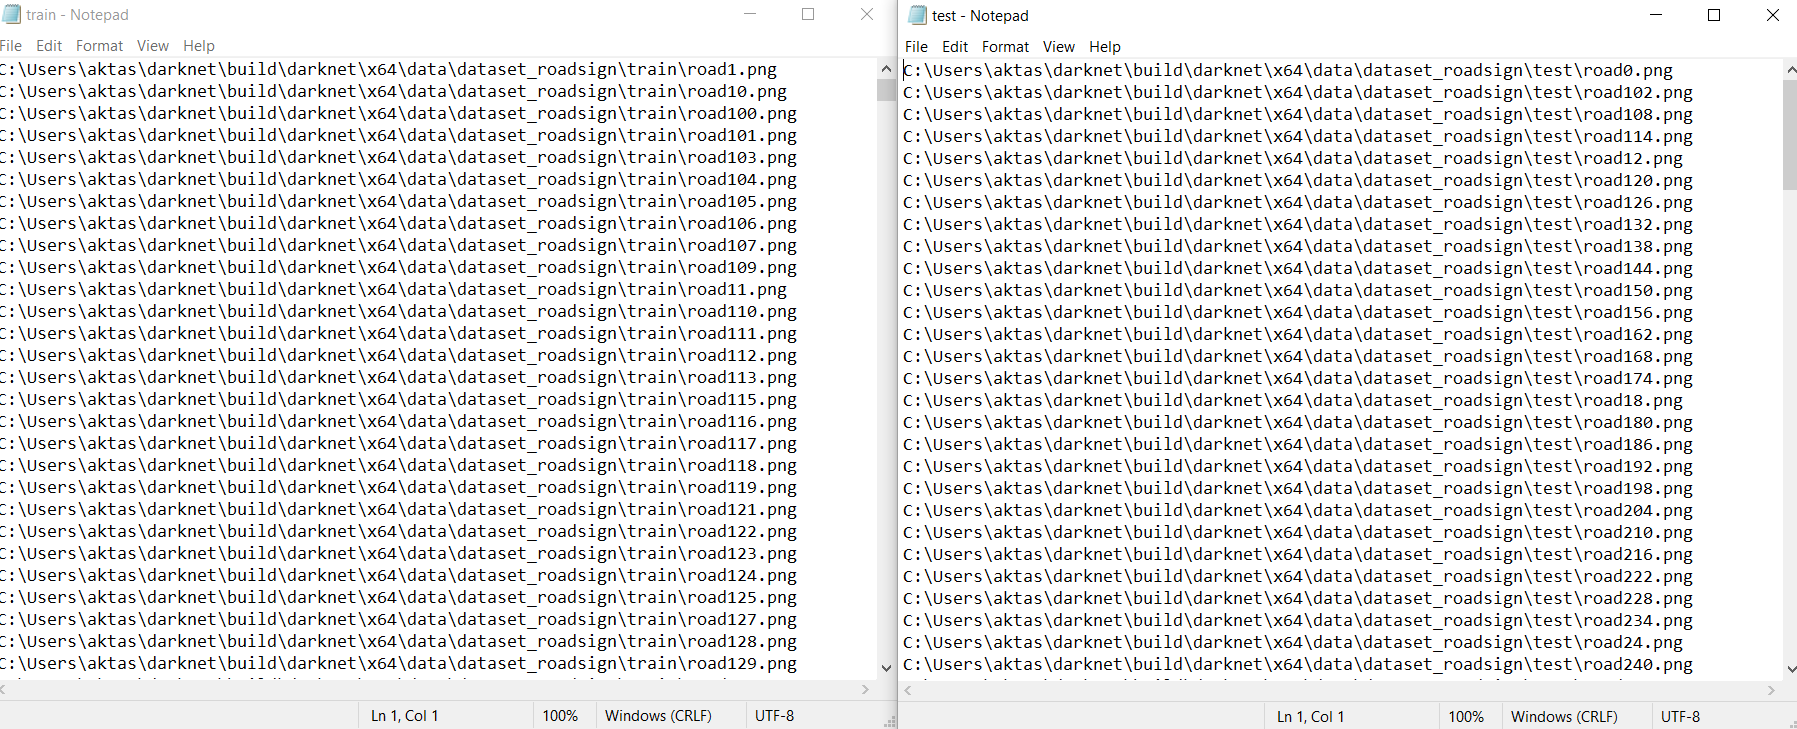
You can use folder_to_txt.py script in scripts folder to obtain train.txt and test.txt files from your dataset folder.
-
Arrange yolov4_custom.cfg file that you can find in cfg folder.
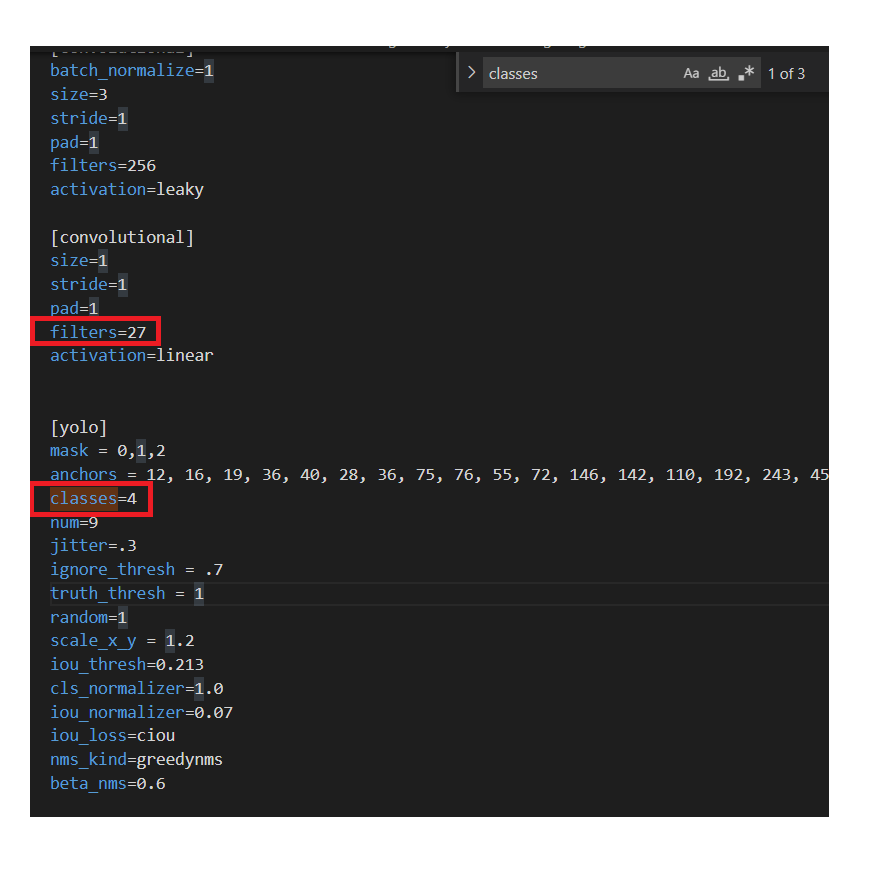
- You need to change classes= line according to the number of classes in your dataset
- You need to change filters= line coming just before yolo layer to the amount of (class_number + 5)x3 . For example, for my sample case I had 4 classes and I arranged the .cfg file as follows. There are 3 of each of them so don't forget to change all!
-
Now with the following command you can start your first train! (Of course by changing the file names according to your files)
darknet.exe detector train data/dataset_roadsign/obj.data cfg/yolov4_roadsign.cfg weights/pretrained/yolov4.conv.137
-
You will obtain the following chart and your saved weights in backup/ folder


After or during the training of your model, you can just stop the model for a moment and check the mAP using your validation dataset to understand if the model gets overfitting or your train loss - accuracy is trustable. To do this, you can use the following command:
- darknet.exe detector map data/dataset_roadsign/obj.data cfg/yolov4_roadsign.cfg backup/yolov4_roadsign_final.weights -iou_thresh 0.50
So the data and cfg files are the same but I use the weights come from my training process.

To obtain prediction results with their labels saved as annotation files and output images with bounding boxes in "predictions" folder, use the following command:
darknet.exe detector test data/dataset_roadsign/obj.data cfg/yolov4-csp_roadsign.cfg backup/yolov4-csp_roadsign_final.weights -show_imgs -thresh 0.50 -save_labels -ext_output <data/dataset_roadsign/test.txt > result.txt
An example output image in predictions folder:

In the base source, there are different implementations of YOLOV4 with some different activation functions or little changes on the architecture. YOLOV4-CSP is one of them and to use it, the only thing you should do is download the pre-trained weights for this architecture and arrange yolov4-csp_custom.cfg file as explained for YOLOV4. Train, map calculation and test commands are also the same except of the name of the file.
- pre-trained weights for training: https://drive.google.com/open?id=1JKF-bdIklxOOVy-2Cr5qdvjgGpmGfcbp
-
Error : Failed to get convolution algorithm
You should arrange your batch and subdivision size in your .cfg file. You need to approach subdivison to the batch size until this error dismiss. -
Could not load library cudnn_cnn_infer64_8.dll : during cudnn installation, there is an additional step that you forgot to do probably.
-
If the training start and ends without any error, any of the dll files I mentioned may be missing or you probably give .cfg file path wrong in the command.

angle : rotation angle for data augmentation
saturation : saturation for data augmentation
exposure : exposure for data augmentation
hue : hue for data augmentation
max_batches : it defines after how many batches your training will end
steps : the learning rate decreases according to these steps which are the iteration numbers