Subject:paint with word with Stable Diffiusion models
final project for computer vision SRBIAU Dr.Koochari by Saba Hesaraki
Article : eDiff-I: Text-to-Image Diffusion Models with an Ensemble of Expert Denoisers Link:https://arxiv.org/pdf/2211.01324.pdf
Website for read more: https://www.unite.ai/nvidias-ediffi-diffusion-model-allows-painting-with-words-and-more/
All of Results Exists on content/demo and output_example folder
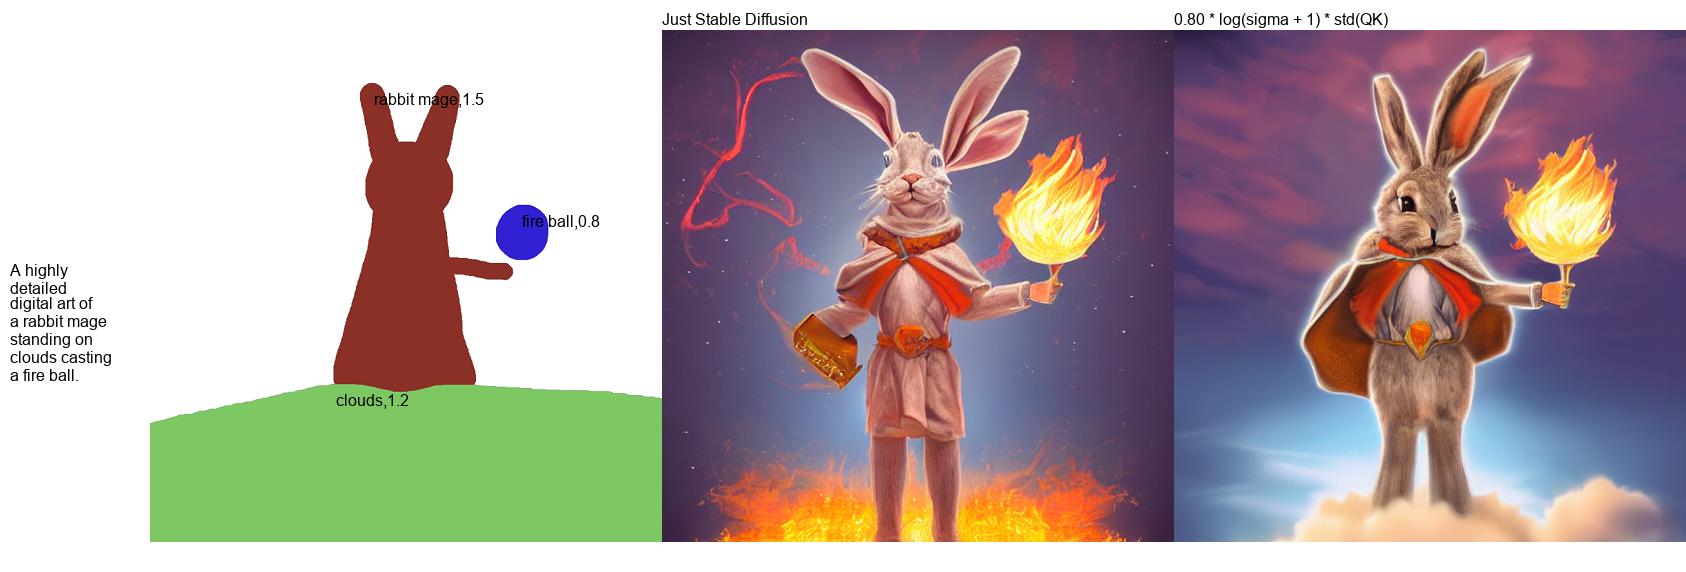
Notice how without PwW the cloud is missing.
Notice how without PwW, abandoned city is missing, and road becomes purple as well.
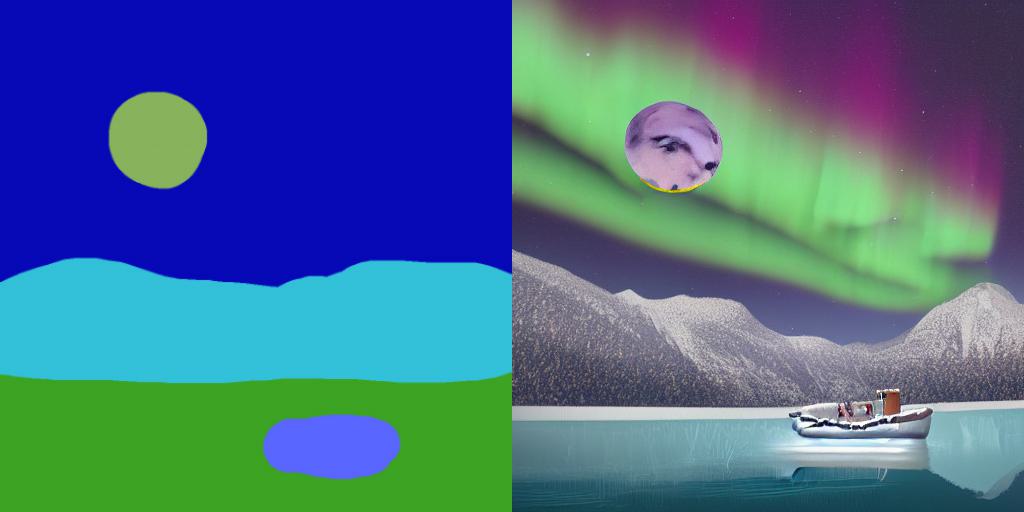
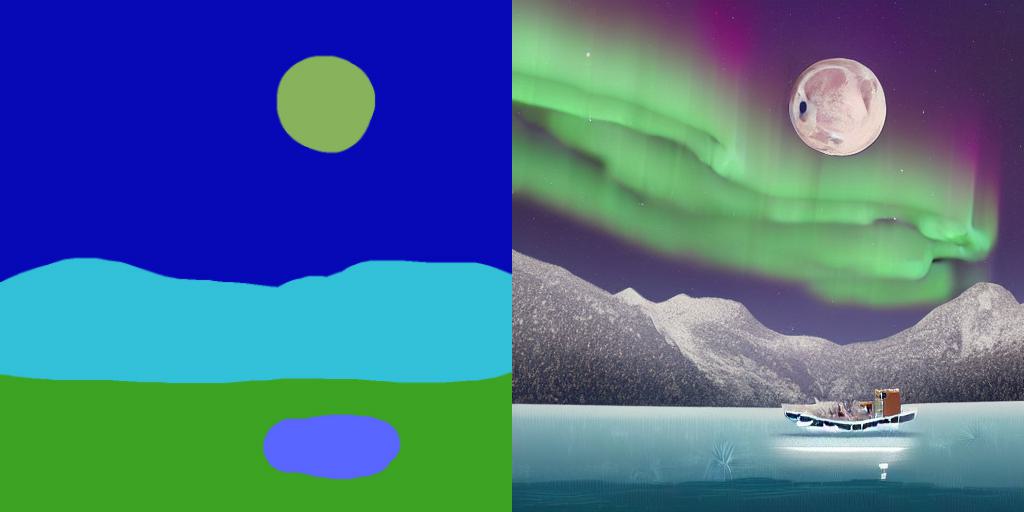
"A digital painting of a half-frozen lake near mountains under a full moon and aurora. A boat is in the middle of the lake. Highly detailed."
Notice how nearly all of the composition remains the same, other than the position of the moon.
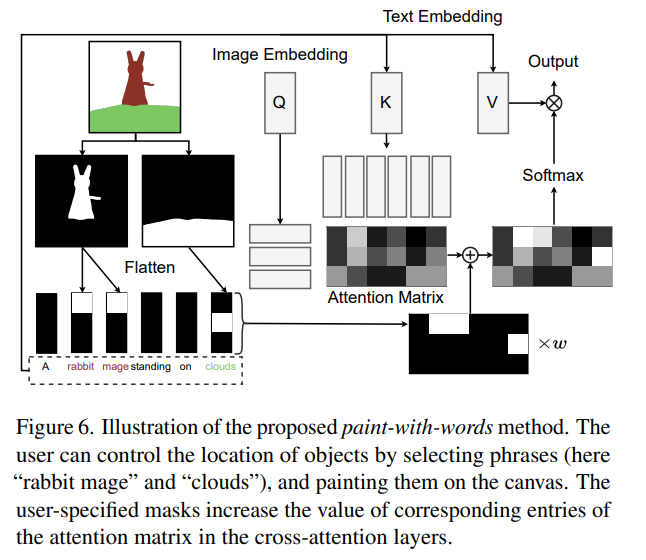
Recently, researchers from NVIDIA proposed eDiffi. In the paper, they suggested method that allows "painting with word". Basically, this is like make-a-scene, but with just using adjusted cross-attention score. You can see the results and detailed method in the paper.
Their paper and their method was not open-sourced. Yet, paint-with-words can be implemented with Stable Diffusion since they share common Cross Attention module. So, I implemented it with Stable Diffusion.
pip install paint-with-words-pipelinePrepare segmentation map, and map-color : tag label such as below. keys are (R, G, B) format, and values are tag label.
{
    (0, 0, 0): "cat,1.0",
    (255, 255, 255): "dog,1.0",
    (13, 255, 0): "tree,1.5",
    (90, 206, 255): "sky,0.2",
    (74, 18, 1): "ground,0.2",
}
You neeed to have them so that they are in format "{label},{strength}", where strength is additional weight of the attention score you will give during generation, i.e., it will have more effect.
import torch
from paint_with_words.pipelines import PaintWithWordsPipeline

settings = {
    "color_context": {
        (0, 0, 0): "cat,1.0",
        (255, 255, 255): "dog,1.0",
        (13, 255, 0): "tree,1.5",
        (90, 206, 255): "sky,0.2",
        (74, 18, 1): "ground,0.2",
    },
    "color_map_img_path": "contents/example_input.png",
    "input_prompt": "realistic photo of a dog, cat, tree, with beautiful sky, on sandy ground",
    "output_img_path": "contents/output_cat_dog.png",
}

color_map_image_path = settings["color_map_img_path"]
color_context = settings["color_context"]
input_prompt = settings["input_prompt"]

# load pre-trained weight with paint with words pipeline
pipe = PaintWithWordsPipeline.from_pretrained(
    model_name,
    revision="fp16",
    torch_dtype=torch.float16,
)
pipe.safety_checker = None  # disable the safety checker
pipe.to("cuda")

# load color map image
color_map_image = Image.open(color_map_image_path).convert("RGB")

with torch.autocast("cuda"):
    image = pipe(
        prompt=input_prompt,
        color_context=color_context,
        color_map_image=color_map_image,
        latents=latents,
        num_inference_steps=30,
    ).images[0]

img.save(settings["output_img_path"])In the paper, they used
$w' = w \log (1 + \sigma) std (Q^T K)$
$w' = w \log (1 + \sigma) \max (Q^T K)$
$w' = w \log (1 + \sigma^2) std (Q^T K)$
You can define your own weight function and further tweak the configurations by defining weight_function argument in the PaintWithWordsPipeline.
Example:
def weight_function(
    w: torch.Tensor,
    sigma: torch.Tensor,
    qk: torch.Tensor,
) -> torch.Tensor:
    return 0.4 * w * math.log(sigma ** 2 + 1) * qk.std()

with torch.autocast("cuda"):
    image = pipe(
        prompt=input_prompt,
        color_context=color_context,
        color_map_image=color_map_image,
        latents=latents,
        num_inference_steps=30,
        #
        # set the weight function here:
        weight_function=weight_function,
        #
    ).images[0]
$w' = w \log (1 + \sigma) std (Q^T K)$
$w' = w \log (1 + \sigma) \max (Q^T K)$
$w' = w \log (1 + \sigma^2) std (Q^T K)$


